- Как добавить сертификат Центра Сертификации (CA) в доверенные в Windows
- Как добавить корневой сертификат в доверенные в Windows на уровне системы
- Как добавить корневой сертификат в доверенные в Windows в веб браузеры
- Установка доверенных корневых сертификатов доверенного платформенного модуля Install trusted TPM root certificates
- Configure Trusted Roots and Disallowed Certificates
- Certificates and trust
- Software update description
- Configuration options
- Configure a file or web server to download the CTL files
- To configure a server that has access to the Internet to retrieve the CTL files
- Redirect the Microsoft Automatic Update URL for a disconnected environment
- To configure a custom administrative template for a GPO
- Redirect the Microsoft Automatic Update URL for untrusted CTLs only
- To selectively redirect only untrusted CTLs
- Use a subset of the trusted CTLs
- To create a subset of trusted certificates
- To distribute the list of trusted certificates by using Group Policy
- Registry settings modified
- New Certutil Options
- Potential errors with Certutil -SyncWithWU
Как добавить сертификат Центра Сертификации (CA) в доверенные в Windows
Как добавить корневой сертификат в доверенные в Windows на уровне системы
1. Мастер импорта сертификатов
Если сертификат имеет расширение .crt, то его достаточно запустить двойным кликом:

В открывшемся окне нажмите кнопку «Установить сертификат»:

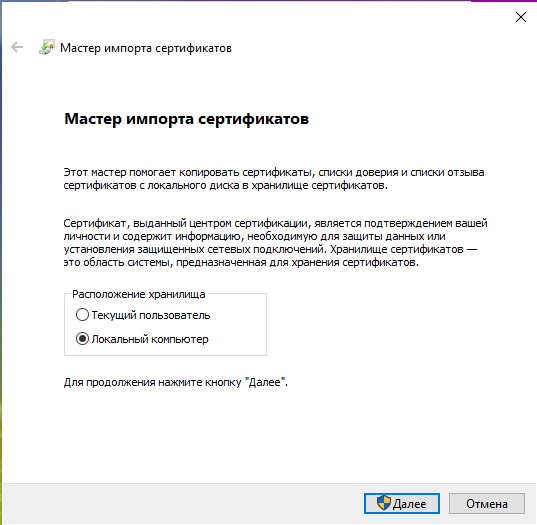
Выберите один из вариантов:
- «Текущий пользователь» — сертификат будет иметь эффект только для одного пользователя
- «Локальный компьютер» — сертификат будет иметь эффект для всех пользователей данного компьютера
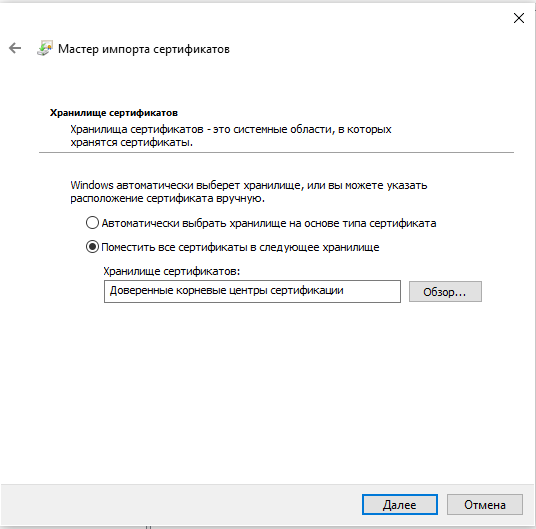
Выберите «Пометить все сертификаты в следующие хранилища»:

Нажмите кнопку «Обзор» и выберите «Доверенные корневые центры сертификации»:

Нажмите «Далее»:

Нажмите «Готово»:
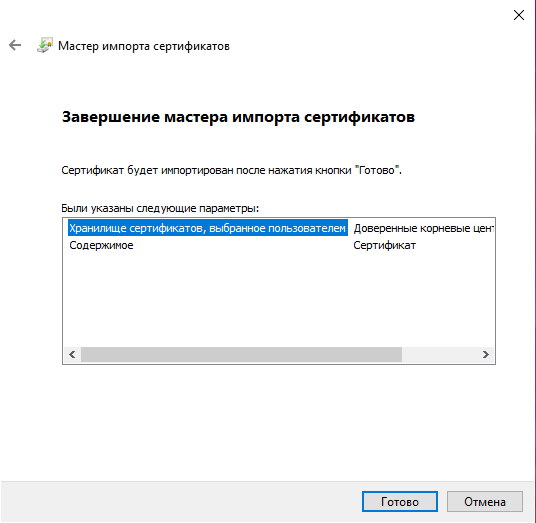
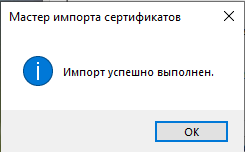
Сообщение об успешном импорте:
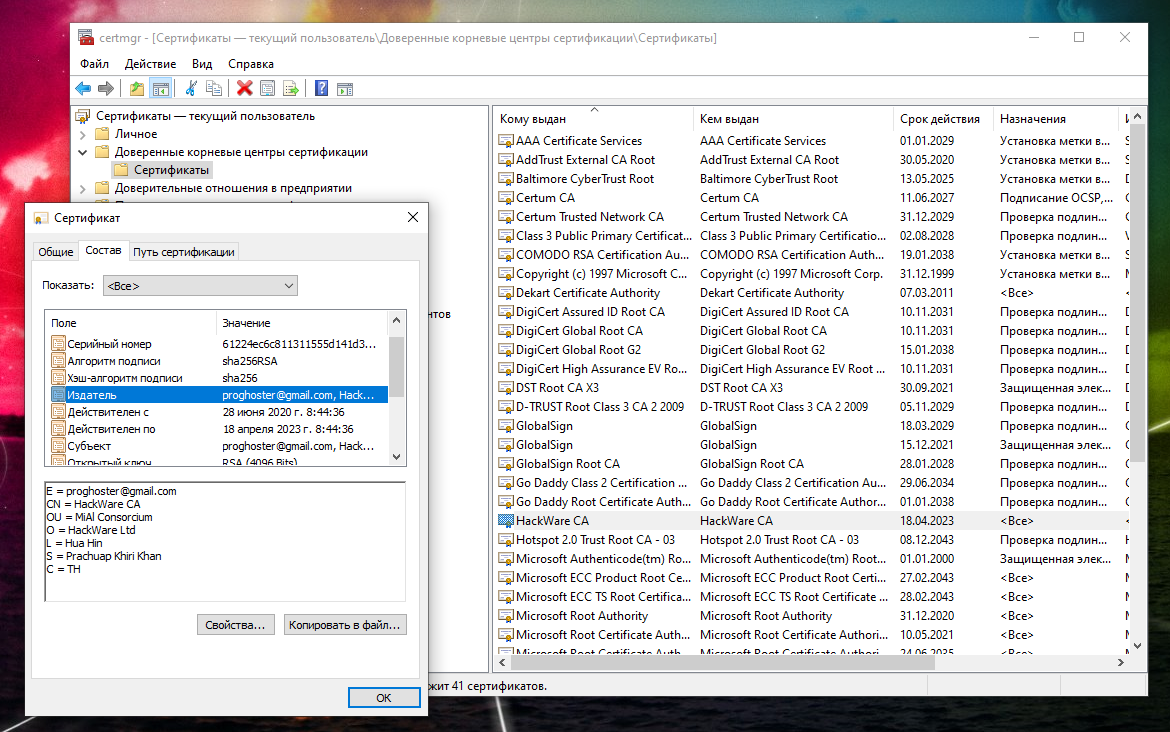
Теперь сертификат будет доступен в Менеджере Сертификатов:

2. Добавление root CA сертификата в Менеджере Сертификатов
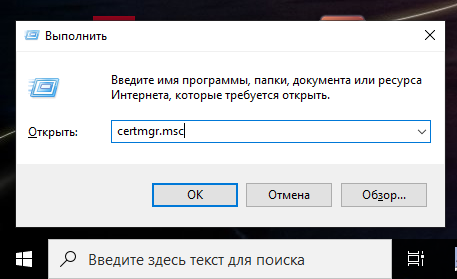
Чтобы открыть Менеджер Сертификатов нажмите Win+r, введите в открывшееся поле и нажмите Enter:
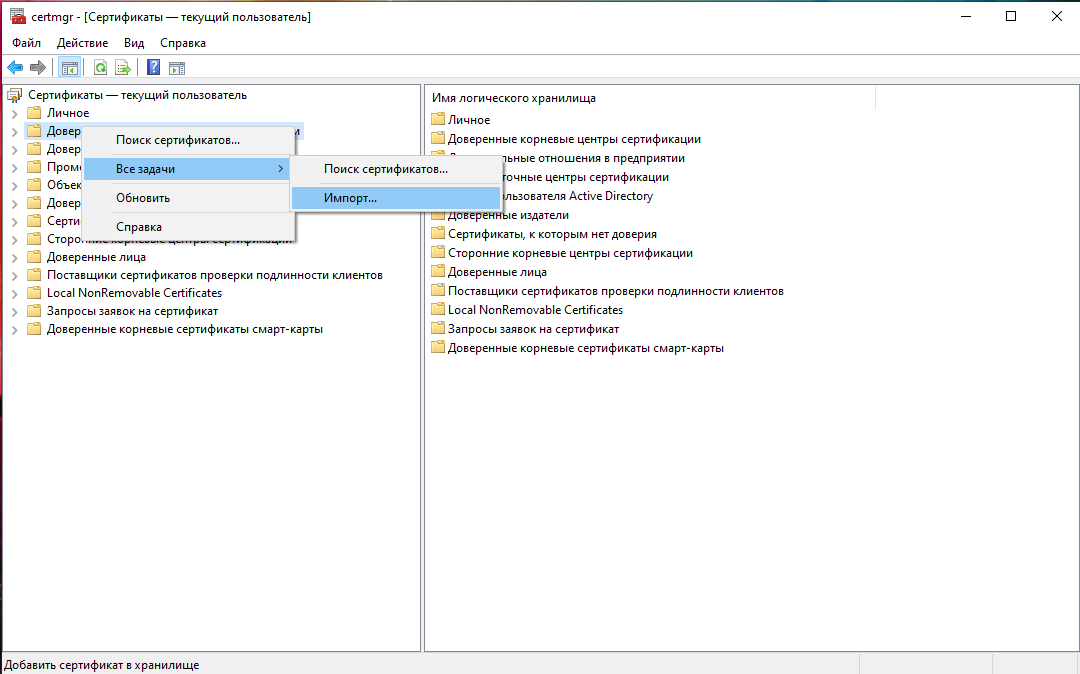
Кликните правой кнопкой мыши по пункту «Доверенные корневые центры сертификации», выберите пункт «Все задачи» → «Импорт»:
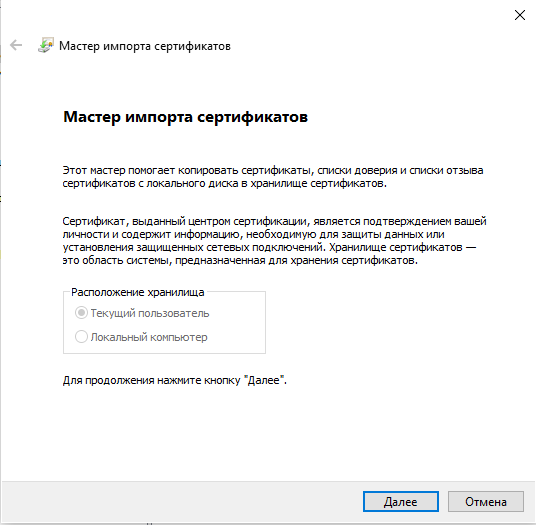
Нажмите «Далее»:
Укажите папку и имя файла:

Нажмите «Далее»:
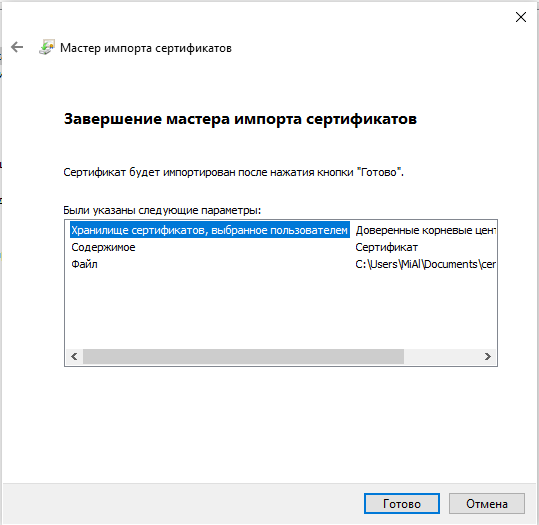

Теперь действительно всё готово:
Только что импортированный сертификат в Менеджере Сертификатов:
Как добавить корневой сертификат в доверенные в Windows в веб браузеры
Chrome, Chromium, Opera и сделанные на их основе веб браузеры используют общесистемные корневые CA сертификаты. То есть для добавления новых доверенных CA достаточно добавить их в систему, как это показано выше.
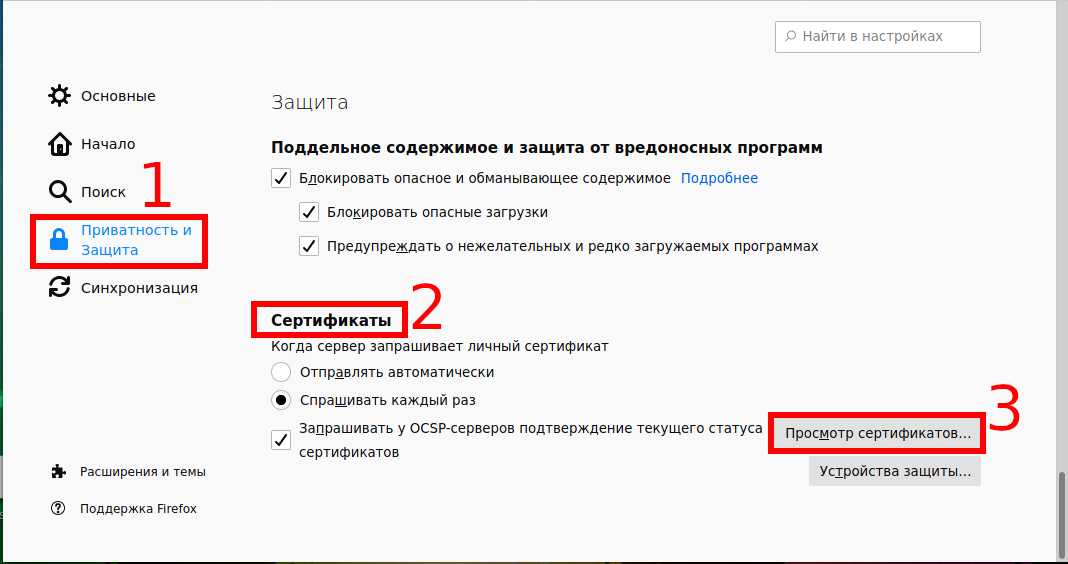
Firefox использует исключительно своё хранилище. Для добавления корневых сертификатов CA в Firefox нужно сделать так:
- В настройках Firefox: Приватность и Защита → Сертификаты → Просмотр сертификатов → Центры сертификации:

Нажмите кнопку «Импортировать»:

Выберите файл с сертификатом.
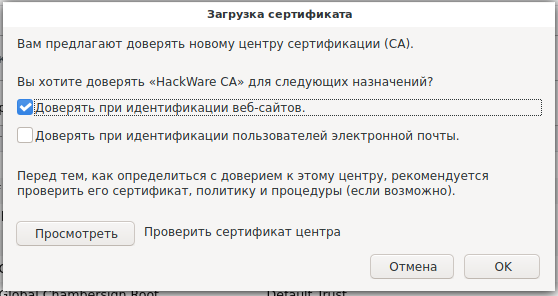
Укажите, какие полномочия вы даёте этому сертификату:
Для глубокого понимания OpenSSL смотрите также полное руководство: «OpenSSL: принципы работы, создание сертификатов, аудит».
Установка доверенных корневых сертификатов доверенного платформенного модуля Install trusted TPM root certificates
Область применения: Windows Server 2019, Windows Server (половина ежегодного канала), Windows Server 2016 Applies to: Windows Server 2019, Windows Server (Semi-Annual Channel), Windows Server 2016
При настройке HGS для использования аттестации TPM необходимо также настроить HGS, чтобы доверять поставщикам доверенных платформенных модулей на серверах. When you configure HGS to use TPM attestation, you also need to configure HGS to trust the vendors of the TPMs in your servers. Этот дополнительный процесс проверки гарантирует, что только исдлинные доверенные платформенные модули смогут подтверждать работу с HGS. This extra verification process ensures only authentic, trustworthy TPMs are able to attest with your HGS. При попытке зарегистрировать недоверенный доверенный платформенный модуль с помощью Add-HgsAttestationTpmHost вы получите сообщение об ошибке, указывающее, что поставщик доверенного платформенного модуля не является доверенным. If you try to register an untrusted TPM with Add-HgsAttestationTpmHost , you will receive an error indicating the TPM vendor is untrusted.
Чтобы доверять доверенным платформенным модулям, необходимо установить корневой и промежуточный сертификаты подписи, используемые для подписывания ключа подтверждения в доверенных платформенных модулях серверов, в службе HGS. To trust your TPMs, the root and intermediate signing certificates used to sign the endorsement key in your servers’ TPMs need to be installed on HGS. Если в центре обработки данных используется более одной модели TPM, может потребоваться установить разные сертификаты для каждой модели. If you use more than one TPM model in your datacenter, you may need to install different certificates for each model. HGS пройдет хранилища сертификатов «TrustedTPM_RootCA» и «TrustedTPM_IntermediateCA» для сертификатов поставщика. HGS will look in the «TrustedTPM_RootCA» and «TrustedTPM_IntermediateCA» certificate stores for the vendor certificates.
Сертификаты поставщика TPM отличаются от сертификатов, установленных по умолчанию в Windows, и представляют конкретные корневые и промежуточные сертификаты, используемые поставщиками TPM. The TPM vendor certificates are different from those installed by default in Windows and represent the specific root and intermediate certificates used by TPM vendors.
Коллекция доверенных корневых и промежуточных сертификатов доверенного платформенного модуля публикуется корпорацией Майкрософт для вашего удобства. A collection of trusted TPM root and intermediate certificates is published by Microsoft for your convenience. Для установки этих сертификатов можно использовать следующие шаги. You can use the steps below to install these certificates. Если Сертификаты доверенного платформенного модуля не включены в указанный ниже пакет, обратитесь к поставщику доверенного платформенного модуля или к ИЗГОТОВИТЕЛю сервера, чтобы получить корневые и промежуточные сертификаты для конкретной модели доверенного платформенного модуля. If your TPM certificates are not included in the package below, contact your TPM vendor or server OEM to obtain the root and intermediate certificates for your specific TPM model.
Повторите следующие шаги на каждом сервере HGS. Repeat the following steps on every HGS server:
Проверьте подпись CAB-файла, чтобы убедиться в его подлинности. Verify the signature of the cab file to ensure its authenticity. Не продолжайте, если подпись недействительна. Do not proceed if the signature is not valid.
Вот пример выходных данных: Here’s some example output:
Разверните CAB-файл. Expand the cab file.
По умолчанию скрипт конфигурации установит сертификаты для каждого поставщика TPM. By default, the configuration script will install certificates for every TPM vendor. Если требуется импортировать сертификаты только для конкретного поставщика доверенного платформенного модуля, удалите папки для поставщиков доверенного платформенного модуля, которые не являются доверенными для вашей организации. If you only want to import certificates for your specific TPM vendor, delete the folders for TPM vendors not trusted by your organization.
Установите пакет доверенных сертификатов, запустив сценарий установки в развернутой папке. Install the trusted certificate package by running the setup script in the expanded folder.
Чтобы добавить новые сертификаты или объекты, которые преднамеренно пропущены во время предыдущей установки, просто повторите описанные выше действия на каждом узле в кластере HGS. To add new certificates or ones intentionally skipped during an earlier installation, simply repeat the above steps on every node in your HGS cluster. Существующие сертификаты останутся доверенными, но новые сертификаты, найденные в расширенном CAB-файле, будут добавлены в доверенные хранилища TPM. Existing certificates will remain trusted but new certificates found in the expanded cab file will be added to the trusted TPM stores.
Configure Trusted Roots and Disallowed Certificates
Applies To: Windows 8.1, Windows Server 2012 R2
The Windows Server 2012 R2, Windows Server 2012, Windows 8.1, and Windows 8 operating systems include an automatic update mechanism that downloads certificate trust lists (CTLs) on a daily basis. In Windows Server 2012 R2 and Windows 8.1, additional capabilities are available to control how the CTLs are updated.
Software updates are available for Windows Server 2012, Windows Server 2008 R2, Windows Server 2008, Windows 8, Windows 7, and Windows Vista. To provide the enhancements of the automatic update mechanism that are discussed in this document, apply the following updates:
Certificates and trust
The Microsoft Root Certificate Program enables distribution of trusted root certificates within Windows operating systems. For more information about the list of members in Windows Root Certificate Program, see Windows Root Certificate Program — Members List (All CAs).
Trusted root certificates are meant to be placed in the Trusted Root Certification Authorities certificate of the Windows operating systems. These certificates are trusted by the operating system and can be used by applications as a reference for which public key infrastructure (PKI) hierarchies and digital certificates that are trustworthy.
When you want to distribute trusted root certificates, the list of trusted root certificates is stored in a CTL. Client computers access the Windows Update site by using the automatic update mechanism to update this CTL.
The list of trusted root certificates is called the trusted CTL.
Untrusted certificates are certificates that are publicly known to be fraudulent. Like the trusted CTL, the list of untrusted certificates is stored in a CTL. Client computers access the Windows Update site by using the automatic update mechanism to update this CTL.
A list of untrusted certificates is called an untrusted CTL. For more information, see Announcing the automated updater of untrustworthy certificates and keys.
Prior to Windows Server 2012 R2 and Windows 8.1 (or the installation of the software update, as previously discussed), the same registry setting controlled updates for trusted root certificates and untrusted certificates. An administrator could not selectively enable or disable one or the other. This resulting in the following challenges:
Although disabling automatic updates for trusted CTLs is recommended for administrators who manage their lists of trusted root certificates (in disconnected or connected environments), disabling automatic updates of untrusted CTLs is not recommended.
Because there was not a method for network administrators to view and extract only the trusted root certificates in a trusted CTL, managing a customized list of trusted certificates was difficult task.
Software update description
The following improved automatic update mechanisms for a disconnected environment are available in Windows Server 2012 R2 and Windows 8.1 or when the appropriate software update is installed:
Registry settings for storing CTLs New settings enable changing the location for uploading trusted or untrusted CTLs from the Windows Update site to a shared location in an organization. For more information, see the Registry settings modified section.
Synchronization options If the URL for the Windows Update site is moved to a local shared folder, the local shared folder must be synchronized with the Windows Update folder. This software update adds a set of options in the Certutil tool that administrators can use to enable synchronization. For more information, see the New Certutil Options section.
Tool to select trusted root certificates This software update introduces a tool for administrators who manage the set of trusted root certificates in their enterprise environment. Administrators can view and select the set of trusted root certificates, export them to a serialized certificate store, and distribute them by using Group Policy. For more information, see the New Certutil Options section in this document.
Independent configurability The automatic update mechanism for trusted and untrusted certificates are independently configurable. This enables administrators to use the automatic update mechanism to download only the untrusted CTLs and manage their own list of trusted CTLs. For more information, see the Registry settings modified section in this document.
Configuration options
In Windows Server 2012 R2 and Windows 8.1 (or by installing the previously mentioned software updates on supported operating systems), an administrator can configure a file or web server to download the following files by using the automatic update mechanism:
authrootstl.cab, which contains a non-Microsoft CTL
disallowedcertstl.cab, which contains a CTL with untrusted certificates
disallowedcert.sst, which contains a serialized certificate store, including untrusted certificates
thumbprint.crt, which contains non-Microsoft root certificates
The steps to perform this configuration are described in the Configure a file or web server to download the CTL files section of this document.
By using Windows Server 2012 R2 and Windows 8.1 (or by installing the previously mentioned software updates on supported operating systems), an administrator can:
Configure Active Directory Domain Services (AD DS) domain member computers to use the automatic update mechanism for trusted and untrusted CTLs, without having access to the Windows Update site. This configuration is described in the Redirect the Microsoft Automatic Update URL for a disconnected environment section of this document.
Configure AD DS domain member computers to independently opt-in for untrusted and trusted CTL automatic updates. This configuration is described in the Redirect the Microsoft Automatic Update URL for untrusted CTLs only section of this document.
Examine the set of root certificates in the Windows Root Certificate Program. This enables administrators to select a subset of certificates to distribute by using a Group Policy Object (GPO). This is configuration is described in the Use a subset of the trusted CTLs section of this document.
All the steps shown in this document require that you use an account that is a member of the local Administrators group. For all Active Directory Domain Services (AD DS) configuration steps, you must use an account that is a member of the Domain Admins group or that has been delegated the necessary permissions. The procedures in this document depend upon having at least one computer that is able to connect to the Internet to download CTLs from Microsoft. The computer requires HTTP (TCP port 80) access and name resolution (TCP and UDP port 53) ability to contact ctldl.windowsupdate.com. This computer can be a domain member or a member of a workgroup. Currently all the downloaded files require approximately 1.5 MB of space. The settings described in this document are implemented by using GPOs. These settings are not automatically removed if the GPO is unlinked or removed from the AD DS domain. When implemented, these settings can be changed only by using a GPO or by modifying the registry of the affected computers. The concepts discussed in this document are independent of Windows Server Update Services (WSUS).
Configure a file or web server to download the CTL files
To facilitate the distribution of trusted or untrusted certificates for a disconnected environment, you must first configure a file or web server to download the CTL files from the automatic update mechanism.
The configuration described in this section is not needed for environments where computers are able to connect to the Windows Update site directly. Computers that can connect to the Windows Update site are able to receive updated CTLs on a daily basis (if they are running Windows Server 2012, Windows 8, or the previously mentioned software updates are installed on supported operating systems). For more information, see document 2677070 in the Microsoft Knowledge Base.
To configure a server that has access to the Internet to retrieve the CTL files
Create a shared folder on a file or web server that is able to synchronize by using the automatic update mechanism and that you want to use to store the CTL files.
Before you begin, you may have to adjust the shared folder permissions and NTFS folder permissions to allow the appropriate account access, especially if you are using a scheduled task with a service account. For more information on adjusting permissions see Managing Permissions for Shared Folders.
From an elevated command prompt, run the following command:
Substitute the actual server name for and shared folder name for . For example, if you run this command for a server named Server1 with a shared folder named CTL, you would run the command:
Download the CTL files on a server that computers on a disconnected environment can access over the network by using a FILE path (for example, FILE://\\Server1\CTL) or an HTTP path (for example, HTTP://Server1/CTL).
Redirect the Microsoft Automatic Update URL for a disconnected environment
If the computers in your network are configured in a domain environment and they are unable to use the automatic update mechanism or download CTLs, you can implement a GPO in AD DS to configure those computers to obtain the CTL updates from an alternate location.
The configuration in this section requires that you have already completed the steps in Configure a file or web server to download the CTL files.
To configure a custom administrative template for a GPO
On a domain controller, create a new administrative template. You can start this as a text file and then change the file name extension to .adm. The contents of the file should be as follows:
Use a descriptive name to save the file, such as RootDirURL.adm.
Open the Group Policy Management Editor.
If you are using Windows Server 2008 R2 or Windows Server 2008, click Start, and then click Run.
If you are using Windows Server 2012 R2 or Windows Server 2012, press the Windows key plus the R key simultaneously.
Type GPMC.msc, and then press ENTER.
You can link a new GPO to the domain or to any organizational unit (OU). The GPO modifications implemented in this document alter the registry settings of the affected computers. You cannot undo these settings by deleting or unlinking the GPO. The settings can only be undone by reversing them in the GPO settings or by modifying the registry using another technique.
In the Group Policy Management console, expand the Forest object, expand the Domains object, and then expand the specific domain that contains the computer accounts that you want to change. If you have a specific OU that you want to modify, then navigate to that location. Click an existing GPO or right-click and then click Create a GPO in this domain, and Link it here to create a new GPO. Right-click the GPO you want to modify and then click Edit.
In the navigation pane, under Computer Configuration, expand Policies.
Right-click Administrative Templates, and then click Add/Remove Templates.
In Add/Remove Templates, click Add. In the Policy Templates dialog box, select the .adm template that you previously saved. Click Open, and then click Close.
In the navigation pane, expand Administrative Templates, and then expand Classic Administrative Templates (ADM).
Click Windows AutoUpdate Settings, and in the details pane, double-click URL address to be used instead of default ctldl.windowsupdate.com.
Select Enabled. In the Options section, enter the URL to the file server or web server that contains the CTL files. For example, http://server1/CTL or file://\\server1\CTL. Click OK. Close the Group Policy Management Editor.
The policy is effective immediately, but the client computers must be restarted to receive the new settings, or you can type gpupdate /force from an elevated command prompt or from Windows PowerShell.
The trusted and untrusted CTLs can be updated on a daily basis, so ensure that you keep the files synchronized by using a scheduled task or another method (such as a script that handles error conditions) to update the shared folder or web virtual directory. For additional details about creating a scheduled task, see Schedule a Task. If you plan to write a script to make daily updates, see the New Certutil Options and Potential errors with Certutil -SyncWithWU sections of this document. These sections provide more information about command options and the error conditions.
Redirect the Microsoft Automatic Update URL for untrusted CTLs only
Some organizations may want only the untrusted CTLs (not the trusted CTLs) to be automatically updated. To accomplish this, you can create two .adm templates to add to Group Policy.
To selectively redirect only untrusted CTLs
On a domain controller, create the first new administrative template by starting with a text file and then changing the file name extension to .adm. The contents of the file should be as follows:
Use a descriptive name to save the file, such as DisableAllowedCTLUpdate.adm.
Create a second new administrative template. The contents of the file should be as follows:
Use a descriptive file name to save the file, such as EnableUntrustedCTLUpdate.adm.
Open the Group Policy Management Editor.
In the Group Policy Management console, expand the Forest, Domains, and specific domain object that you want to modify. Right-click the Default Domain Policy GPO, and then click Edit.
In the navigation pane, under Computer Configuration, expand Policies.
Right-click Administrative Templates, and then click Add/Remove Templates.
In Add/Remove Templates, click Add. Use the Policy Templates dialog box to select the .adm templates that you previously saved. (You can hold the CTRL key, and click each file to select both.) Click Open, and then click Close.
In the navigation pane, expand Administrative Templates and then expand Classic Administrative Templates (ADM).
Click Windows AutoUpdate Settings and then in the details pane, double-click Auto Root Update.
Select Disabled. This setting prevents the automatic update of the trusted CTLs. Click OK.
In the details pane, double-click Untrusted CTL Automatic Update. Select Enabled. Click OK.
The policy is effective immediately, but the client computers must be restarted to receive the new settings, or you can type gpupdate /force from an elevated command prompt or from Windows PowerShell.
The trusted and untrusted CTLs can be updated on a daily basis, so ensure that you keep the files synchronized by using a scheduled task or another method to update the shared folder or virtual directory.
Use a subset of the trusted CTLs
This section describes how you can produce, review, and filter the trusted CTLs that you want computers in your organization to use. You must implement the GPOs described in the previous procedures to make use of this resolution. This resolution is available for disconnected and connected environments.
There are two procedures to complete to customize the list of trusted CTLs.
Create a subset of trusted certificates
Distribute the trusted certificates by using Group Policy
To create a subset of trusted certificates
From a computer that is connected to the Internet, open Windows PowerShell as an Administrator or open an elevated command prompt, and type the following command:
You can run the following command in Windows Explorer to open the WURoots.sst:
You can also use Internet Explorer to navigate to the file and double-click it to open it. Depending on where you stored the file, you may also be able to open it by typing wuroots.sst .
In the navigation pane of Certificate Manager, expand the file path under Certificates -Current User until you see Certificates, and then click Certificates.
In the details pane, you can see the trusted certificates. Hold down the CTRL key and click each of the certificates that you want to allow. When you have finished selecting the certificates you want to allow, right-click one of the selected certificates, click All Tasks, and then click Export.
You must select a minimum of two certificates to export the .sst file type. If you select only one certificate, the .sst file type is not available and the .cer file type is selected instead.
In the Certificate Export Wizard, click Next.
On the Export File Format page, select Microsoft Serialized Certificate Store (.SST), and then click Next.
On the File to Export page, enter a file path and an appropriate name for the file, such as C:\AllowedCerts.sst, and then click Next. Click Finish. When you are notified that the export was successful, click OK.
Copy the .sst file that you created to a domain controller.
To distribute the list of trusted certificates by using Group Policy
On the domain controller that has the customized .sst file, open the Group Policy Management Editor.
In the Group Policy Management console, expand the Forest, Domains, and specific domain object that you want to modify. Right-click Default Domain Policy GPO, and then click Edit.
In the navigation pane, under Computer Configuration, expand Policies, expand Windows Settings, expand Security Settings, and then expand Public Key Policies.
Right-click Trusted Root Certification Authorities, and then click Import.
In the Certificate Import Wizard, click Next.
Enter the path and file name of the file that you copied to the domain controller, or use the Browse button to locate the file. Click Next.
Confirm that you want to place these certificates in the Trusted Root Certification Authorities certificate store by clicking Next. Click Finish. When you are notified that the certificates imported successfully, click OK.
Close the Group Policy Management Editor.
The policy is effective immediately, but the client computers must be restarted to receive the new settings, or you can type gpupdate /force from an elevated command prompt or from Windows PowerShell.
Registry settings modified
The settings described in this document configure the following registry keys on the client computers. These settings are not automatically removed if the GPO is unlinked or removed from the domain. These settings must be specifically reconfigured, if you want to change them.
| Registry keys | Value and Description |
|---|---|
| HKEY_LOCAL_MACHINE\SOFTWARE\Policies\Microsoft\SystemCertificates\AuthRoot\DisableRootAutoUpdate | A value of 1 disables the Windows AutoUpdate of the trusted CTL. |
| HKEY_LOCAL_MACHINE\SOFTWARE\Policies\Microsoft\SystemCertificates\AuthRoot\EnableDisallowedCertAutoUpdate | A value of 1 enables the Windows AutoUpdate of the untrusted CTL. |
| HKEY_LOCAL_MACHINE\SOFTWARE\Microsoft\SystemCertificates\AuthRoot\AutoUpdate\RootDirUrl | Configures the shared location (the HTTP or the FILE path). |
New Certutil Options
The following options were added to Certutil:
| Syntax | Description | Example |
|---|---|---|
| CertUtil [Options] -syncWithWU DestinationDir | Sync with Windows Update. В
В
| CertUtil -syncWithWU \\server1\PKI\CTLs |
| CertUtil [Options] -generateSSTFromWU SSTFile | Generate SST by using the automatic update mechanism. SSTFile: .sst file to be created. The generated .sst file contains the non_Microsoft root certificates that were downloaded by using the automatic update mechanism. | CertUtil –generateSSTFromWU TRoots.sst |
Certutil -SyncWithWU -f updates existing files in the target folder. Certutil -syncWithWU -f -f removes and replaces files in the target folder.
Potential errors with Certutil -SyncWithWU
You may encounter the following errors and warnings when running the Certutil -syncWithWU command:
If you use a non-existent local path or folder as the destination folder, you will see the error:
The system cannot find the file specified. 0x80070002 (WIN32: 2 ERROR_FILE_NOT_FOUND)
If you use a non-existent or unavailable network location as the destination folder, you will see the error:
The network name cannot be found. 0x80070043 (WIN32: 67 ERROR_BAD_NET_NAME)
If your server cannot connect over TCP port 80 to Microsoft Automatic Update servers, you will receive the following error:
A connection with the server could not be established 0x80072efd (INet: 12029 ERROR_INTERNET_CANNOT_CONNECT)
If your server is unable to reach the Microsoft Automatic Update servers with the DNS name ctldl.windowsupdate.com, you will receive the following error:
The server name or address could not be resolved 0x80072ee7 (INet: 12007 ERROR_INTERNET_NAME_NOT_RESOLVED).
If you do not use the -f switch, and any of the CTL files already exist in the directory, you will receive a file exists error:
CertUtil: -syncWithWU command FAILED: 0x800700b7 (WIN32/HTTP: 183 ERROR_ALREADY_EXISTS) Certutil: Cannot create a file when that file already exists.


