- Adding Users to the Local Admin Group via Group Policy
- Local Administrators Group in Active Directory Domain
- How to Add Domain Users to the Local Administrators via GPO Preferences?
- Managing Local Admins Group Using Restricted Groups
- Using GPO to Add a Single User to the Local Admin Group on a Specific Computer
- List of user groups command line
- Adding Local Users to Local Groups
- Connect to the actual group
- iSumsoft
- Tell You More about IT World
- How to Add User to Local Administrator Group in Windows
- Two ways to add a user to the local administrator group in Windows
- Way 1: Add user to the local administrator group in Windows Computer Management
- Way 2: Add user to the local administrator group using Command Prompt
- Step 1: Open Command Prompt dialog.
- Step 2: View all local groups
- Step 3: Add the user to the local administrator group
Adding Users to the Local Admin Group via Group Policy
You can use GPO (Group Policy) to add Active Directory users and groups to the local Administrators group on domain-joined servers and workstations. This allows you to grant local admin privileges on domain computers to technical support staff, HelpDesk team, specific users or other privileged accounts. In this article we’ll show how to manage members of the local Administrator group on domain computers using GPO.
Local Administrators Group in Active Directory Domain
When you joining a computer to an AD domain, the Domain Admins group is automatically added to the local Administrators group, and the Domain User group is added to the local Users group.
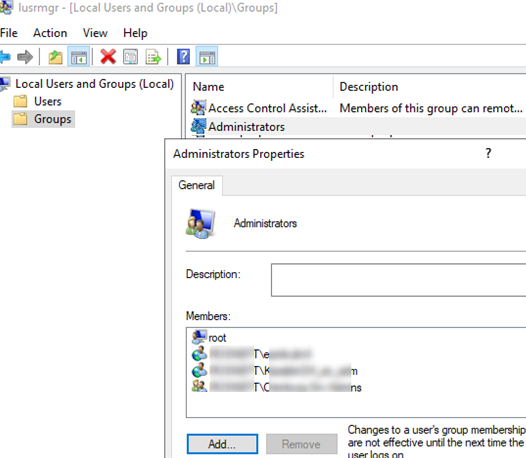
The easiest way to grant local admin privileges on a computer is to add a user or group to the local security group Administrators using the Local users and groups snap-in ( lusrmgr.msc ). However, this method is not convenient if there are a lot of computers and in some time unwanted people may stay the members of the privileged group. If you are using this method of granting local privileges, it is not convenient to control the members of the local admins group on each domain computer.
Microsoft recommends using the following groups to separate administrative privileges in an AD domain:
- Domain Admins are used only on domain controllers;
Suppose, you want to grant local administrator privileges on computers in the specific OU to the group of technical support and HelpDesk employees. Create a new security group in your domain using PowerShell and add the technical support accounts to it:
New-ADGroup munWKSAdmins -path ‘OU=Groups,OU=Munich,OU=DE,DC=woshub,DC=com’ -GroupScope Global –PassThru
Add-AdGroupMember -Identity munWKSAdmins -Members amuller, dbecker, kfisher
Open the domain Group Policy Management console ( GPMC.msc ), create a new policy (GPO) AddLocaAdmins and link it to the OU containing computers (in my example, it is ‘OU=Computers,OU=Munich,OU=DE,DC=woshub,DC=com’).
AD Group Policy provides two methods to manage local groups on domain computers. Let’s study them in turn:
- Local groups management using Group Policy Preferences;
- Restricted Groups.
How to Add Domain Users to the Local Administrators via GPO Preferences?
Group Policy Preferences (GPP) provide the most flexible and convenient way to grant local administrator privileges on domain computers through a GPO.
- Open the AddLocaAdmins GPO you created earlier in the Edit mode;
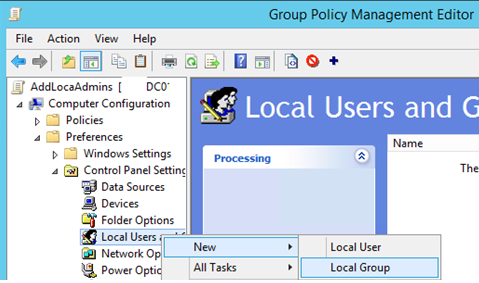
- Go to the following GPO section: Computer Configuration –> Preferences –> Control Panel Settings –> Local Users and Groups;
- Add a new rule (New ->Local Group);

- Select Update in the Action field (it is an important option!);
- In the Group Name dropdown list, select Administrators (Built-in). Even if this group has been renamed on the computer, the settings will be applied to the local Administrators group by its SID — S-1-5-32-544 ;
- Click the Add button and select the groups you want to add to the local administrators group (in our case, it is munWKSAdmins);
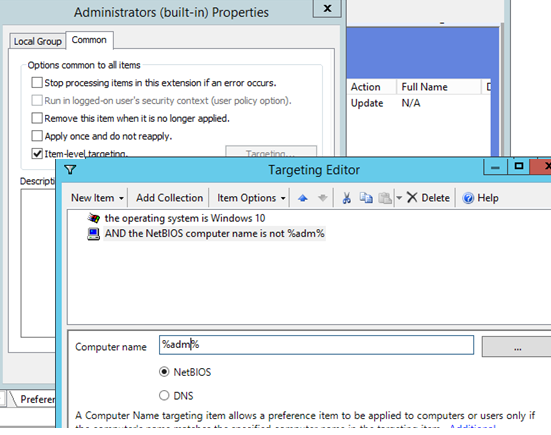
You can configure additional (granular) conditions for targeting the policy on the specific computers using the GPO WMI filters or Item-level Targeting.
In the second case, go to the Common tab and check the Item-level targeting. Click Targeting. Here you can specify the conditions when the policy will be applied. For example, I want the policy of adding administrator groups to be applied only to Windows 10 computers, which NetBIOS/DNS names don’t contain adm . You can use your own filtering options.
It is not recommended to add individual user accounts to this policy. It is better to use the domain security groups. In this case, to grant administrator privileges to another tech support employee, it is enough to add them to the domain group (you won’t need to edit the GPO).
Managing Local Admins Group Using Restricted Groups
The Restricted Groups policy also allows to add domain groups/users to the local security group on computers. It is an older method of granting local administrator privileges and is used less often now (it is less flexible than that the Group Policy Preferences method).
- Open a GPO in the editing mode;
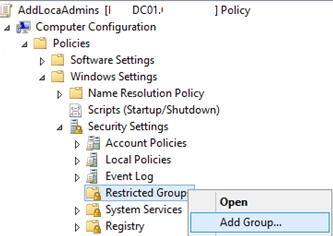
- Expand the section Computer Configuration -> Policies -> Security Settings -> Restricted Groups;
- Select Add Group in the context menu;
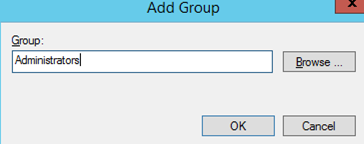
- In the next window, type Administrators and then click OK;
- Click Add in the Members of this group section and specify the group you want to add to the local admins;
- Save the changes, apply the policy to user computers and check the local Administrators group. It must contain only the group you have specified in the policy.

Using GPO to Add a Single User to the Local Admin Group on a Specific Computer
Sometimes you may need to grant a single user the administrator privileges on the specific computer. For example, you have several developers who need elevated privileges from time to time to test drivers, debug or install them on their computers. It is not advisable to add them to the group of workstation admins on all computers.
To grant local administrator privileges on the specific computer, you can use the following scheme:
Right in the GPO preference section (Computer Configuration –> Preferences –> Control Panel Settings –> Local Users and Groups) of AddLocalAdmins policy created earlier create a new entry for the Administrators group with the following settings:
- Action: Update
- Group Name: Administrators (Built-in)
- Description: “ Add amuller to the local administrators on the mun-dev-wsk21 computer ”
- Members: Add -> amuller
- In the Common ->Targeting tab, specify this rule: “ the NETBIOS computer name is mun—dev-wks24. ” It means that this policy will be applied only to the computer specified here.


Also, pay attention to the order in which groups are applied on the computer (the Order GPP column). Local group settings are applied from top to bottom (starting from the Order 1 policy).
The first GPP policy (with the “Delete all member users” and “Delete all member groups” settings as described above) removes all users/groups from the local administrator groups and adds the specified domain group. Then the additional computer-specific policies are applied that add the specified user to the local admins. If you want to change the membership order in your Administrators group, use the buttons on top of your GPO Editor console.
List of user groups command line
On Windows OS we can find the list of local user groups created on a system from Contorl Panel -> User Accounts. This information can be obtained from command line also using net command. Syntax is shown below.
Example: Running this command shows the following local groups on my system.
How to list the users in a local group?
Use the below command to know the list of members of a group from command line.
For example to get the list of all remote desktop users on a system we can run the below command.
How to find the list of all groups a user is member of?
You can run the below command to list the groups a user is member of. This command prints the details of the given user account. You can find the group membership information in the last two line of this command output.
Useful references, however “net use username” should be changed to “net user username”
Thank you Kennedy. Corrected the command.
Please get me a command which will display all local users as: LOGIN, FULL NAME, DESCRIPTION, GROUP etc..
I’d just like to express my frustration with this API. As you can see in these examples, thet net API localgroups functionality will happily list all members of a group. However the net user code completely ignores system accounts, as does most of the rest of what Windows makes available. Internally they are organized as a subclass of Win32_Account but not Win32_UserAccount. So it’s possible to retrieve a bunch of useless information from the Windows API. This happens with LookupAccountSid as well. If you give it an SID like S-1-5-20, it will give you an answer. But the answer it gives you can’t be used as input for anything else, which is obnoxious.
You can query if users exist by doing
SET /P query_user=What user do i look for?
::Take out /domain if you want to look on the local computer
Net User %query_user% /domain
if NOT %errorlevel% == 0 goto s_error_1
if %errorlevel% == 0 goto s_success_1
“net user /domain username” lists only the groups to which the username is a direct member. It can’t show nested groups. I was doing a quick check to see if a username was a member of a group:
net user /domain username | find “Group Name”
That fails since the user is not directly a member of “Group Name”. In reality, they are a member, as they’re a member of a nested group.
Any idea of a command line that will expand groups to look for a particular member? I’ve used the “dsquery” and “dsget” commands, but they are only present if the AD tools are installed.
Very useful thanks, didn’t worked for me the first time.
The command is not case sensitive.
For example “NET USER /DOMAIN MYDOMAIN/MyUser” Didn’t worked.
But “NET USER /DOMAIN MyUser” works fine!
So not necessary to put explicitly the domain.
By the way it means also you can’t query another domain than the main one you are logged on to ?
Is there any option where we can get the multiple user’s output in excel for local computer and remote computer
net user userName
Adding Local Users to Local Groups

October 3rd, 2014
Summary : Learn how to use Windows PowerShell to add local users to local groups.
Microsoft Scripting Guy, Ed Wilson, is here. Creating local user objects and local group objects is fine, but to be useful, I need to be able to add users to groups. When working with local accounts, I need to use the ADSI type accelerator to facilitate the way things work.
Note This is the third in a series of three posts. If you haven’t read them already, you might benefit from reading the first two posts before you read this:
Today I add the users to the group.
Connect to the actual group
Adding a user to a group is a bit different than creating a local user or a local group. When I add a user to a group, I need to connect to the group itself. I still need to open the Windows PowerShell console or ISE with Admin rights, but this time the connection is a bit more complicated. I still use the [ADSI] type accelerator, I still use WinNT as my provider, and I still specify the name of the computer. But I also must specify the name of the group and provide a hint that I am connecting to a group. Here is the command:
If the group does not exist, the connection will not fail. In fact, it will actually appear to succeed. The error message will only appear when I try to use the object that I stored in the $group variable. This is shown here:

When I have a connection to an existing group, I call the Add method to add my local user object. The Add method accepts what is called an ADsPath—that is the complete path to the user object, including the WinNT provider. Here is an example of the ADsPath to the mred user that I created the other day:
There are four parts: WinNT, the computer name, the user account name are required. The fourth part, user, is a hint that is not really required, but it makes things go a bit faster because it tells the provider the type of object I am looking for. Here is the complete Add command:
That is it. Two lines for the complete script:
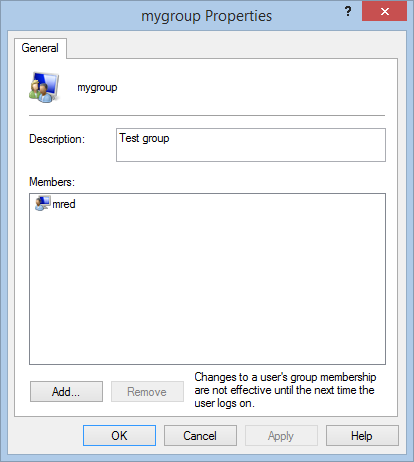
I open the group in the computer management console, and sure enough, the user is now a member of the group.
That is all there is to using Windows PowerShell to add local users to local groups. Join me tomorrow when I will talk about how to make Windows PowerShell Help always display examples.
iSumsoft
Tell You More about IT World
- Blog>
- Computer Tips>
- How to Add User to Local Administrator Group in Windows
How to Add User to Local Administrator Group in Windows

Generally, in Windows, a user account belonging to the administrator group is called an administrator account. As we know, only the administrator account has full rights to control the Windows computer, while the standard accounts and guest accounts have no permission to perform most common tasks such as changing system settings and installing software. If you are a standard user without admin rights on your computer, it may bring so much inconvenience and trouble for you. But never mind, you can add any user existing in your Windows to local administrator group to grand it administrator privileges.
Two ways to add a user to the local administrator group in Windows
Tips: It requires you to log into your Windows as administrator when you use any one of the two ways.
Way 1: Add user to the local administrator group in Windows Computer Management
Step 1: Right-click on Computer/My Computer, and select Manage.
Step 2: Expand Local User and Groups. And select Users folder.
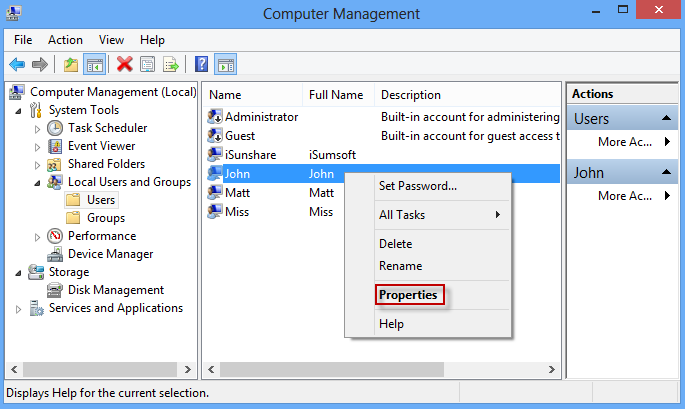
Step 3: It lists all existing users on your Windows. Right-click on the user you want to add to the local administrator group, and select Properties.
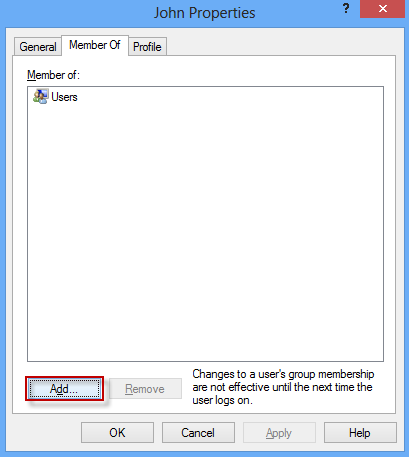
Step 4: The Properties dialog opens. Select the Member Of tab. You can see which group the user belongs to. Then click on the Add button.
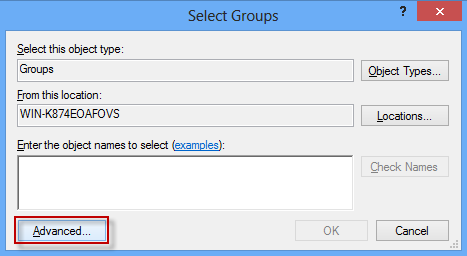
Step 5: The Select Groups dialog opens. Click the Advanced button.
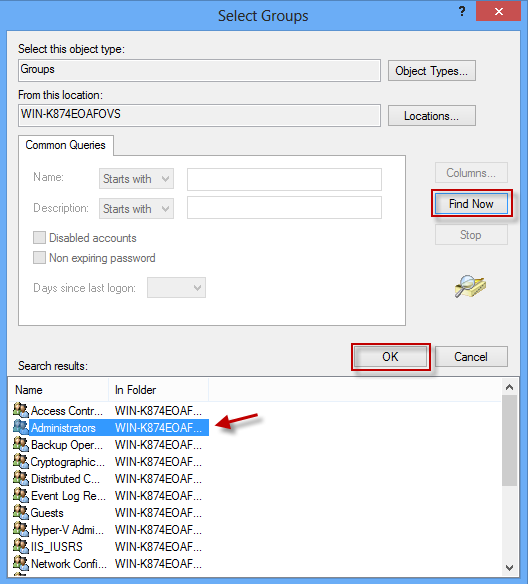
Step 6: Click on the Find Now button. Then it displays all groups. Select your target local administrator group name, and click on OK.
Way 2: Add user to the local administrator group using Command Prompt
Step 1: Open Command Prompt dialog.
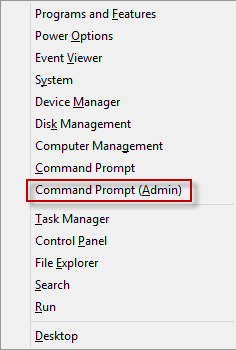
In Windows 8/8.1/10 and Windows Server 2012/2008, press Win + X keys combination and select Command Prompt (Admin).
In Windows 7/Vista, click on Start -> All Programs -> Accessories, right-click on the Command Prompt and select Run as administrator to open Command Prompt as administrator.
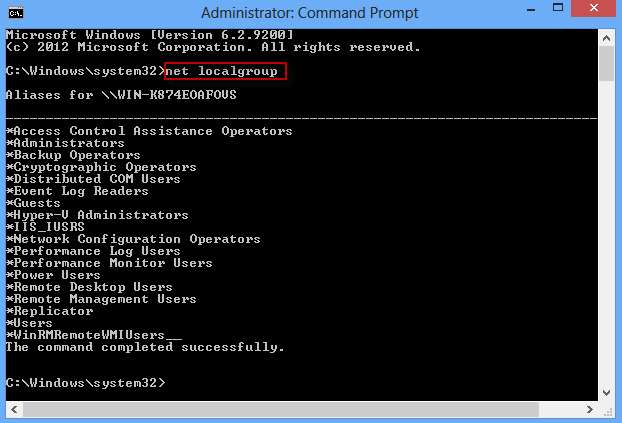
Step 2: View all local groups
In the Command Prompt dialog, run the command: net localgroup. It will list all your local groups.
Step 3: Add the user to the local administrator group
Run the command: net localgroup Administrators [username] /add. Replace [username] with your user you want to add to the local admin group and replace “Administrators” with your local administrator group name.


