- Windows 10 could not reconnect all network drives [Easy Fix]
- How to fix Windows cannot connect to all network drivers?
- 1. Use Driverfix
- Driverfix
- 2. Make Window wait for the connection before mapping network drivers
- Run a System Scan to discover potential errors
- 3. Connect the actual external driver
- 4. Disconnect network drive
- 5. Disable the Windows cannot connect to all network drivers message at start-up
- How to map network drives for all users in Windows 7
- Could not reconnect all network drives Windows 8
- Replies (16)
- 4 ways to delete mapped network drives in Windows 10
- 1. Use File Explorer to delete a mapped network drive from Windows 10
- 2. Run “net use /delete” in Command Prompt or PowerShell to delete a mapped network drive
- 3. Run “net use * /delete” in Command Prompt or PowerShell to delete all the mapped network drives
- 4. Use File Explorer to remove a network location mapping from your PC by erasing its shortcut
- Troubleshoot network drives and locations that won’t go away
- Did you manage to remove all the mapped network drives you wanted?
Windows 10 could not reconnect all network drives [Easy Fix]

- The Windows could not reconnect all network drives notification could be more harmful than you think.
- In this article we will present you with some options on how you can easily solve this problem.
- Become a Windows 10 troubleshooting whiz by taking a look at our Window 10 Hub.
- Solve any issue that might interrupt your online experience, by visiting our Windows Errors Section.
- Download Restoro PC Repair Tool that comes with Patented Technologies (patent available here).
- Click Start Scan to find Windows issues that could be causing PC problems.
- Click Repair All to fix issues affecting your computer’s security and performance
- Restoro has been downloaded by 0 readers this month.
When you plug-in different external devices to your Windows 10 computer, or when your PC is connected to a specific network, you will receive different system notifications.
These elements are related to the network status or how the external devices are or aren’t recognized by your machine. Among these notifications, we have the alert that says: Windows cannot connect to all network drivers.
While this default notification is there to let you know that some devices from your network cannot be currently used, it can be also a false positive. In this case, you should learn how to disable it.
In the tutorial below, you will learn how to fix the problems related to this system notification in order to get the best Windows 10 experience.
How to fix Windows cannot connect to all network drivers?
1. Use Driverfix

Driverfix is one of the most efficient tools for always keeping your PC up to date. It comes with an easy to use interface and an advanced yet simple technology that helps you maintain your device in top shape.
As soon as you install it, Driverfix will start scanning your PC for updates and download those patches that are essential in order for your drivers to function at their best capacity.
Thanks to this software you’ll have over 18 million driver files available for download at any time. With the schedule manager, you can perform regular scanning in order to ensure your device runs smoothly.
You also get to see which programs are missing important updates thanks to an accurate report provided by Driverfix.

Driverfix
2. Make Window wait for the connection before mapping network drivers
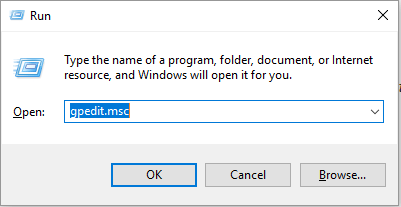
- Press the Win+R keyboard hotkey for bringing the Run box on your computer.
- In that window type gpedit.msc and press Enter, the Group Policy Editor will be launched.

- Access Computer Configuration then Administrative Templates System and click Logon.
- Next, just enable the Always wait for the network at computer startup and logon group policy field.
- Apply these new settings and save your options.
- Reboot your Windows 10 system in the end.
Run a System Scan to discover potential errors


Usually, when the Windows cannot connect to all network drivers message is displayed, the policy that maps your drivers is initiated and completed during the start-up process, so before you can log into the system.
Basically, there is no active connectivity by that moment, meaning that the drivers cannot be loaded until you complete the Windows 10 log in sequence.
Thus, in that case you have to configure a local group policy object that can force Windows to wait for the connection before enabling the mapping process.
3. Connect the actual external driver
If this notification is related to a driver that is currently disconnected from your computer, you only have to re-establish the actual connection.
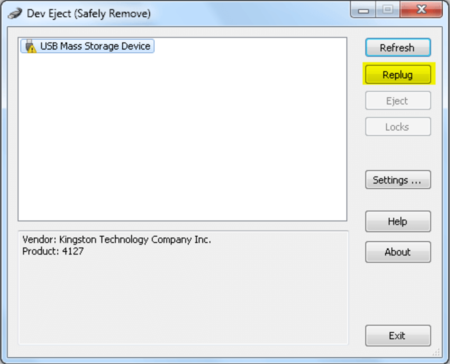
For example, if we’re talking about an external hard drive that’s currently not recognized by your PC and if the actual alert is caused by this specific external hardware, we should unplug and re-plug the USB cord.
That should fix the system alert and also the network connection issue that was first reported by your Windows 10 system.
4. Disconnect network drive
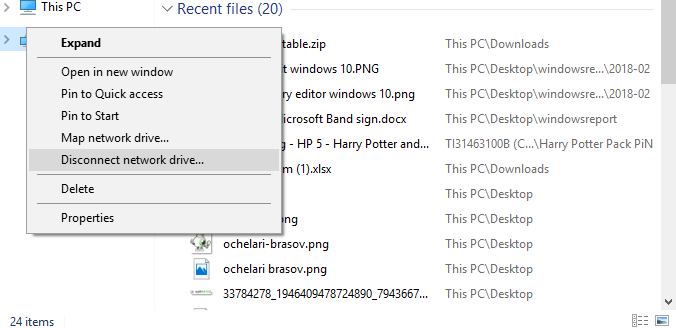
- Open This PC on your computer, press Win+E keyboard hotkeys to access Windows Explorer.
- Find the driver that’s not connected and right-click on its icon.
- From the list of options that are displayed click on the Disconnect entry.
- Or, from the main window status bar click on the Map network drive and choose Disconnect network drive.
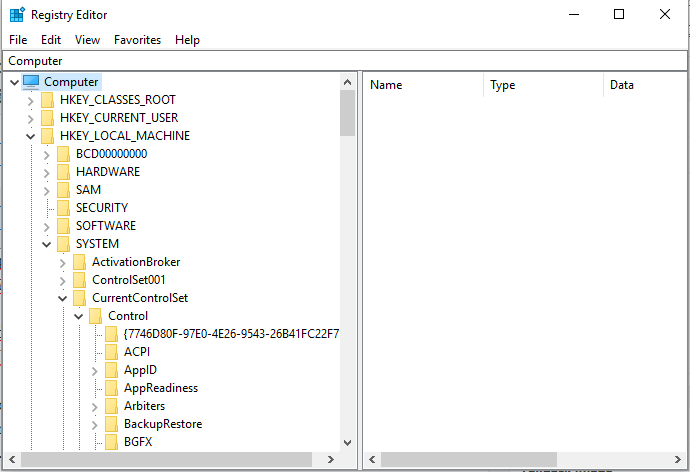
5. Disable the Windows cannot connect to all network drivers message at start-up
- On your computer launch the Run box – press the Win+R keyboard keys.
- In the Run box type ‘regedit’ and press Enter.
- Now the Registry Editor window will be displayed on your PC.
- In there navigate towards: HKEY_LOCAL_MACHINESYSTEMCurrentControlSetControlNetworkProvider
- Then, on the right side of the main window double-click on NetworkProvider.
- Note: if this value isn’t there right-click on the RestoreConnection folder and pick up New then click DWORD Value.
- Set the Restore Connection value to 0 in order to disable the mapped network drive message.
- Save your changes and close the Registry Editor.
- Reboot your Windows 10 system in the end.

The troubleshooting solutions we listed in our article should help you fix or disable the ‘Windows cannot connect to all network drivers’ message alert displayed on your Windows 10 computer.
If you used other similar solutions that might work, don’t hesitate and share your experience with us in the comments below.
How to map network drives for all users in Windows 7
I am trying to map network drives in Windows 7. I did it by usual method, but those network drives only appear for one user (administrator) and they do not appear for other users. Is there any way to map those drives as admin so that all users can see them (instead of each user maps by himself)?
Thanks for your help!
It’d be once per user. From that point forward, it would automatically connect every time the user logs into Windows, as long as the network location is accessible. If the server or remote computer was off, it’d prompt the user during login to let them know that a drive could not be connected.
If this was helpful, please vote by clicking the green triangle. If it solves the issue, click Propose as Answer. Thanks!
4 people found this reply helpful
Was this reply helpful?
Sorry this didn’t help.
Great! Thanks for your feedback.
How satisfied are you with this reply?
Thanks for your feedback, it helps us improve the site.
How satisfied are you with this reply?
Thanks for your feedback.
There is no option to map the network drive for all users at one go.
However you can access the mapped network drive from other user accounts using credentials.
To access the mapped network drive.
1. Click Start and click on Computer.
2. Click on Map Network Drive.
3. Now put a check mark in Connect using different credentials.
4. Click Finish.
Thanks and Regards:
Swathi B — Microsoft Support.
Visit our Microsoft Answers Feedback Forum and let us know what you think.
Could not reconnect all network drives Windows 8
Replies (16)
* Please try a lower page number.
* Please enter only numbers.
* Please try a lower page number.
* Please enter only numbers.
Was this reply helpful?
Sorry this didn’t help.
Great! Thanks for your feedback.
How satisfied are you with this reply?
Thanks for your feedback, it helps us improve the site.
How satisfied are you with this reply?
Thanks for your feedback.
Was this reply helpful?
Sorry this didn’t help.
Great! Thanks for your feedback.
How satisfied are you with this reply?
Thanks for your feedback, it helps us improve the site.
How satisfied are you with this reply?
Thanks for your feedback.
Was this reply helpful?
Sorry this didn’t help.
Great! Thanks for your feedback.
How satisfied are you with this reply?
Thanks for your feedback, it helps us improve the site.
How satisfied are you with this reply?
Thanks for your feedback.
Same here.. I think maryland157 is right; the drivers for wireless seems to load after Windows tries to establish a connection. It should only try to connect to the mapped drives WHEN it detects a connection (and of course after a timeout if no connection).
I hope to get this fixed.
Did some more searching and found this:
17 people found this reply helpful
Was this reply helpful?
Sorry this didn’t help.
Great! Thanks for your feedback.
How satisfied are you with this reply?
Thanks for your feedback, it helps us improve the site.
How satisfied are you with this reply?
Thanks for your feedback.
Was this reply helpful?
Sorry this didn’t help.
Great! Thanks for your feedback.
How satisfied are you with this reply?
Thanks for your feedback, it helps us improve the site.
How satisfied are you with this reply?
Thanks for your feedback.
Same here.. I think maryland157 is right; the drivers for wireless seems to load after Windows tries to establish a connection. It should only try to connect to the mapped drives WHEN it detects a connection (and of course after a timeout if no connection).
I hope to get this fixed.
Did some more searching and found this:
Was this reply helpful?
Sorry this didn’t help.
Great! Thanks for your feedback.
How satisfied are you with this reply?
Thanks for your feedback, it helps us improve the site.
How satisfied are you with this reply?
Thanks for your feedback.
Was this reply helpful?
Sorry this didn’t help.
Great! Thanks for your feedback.
How satisfied are you with this reply?
Thanks for your feedback, it helps us improve the site.
How satisfied are you with this reply?
Thanks for your feedback.
Was this reply helpful?
Sorry this didn’t help.
Great! Thanks for your feedback.
How satisfied are you with this reply?
Thanks for your feedback, it helps us improve the site.
How satisfied are you with this reply?
Thanks for your feedback.
Ditto. I would like to use a network drive for backup. I have mapped it in explorer and checked «remember my credentials». When I restart Windows, I always get the «could not reconnect all drives» message and the drive is shown as mapped, but not connected, even when I have a hard-wired network connection. In order to reconnect, I have to resupply the login password.
I don’t have to supply a password for my NAS. I just double-click the mapped drive icon and it opens. This is a problem on both my Win 8 computers.
MS Support Engineers, is there a way to at least turn off the notifications? That way Windows won’t be continually bothering me with false messages about my network drives. Before you answer, let me say that I’ve tried «Taskbar and Navigation Properties». The notification doesn’t appear in the list.
1 person found this reply helpful
Was this reply helpful?
Sorry this didn’t help.
Great! Thanks for your feedback.
How satisfied are you with this reply?
Thanks for your feedback, it helps us improve the site.
4 ways to delete mapped network drives in Windows 10
Mapping network drives and other locations is a good way of keeping remote data at hand in your local area network. However, at some point, you might also want to delete some of these drive mappings and keep only those that you regularly use. In this article, we show you exactly how to do that. Here are four methods for deleting mapped drives and network locations from Windows 10:
NOTE: If you arrived here while searching for ways to create mapped network drives in Windows 10, and not ways to delete them, read: How to map FTP locations, network drives, and web shares, in Windows 10 and Windows 8.1. This guide was made for Windows 10, but the methods we show also work in older versions of Windows.
1. Use File Explorer to delete a mapped network drive from Windows 10
If you need to delete a previously created drive mapping, the first thing you must do is open File Explorer. Then, on the left side of the window, select This PC. All of the mapped drives are available in the Network Locations group, beneath your solid-state drive, hard-disk drives and other similar devices such as CD/DVD units or USB memory sticks.
To delete a drive mapping toward a network location, right-click (or press-and-hold) on it and select Disconnect.
To remove a drive mapping towards a network folder or FTP site, right-click (or press-and-hold) on it and select Delete.
The deleted mapped drives then stop showing. If you want to restore them, you have to recreate them.
2. Run “net use /delete” in Command Prompt or PowerShell to delete a mapped network drive
If you prefer command-line environments, you can use the net use command to delete mapped network drives from Command Prompt or PowerShell. Open the one you like best and run this command: net use [Mapped Drive Letter] /delete. Then, press Enter. For example, we have a drive mapping to which we assigned the letter Z, so we have to type: net use Z: /delete.
You are informed that the mapped drive was deleted successfully, and the network drive disappears immediately from File Explorer.
NOTE: The net use /delete command only works for drive mappings that have a letter assigned. It doesn’t work for network location mappings such as FTP servers or web servers.
3. Run “net use * /delete” in Command Prompt or PowerShell to delete all the mapped network drives
If you have more than one mapped network drive configured and you want to delete them all at once, you can use the same net use command to disconnect them all at once. Open Powershell or start Command Prompt and run the following command: net use * /delete.
PowerShell or Command Prompt then shows you all the active network connections that are going to be canceled. It might also ask whether you are sure that you want to continue. Type in Y if you do, or N if you don’t.
TIP: If you want to use the net use command to delete all the mapped network drives and you want to force the process to go on without asking for any confirmations, add the /y parameter to the command: net use * /delete /y.
4. Use File Explorer to remove a network location mapping from your PC by erasing its shortcut
A network location mapping is a shortcut stored as a file on your Windows computer. If you can’t delete it using the first method we’ve shown, you can try others. One of them is to use File Explorer to delete its shortcut. Open File Explorer and navigate to “C:\Users\Your_User_Name\AppData\Roaming\Microsoft\Windows\Network Shortcuts”. Your_User_Name is the name of your Windows 10 user account. In the Network Shortcuts folder, you can find all network location mappings. Select the ones you no longer want to use. Then, right-click (or press-and-hold) on them and select Delete or press the Delete key on your keyboard.
The selected network mappings are deleted immediately, without additional confirmation.
Troubleshoot network drives and locations that won’t go away
There are times when none of the methods we described above work as they should. When such a situation occurs, there are a few things you should try:
- If you disconnect a mapped network drive or delete a network location, but it doesn’t disappear from File Explorer, the reason might be that the File Explorer didn’t get to refresh its contents. Try pressing the F5 key on your keyboard or click/tap on Refresh in the right-click menu inside File Explorer.
- If you tried to remove a network mapping from your Windows 10 PC, but you get an error about that location as no longer being available, your Windows operating system is likely outdated. We’ve tested to see what happens when the PC with the mapped network drives and locations is disconnected from the network or when the network resources are no longer available (target devices are shut down or are no longer part of the network), and all the methods illustrated in this article worked correctly.
- Sometimes, even though you disconnected or deleted a network drive or location from your Windows PC, the operating system gets hung up and can’t remove these links on the fly. A good idea in such a situation would be for you to restart Windows 10. You can also restart the explorer.exe process by using Powershell or Command Prompt to run these two commands: taskkill /f /IM explorer.exe and explorer.exe.
Did you manage to remove all the mapped network drives you wanted?
As you can see from this article, there are quite a few alternatives to deleting drive mappings. The instructions above work on any Windows 10 computer or device. Did you manage to delete every mapped network drive or location you wanted? If you have something to add to our guide, don’t hesitate to use the comments below.


