- How to Dual Boot Windows 10 and Linux Starting with Windows or Linux
- Dual Boot Linux with Windows 10 – Linux Installed First
- Create Bootable Windows 10 Install Media Using Unetbootin
- Create Bootable Windows 10 Install Media Using Brasero
- Dual Boot Linux with Windows 10 – Windows Installed First
- 4 Best Linux Boot Loaders
- What is a Boot Loader?
- 1. GNU GRUB
- 2. LILO (Linux Loader)
- 3. BURG – New Boot Loader
- 4. Syslinux
- If You Appreciate What We Do Here On TecMint, You Should Consider:
- Создание системы двойной загрузки с Linux и Windows
How to Dual Boot Windows 10 and Linux Starting with Windows or Linux


A computer that boots both Windows 10 and Linux can easily be the best of both worlds. Having easy access to either of the operating systems lets you enjoy the benefits of both. You can hone your Linux skills and enjoy the free software only available for Linux platforms. Or, you can switch back to Windows 10 to use apps like Photoshop, AutoCAD or Microsoft Office. The beauty of dual booting is that it lets each operating system take full advantage of the hardware resources of your computer. While virtual machines and the Windows Subsystem for Linux can give you a taste of the Linux experience, dual booting lets you tap its full potential.
The good news is that Windows 10 and Linux live in harmony better than ever these days. Dual booting Windows 10 and Linux used to be a precarious process that could wreck your Windows installation, your Linux installation or both. While the process isn’t quite a smooth as dual booting macOS and Windows with Boot Camp, it comes close. In this article, we’ll show you how to safely install Windows 10 and Linux on the same hard drive. It doesn’t matter if you’re starting with Linux or starting with Windows—dual booting is easy to set up either way.
Dual Boot Linux with Windows 10 – Linux Installed First
Let’s start with the (slightly) harder way first; you already have a copy Linux installed and you want to install Windows on a partition. The first step is to create the partition where Windows 10 will be installed. We have covered how to create partitions in Linux, so, start by reviewing our article on how to do that.
Once you have your partition set up, you will need to purchase Windows 10, download the ISO file then create a bootable copy. Creating a bootable copy of Windows 10 on Linux can be done using the free Unetbootin (USB thumb drive) or Brasero software if you are installing from a DVD.
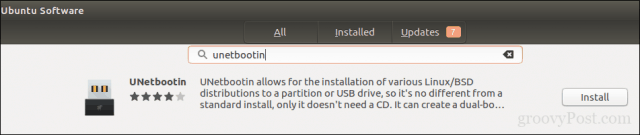
Create Bootable Windows 10 Install Media Using Unetbootin
Unetbootin can be downloaded from the Software Center in Ubuntu. Once you have it up and running, launch it. Make sure you are using a thumb drive with at least 8 GBs of free space.
Select the Disk Image radio box, click the browse button (represented by an ellipsis …), browse to the ISO file then click Open. Chose the medium from the Type list box—in this case, your USB drive. Click on the drive list box then select your USB thumb drive.
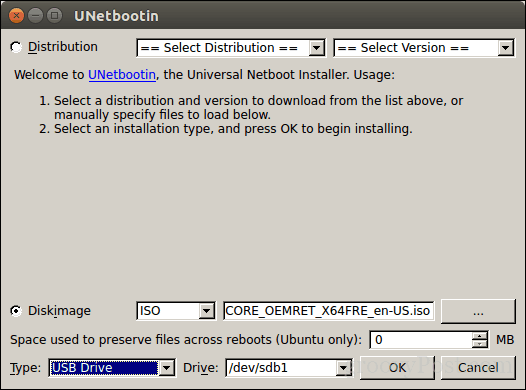
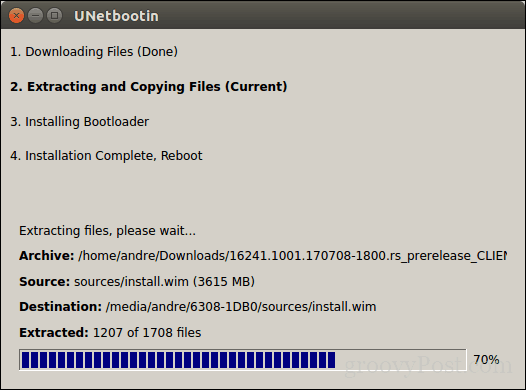
Click OK, then wait while the bootable copy is created.
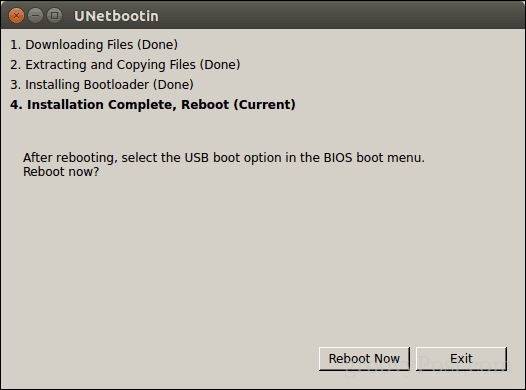
When complete, click Exit.
Create Bootable Windows 10 Install Media Using Brasero
If you already made a bootable USB with Unetbootin, you can skip this part. If you are still using an old school system with a DVD drive, you can use the Brasero DVD Burning software, which you can download from the Software Center also. Please keep in mind, Windows 10 ISO files are getting larger beyond the standard 4.7 GB DVDs. So, in some cases, it’s best you use 8.5 GB dual-layer DVDs if supported by your drive. If you can’t, then it’s best you use a USB thumb drive.
In Brasero, click Burn Image.
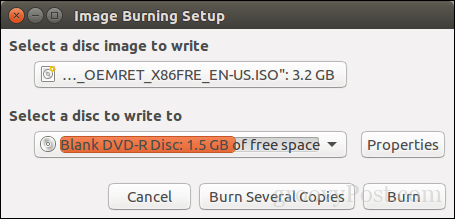
Select your disc image, make sure a blank DVD disc is inserted then click Burn.
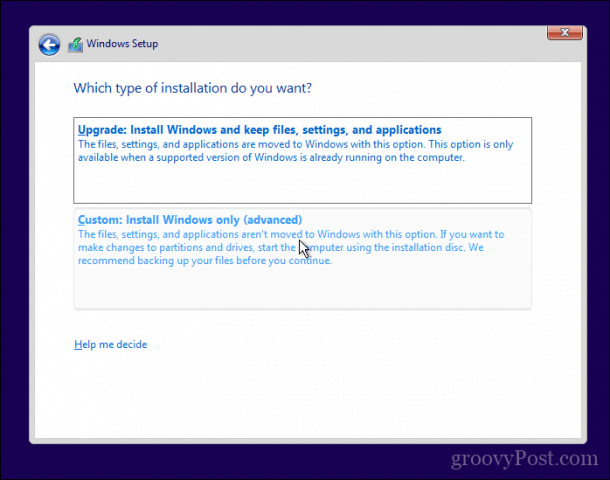
After preparing your install media, insert it or connect it. Reboot your computer, then configure your BIOS to boot from the drive. Windows 10 will boot into setup as it normally does. After you arrive at the setup screen, click Custom: Install Windows only (advanced).
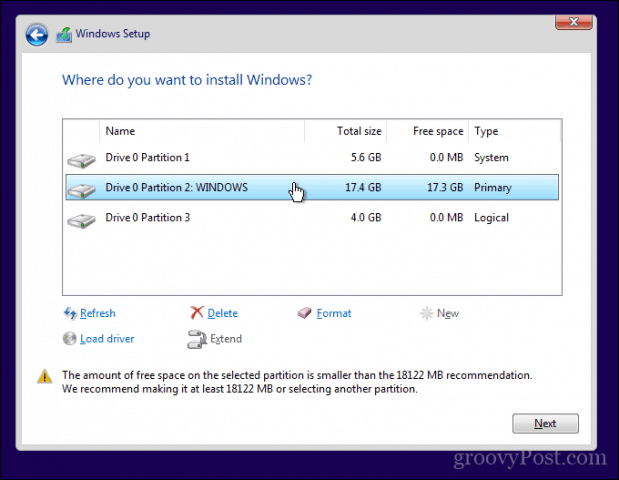
Make sure you select the right partition; don’t wipe out your Linux installation. Click Next then wait while Windows 10 Setup copies files to the drive. Your computer will be rebooted several times.
When setup is complete, follow the instructions to complete the out of box experience.
After that’s complete, you might notice the obvious—there is no way to boot into Linux anymore. Here is how you fix that. Download a free utility called EasyBCD from Neosmart Technologies. Proceed to install EasyBCD then launch it. Select the Linux/BSD tab. Click in the type list box, select Ubuntu; enter the name of the Linux distribution, choose automatically locate and load then click Add Entry. Reboot your computer.
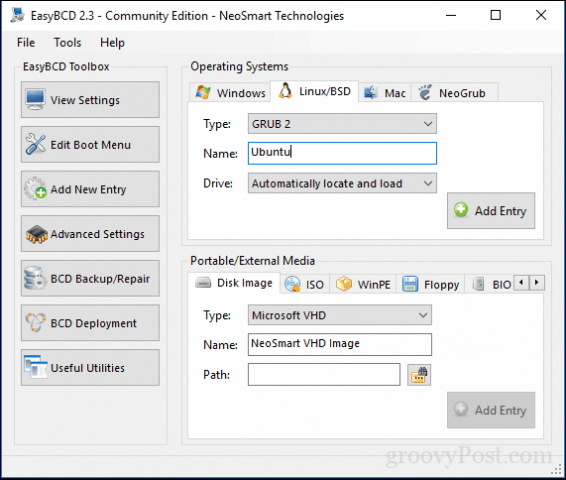
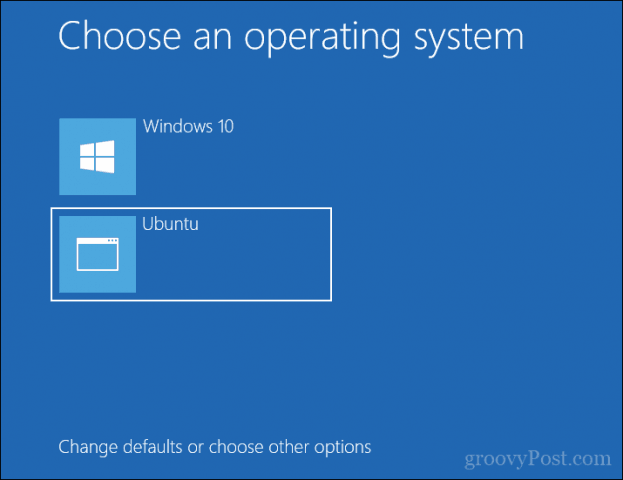
You will now see a boot entry for Linux on the Windows graphical boot manager.
Dual Boot Linux with Windows 10 – Windows Installed First
For many users, Windows 10 installed first will be the likely configuration. In fact, this is the ideal way to dual boot Windows and Linux. Again, I will be using the Ubuntu Linux distribution. You can download the Ubuntu Linux ISO image from Canonical’s web page then create a bootable copy using Unetbootin for Windows or burn to a blank DVD using disc image in Windows 10.
After creating your install media, configure your BIOS to boot from it. Ubuntu’s installation wizard intelligently detects existing Windows installations. It will ask you if you would like to install Ubuntu alongside Windows.
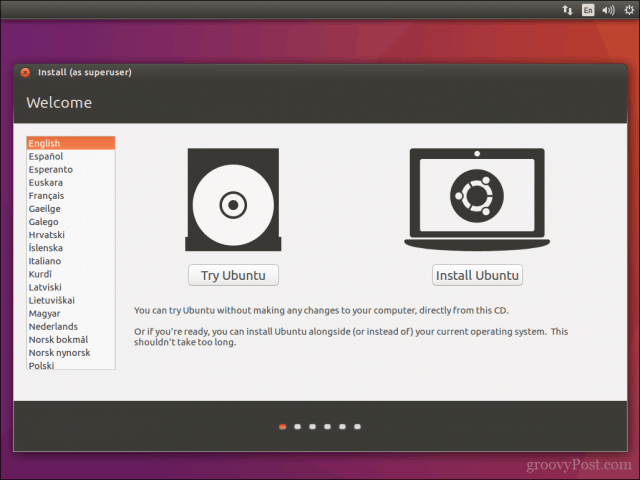
At the Ubuntu install screen, click Install Ubuntu.
Choose whether you want to download and install updates and third-party drivers and codecs then click Continue.

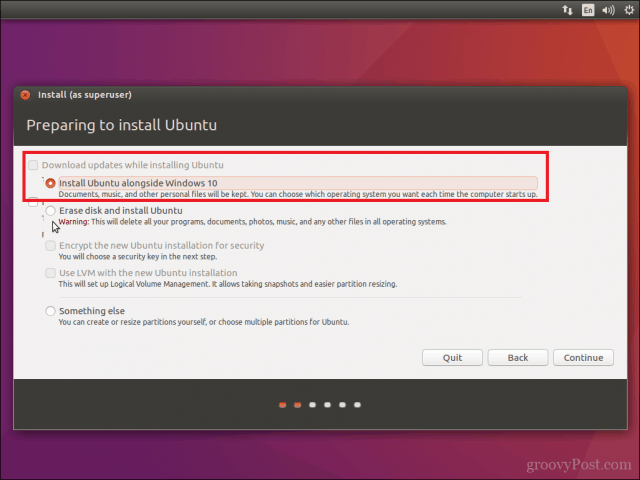
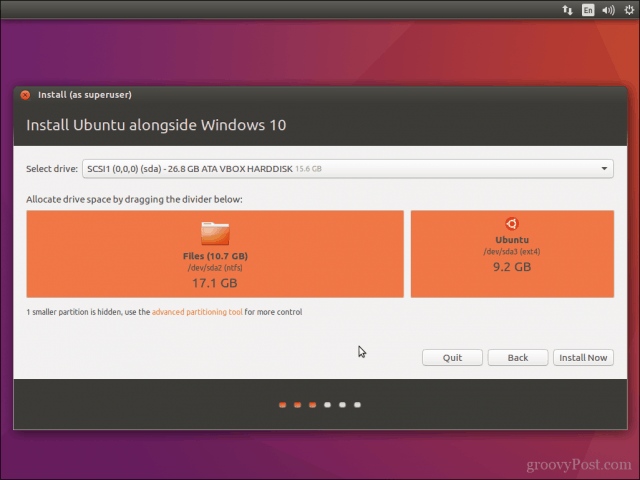
Select the option Install Ubuntu alongside Windows 10 then click Continue.
Ubuntu’s installer will set a default allocation of space for the installation. If you have enough space, you can resize the partition by placing your mouse between the divider then drag it left or right to make adjustments. Once you are satisfied with the allocated amount for your Ubuntu installation, click Install Now.
Click Continue to confirm changes.
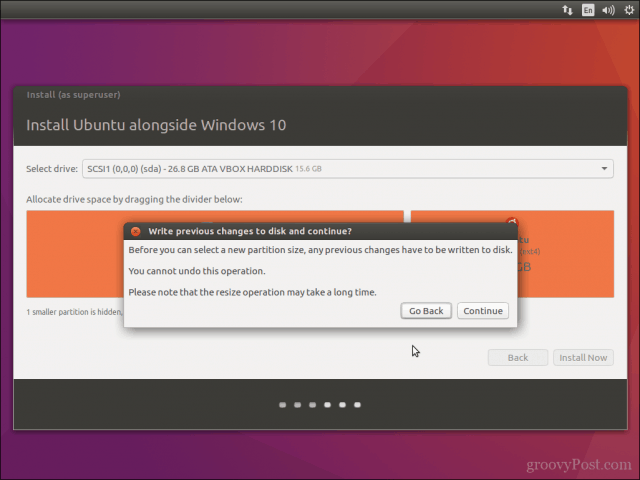
Click Continue again.
Enter your time zone then click Continue.

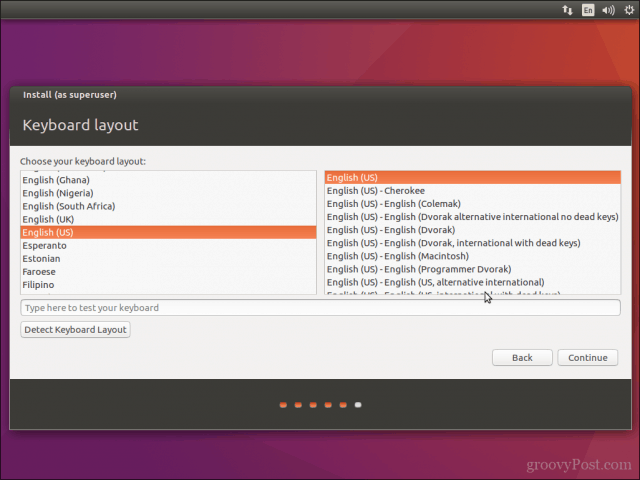
Select your keyboard layout, click Continue.
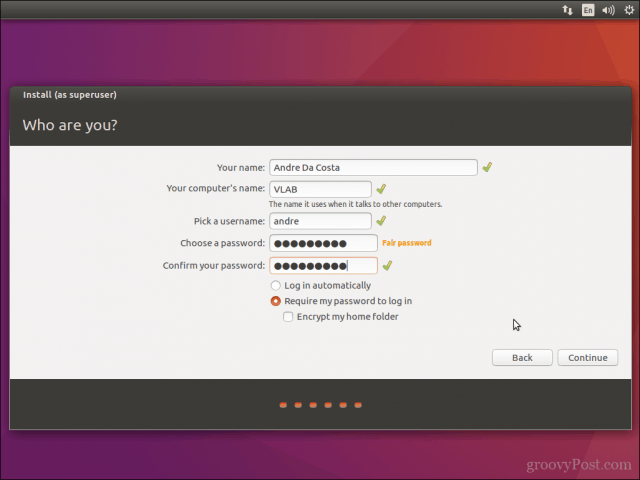
Create your user account by providing your full name, computer name, login name, and password. Choose whether you want to log in automatically or be prompted for a password. You can also encrypt your home folder for extra security. Click Continue.
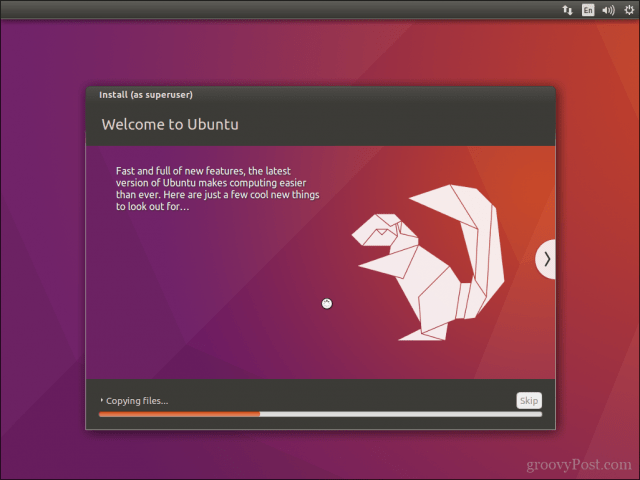
Wait while Ubuntu copies files.
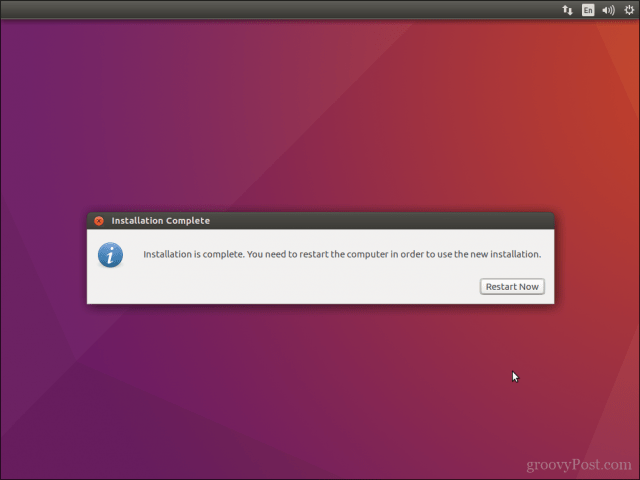
When complete, click Restart Now.
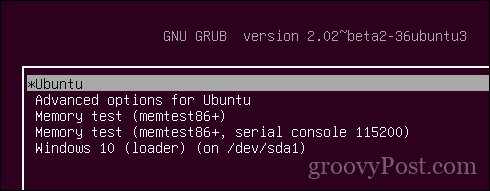
Ubuntu will add a boot entry for Windows 10 to the GRUB boot manager, which you can select using the up or down arrow then hitting Enter.
That’s it, Windows 10 and Ubuntu is now set up on your computer.
Let us know what you think. If you have done this before, share some of your tips with us. By the way, what’s your favorite distro?
4 Best Linux Boot Loaders
When you turn on your machine, immediately after POST (Power On Self Test) is completed successfully, the BIOS locates the configured bootable media, and reads some instructions from the master boot record (MBR) or GUID partition table which is the first 512 bytes of the bootable media. The MBR contains two important sets of information, one is the boot loader and two, the partition table.
What is a Boot Loader?
A boot loader is a small program stored in the MBR or GUID partition table that helps to load an operating system into memory. Without a boot loader, your operating system can not be loaded into memory.
There are several boot loaders we can install together with Linux on our systems and in this article, we shall briefly talk about a handful of the best Linux boot loaders to work with.
1. GNU GRUB
GNU GRUB is a popular and probably the most used multiboot Linux boot loader available, based on the original GRUB (GRand Unified Bootlader) which was created by Eirch Stefan Broleyn. It comes with several improvements, new features and bug fixes as enhancements of the original GRUB program.
Importantly, GRUB 2 has now replaced the GRUB. And notably, the name GRUB was renamed to GRUB Legacy and is not actively developed, however, it can be used for booting older systems since bug fixes are still on going.
GRUB has the following prominent features:
- Supports multiboot
- Supports multiple hardware architectures and operating systems such as Linux and Windows
- Offers a Bash-like interactive command line interface for users to run GRUB commands as well interact with configuration files
- Enables access to GRUB editor
- Supports setting of passwords with encryption for security
- Supports booting from a network combined with several other minor features
2. LILO (Linux Loader)
LILO is a simple yet powerful and stable Linux boot loader. With the growing popularity and use of GRUB, which has come with numerous improvements and powerful features, LILO has become less popular among Linux users.
While it loads, the word “LILO” is displayed on the screen and each letter appears before or after a particular event has occurred. However, the development of LILO was stopped in December 2015, it has a number of features as listed below:
- Does not offer an interactive command line interface
- Supports several error codes
- Offers no support for booting from a network
- All its files are stored in the first 1024 cylinders of a drive
- Faces limitation with BTFS, GPT and RAID plus many more.
3. BURG – New Boot Loader
Based on GRUB, BURG is a relatively new Linux boot loader. Because it is derived from GRUB, it ships in with some of the primary GRUB features, nonetheless, it also offers remarkable features such as a new object format to support multiple platforms including Linux, Windows, Mac OS, FreeBSD and beyond.
Additionally, it supports a highly configurable text and graphical mode boot menu, stream plus planned future improvements for it to work with various input/output devices.
4. Syslinux
Syslinux is an assortment of light weight boot loaders that enable booting from CD-ROMs, from a network and so on. It supports filesystems such as FAT for MS-DOS, and ext2, ext3, ext4 for Linux. It as well supports uncompressed single-device Btrfs.
Note that Syslinux only accesses files in its own partition, therefore, it does not offer multi-filesystem boot capabilities.
Conclusion
A boot loader allows you to manage multiple operating systems on your machine and select which one to use at a particular time, without it, your machine can not load the kernel and the rest of the operating system files.
Have we missed any tip-top Linux boot loader here? If so, then let us know by using the comment form below by making suggestions of any commendable boot loaders that can support Linux operating system.
If You Appreciate What We Do Here On TecMint, You Should Consider:
TecMint is the fastest growing and most trusted community site for any kind of Linux Articles, Guides and Books on the web. Millions of people visit TecMint! to search or browse the thousands of published articles available FREELY to all.
If you like what you are reading, please consider buying us a coffee ( or 2 ) as a token of appreciation.

We are thankful for your never ending support.
Создание системы двойной загрузки с Linux и Windows
В этой статье мы увидим, как установить ОС на базе Linux вместе с ОС Windows, уже установленной в Системе.
Прежде чем мы начнем, вот некоторые из преимуществ ОС Linux над ОС Windows и почему вы должны рассмотреть возможность использования системы Linux. (Чисто исходя из моего опыта)
- Системы Linux, как правило, не используют системные ресурсы и, следовательно, работают быстрее даже на старых установках оборудования.
- В Linux есть встроенная поддержка компилятора gcc и интерпретатора python.
- Linux также имеет встроенную поддержку Git, которая позволяет людям синхронизировать свою работу с удаленными репозиториями на GitHub.
- Linux является открытым исходным кодом, и, следовательно, работа с его исходным кодом может дать нам лучшее понимание структуры ОС.
Предварительные условия, прежде чем мы начнем процесс:
- Рекомендуется, чтобы у вас было 100–150 ГБ свободного места на жестком диске, хотя все, что выше 40 ГБ, подойдет. (Этот шаг важен, так как это объем пространства, который вы будете выделять для своей ОС Linux, и после установки Linux вы не сможете получить доступ к этому пространству через Windows)
- Флэш-накопитель USB занимает минимум 8 Гб.
- (Необязательно, только для новых машин). Убедитесь, что Windows установлена в режиме UEFI или в устаревшем режиме BIOS.

Убедитесь, установлена ли Windows в устаревшем режиме BIOS или в режиме UEFI
- ШАГ 1. Распределение необходимого объема пространства на жестком диске.
Этот шаг необходим для освобождения места на жестком диске, отформатированном в NTFS. Это нераспределенное пространство будет содержать системный раздел Linux, и поэтому вам необходимо тщательно решить, сколько места вы будете выделять Linux.
Для этого перейдите в Службу управления дисками Windows. Вы можете перейти в «Выполнить», ввести «diskmgmt.msc» и запустить.

Служба управления дисками Windows

Shinking существующий том, чтобы создать нераспределенное пространство

Указание суммы для сокращения
В окне «Управление дисками» щелкните правой кнопкой мыши раздел, из которого вы хотите извлечь необходимый ( рекомендуемый размер 100–150 ГБ ) свободного места, и нажмите «Сократить объем». В появившемся диалоговом окне введите «количество места для сжатия», равное 102400 Мб (100 Гб), и продолжайте. Это уменьшит пространство текущего объема на 100 ГБ, а оставшиеся 100 ГБ будут показаны как Нераспределенное пространство. Это завершает 1-й шаг.
ШАГ 2: Создание загрузочного USB-накопителя Linux.
Для целей этой статьи я буду устанавливать «Ubuntu» в качестве операционной системы Linux, так как она является самой популярной ОС Linux и имеет большую базу поддержки.
Сначала нам нужно скачать файл образа диска (файл .iso) ОС Ubuntu с официального сайта Ubuntu ( www.ubuntu.com ).
Последняя версия LTS (долгосрочная поддержка) предпочтительнее, чем версия без LTS, поскольку они обеспечивают поддержку обновлений в течение 5 лет, а не 9 месяцев для версий без LTS.
Нам также нужно другое программное обеспечение под названием Rufus для создания загрузочного USB-накопителя. Загрузочный диск — это тот, с которого машина может загрузить ОС, не устанавливая ее.
Затем нам нужно сделать резервную копию всего содержимого флешки и запустить Руфус. В Rufus мы делаем следующие настройки, показанные ниже.

Написание изображения в режиме ISO

Создание загрузочного USB
После завершения вышеуказанного процесса мы готовы к загрузочному USB-накопителю.
ШАГ 3. Отключение безопасной загрузки и быстрой загрузки (только для более новых компьютеров)
Этот шаг не требуется для старых машин, скажем, старше 2012 года. На этом шаге нам нужно войти в меню BIOS / UEFI нашего компьютера.
Если вы используете Windows 8.1 / 10, перед входом в меню BIOS / UEFI необходимо отключить «Быстрый запуск».
Для этого перейдите в «Опции электропитания». В левой части выберите «Выберите, что делают кнопки питания», затем нажмите «Изменить настройки, которые в данный момент недоступны» и снимите флажок «Быстрый запуск» ниже и сохраните эти изменения.


Выбор того, что делают кнопки питания

Отключение быстрого запуска
Теперь этот этап процесса зависит от производителя. Я советую немного пообщаться с Google, чтобы получить точную комбинацию клавиш, которую нужно нажать во время запуска машины, чтобы открыть меню BIOS / UEFI. В большинстве случаев вам нужно нажать одну из клавиш f1, f2 или f12 после включения машины, но до того, как начнут загружаться окна.

Отключение безопасной загрузки

Отключение быстрой загрузки
ШАГ 4: Загрузка Ubuntu Linux с USB-накопителя.
На следующем этапе мы загружаем Linux с USB-накопителя, который мы только что создали. Для этого мы входим в «Параметры загрузки» во время загрузки машины, но до загрузки Windows. «Меню параметров загрузки» показано ниже:

Меню параметров загрузки

Первый экран после загрузки через USB
Первая загрузка Ubuntu Linux:

ШАГ 5: Установка Ubuntu Linux
После того, как Ubuntu загрузится с флэш-накопителя USB, вы сможете опробовать различные приложения, предлагаемые дистрибутивом Linux, и после того, как вы проверите все основные функции ОС, которые вы будете использовать для работы на вашем компьютере, мы можем приступить к установке. ,
Запустите значок «Установить Ubuntu», показанный на рабочем столе Ubuntu, дважды щелкнув его и следуя инструкциям, приведенным ниже.


Выбор раскладки клавиатуры

Выбор типа установки: нормальная или минимальная

Тип установки: выбрано «Что-то еще»
Как только вы дойдете до шага, вас спросят: «Как вы хотите установить Ubuntu». Выберите «Что-то еще» и продолжите. На следующем экране вы увидите окно со всеми разделами жесткого диска на вашем компьютере. Вам необходимо найти среди всех разделов тот, который вы распределили на 1-м шаге, в этом окне он будет помечен как свободное место, и его пространство должно приблизительно соответствовать 102400 Мб. Выделите это «свободное место», щелкнув левой кнопкой мыши по нему, а затем выберите маленький знак «+» ниже, появится диалоговое окно для создания нового раздела.

Изменение таблицы разделов
Теперь, так как у меня уже установлен Linux в моей системе, вы видите, что есть 2 раздела типов ‘swap’ и ‘ext4’, это два раздела Linux. Но если у вас не было установленного ранее Linux, вы найдете только часть, помеченную как свободное место, как указано выше.
Сначала мы создадим «область подкачки», выделим «свободное пространство», откройте окно создания нового раздела и введите количество пространства для подкачки, равное объему оперативной памяти, который у вас есть.
затем выберите «New Partition type» в качестве «Primary» и, наконец, выберите «Use as» «swap area». Теперь, как я уже упоминал, поскольку у меня уже установлен Linux, с этого момента я собираюсь продолжить процесс установки на виртуальной машине, и, следовательно, точная таблица разделов и размеры разделов могут не совпадать.

Свободное пространство (точные размеры разделов не будут соответствовать)

Создание области обмена

‘область обмена’ создана

Создание корневого раздела файловой системы

Таблица разделов создана
Также убедитесь, что ваше «Устройство для установки загрузчика» установлено на ваш внутренний жесткий диск. (Там, где установлена Windows и Linux будет установлен), в большинстве случаев это «/ dev / sda»

Устройство для установки загрузчика
После того, как это будет создано, вы нажимаете «Установить сейчас» и подтверждаете, что вносите изменения в таблицу разделов, как показано ниже:

Подтверждение изменений (Убедитесь, что оба раздела, которые вы создали из свободного пространства, перечислены)
После того, как все это сделано, вам нужно просто выполнить следующие действия до начала установки:

Выбор вашего часового пояса
После этого вам просто нужно продолжить и указать свои учетные данные (имя пользователя, пароль), после чего начнется установка. После завершения установки вы можете выключить компьютер, вынуть загрузочный USB-накопитель и при следующем включении компьютера вы увидите окно grub, как показано ниже, позволяющее выбрать между Linux (Ubuntu, 1st Option) и Windows ( Менеджер загрузки для Windows). И там у вас есть собственная система с двойной загрузкой.


