- How to Create Partitions in Windows 10, macOS and Linux
- Create Partitions in Windows 10
- MBR, GPT, EFI – What’s the Difference?
- How to Create Partitions in macOS
- How to Create Partitions Linux
- Conclusion
- How to Access Linux Partitions in Windows
- Choosing The Right Software for Linux Partitions
- Using DiskInternals Linux Reader
- Read & Write Access With Ext2Fsd
- Safely Accessing Your Linux Files On Windows
How to Create Partitions in Windows 10, macOS and Linux

A partition is a way for you to slice up your local drive into multiple pieces. It can be for a variety of reasons, whether you are dual booting different operating systems, storing files or applications or creating a space to store your backups. Each operating system platform has its own way of partitioning a drive. In this article, we will look at the three major ones. Feel free to skip ahead:
Create Partitions in Windows 10
Depending on your computer configuration, Windows 10 can use as little as four primary partitions—using the MBR partition scheme—or as many as 128, if you are using the newer GPT partition scheme. The GPT partition is technically unlimited, but Windows 10 will impose a limit of 128, but each is primary. Within a primary partition, you can have an extended primary partition and create additional logical partitions. Extended partitions work around the limits of MBR, but there are limitations associated with it too since they cannot be used to keep a bootable copy of Windows. This is where the advantage of the newer UEFI GPT standard comes in.
MBR, GPT, EFI – What’s the Difference?
These acronyms refer to the partitioning and boot scheme used by your operating system to handle disks in Windows.
MBR – known as the master boot record, has been around for many decades and accompanies the older BIOS (Basic Input Output System) used to boot older computers. When your computer starts, it checks the BIOS for a bootloader (in Windows 10 known as winload.exe), which loads the operating system into the main memory.
EFI – known as the extensible firmware interface, came into the mainstream more than a decade ago with systems such as the first Intel Macs and computers pre-loaded with Windows Vista. UEFI offers more advanced options than BIOS, with support for features such as a graphical user interface and mouse support, making it easier to configure boot and hardware settings.
GPT – GUID or Global Unique Identifier Partition Table, is the successor to MBR and is an integral part of modern UEFI systems for booting Windows. If you are using a drive that’s larger than 2 TBs, GPT is recommended.
Check out our guide to learn more about configuring your computer boot options.
There are multiple ways to create a partition in Windows 10. You can use the operating systems built-in Disk Management utility, Disk Part from the command line, or a third-party program such as Easeus Partition Home (free).
(Note: We recommend you suspend BitLocker Drive Encryption before making changes to your partition.)
Press Windows key + X and click Disk Management. Select the drive, right-click it then click Shrink Volume to create a new logical partition.

Your ability to shrink the partition will depend on certain factors. According to Windows:
You cannot shrink a volume beyond the point where any unmovable files are located.
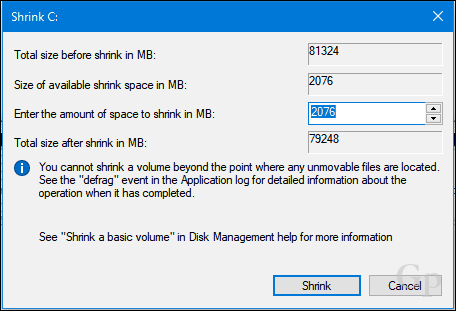
Clearly, I have more than 2 GB of free space available that I can shrink, so what’s blocking that? This can be attributed to a number of factors. Files on the drive such as your hibernation file, page file, or shadow copy files used by System Restore and Previous versions might be in locations on the drive that cannot be moved. It turns out that the easiest thing you can do is temporarily disable all three in order to shrink the drive to the desired size.
To disable hibernation, click Start, type: CMD, right-click CMD then click Run as administrator. At the command prompt, type the following then hit Enter, exit the command prompt then restart your computer:
To disable System Protection, click Start, type: CMD, right-click CMD then click Run as administrator. At the command prompt, type the following then hit Enter, exit the command prompt then restart your computer:
To disable Pagefile, click Start, type: CMD, right-click CMD then click Run as administrator. At the command prompt, type each command then hit Enter, exit the command prompt then restart your computer:
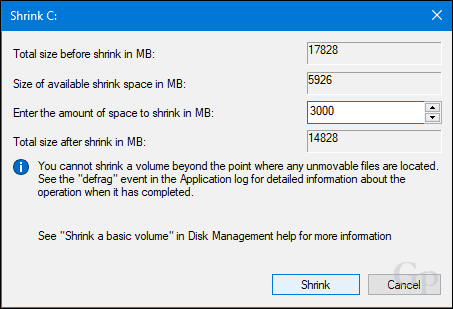
Open Disk Management again, right-click the partition, then click Shrink. Choose the amount of space you would like to allocate for the partition. For my purposes, I will choose 3000 MBs (3 GBs) then click Shrink.
This will create a new unallocated partition within Disk Management. Currently, it is not usable, so, you will need to initialize it. Right-click the partition then click New Simple Volume…


If you want, you can shrink the partition even further to create additional partitions. For my purposes, I will stick with the current volume size. Click Next.

You can assign an available drive letter, so, the partition will be mounted in File Explorer. Click Next.

You can give the volume a label so it can be easily recognized. You also have the option of choosing another file system such as FAT or FAT32. Click Next

Click Finish to apply changes.

Your new partition will show up in Disk Management and File Explorer as a local drive. You can store files there or even redirect your personal folders there.

If you don’t want to go through all this trouble, then you can download a free tool such as Easeus Partition Manager and it will take care of all of this for you.
One last thing: If disabled your hibernation, page file, or system protection, make sure you re-enable them all in an administrator command prompt:
- Enable hibernation: powercfg -h on
- Enable system protection: Enable-ComputerRestore -Drive C:
- Enable pagefile: wmic computersystem set AutomaticManagedPagefile=True
How to Create Partitions in macOS
As with most things in macOS, it’s dead simple. You can, of course, do this from the Terminal, but we are not gonna go there today. To create a simple partition, we are going to use Disk Utility, which you can find in the Finder > Applications > Utilities folder; or just press Command + Spacebar then type Disk Utility.

Select the drive you want to edit within the sidebar, then click the Partition button.

Select the slider on the pie chart, then drag it until the desired size is reached. Click Apply to confirm changes.

Wait while changes are applied.


Proceed to label the drive.

How to Create Partitions Linux
Users shouldn’t feel apprehensive about partitioning in Linux; it’s just as easy to do as Windows 10 and macOS. For this article, I will be using Ubuntu Linux, but the same principles should work for any Gnome based distro.
Partitioning in Linux is not really an out of box experience like it is on Windows 10 or macOS, but with third-party tools, it can be. For this purpose, I recommend you download the free GParted Editor from the Ubuntu software center. It’s a graphical partition manager that’s easy to understand and navigate. GParted also works on Windows, too.

After setting up GParted, launch the app, then select the partition you want to edit. Right-click on it then click Resize/Move.

Click in the field, Free space following (MiB): enter the amount for the partition you want to create then click Resize/Move.

Right-click the unallocated partition then click New.

You can make further adjustments to the partition such as resize, choose whether you want it to be a primary or logical drive, file system, and label it. Click Add.

Click the green checkmark to apply your changes.

Wait while the partition scheme is modified.


Your new partition will now appear in the Launcher and File manager.

Conclusion
That’s a look at partitioning disks in popular desktop operating systems. Sure, there are other ways you can do this, but I thought I would cover the most convenient methods on each platform, whether using built tools or third-party solutions.
Let us know why you’re creating partitions on your hard drive and how it goes by dropping us a line in the comments.
How to Access Linux Partitions in Windows
For those who need access to both operating systems
If you have a Linux distribution sitting alongside Windows on your PC, you’ll have no problem accessing your Windows drive. NTFS, the default Windows file system, is well supported, and most Linux distros will be able to mount NTFS drives with ease.
The same can’t be said for Windows users, however. Common Linux file systems like Ext4 aren’t supported. If you want to access Linux partitions in Windows, you’ll need to install some additional software to do the job.
Choosing The Right Software for Linux Partitions
There are several software options for Windows users looking to access their files on Linux. For many years, Ext2Fsd has been the go-to option, allowing you to read and write to your Linux file systems within Windows itself.
Unfortunately, Ext2Fsd hasn’t been updated since 2017, and the penultimate release, 0.68, had a “critical bug” that could corrupt your data on Ext4 drives with 64-bit mode enabled. The site for Ext2Fsd has gone down, and it’s unclear whether Ext2Fsd 0.69 fixed this bug.
It’s still an option if you need write access to your Linux drive, but given the risks, it isn’t our main recommendation if you have a 64-bit Ext4 Linux partition. Make sure you back up any critical data first and use only the most recent, 0.69 release of Ext2Fsd.
As an alternative, we recommend DiskInternals Linux Reader. It lets you access files from the most common Linux file systems. Unlike Ext2fs, it doesn’t do this through Windows Explorer, but through its own file manager. It’s also free for you to use.
It won’t let you write files to your Linux drive directly, but you can save any files you need to edit to your Windows drive. A similar, open-source alternative, Ext2read, is also available for you to use, with many of the same features. You don’t need to install Ext2read, as it comes as a portable .exe file.
Using DiskInternals Linux Reader
DiskInternals Linux Reader is freeware, so you don’t have to pay to download and use it.
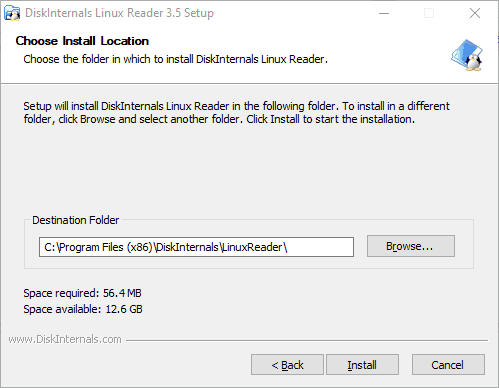
To begin, you’ll need to download the Linux Reader installer. Open the installer, accept the terms, confirm your installation location and click Install.
Once the installation is complete, make sure the Run DiskInternals Linux Reader checkbox is checked, and then click Finish.
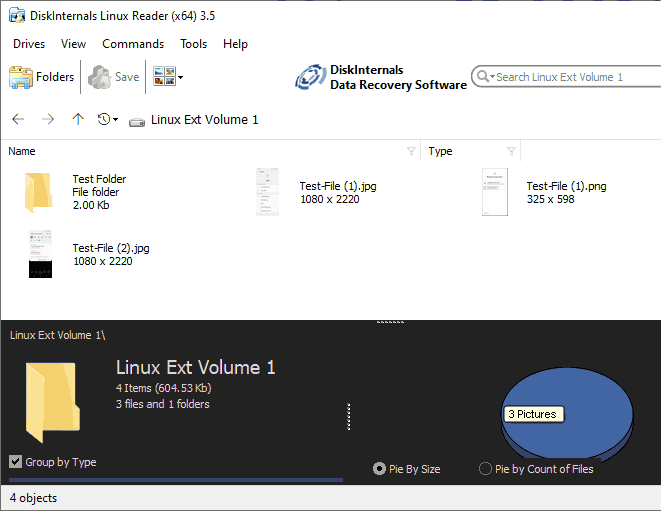
The Linux Reader client is well designed and has some similarities in design to the Windows File Explorer. You’ll see a list of your drives, including any removable storage like USB flash drives or SD cards.

Find your Linux partition, under either Hard Disk Drives or Drives with Removable Storage.
You can either double-click to view your files, or right-click and select Open Partition from the drop-down menu instead.
You’ll see a split-screen, with the top half showing files and folders on your Linux drive. As we’ve mentioned already, you can’t make any changes to the drive directly. You’ll need to copy the files to your Windows drive, or to another Windows-suitable partition.
To do this, select the files and folders you want to copy. Right-click the selected files and click Save.
In the Export Wizard, you’ll see the option to save files is already selected.
Click Next.
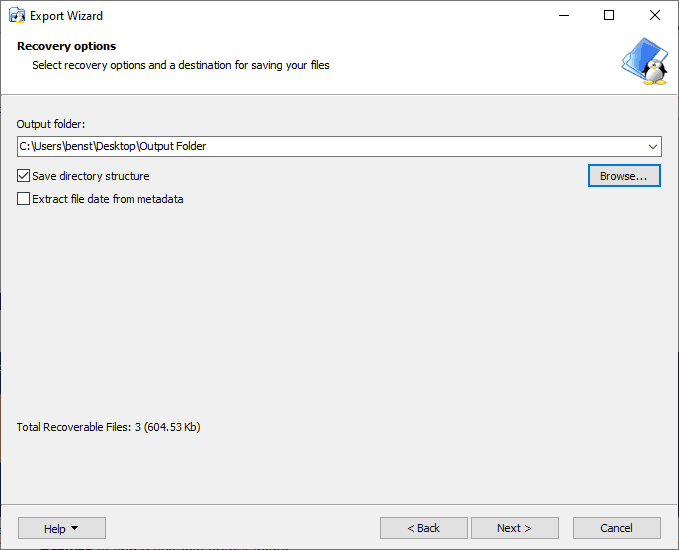
Choose the location to save your files and folders. You can type the location yourself, or click Browse to find a suitable output folder before clicking Next.
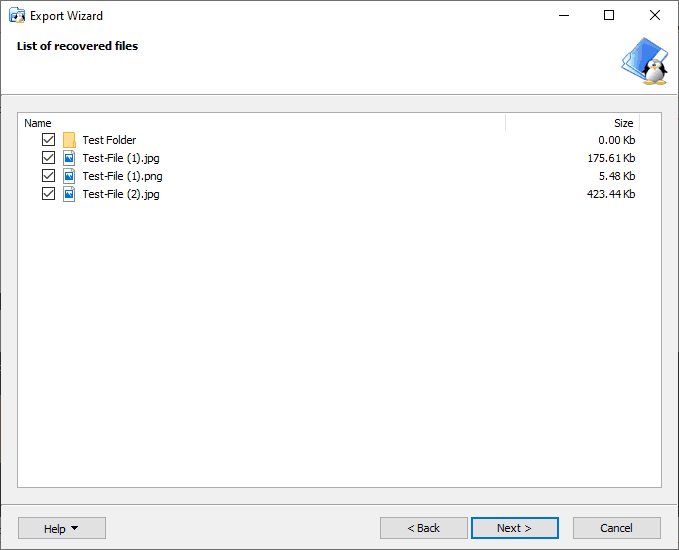
You’ll see a final list of your chosen files and folders. If you want to remove any files or folders before the copying process begins, uncheck the checkbox next to any items.
Click Next to proceed.
Once completed, you’ll see a final confirmation, confirming the number of files and folders copied, as well as the save location. Click Finish to close the Export Wizard.

While DiskInternals Linux Reader doesn’t allow you to modify files or folders directly, you can use it to quickly access any essential Linux files. You can then transfer these back to your Linux drive when you’re running Linux or, if you’re willing to take the risk, you can use Ext2Fsd instead.
Read & Write Access With Ext2Fsd
Ext2Fsd, as we mentioned previously, is the only option for users who need to make changes to files or folders on their Linux drive directly from within Windows. Once it’s installed, you can access your drive from within Windows File Explorer as normal. Ext2Fsd 0.69 is recommended, especially for users with Ext4 64-bit Linux partitions.
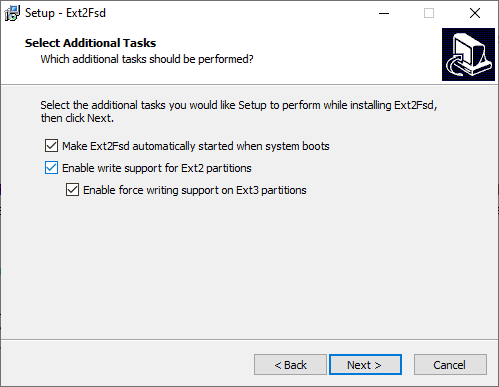
To start, download the Ext2Fsd installer file and begin the installation. Accept the terms and installation location, and make sure that under Select Additional Tasks, all the checkboxes are checked.
Once the installer is completed, you’ll be asked to restart your PC. Safely close any essential programs and click Finish to reboot.
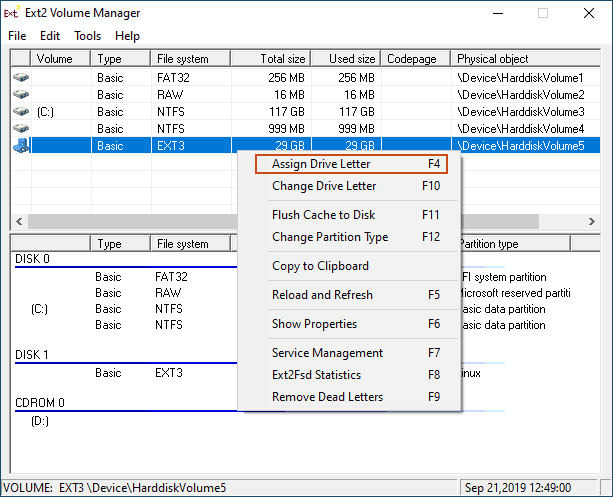
Once you’ve rebooted, see if you spot your drive in File Explorer and double-click to open it. If you don’t see it, open the Ext2 Volume Manager, right-click your drive, and click Assign Drive Letter.
As soon as a drive letter is assigned to your drive, you should be able to see it in File Explorer. You’ll be able to create, copy, move, or delete files as you would any other drive, but given the risks, don’t use this for critical data unless you’re certain you have a backup available.
Safely Accessing Your Linux Files On Windows
The safest method for accessing Linux files or folders is to use a read-only option like DiskInternals Linux Reader. With software like this, the chances of corrupting your files are zero.
If you absolutely need to edit files or folders on your Linux drive, Ext2Fsd will allow you to do it, but take care to avoid risks by using the most recent version, and only on a drive with non-critical files.
If you want to avoid this problem in the future, consider having a “pooled” Linux partition drive (formatted as NTFS) to share your files across both systems, or sync your files to Google Drive instead.
Ben Stockton is a freelance technology writer based in the United Kingdom. In a past life, Ben was a college lecturer in the UK, training teens and adults. Since leaving the classroom, Ben has taken his teaching experience and applied it to writing tech how-to guides and tutorials, specialising in Linux, Windows, and Android. He has a degree in History and a postgraduate qualification in Computing. Read Ben’s Full Bio


