- Добавление экрана-заставки Add a splash screen
- Задание изображения экрана-заставки и цвета фона с помощью Visual Studio Set the splash screen image and background color in Visual Studio
- Сводка и дальнейшие действия Summary and next steps
- Developing Background Applications
- Where can Background Applications be installed from?
- What languages are available?
- How are background applications used?
- How do background applications start?
- See Also
- Change application background color window 10
- Replies (54)
Добавление экрана-заставки Add a splash screen
Задайте изображение экрана-заставки и цвет фона для вашего приложения с помощью Microsoft Visual Studio. Set your app’s splash screen image and background color using Microsoft Visual Studio.
Задание изображения экрана-заставки и цвета фона с помощью Visual Studio Set the splash screen image and background color in Visual Studio
Если для создания приложения используется шаблон Visual Studio, изображение по умолчанию добавляется в проект и задается как изображение экрана-заставки. When you use a Visual Studio template to create your app, a default image is added to your project and set as the splash screen image. Цвет фона для экрана-заставки по умолчанию светло-серый. The background color for your splash screen defaults to a light gray. Чтобы изменить стандартное изображение или цвет экрана-заставки вашего приложения: If you want to change the default image or color of your app’s splash screen, follow these steps:
Откройте существующий проект универсальной платформы Windows (UWP) в Visual Studio. Open your existing Universal Windows Platform (UWP) app project in Visual Studio.
В средстве Обозреватель решений откройте файл Package.appxmanifest. From Solution Explorer, open the «Package.appxmanifest» file. Его также можно открыть, выбрав в строке меню Проект > Магазин > Изменить манифест приложения. You can also open this file from the menu bar by choosing Project > Store > Edit App Manifest.
Перейдите на вкладку Визуальные ресурсы и выберите Экран-заставка в области Все визуальные ресурсы в левой части окна Package.appxmanifest. Open the Visual Assets tab and select Splash Screen from the All Visual Assets pane on the left side of the «Package.appxmanifest» window. Если вы меняете экран-заставку в первый раз, вы увидите путь «активы \SplashScreen.png» в поле экрана- заставки . If you’re changing your splash screen for the first time, you’ll see the «Assets\SplashScreen.png» path in the Splash Screen field.
На следующем снимке экрана показано окно Package.appxmanifest в Visual Studio. The following screen shot shows the «Package.appxmanifest» window in Visual Studio. Доступный вам набор визуальных ресурсов может несколько отличаться в зависимости от типа проекта. Depending on the type of project, you will see a slightly different set of visual assets.

При открытии «Package. appxmanifest» в текстовом редакторе элемент SplashScreen отображается как дочерний элемент элемента висуалелементс. If you open «Package.appxmanifest» in a text editor, the SplashScreen element appears as a child of the VisualElements element. Ниже показано, как разметка экрана-заставки, используемого по умолчанию, в файле манифеста выглядит в текстовом редакторе. The default splash screen markup in the manifest file looks like this in a text editor:
Чтобы выбрать новое изображение экрана-заставки для приложения UWP, нажмите кнопку с многоточием, которая отображается рядом с меткой 1240 x 600 пикселей под областью Масштабированные активы. To select a new splash screen image for a UWP app, press the button with an ellipsis that appears next to the 1240 x 600 px label below Scaled Assets. Выберите изображение размером 1240 x 600 пикселей (с расширением PNG, JPG или JPEG), которое вы бы хотели использовать в качестве экрана-заставки. Choose the 1240 x 600 pixel image (.png, .jpg, or .jpeg) you’d like to use for your splash screen image.
Важно! Выбранное изображение экрана-заставки должно быть 620 x 300 пикселей с коэффициентом масштабирования 1x. Important The splash screen image you choose must be 620 x 300 pixels using a 1x scaling factor. Кроме того, при разработке экрана-заставки обратите внимание, что экран-заставка меньше экрана и расположен по центру. Also, when designing your splash screen, note that it is smaller than the screen, and centered. Экран-заставка не заполняет экран, как это делает экран-заставка приложения Магазина Windows Phone. It does not fill the screen like a splash screen for a Windows Phone Store app does.
Чтобы выбрать новое изображение экрана-заставки для приложения Магазина Windows Phone, нажмите кнопку с многоточием, которая отображается рядом с меткой 1152 x 1920 пикселей под областью Масштабированные активы. To select a new splash screen image for a Windows Phone Store app, press the button with an ellipsis that appears next to the 1152 x 1920 px label below Scaled Assets. Выберите изображение размером 1152 x 1920 пикселей (с расширением PNG, JPG или JPEG), которое вы бы хотели использовать в качестве экрана-заставки. Choose the 1152 x 1920 pixel image (.png, .jpg, or .jpeg) you’d like to use for your splash screen image.
Важно! Выбранное изображение экрана-заставки должно составлять 1152 x 1920 пикселей, что является правильным размером для коэффициента масштабирования 2.4 x. Important The splash screen image you choose must be 1152 x 1920 pixels which is the correct size for a 2.4x scaling factor. Если это единственный ресурс, который вы предоставляете, то он будет масштабироваться в сторону уменьшения для коэффициентов масштабирования 1,4x и 1x. If this is the only asset you provide then it will be scaled down for 1.4x and 1x scaling factors.
В поле Цвет фона в разделе Экран-заставка задайте цвет фона, отображаемый вместе с изображением экрана-заставки. In the Background Color field of the Splash Screen section, set the background color displayed with your splash screen image. Можно ввести либо имя цвета, либо » # «, а также шестнадцатеричное значение цвета. You can enter either the name of a color or ‘#’ and the hex value of a color. Список названий доступных цветов см. в элементе SplashScreen. For a list of the names of available colors, see SplashScreen element. Задавать цвет фона экрана-заставки не обязательно. Setting a background color for your splash screen is optional. Если не указать цвет для приложения UWP, то цвет фона экрана-заставки по умолчанию будет светло-серым (шестнадцатеричное значение # 464646). If you don’t specify a color for a UWP app, the splash screen background color defaults to a light gray (hex value #464646). Такой же цвет задан по умолчанию для фона элемента Плитка (см. поле Цвет фона раздела Изображения и логотипы на плитках на вкладке Визуальные ресурсы). This is the same color as the default Tile background color (see the Background Color field of the Tile Images and Logos section in the Visual Assets tab). Если вы не укажете цвет для Windows Phone или установите для него значение «прозрачный», цвет фона экрана-заставки будет прозрачен. If you don’t specify a color for a Windows Phone, or set it to «transparent», then the splash screen background color will be transparent.
Сводка и дальнейшие действия Summary and next steps
Если ваше приложение загружается медленно, рекомендуется добавить расширенный экран-заставку. If your app takes a while to load, consider adding an extended splash screen. Пошаговое руководство см. в статье Создание настраиваемого экрана-заставки. For step-by-step guidance, see Create a customized splash screen.
Developing Background Applications
Visual Studio will generate a cryptic error when deploying to a RS5 (or RS4 with OpenSSH enabled) IoT image unless a SDK from RS4 or greater is installed that Visual Studio can access.
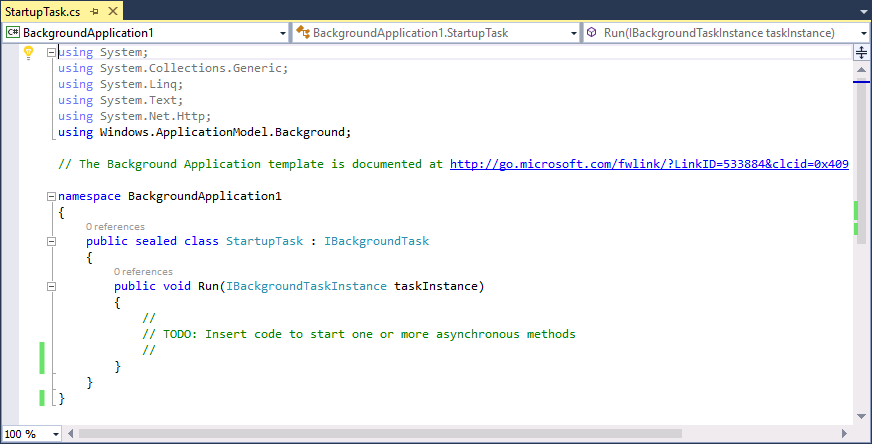
Background applications are applications that have no direct UI. Once deployed and configured, these applications launch at machine startup and run continuously without any process lifetime management resource use limitations. If they crash or exit the system will automatically restart them. These Background Applications have a very simple execution model. The templates create a class that implements the «IBackgroundTask» interface and generates the empty «Run» method. This «Run» method is the entry point to your application.
There is one critical point to note: by default, the application will shut down when the run method completes. This means that apps that follow the common IoT pattern of running a server waiting for input or on a timer will find the app exit prematurely. To prevent this from happening you must call the «GetDeferral» method to prevent the application from exiting. You can find more information on the deferral pattern here.
Where can Background Applications be installed from?
You can download and install IoT templates to enable Background Applications from the Visual Studio Gallery here. Alternatively, the templates can be found by searching for Windows IoT Core Project Templates in the Visual Studio Gallery or directly from Visual Studio in the Extension and Updates dialog (Tools > Extensions and Updates > Online).
What languages are available?
Background Application (IoT) templates can be found for:
- C++ File > New > Project > Installed > Visual C++ > Windows > Windows IoT Core
- C# File > New > Project > Installed > Visual C# > Windows > Windows IoT Core
- Visual Basic File > New > Project > Installed > Visual Basic > Windows > Windows IoT Core
- JavaScript File > New > Project > Installed > JavaScript > Windows > Windows IoT Core
How are background applications used?
Creating a background application is very similar to creating a Background Task. When the Background Application starts, the Run method is called:
When the Run method ends, unless a deferral object is created, the background application ends. The common practice, for asynchronous programming is to take a deferral like this:
Once a deferral is taken, the background application will continue until the deferral object’s Complete method is called.
How do background applications start?
This question can be broken into deployment and invocation.
To deploy a background application, you can either:
- Use Visual Studio’s F5 (which will build, deploy, and invoke). For more details, see our Hello World sample where we describe how to deploy and launch from Visual Studio.
This will not configure your background application to start when the device boots.
- Create an AppX in Visual Studio by selecting Project > Store > Create App Packages. Once you have created an AppX, you can use Windows Device Portal to deploy it to your Windows 10 IoT Core device.
To invoke a background application, you can either:
- As mentioned above, Visual Studio’s F5 functionality will deploy and immediately start your Background Application.
This will not configure your background application to start when the device boots.
- For a background application that has been deployed to an IoT device, you can use the iotstartup.exe utility to configure your background application to start when the device boots. To specify your background application as a Startup App, follow these instructions (substitute your app’s name for BackgroundApplication1 below):
-
Start a PowerShell (PS) session with your Windows IoT Core device as described here.
From the PS session, type:
[ ]: PS C:\> iotstartup list BackgroundApplication1
- You should see the full name of your background application, i.e. something like:
Headed : BackgroundApplication1-uwp_cqewk5knvpvee!App Headless : BackgroundApplication1-uwp_1.0.0.0_x86__cqewk5knvpvee
The utility is confirming that your background application is an ‘headless’ application, and is installed correctly. You will likely see a Headed entry as well for your Background Applications, but this can be disregarded.
Now, it’s easy to set this app as a ‘Startup App’. Just type the command:
[ ]: PS C:\> iotstartup add headless BackgroundApplication1
- The utility will confirm that your background application has been added to the list of headless ‘Startup Apps’:
Added Headless: BackgroundApplication1-uwp_1.0.0.0_x86__cqewk5knvpveeplication1
- Go ahead and restart your Windows IoT Core device. From the PS session, you can issue the shutdown command:
[ ]: PS C:\> shutdown /r /t 0
- Once the device has restarted, your background application will start automatically and Windows 10 IoT Core will make sure that it gets restarted anytime it stops.
Once a background app is registered to run automatically, if the app exits or crashes it will be automatically restarted. The app isn’t informed of the reason that it’s being started or restarted so if you want to take special action on a restart you will need to track the app state in your app.
- You can remove your background application from the list of headless Startup Apps by typing the command:
[ ]: PS C:\> iotstartup remove headless BackgroundApplication1
- The utility will confirm that your background application has been removed from the list of headless ‘Startup Apps’:
Removed headless: BackgroundApplication1-uwp_1.0.0.0_x86__cqewk5knvpvee
See Also
To add a background app when building a custom image see Create an Appx package
Change application background color window 10
I have an application (CAD) that I need to have a white background color for the window.
When I installed Windows 10 the background color of the application window is dark gray. I have not found a way to change the color to white.
I there a way in Windows 10 to change the background color of an application’s window?
Replies (54)
* Please try a lower page number.
* Please enter only numbers.
* Please try a lower page number.
* Please enter only numbers.

Thank you for posting your query in Microsoft Community, we appreciate your interest in Windows 10.
I understand your concern to change the background color in Windows 10.
Try the below steps and check if it helps.
Steps:
- From Desktop, right click and select Personalize.
- In Personalization window, click on Themes in the left pane.
- Click on Theme settings, select the Themes you need and close this window.
- Click on Colors in the Personalization window and turn off, Automatically pick an accent color from my background.
- Select the color you wish to as a background under Choose your accent color.
Hope it helps. Feel free to contact us for any further assist on Windows Operating System. We will be happy to help you.


