- How to Fix Windows Application Error 0xc0000906?
- What’s causing the Application Error 0xc0000906 on Windows?
- Method 1: Running DISM and SFC scans
- Method 2: Performing a System Restore
- Method 3: Refreshing every OS component
- Fix Windows Update errors
- Fix: Windows Application Error Code 0x0000022
- Method 1: Repair Installation
- Method 2: Uninstall CA or any other AV
- Method 3: Turn Windows Features On or Off
- Method 4: Run in Compatibility Mode
- Method 5: Get Permissions for Software Protection Service
- Method 6: SFC scannow
How to Fix Windows Application Error 0xc0000906?
Several Windows users have been reaching us with questions after encountering the Application Error 0xc0000906 when trying to open up various third-party applications. Some users are reporting that the majority of applications that they try to open are triggering this error code, while others say that it only happens with a select selection of games. As it turns out, the issue is occurring on Windows 7, Windows 8.1 and Windows 10.
What’s causing the Application Error 0xc0000906 on Windows?
We investigated this issue by looking at various user reports and by testing out the most popular fixing strategies that affected users have successfully deployed to resolve the 0xc0000906 error code. As it turns out, there are several different potential culprits that might trigger this error code. Here’s a shortlist with potential culprits:
- System File Corruption – In most cases, this particular issue is caused by some type of system corruption that is interfering with a couple of DLLs responsible for launching applications. If this scenario is applicable, you can resolve the issue by trying to repair the corrupted files via DISM or SFC or by refreshing each OS component via a repair install or a clean install procedure.
- Recent system change – As it turns out, it’s also possible that a recent machine changes such as some 3rd party installation or a driver update might end up interfering with some DLLs responsible for launching 3rd party apps. If this scenario is applicable, you should be able to fix the issue by using the System Restore utility to restore your machine state back to a healthy state.
Method 1: Running DISM and SFC scans
As it turns out, in the vast majority of cases, this error is occurring due to some type of system file corruption. The 0xc0000906 error code is often linked to instances where the system previously suffered some alterations (like an OS upgrade, a security scan that ended up quarantining some items or an unexpected machine interruption).
If this scenario is applicable, the most efficient way of resolving the issue is to run a series of built-in utilities that are capable of fixing logical errors and system file corruption among the operating system files. When it comes to achieving this, both DISM (Deployment Image Servicing and Management) and SFC (System File Checker).
Although they operate a little differently, both will ultimately help you achieve the same goal. DISM is better at fixing system processes while SFC is superior when it comes to fixing logical errors.
In order to maximize your chances of resolving the issue, we encourage you to run both types of scans in order to improve our chances of fixing every corrupt instance that might end up causing the 0xc0000906 error.
Here’s a quick step-by-step guide that will guide you through the entire process:
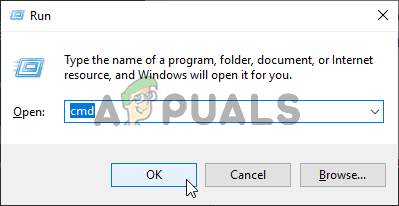
- Press Windows key + R to open up a Run dialog box. Next, type ‘cmd’ inside the text box, then press Ctrl + Shift + Enter to open up the Command prompt with admin access. When you’re prompted by the UAC (User Account Control) prompt, click Yes to grant administrative privileges.
 Opening the Command Prompt
 - Once you manage to get inside the elevated CMD prompt, type the following command in the same order and press Enter to initiate a DISM scan:
 Opening the Command Prompt
Note: Ensure that your Internet connection is stable before you initiate this procedure before initiating this procedure. This happens because DISM is actively using WU to download healthy copies that will later be used to replace corrupted items. And just so you know what each command does, the first (scanleath) analyses your system for system inconsistencies while the second (restorehealth) will start the repair procedure.
Wait until this procedure is complete, then restart your computer and wait patiently until the next startup procedure is complete. Once this is done, follow step 1 again to open up another elevated CMD prompt. But this time, type the following command and press Enter to initiate an SFC scan:
Note: Under no circumstances should you interrupt this procedure before it completes (even if you see the operation freezing for a couple of minutes). Doing this puts your system at risk, and you might end up facing other logical errors in the future.
If you followed the instructions above and you’re still encountering the same 0xc0000906 error, move down to the next method below.
Method 2: Performing a System Restore
In case you only started to experience this behavior recently, there’s a high chance that the issue is happening due to a recent system change. as some affected users have confirmed, 3rd party services or services might very well be responsible for the apparition of this problem.
In this case, using the System Restore utility is one of the most convenient ways that will allow you to resolve the issue. Keep in mind that by default, Windows is configured to regularly save snapshots at important landmarks (critical update installation, 3rd party installations, etc.)
But before you start following the instructions below, keep in mind that any changes you made since the restore point was created will be lost if you use it to restore your machine. This includes every installed app, driver, 3rd party application, game, and everything else.
If you understand the consequences of this method, follow the instructions below to initiate the restoring process:
- Press Windows key + R to open up a Run dialog box. Then, type ‘rstrui’ inside the text box and press Enter to open up the System Restore menu. Opening the System Restore wizard via Run box
- Once you arrive at the initial System Restore screen, click Next to advance to the next menu. Using System Restore
- At the next screen, start by checking the box associated with Show more restore points. Once you complete this step, start comparing the dates of each saved restore point and select one that was created previous to the apparition of the 0xc0000906 error. Once the correct restore point is selected, click on Next to advance to the final menu. Restoring your system to a previous point in time
- Once you arrive at this point, the utility is ready to go. All that’s left to do now is to initiate the restoring process by clicking on Finish.
- As soon as you do this, your PC will restart and the previous state will be mounted. Once the process is finished attempt to launch the applications again and see if the 0xc0000906 error is resolved.
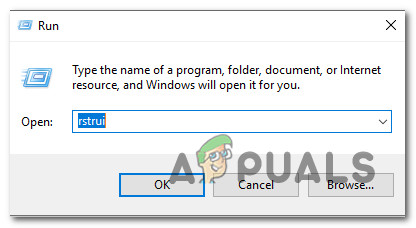 Opening the System Restore wizard via Run box
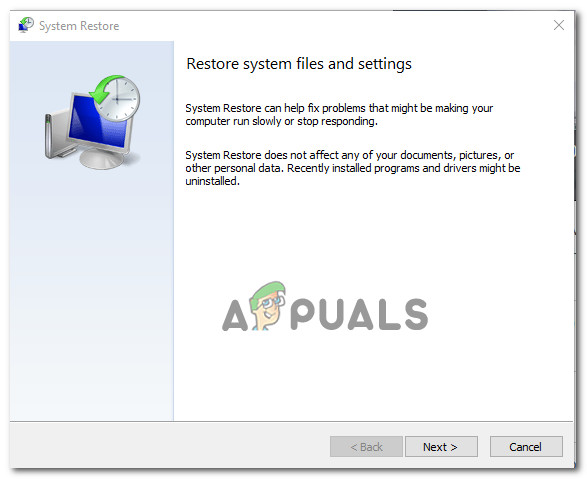 Using System Restore
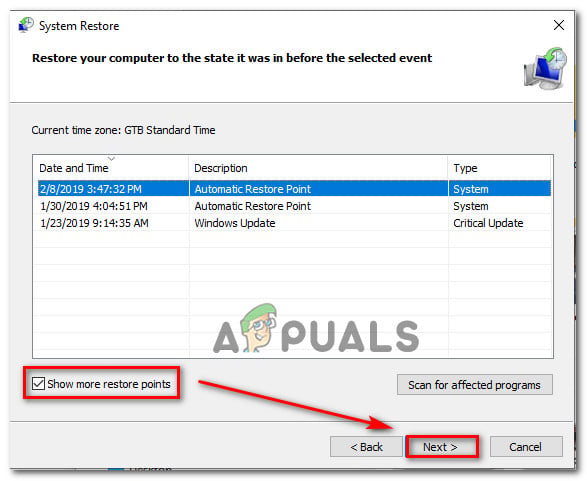 Restoring your system to a previous point in time
If you’re still struggling with the same problem, move down to the next method below.
Method 3: Refreshing every OS component
If none of the instructions above have allowed you to resolve the 0xc0000906 error, it’s very likely that that you’re facing some type of system corruption issue that cannot be resolved conventionally. In this case, you can resolve the issue by following a procedure that will refresh every Windows component.
A complete system file reset can be achieved in two different ways – via a clean install or via a repair install (in-place repair).
A clean install is an easier procedure, but the major downside is that you will not be allowed to keep any personal data (media, apps, games, etc.) unless you back them up in advance.
A more focused but more tedious approach is to go for a repair install (in-place upgrade). It’s a much longer operation, but it will allow you to keep all your personal data including applications and games without the need to create a selective backup.
Fix Windows Update errors
What does this guided walk-through do?
This guided walk-through provides steps to fix problems with Windows Updates for Windows 8.1 and 7, such as taking a long time to scan, or error codes while installing updates.
For help with Windows Update issues in Windows 10, see Troubleshoot problems updating Windows 10 instead.
A common cause of errors is inadequate drive space. If you need help freeing up drive space, see Tips to free up drive space on your PC.
Common error codes
The steps in this guided walk-through should help with all Windows Update errors and other issues— you don’t need to search for the specific error to solve it. As an example, here are some commonly seen error codes: 0x0xc1900223223; 0x80240034; 0x8007000E, 0x80242006, 0x80244018, 0x80D02002, 0x80246017, 0x80240438, 0x80070070, 0x8007000D, 0x80246008, 0x80096004, 0x80070020.
The steps provided here should help fix any errors that come up during the Windows Update process.
How does it work?
We’ll begin by asking you questions about the Windows version you’re using and the issue you’re experiencing. Next, we’ll take you through a series of troubleshooting steps that are specific to your situation. At the end of each step, you’ll be asked “Did this resolve the issue?” If it’s resolved, select Yes, and you’re done! If it isn’t resolved, select No and continue with the guided walk-through.
Fix: Windows Application Error Code 0x0000022
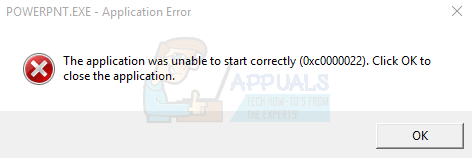
If you are a Windows user then you might see the error 0xc0000022 when trying to open certain apps. The error code might have “The application was unable to start correctly” message. For some users, they might see this error message when trying to activate the Windows as well. When seeing the error message while activating the Windows, the error code will usually have an “Access Denied” description.
The error message is usually brought up because of issues with the system files. A lot of the time the system files get corrupted and causes issues like these. For people who are experiencing this issue while trying to activate the windows, the issue will most likely be caused by a problem with Software Protection Service. In some cases, the issue might simply be because of your security application.
Method 1: Repair Installation
This solution is for people who are seeing the error message with the Adobe applications e.g. when opening a pdf via Adobe Acrobat Reader. If you are seeing the error on Adobe Acrobat Reader then repairing the installation will solve the issue for you.
- Open the pdf in Adobe
- You will see the error message, click Ok
- Click Help from the top
- Scroll down and select Repair Installation. Follow any additional on-screen instructions.

Once done, you should be good to go.
Method 2: Uninstall CA or any other AV
For some, the issue might be caused by their antivirus application especially if they have the CA antivirus program on Windows 7. Uninstalling the antivirus application in Safe Mode has worked for a lot of users. If uninstalling the antivirus resolves the issue then it is time to switch your security application.
Here are the steps for getting into Safe Mode and uninstalling the security application.
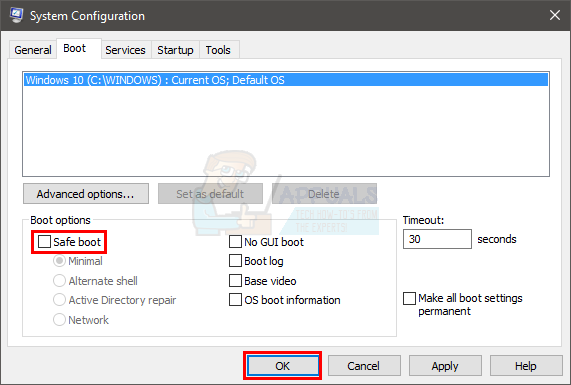
- Hold Windows key and press R
- Type msconfig and press Enter

- Select Boot tab

- Check the option Safe Boot in the Boot options section
- Select the option Minimal under the Safe Boot option
- Click Ok

- Windows will ask you to restart. Click Restart
- Once the system restarts, you will be in the Safe Mode. Uninstall the problematic application. Hold Windows key and press R
- Type appwiz.cpl and press Enter

- Locate the antivirus application and select it
- Click Uninstall and follow the on-screen instructions
- Once the application is uninstalled, you need to turn off the Safe Mode option.
- Hold Windows key and press R
- Type msconfig and press Enter

- Select Boot tab

- Uncheck the option Safe Boot in the Boot options section
- Click Ok
- Windows will ask you to restart. Click Restart
Check if the problem is resolved or not. If you don’t see the error message again then the problem was caused by your antivirus program. Kindly download any other antivirus program because these programs are essential for the security of your system.
Method 3: Turn Windows Features On or Off
A lot of users resolved the issue by turning on the option Direct Play from Turn Windows Features On or Off option. Here are the steps for turning Direct Play on.
- Hold Windows key and press R
- Type appwiz.cpl and press Enter

- Click Turn Windows Features On or Off

- Scroll down and find Legacy Components option
- Click the + sign on the left side of Legacy Components

- You should see an option named Direct Play under Legacy Components. Make sure Direct Play option is Checked
- Click Ok

You should be good to go.
Method 4: Run in Compatibility Mode
If you are experiencing the problem with just one application then running the application in the compatibility mode for Windows XP or Windows 7 will most likely resolve the issue. Follow the steps given below to turn on the compatibility mode for your application.
- Locate the executable file of the problematic application. You can also go to the shortcut of the application on Desktop
- Right click the executable/shortcut file and select Properties
- Select Compatibility tab

- Check the option Run this program in compatibility mode for. This option should be in Compatibility mode section
- Select Windows XP or Windows 7 from the drop down menu
- Click Apply then select Ok

Your issue should be resolved.
Method 5: Get Permissions for Software Protection Service
If you are seeing this error while trying to activate the Windows then the problem might be with the Software Protection Service. The main problem is that the Software Protection Service isn’t starting. You can try to start the Software Protection Service and then try to activate the Windows again. Here are the steps for turning on Software Protection Service
- Hold Windows key and press R
- Type services.msc and press Enter

- Locate and double click Software Protection

- Click Automatic from the drop down menu in Startup Type
- Click Start button and click Ok

If the service is started then try to activate the Windows again and see if it works. If it doesn’t work then reboot and check again. If it still doesn’t work then you might be seeing the Access Denied error message. This means that Software Protection Service cannot start because of some permission or file issues. Follow the steps given below to solve this issue.
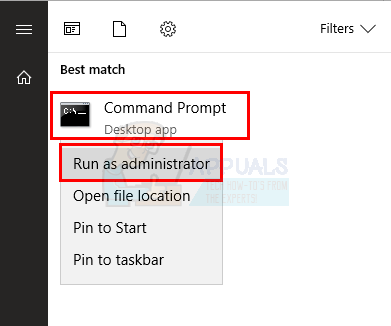
- Press Windows key once
- Type command prompt in the Start Search box
- Right clickCommand Prompt from the search results and select Run as administrator

- Type the lines given below and press Enter. Note: The command given below is just one command, simply copy paste it and press Enter.
Icacls %windir%\ServiceProfiles\NetworkService\AppData\Roaming\Microsoft\SoftwareProtectionPlatform /grant “BUILTIN\Administrators:(OI)(CI)(F)” “NT AUTHORITY\SYSTEM:(OI)(CI)(F)” “NT Service\sppsvc:(OI)(CI)(R,W,D)” “NETWORK SERVICE:(OI)(CI)(F)”

- Now, close the Command Prompt
- Hold Windows key and press R
- Type %windir%\System32 and press Enter

- Click View and check the option Hidden items

- Locate a folder named 7B296FB0-376B-497e-B012-9C450E1B7327-5P-0.C7483456-A289-439d-8115-601632D005A0. Right click this folder, select Delete and click yes to any confirmation dialogs. You might see multiple folders or files with this name. So, delete every file or folder with this name.
- Close the Windows Explorer
- Hold Windows key and press R
- Type %windir%\ServiceProfiles\NetworkService\AppData\Roaming\Microsoft\SoftwareProtectionPlatform\ and press Enter

- Locate and right click the file name dat. Select Rename and rename the file to tokens.bak and press Enter
- This should fix the issues with the Software Protection Service.
- Hold Windows key and press R
- Type services.msc and press Enter

- Locate Software Protection Service and double click it

- Select Automatic from the drop down menu in Startup Type
- Click Start button and click Ok

- The service should start normally now. Reboot the computer and try to activate the Windows now
Method 6: SFC scannow
SFC stands for System File Checker. This is basically Windows built-in tool for fixing any Windows related corrupt files. You can use this tool to fix any corrupt files that might be causing the issue. Since this problem can be caused by a corrupt Windows file, running SFC is a good way of fixing this issue.
Here are the steps for running SFC
- Press Windows key once
- Type command prompt in the Start Search
- Right click the Command Prompt from the search results and select Run as administrator
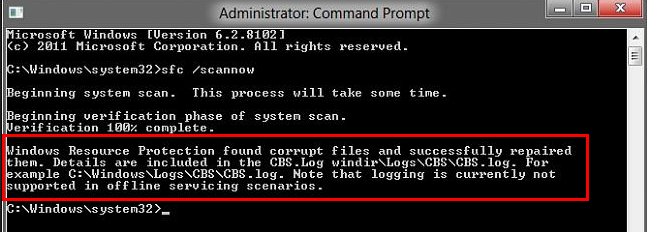
- Type sfc /scannow and press Enter. There is a space after “sfc” part. A lot of people miss that space. Note: If you see this error message Windows Resource Protection Could Not Start the Repair Service then that means the Windows Modules Installer service is either disabled or stopped. You should type net start trustedinstaller and press Enter and then retype sfc /scannow

- Now, wait for the scan to finish. It might take a while
- Once the scan is completed, SFC will show you the results as well.
- There are 4 types of results that you will get
- Windows Resource Protection did not find any integrity violations. This means that everything is fine

- Windows Resource Protection found corrupt files and successfully repaired them. This means that there was a problem but now the issue is solved
- Windows Resource Protection could not perform the requested operation. This means that there was a problem in the process. Make sure you started command prompt with administrator privileges or type net start trustedinstaller and press Enter in the command prompt.
- Windows Resource Protection found corrupt files but was unable to fix some of them. If you see this message then go here and analyze the log file created by SFC.
- Now that you are done with the scan, we will advise you to repeat step 4 (Type sfc /scannow and press Enter) 3 more times to ensure that everything is checked and fixed. Scanning 3-4 times is a good practice and it ensure best results
Once done, reboot your computer and check if the problem persists or not.


