- Fix: HDMI Sound Not Working
- Why HDMI Sound Does Not Work
- Method 1: Enable and Make Your HDMI the Default Playback Device
- Method 2: Update your drivers
- Method 3: Rollback your graphics drivers
- Method 4: Enable all Audio Controllers
- Method 5: Uninstall and reinstall Display Audio and Audio Controllers
- Method 6: Change your monitor or TV audio settings
- Method 7: Use Sound Troubleshooter
- How to Fix HDMI No Sound after Connecting Computer to Monitor and TV
- Solution 1: Check if all hardware devices work properly
- Solution 2: Set HDMI Device as Default Device
- Solution 3: Update the Sound Driver
- Solution 4: Switch to ChromeOS
Fix: HDMI Sound Not Working
The HDMI (high definition multimedia interface) made a tremendous stride in video and audio streaming when it finally allowed uncompressed media streaming hence clearer and sharper images and sound. Using only one cable/port, users could now stream audio and video to their monitors and TVs including 4K content. While the technology has been seamless, several users have always complained that their HDMI connection can show the video but there is no sound accompanying it. This article will explore this issue and give working solutions to the problem.
 HDMI Cable
Why HDMI Sound Does Not Work
There are several reasons why your HDMI sound might not be working. The problem could be anywhere from your PC, the HDMI cable, to your monitor or TV. Start by plugging your HDMI to another PC. If the issue persists, then the cable or your monitor/TV is likely to be the issue; if not, then the PC might be the issue. Also, try using another HDMI cable that is known to be functioning. If the problem remains, then your PC or your monitor/TV might be the issue. You can also use try using another TV/Monitor to narrow down the problem further.
HDMI cables can easily be replaced. However, if the PC is the issue, then there might be different reasons for the problem. It might be caused by an incompatible or wrong driver or even a selection of the wrong playback device. Your internal speakers’ soundcard might have been set as the default device hence the PC is unable to switch from speakers to HDMI audio output. You monitor or TV might also not have been configured to receive the HDMI audio. This problem has also been seen in conflicting drivers where drivers that depend on each other had been disabled hence the sound card was not able to function properly. Below are the solutions to the problem. But before moving on, keep the cable plugged in and restart the devices. Also, make sure the cable is not faulty. Do not forget to check your Graphics Card e.g. Nvidia Control Panel for any wrong configuration. Do note that pre-GeForce 200 series Nvidia cards don’t support HDMI audio. Realtek drivers are known to have this issue.
Method 1: Enable and Make Your HDMI the Default Playback Device
Windows easily lets you switch from your speakers to your HDMI audio output from the system tray. However, by making your speakers the default playback over your HDMI output, the computer will not be able to switch to the HDMI output whenever it is plugged in. This is quite common whenever a PC has more than one graphics or sound card.
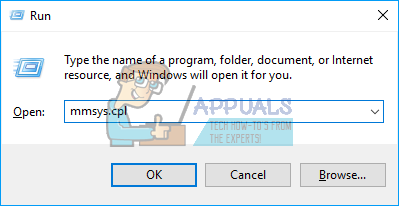
- Press Windows + R Key to open Run
- Type mmsys.cpl and hit enter to open the sound and audio device settings window.
 Run mmsys.cpl command
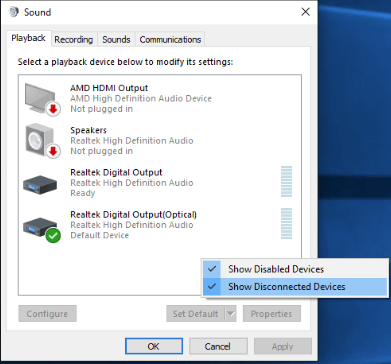
 - Go to the playback tab. Now plug in your HDMI cable. It should appear on the list usually with the name of the monitor or TV. If not, right-click anywhere on the list and make sure that the “Show Disabled Devices” and the “Show Disconnected Devices” options are checked. Show Disabled Devices
- If there is an HDMI audio device that is disabled, right-click on it and select “Enable” Enable HDMI Audio Device
- Now click on your HDMI output device to select it. At the bottom click “Set as default” to bring it online whenever it is connected. Click OK to exit. Set HDMI Device as Default
 Run mmsys.cpl command
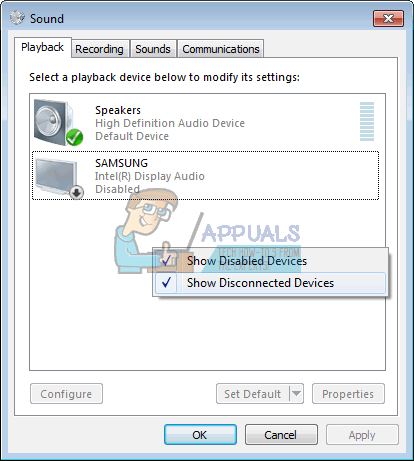 Show Disabled Devices
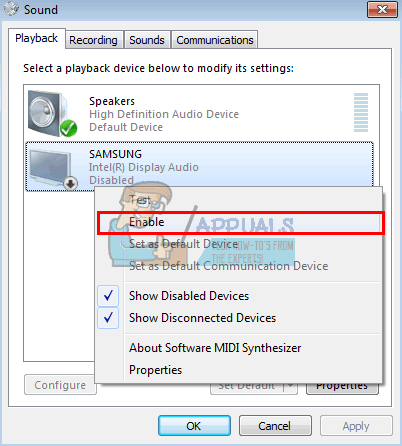 Enable HDMI Audio Device
 Set HDMI Device as Default
Method 2: Update your drivers
The best way to get your drivers is to go online to your audio card manufacturer or your PC manufacturer (additional audio features will be supported), download the audio drivers and then install them on your PC. For Dell users, you can go here to download your drivers. HP users can go here. You can also update your drivers over the internet by following the steps below.
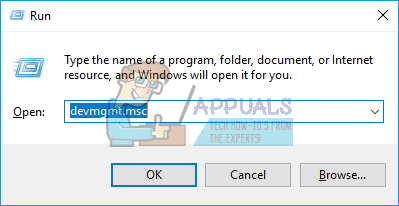
- Press Windows Key + R to open Run
- Type devmgmt.msc and hit enter to open the device manager Run devmgmt.msc Command
- Expand the ‘sound, video and game controller’ section
- Right-click on your audio device, and select ‘update driver software’. An internet connection will give you better results. Update Driver in Device Manager
 Run devmgmt.msc Command
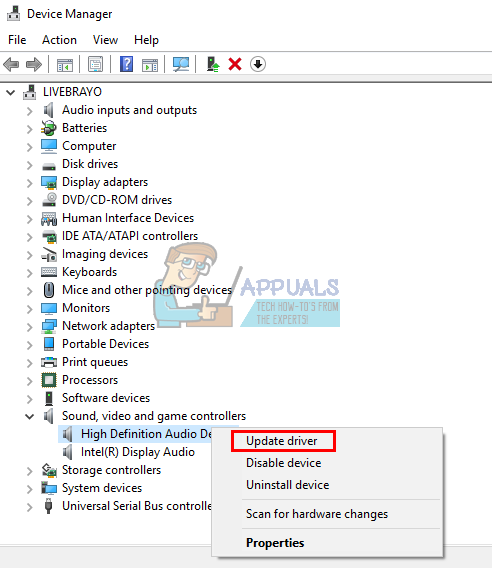 Update Driver in Device Manager
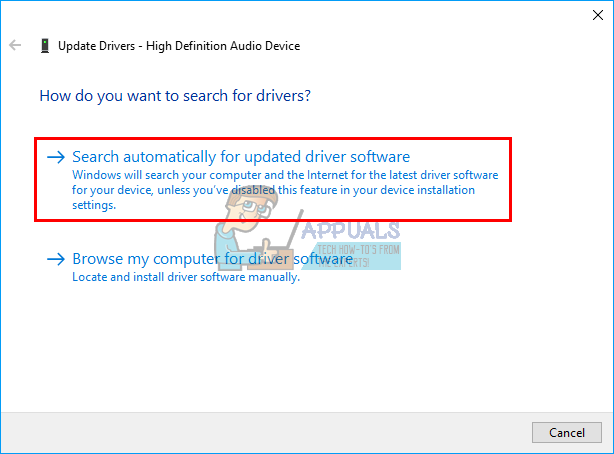
- On the next window click “Search automatically for updated driver software” Search Automatically for Updated Driver Software
- The device manager will search for drivers online and install them.
 Search Automatically for Updated Driver Software
Method 3: Rollback your graphics drivers
HDMI video and audio are tied to your graphics processor. If your HDMI had been working previously and suddenly couldn’t work again (especially after some update) then you will need to roll back to the graphics drivers that previously functioned.
- Press Windows Key + R to open Run
- Type devmgmt.msc and hit enter to open the device manager Run devmgmt.msc Command
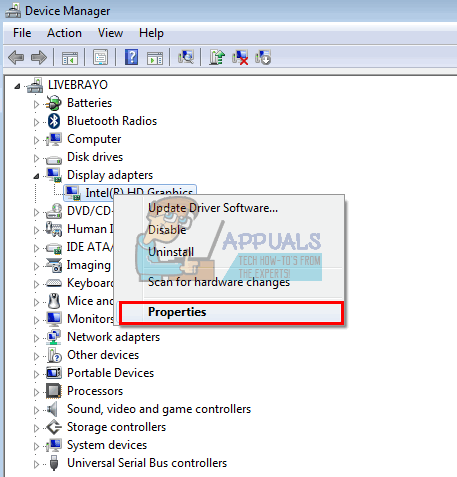
- Expand the ‘Display Adapters” section
- Right-click on your driver and select ‘properties’ Open Properties of the Device
- Go to the ‘Driver’ tab and click “Roll Back Driver” Roll Back Driver
- Click ‘Yes’ on the warning/confirmation message box and wait for your drivers to be rolled back. You might have to restart your computer for effect to take place. Confirm to Roll Back Driver
 Open Properties of the Device
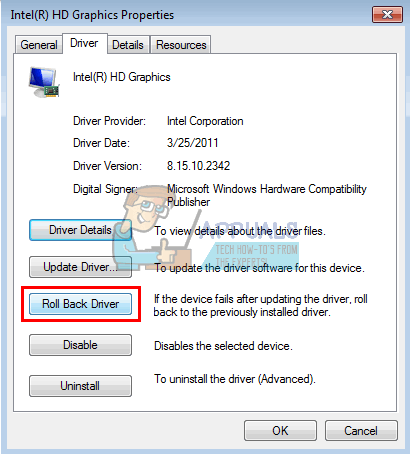 Roll Back Driver
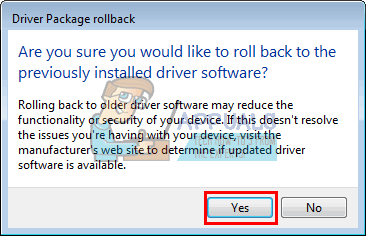 Confirm to Roll Back Driver
Method 4: Enable all Audio Controllers
Audio controllers allow windows to automatically determine the audio behavior of your system. Disabling these controllers will lead to malfunctioning of your audio output swapping.
- Press Windows Key + R to open Run
- Type devmgmt.msc and hit enter to open the device manager Run devmgmt.msc Command
- On the menu, click on ‘View’ and then select “view hidden devices” (if not checked already) Show Hidden Devices in Device Manager
- Expand the ‘System Devices” section
- Look for audio controllers, e.g. ‘High Definition Audio Controller’
- Right Click on the device and go to ‘Properties’. Open Properties of Device
- Go to the ‘Driver’ tab and click on ‘Enable’ if you have that option (it means your controller is disabled) Enable Driver
- If you have more than one audio controller, make sure all are enabled. Restart your PC if you are prompted; for effect to take place. Confirm to Restart Computer
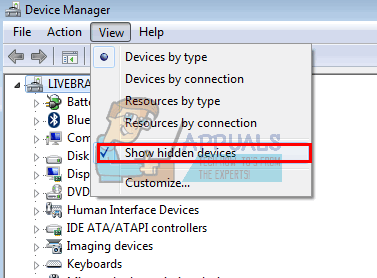 Show Hidden Devices in Device Manager
 Open Properties of Device
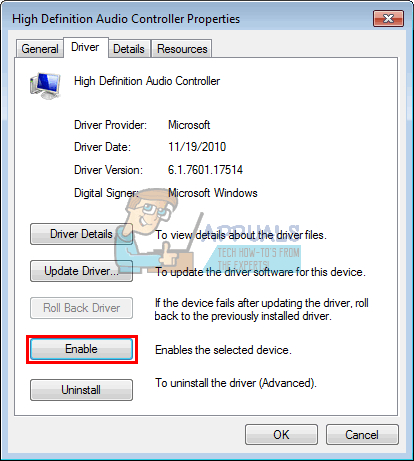 Enable Driver
 Confirm to Restart Computer
Method 5: Uninstall and reinstall Display Audio and Audio Controllers
Whenever you plug in your HDMI, a new device might appear in your device manager within the sound section. If the drivers for this are not functioning correctly, then you might have a sound output problem. Uninstalling these drivers and restarting your PC will automatically reinstall the correct drivers from the Windows repository.
- Plugin your HDMI output cable and connect it to your TV or monitor
- Press Windows Key + R to open Run
- Type devmgmt.msc and hit enter to open the device manager Run devmgmt.msc Command
- Expand the ‘sound, video and game controller’ section
- Right-click on the ‘Intel Display Audio’ device (you can find the equivalent for your PC by plugging and unplugging the HDMI and see which device is affected), and select ‘Uninstall’. Uninstall Device in Device Manager
- Confirm that you want to uninstall by clicking ‘OK’ on the warning message Confirm to Uninstall Device
- Now expand the ‘System Devices’ section
- Look for audio controllers, e.g. ‘High Definition Audio Controller’
- Right Click on the device and go to ‘Uninstall. Uninstall Device in Device Manager
- Confirm that you want to uninstall by clicking ‘OK’ on the warning message Confirm to Uninstall the Device
- If you have more than one audio controller, make sure you uninstall all of them.
- With your HDMI still plugged in, restart your PC. Windows will automatically install the correct drivers from its repository. You might need to restart your PC again if prompted.
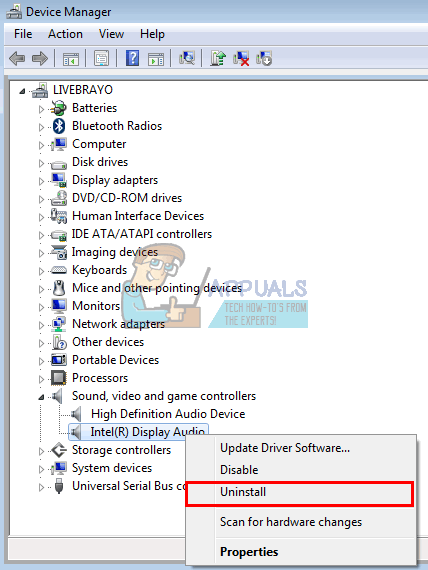 Uninstall Device in Device Manager
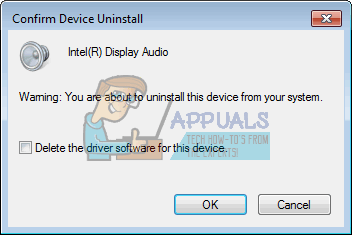 Confirm to Uninstall Device
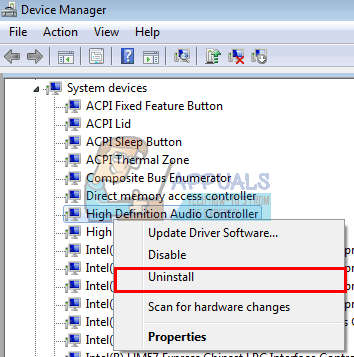 Uninstall Device in Device Manager
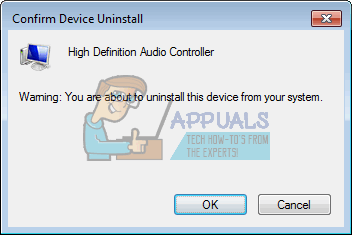 Confirm to Uninstall the Device
You might also want to check the “Other Devices” section and install all devices with yellow exclamations.
Method 6: Change your monitor or TV audio settings
Besides changing the obvious things like setting your TV input source to the corresponding HDMI input port and making sure that the cable is seated correctly and firmly or that the TV is not on mute, you can also try tweaking the TV/Monitor sound properties.
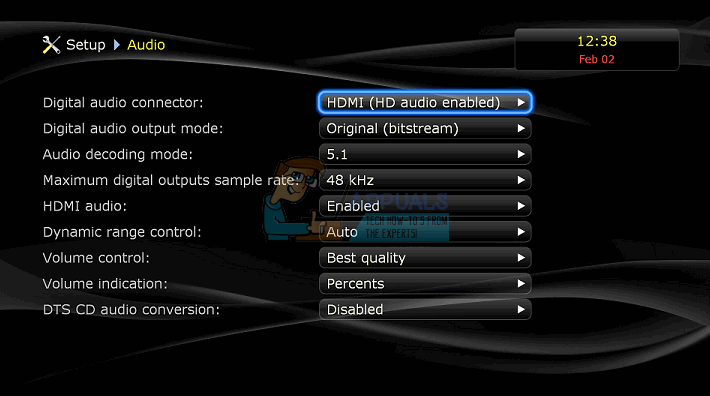
- Go to your TV/Monitor menu > Settings > audio and try changing the audio coding to automatic or to HDMI. Make sure that your audio is automatic or HDMI audio is enabled. Change Audio Connector to HDMI
- You can also try toggling the ‘Dolby Volume Mode’ to OFF and see if it helps (known issue in some TVs)
- Try toggling the ‘Audio Range’ between WIDE and NARROW or any other setting you have (stereo, mono, standard, etc.). Change Audio Output to Stereo
 Change Audio Connector to HDMI
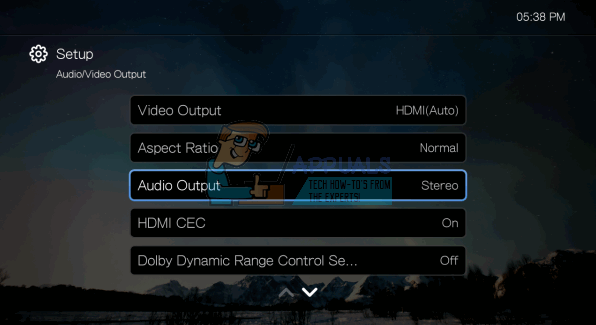 Change Audio Output to Stereo
The HDMI graphics card may support HDMI Video, but may not support HDMI Audio; if your HDMI video card does not support audio, you may need to connect additional audio cables between the PC and TV.
Method 7: Use Sound Troubleshooter
Windows has a lot of built-in troubleshooters to troubleshoot common Windows issues. One of these is the Sound troubleshooter. As the name suggests, this troubleshooter tests your current sound hardware with the software components and if it finds any discrepancies, it automatically fixes it by restart/reinitializing either components. Make sure that you are logged in as an administrator before proceeding.
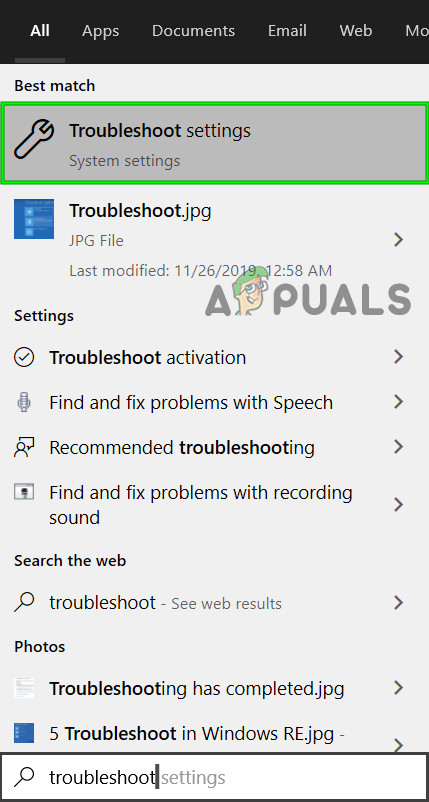
- Press Windows key, type Troubleshoot and in the resulting list, click on Troubleshoot Settings. Open Troubleshoot Settings
- In the right pane of the window, scroll down till you find and click Playing Audio, then click on Run this troubleshooter. Troubleshoot Playing Audio
- Follow the instructions shown on the screen to complete the troubleshooter. Restart your computer after the progress and completed and check if you can access the sound through HDMI or not.
 Open Troubleshoot Settings
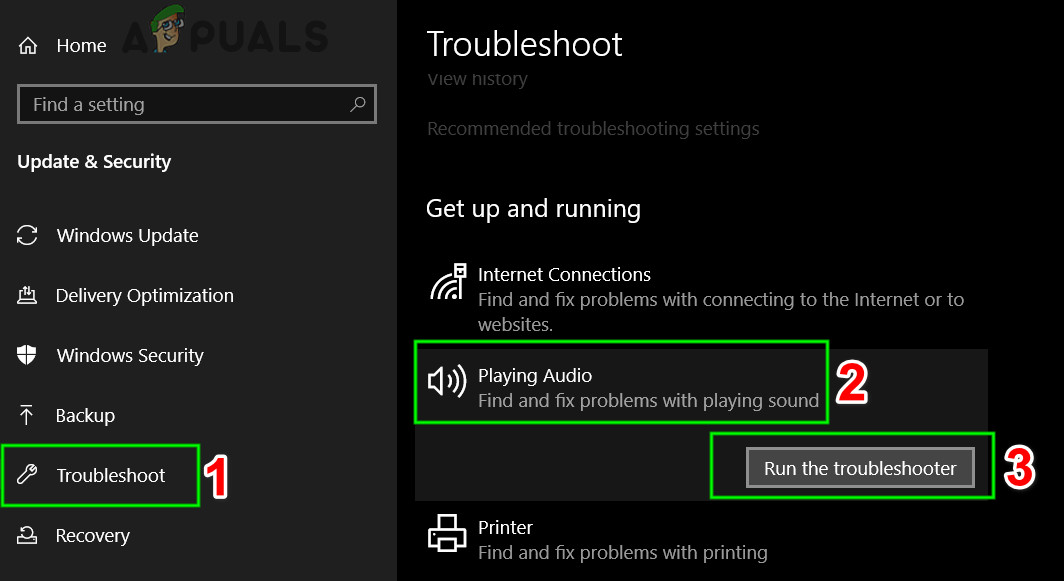 Troubleshoot Playing Audio
Note: If you cannot listen to the sound through HDMI even after performing all the above solutions, we recommend that you check the same HDMI/HDMI source with another system. If it is also occurring there, it means there is no issue with the computer. If the other system works fine, then consider doing a clean install or inspecting your ports.
How to Fix HDMI No Sound after Connecting Computer to Monitor and TV
Last Updated: 2 months ago
If you get HDMI no sound error in Windows 10, don’t worry. You’re not alone. Many Windows users have reported this issue. You can fix the error with one of the solutions below. You may not have to try them all. Just work your way down at the top of the list until you find the one that works for you.
Try these fixes, one at a time:
Solution 1: Check if all hardware devices work properly
Broken hardware devices probably cause HDMI not working. So before moving on to other solutions, check if all hardware devices work properly:
1. Check if the cable has any problem. Use another cable to and see if the problem resolves.
2. Check if the output port works fine. If your PC has multiple HDMI output ports, try different ports and see if the problem resolves.
3. Check if the monitor works properly. Make sure the monitor’s speaker volume is not turned down or muted. Then try connecting the monitor to another PC.
Solution 2: Set HDMI Device as Default Device
If the HDMI device is not set as default device, you cannot hear the sound from HDMI output. Follow steps below to set the HDMI device as Default Device:
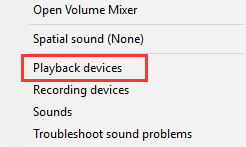
1) Right-click on the sound volume icon in the lower right corner of Windows. A context menu will pop up.

2) Click Playback devices.
3) In the Playback tab, select Digital Output Device or HDMI option. Click Set Default and click OK. Then the HDMI sound output will be set as default.
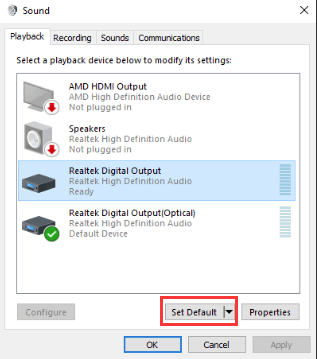
If you do not see the Digital Output Device or HDMI option in the Playback tab, right-click on the blank place, then click Show disconnected devices and Show disabled devices on the context menu. Then set it as default device.
Solution 3: Update the Sound Driver
Your HDMI no sound problem can be caused by corrupt or missing audio driver issues. To fix the problem, you can try to update the sound driver.
There are two ways you can get the right drivers for your sound card: manually or automatically.
Manual driver update – You can update your sound drivers manually by going to the manufacturer’s website for your sound card, and searching for the most recent correct sound driver. Be sure to choose only drivers that are compatible with your variant of Windows 10.
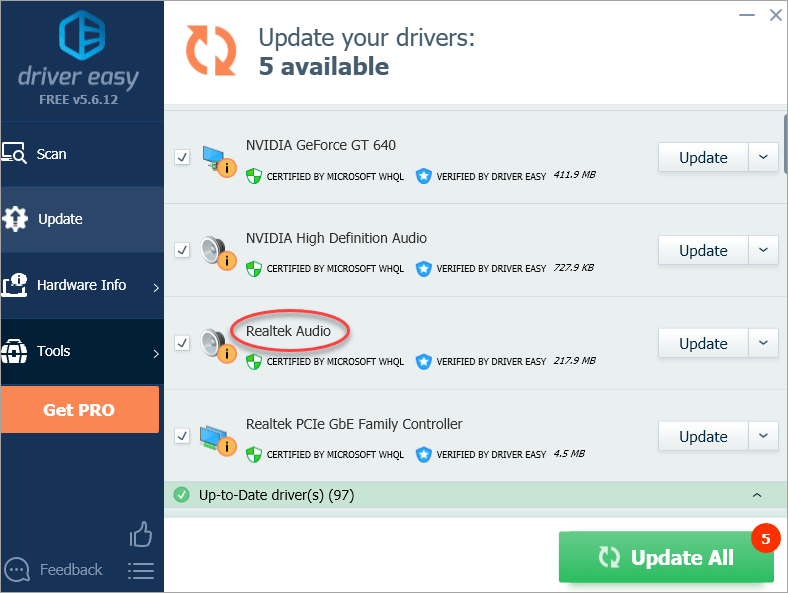
Automatic driver update – If you don’t have the time, patience or computer skills to update your audio drivers manually, you can, instead, do it automatically with Driver Easy. Driver Easy will automatically recognize your system and find the correct drivers for your sound card, and your variant of Windows 10, and it will download and install them correctly :
1) Download and install Driver Easy.
2) Run Driver Easy and click the Scan Now button. Driver Easy will then scan your computer and detect any problem drivers.

3) Click the Update button next to a flagged audio driver to automatically download and install the correct version of this driver (you can do this with the FREE version).
Or click Update All to automatically download and install the correct version of all the drivers that are missing or out of date on your system (this requires the Pro version – you’ll be prompted to upgrade when you click Update All).
Solution 4: Switch to ChromeOS
Windows is a very old technology. Sure, Windows 10 is relatively new, but it’s still just the latest iteration of a decades-old operating system, designed for a bygone era (pre-internet).
Now that we have the internet, fast connection speeds, free cloud storage, and endless web apps (like Gmail, Google Docs, Slack, Facebook, Dropbox and Spotify), the entire Windows way of doing things – with locally installed programs and local file storage – is totally outdated.
Why is that a problem? Because when you’re constantly installing uncontrolled third-party programs, you’re constantly opening the door to viruses and other malware. (And Windows’ insecure permission system compounds this problem.)
Plus the way Windows manages installed software and hardware has always been a problem. If your computer shuts down unexpectedly, or a program installs, uninstalls or updates incorrectly, you can get ‘registry’ corruptions. That’s why Windows PCs always slow down and become unstable over time.
Also because everything’s installed and saved locally, it doesn’t take long before you run out of disk space, and your disk gets fragmented, which makes everything even slower and more unstable.
For most people, the simplest way to solve Windows problems is to ditch Windows altogether, and switch to a faster, more reliable, more secure, easier to use and cheaper operating system…
ChromeOS feels much like Windows, but instead of installing heaps of programs to email, chat, browse the internet, write documents, do school presentations, create spreadsheets, and whatever else you normally do on a computer, you use web apps. You don’t need to install anything at all.
That means you don’t have virus and malware problems, and your computer doesn’t slow down over time, or become unstable.
And that’s just the start of the benefits…
To learn more about the benefits of ChromeOS, and to see comparison videos and demos, visit GoChromeOS.com.
Hope the instructions above helps you resolve the problem. If you have any questions or ideas, please feel free to leave your comments. I’d love to hear of any ideas or suggestions.


