- Windows авторизация для chrome
- Для чего нужна сквозная аутентификация в Google Chrome
- Методы настройки SSO в Google Chrome
- Параметры управления белым списком сайтов для SSO
- Настройка встроенной аутентификацию Windows в Google Chrome локально
- Настройка сквозной авторизации через реестр
- Настройка встроенной аутентификацию Windows в Google Chrome через GPO
- How to turn off windows integrated authentication in Chrome
- 5 Answers 5
- Configuring Chrome and Firefox for Windows Integrated Authentication
- Configuring Delegated Security for Mozilla Firefox
- Configuring Delegated Security in Google Chrome
- To use the command line to configure Google Chrome
- To modify the registry to configure Google Chrome
- To use ADM/ADMX templates through Group Policy to configure Google Chrome
Windows авторизация для chrome

Добрый день! Уважаемые читатели и гости одного из посещаемых IT блогов Рунета Pyatilistnik.org. В прошлый раз мы с вами подробно разобрали реальные примеры использования утилиты Robocopy. Мне понравилось, что статья получила столько отзывов и комментариев. Сегодня я хочу вас научить производить настройку SSO в Google Chrome, чтобы пользователи не вводили свои учетные данные, а сразу попадали на корпоративные ресурсы, тем самым экономя свое время, мы поговорим про сквозную авторизацию.
Для чего нужна сквозная аутентификация в Google Chrome
Когда у вас в компании уже построена инфраструктура на базе домена Active Directory, то это подразумевает использование одной учетной записи на всех сервисах компании. Так как сейчас у сотрудника не обязательно есть только компьютер, у него может быть рабочий, планшет, телефон, ноутбук. Все эти устройства давно так же заводятся в домен и управляются централизовано. Когда вы включаете в компании политику стойкости пароля (PSO), то тем самым вы вынуждаете сотрудника делать его пароль очень сложным. Это за собой влечет сложность ввода учетных данных на мобильных устройствах, отнимая время вашего хелпдеска. Дабы всем упростить жизнь, есть такое понятие, как SSO (Single Sign On), если перевести на русский, это это единая точка входа.
Идея сквозной аутентификации очень проста, вы входите один раз под своей корпоративной учетной записью на устройство, а далее все сервисы компании на которых настроена SSO, для вас доступны без ввода логина и пароля. Согласитесь, что это очень удобно. Так мы например, недавно производили настройку SSO для ManageEngine ServiceDesk или для vCenter Server. Благодаря этому могу выделить плюсы:
- Удобство для пользователей, что влечет экономию простоя их рабочего времени
- Экономия времени сотрудников технической поддержки
- Простота доступа к новым сервисам компании
- Более высокая безопасность
Методы настройки SSO в Google Chrome
Я могу выделить вот такие методы сквозной аутентификации в данном браузере:
- Брать список надежных узлов в Internet Explorer
- Настройка через командную строку
- Настройка через реестр Windows
- Настройка через групповую политику
Параметры управления белым списком сайтов для SSO
В Google Chrome есть ряд настроек, которые отвечают за автоматический sso login.
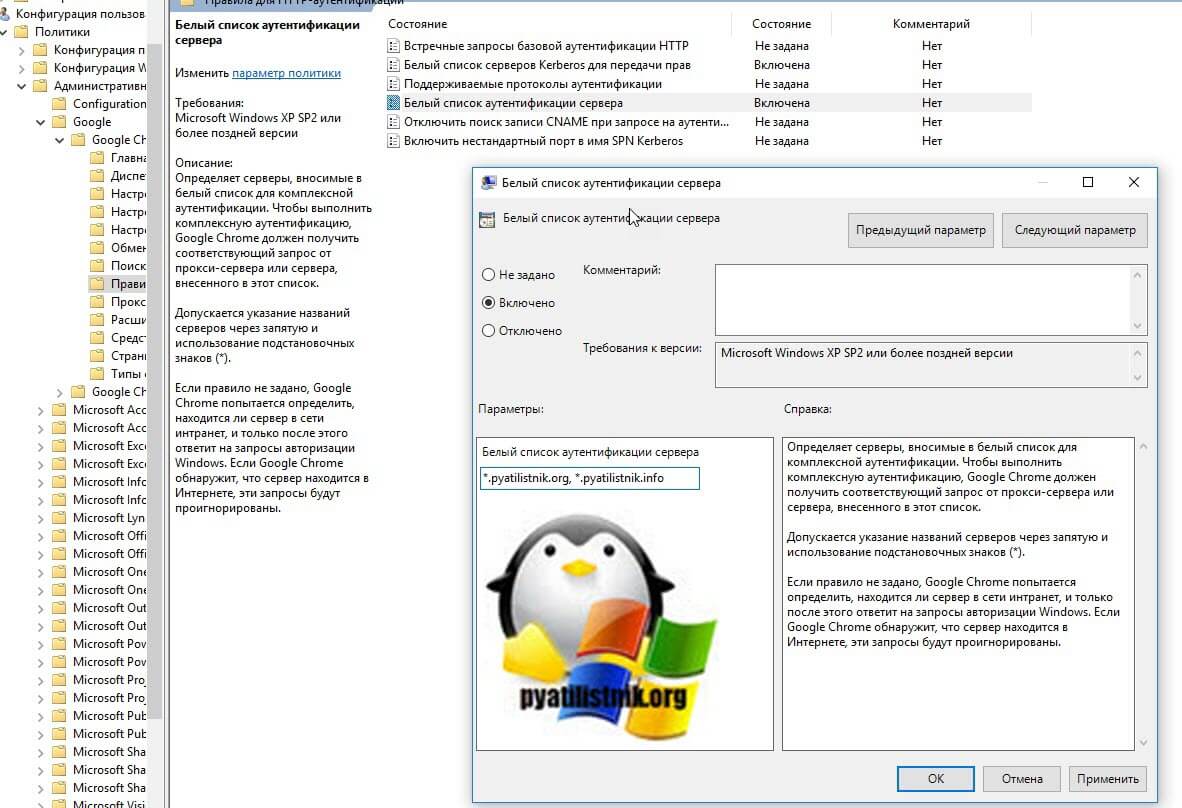
- AuthNegotiateDelegateWhitelist (Белый список серверов Kerberos для передачи прав) — данный параметр говорит Google Chrome, для каких сервисов необходимо предоставлять данные встроенной аутентификацию Windows. Допускается указание названий серверов через запятую и использование подстановочных знаков (*).
- AuthServerWhitelist (Белый список аутентификации сервера) — в данный список вносятся сервера, для которых будет включен вход sso login. Тут ваш браузер будет ждать запрос от прокси-сервера или сервера, внесенного в этот список. Если вы не зададите данный параметр, то при обращении на сервер, где вы хотите, чтобы работала сквозная авторизация, Google Chrome будет проверять является ли данный адрес частью зоны интранет, напоминаю, это он берет из Internet Explorer, если сайт в интранет не входит (Местная интрасеть), то он сделает вывод, что сайт является частью интернета и будет игнорировать сквозной вход на сервер.
Настройка встроенной аутентификацию Windows в Google Chrome локально
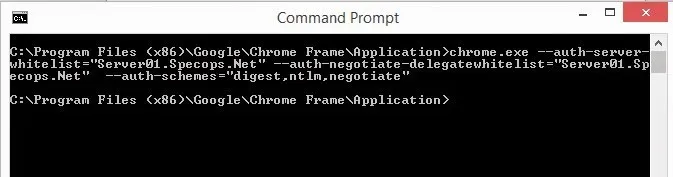
Данный метод позволит вам локально настроить ваш Google Chrome для входа на нужный ресурс с помощью встроенной аутентификацию Windows (сквозная авторизация). Открываем командную строку от имени администратора и вводим команду, в моем примере я буду настраивать вход без ввода учетных данных для ресурса https://pyatilistnik.org.
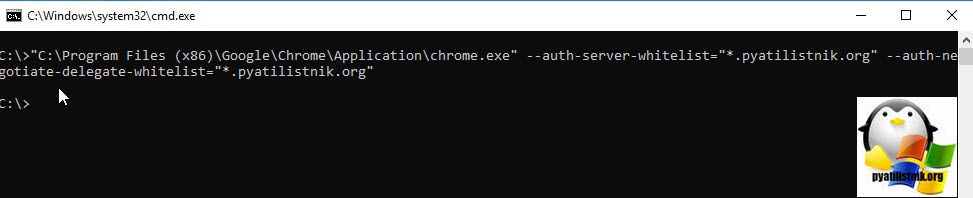
Пробуем теперь перезапустить ваш браузер и проверить автоматический вход на нужный вам сервис. Обратите внимание, что в итоге задали все те же две настройки auth-server-whitelist и auth-negotiate-delegate-whitelist.
Настройка сквозной авторизации через реестр
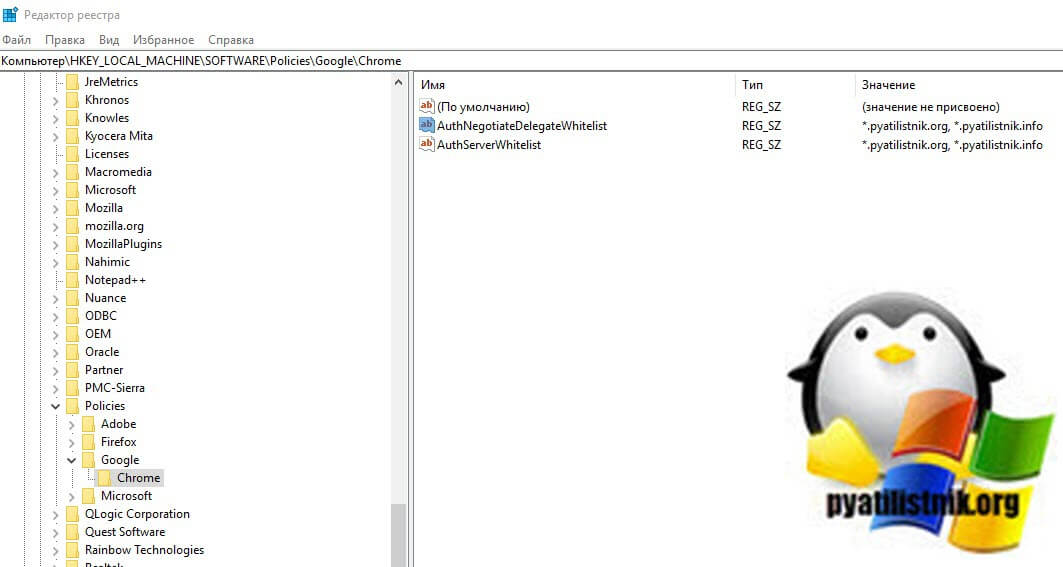
Выше мы выяснили, что у хрома есть два параметра auth-server-whitelist и auth-negotiate-delegate-whitelist. Оба параметра являются всего лишь ключами реестра Windows. Вот вам две ветки реестра, где вы найдете нужные ключи реестра.
Тут должны быть ключи с типом REG_SZ. Все записи начинаются со знака *.имя домена и перечисляются через запятую. После внесения или создания данных ключей, вам нужно перезапустить Google Chrome.
Так же можно создать ключ REG_SZ с именем AuthSchemes — указывает, какие схемы HTTP-аутентификации поддерживаются Google Chrome. Возможные значения: «basic», «digest», «ntlm» и «gotiate». Разделите несколько значений запятыми. Если эта политика не установлена, будут использоваться все четыре схемы.
Настройка встроенной аутентификацию Windows в Google Chrome через GPO
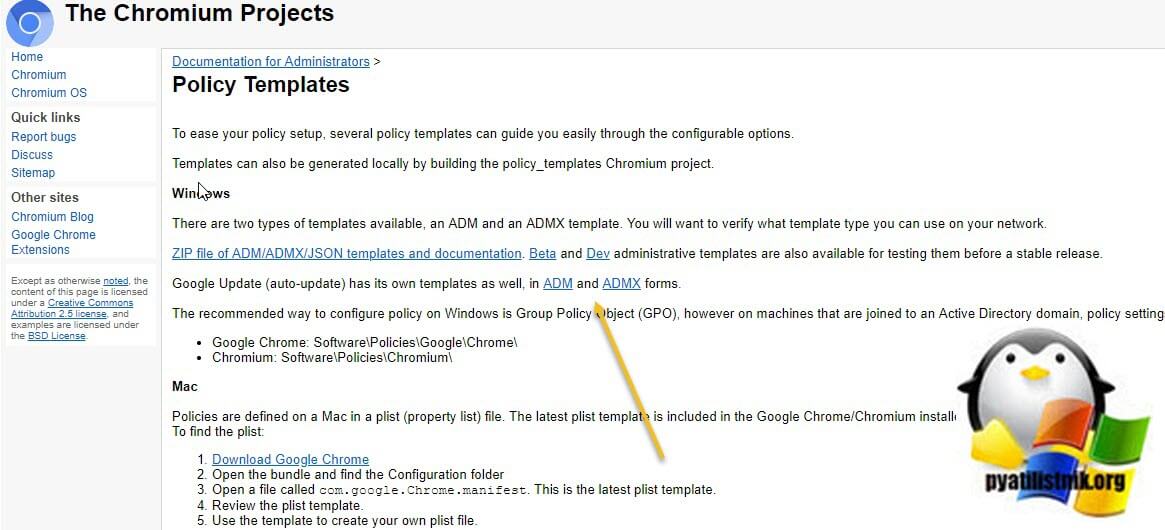
Когда у вас большая компания и огромный штат сотрудников, вам для быстрого распространения настроек, подойдет использование объектов групповой политики. Для этого у вас должен быть создан центральный репозиторий политик и скопирован в него последний набор ADMX шаблонов для Google Chrome.
Как импортировать шаблон настроек Google Chrome в ваш репозиторий, я уже подробно рассказывал, смотрим по ссылке. Создаем новый объект GPO или используем уже существующий. Напоминаю, что все настройки вы можете применять, как к компьютерам, так и к пользователям. Я буду применять к сотрудникам, перейдите в раздел:
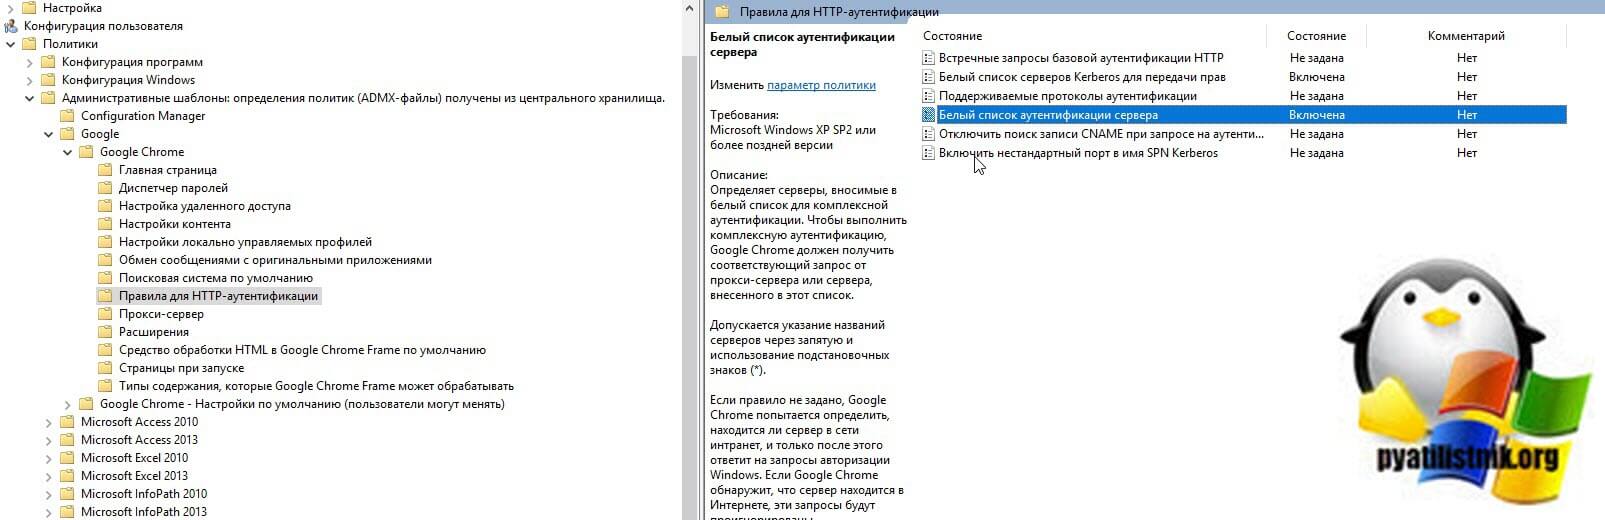
Вводим тут сервер через запятую.
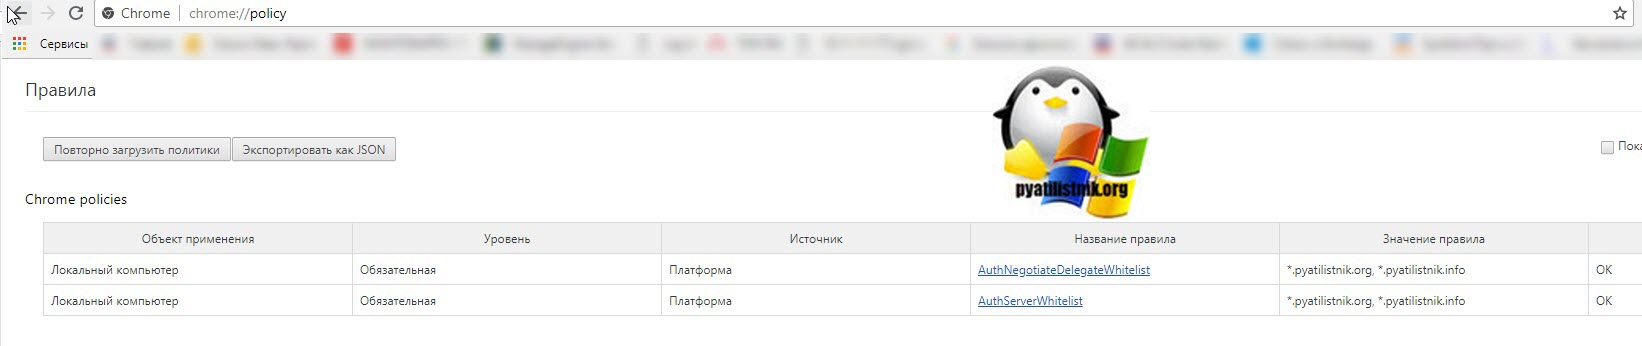
Далее вы обновляете групповые политики у пользователя на рабочей станции и можете проверить сквозную аутентификацию. Так же в Google Chrome, в адресной строке введите адрес chrome://policy/. Тут вы можете увидеть прилетевшие политики. Так же есть кнопка обновления «Повторно загрузить политики».
Настройка SSO в Google Chrome для Azure
Если вы произвели интеграцию вашего Active Directory в облако Azure, то для работы Single Sign On есть расширение «Windows 10 Accounts«. Используйте это расширение для входа на поддерживаемые веб-сайты с учетными записями в Windows 10. Если у вас есть удостоверение, поддерживаемое Microsoft, в Windows 10, вам не потребуется вводить учетные данные для входа на поддерживаемые веб-сайты. Вам нужно будет использовать это расширение, если ваша организация внедрила политику условного доступа. В настоящее время это расширение поддерживает удостоверения Azure Active Directory.
How to turn off windows integrated authentication in Chrome
I used to be able to disable windows integrated authentication by updating the settings in IE. Recently this no longer works. Has something changed in recent versions of chrome? Is there a new way to turn this off?
Chrome version 46.0.2490.71
I used to use this setting in IE Internet Options -> Advanced -> uncheck ‘Enable Windows Integrated Authentication’
5 Answers 5
I got this response from an internal admin and it seems to work.
I think the best we came up with was to create a shortcut to chrome.exe on your desktop and modify the target of the shortcut to be something like:
Edit: Corrected the path for misplaced backslashes. Note also the (x86), just in case.
Expanding on Daniel Trimble’s answer, which worked for me:
I would like to help more people find this useful answer by adding a little more context. What is Integrated Windows Authentication, and why would you want to disable it?
Basically, Integrated Windows Authentication allows a browser such as Chrome to access credentials that are stored on your computer (for example, the password you use to log into your office computer) and use those same credentials to log you into a website (for example, a password-protected portion of your company’s website). This occurs behind the scenes, without a visible password prompt.
The problem is that you may not want to be automatically logged into a particular website.
Example: I like to use Chrome as a test browser to see the «public» view of my company’s website. Generally I log into our site in Firefox or IE, make changes there, and then view the site in Chrome to make sure my changes were «published» as intended.
Suddenly, one day, I could no longer stay signed out of my company’s website in Chrome. Whenever I navigated to a password-protected page, instead of giving me a login prompt, Chrome would automatically sign me in to Microsoft SharePoint (my company’s content-management system) and show me the «logged in» version of that page.
If something similar is happening to you, there are other, more obvious things you should try first. Start by clearing your saved passwords (Chrome menu button > Settings > Show advanced settings > Passwords and forms > Manage passwords).
Clearing my saved passwords didn’t work for me, so I tried other things: cleared the cache, removed all cookies, reset Chrome’s settings, uninstalled and reinstalled Chrome. I even visited a password-protected page in an Incognito window, but Chrome still signed me in automatically.
Finally I found this Stack Overflow page, which solved the problem. (Thank you, Daniel Trimble!) Integrated Windows Authentication was the culprit. IWA used to be turned off by default in Chrome; you had to enable it via a checkbox in your Internet Options (shared with IE). At some point in the recent past, Google apparently decided to enable IWA by default. The unfortunate part is that they did not provide an option under Chrome’s Settings panel to disable it. At least there’s this workaround!
Configuring Chrome and Firefox for Windows Integrated Authentication
Mar 14, 2017 (Last updated on February 5, 2021)
Windows Integrated Authentication allows a users’ Active Directory credentials to pass through their browser to a web server. Windows Integrated Authentication is enabled by default for Internet Explorer but not Google Chrome or Mozilla Firefox. Users who use the non-Microsoft browsers will receive a pop-up box to enter their Active Directory credentials before continuing to the website. This adds additional steps and complexity for users who are using web based applications like self-service password reset solutions Specops uReset and Specops Password Reset. In an effort to make this process as easy as possible for end-users, many IT administrators enable Windows Integrated Authentication for the third party browsers. This can be done with Chrome and Firefox with a few additional steps. This article will show you how to enable Windows Integrated Authentication for Google Chrome and Mozilla Firefox.
Configuring Delegated Security for Mozilla Firefox
To configure Firefox to use Windows Integrated Authentication:
2. In the address bar type about:config
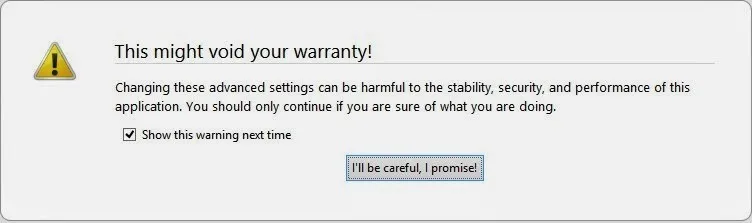
3. You will receive a security warning. To continue, click I’ll be careful, I promise.
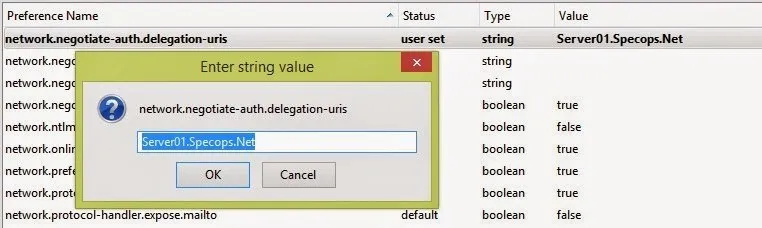
4. You will see a list of preferences listed. Find the settings below by browsing through the list or searching for them in the search box. Once you have located each setting, update the value to the following:
| Setting | Value |
|---|---|
| network.automatic-ntlm-auth.trusted-uris | MyIISServer.domain.com |
| network.automatic-ntlm-auth.allow-proxies | True |
| network.negotiate-auth.allow-proxies | True |
** MyIISServer.domain.com should be the fully qualified name of your IIS server that you are setting up the Windows Integrated Authentication to.
Negotiate authentication is not supported in versions of Firefox prior to 2006.

Configuring Delegated Security in Google Chrome
Note: The latest version of Chrome uses existing Internet Explorer settings. Older version of Chrome require additional configurations (see below).
You can use three methods to enable Chrome to use Windows Integrated Authentication.Your options are the command line, editing the registry, or using ADMX templates through group policy. If you choose to use the command line or edit the registry, you could use Group Policy Preferences to distribute those changes on a broader scale. Below are the steps for the three methods:
To use the command line to configure Google Chrome
Start Chrome with the following command:
Chrome.exe –auth-server-whitelist=”MYIISSERVER.DOMAIN.COM” –auth-negotiate-delegatewhitelist=”MYIISSERVER.DOMAIN.COM” –auth-schemes=”digest,ntlm,negotiate”
To modify the registry to configure Google Chrome
Configure the following registry settings with the corresponding values:
Data type: String (REG_SZ)
Windows registry location: Software\Policies\Google\Chrome\AuthSchemes
Mac/Linux preference name : AuthSchemes
Supported on: Google Chrome (Linux, Mac, Windows) since version 9
Supported features: Dynamic Policy Refresh: No, Per Profile: No
Description: Specifies which HTTP Authentication schemes are supported by Google Chrome. Possible values are ‘basic’, ‘digest’, ‘ntlm’ and ‘negotiate’. Separate multiple values with commas. If this policy is left not set, all four schemes will be used.
Data type: String (REG_SZ)
Windows registry location : Software\Policies\Google\Chrome\AuthServerWhitelist
Mac/Linux preference name : AuthServerWhitelist
Supported on : Google Chrome (Linux, Mac, Windows) since version 9
Supported features : Dynamic Policy Refresh: No, Per Profile: No
Description : Specifies which servers should be whitelisted for integrated authentication. Integrated authentication is only enabled when Google Chrome receives an authentication challenge from a proxy or from a server which is in this permitted list. Separate multiple server names with commas. Wildcards (*) are allowed. If you leave this policy not set Chrome will try to detect if a server is on the Intranet and only then will it respond to IWA requests. If a server is detected as Internet then IWA requests from it will be ignored by Chrome.
Data type: String (REG_SZ)
Windows registry location : Software\Policies\Google\Chrome\AuthNegotiateDelegateWhitelist
Mac/Linux preference name : AuthNegotiateDelegateWhitelist
Supported on : Google Chrome (Linux, Mac, Windows) since version 9
Supported features : Dynamic Policy Refresh: No, Per Profile: No
Description: Servers that Google Chrome may delegate to. Separate multiple server names with commas. Wildcards (*) are allowed. If you leave this policy not set Chrome will not delegate user credentials even if a server is detected as Intranet.
Example Value: ”MYIISSERVER.DOMAIN.COM”
To use ADM/ADMX templates through Group Policy to configure Google Chrome
1. Download Zip file of ADM/ADMX templates and documentation from: http://www.chromium.org/administrators/policy-templates.
2. Add the ADMX template to your central store, if you are using a central store.
3. Configure a GPO with your application server DNS host name with Kerberos Delegation Server Whitelist and Authentication Server Whitelist enabled.
Each of these three methods achieve the same results for configuring Google Chrome for Windows Integrated Authentication. The method that is best for you will depend on how your organization is set up. Personally, I would use the command line or the registry if you are deploying across an enterprise. You can easily distribute a shortcut on the user’s desktop with the command and distribute that with Group Policy preferences. If you choose to use the registry method, that is able to be distributed with Group Policy.
With a variety of third-party browsers available, many users will receive a pop-up box to enter their Active Directory credentials before continuing to an IIS hosted web application. This leads to additional steps, complexity and confusion for many end-users. By setting up Windows Integrated Authentication into Chrome and Firefox, you will be able to give your users the greatest amount of flexibility for their choice of browser as well as ease of use with your web-based applications.
Making everyday IT tasks easier for end users and IT admins is something we specialize in. Our self-service password reset solution Specops uReset guarantees end user adoption thanks to its flexible approach to multi-factor authentication.


