- Binding to Active Directory Domain Services
- Binding Functions and Methods
- Binding Strings
- How to Add New Domains to BIND DNS Server
- Adding New Domain to BIND DNS Server
- Method 1: Adding New Domain Using One Global Zone File
- Editing Zone File to Insert New Domain
- Editing Global Zone File to Keep New Domain’s Resource Records
- Method 2: Adding New Domain Using Its Own Zone File
- Inserting New Domain in BIND Zone File
- Creating New Zone File for New Domain
- Testing New Domain Entry
- Windows: DNS сервер BIND на Windows 7
- Question: Q: Cannot bind to windows domain
- All replies
Binding to Active Directory Domain Services
In Active Directory Domain Services, the act of associating a programmatic object with a specific Active Directory Domain Services object is known as binding. When a programmatic object, such as an IADs or DirectoryEntry object, is associated with a specific directory object, the programmatic object is considered to be bound to the directory object.
Binding Functions and Methods
The method for programmatically binding to an Active Directory object will depend on the programming technology that is used. For more information about binding to objects in Active Directory Domain Services with a specific programming technology, see the topics listed in the following table.
| Programming technology | For more information |
|---|---|
| Active Directory Service Interfaces | Binding to an ADSI Object |
| Lightweight Directory Access Protocol | Establishing an LDAP Session |
| System.DirectoryServices | Binding to Directory Objects |
Binding Strings
All bind functions and methods require a binding string. The form of the binding string depends on the provider. Active Directory Domain Services are supported by two providers, LDAP and WinNT.
Beginning with WindowsВ 2000, the LDAP provider is used to access Active Directory Domain Services. The LDAP binding string can take one of the following forms:
In the examples above, «LDAP:» specifies the LDAP provider. «GC:» uses the LDAP provider to bind to the Global Catalog service to execute fast queries.
» » specifies the server to bind to and is optional. If possible, do not specify a server. It is also possible to bind to an object in a different domain. To do this pass the domain naming system (DNS) name of the target domain for » «. For example, to bind to the Users container in the domain2 domain of fabrikam.com, the binding string would be «LDAP://domain2.fabrikam.com/CN=Users,DC=domain2,DC=fabrikam,DC=com».
» » represents a specific object in Active Directory Domain Services. The object name can be a distinguished name or an object GUID.
For more information about LDAP binding strings, see LDAP ADsPath.
For WindowsВ NTВ 4.0, the WinNT provider is used for access to directory data such as users, user groups, computers, services, and other network objects in the WindowsВ 2000. The WinNT provider on WindowsВ 2000 and later systems has limited functionality compared to the LDAP provider. For more information about WinNT binding strings, see WinNT ADsPath.
An ADsPath of «LDAP://» or «GC://» can be used to bind to the root of the namespace. When bound to the root of the namespace, the supplied namespace object contains no properties and contains the domain object for LDAP and a container object containing a partial replica of all domains in the forest for GC.
For more information about binding in Active Directory Domain Services, see:
How to Add New Domains to BIND DNS Server
DNS (Domain Name System) Server is an essential part to any computer network. So, it is always suggest keeping a DNS Server in every network. How to configure a DNS Server with BIND package was discussed in my previous article. A common question among the fresher admins of BIND DNS is how to add a new domain to BIND DNS Server. For this, this article is designed to discuss the proper way to add multiple domains to BIND DNS Server.
Adding New Domain to BIND DNS Server
The DNS zone file contains a specific domain/subdomain collection in BIND DNS Server. Each domain may have its own zone file or multiple domains may use one global zone file. So, new domain in BIND DNS Server can be added following the below two methods.
- Adding new domain using one global zone file or
- Adding new domains using its own zone file.
I configured a DNS server with BIND package (in my previous article) with the following information.
- Domain name:net
- FQDN:systemzone.net
- Nameserver:systemzone.net
- Host IP:168.40.100
- Forward Zone File:net.for
- Reverse Zone File:net.rev
We will now add a new domain in this BIND DNS Server according to the following information.
- Domain name:com
- Nameserver:systemzone.com
- Host IP:168.40.101 (systemzone.com domain point to this IP address)
- FQDN:systemzone.com
Method 1: Adding New Domain Using One Global Zone File
According to the previous DNS Server configuration with BIND package, the global zone file is systemzone.net.for. So, we will use this global zone file to keep new domains’s DNS Resource Records (RRs). To add a new domain that will use one global zone file, we have to edit the following two files.
- Zone file to insert new domain and
- Global zone file to keep new domain’s RRs.
Editing Zone File to Insert New Domain
According to the previous DNS Server configuration, DNS Zone entries are kept in the named.rfc1912.zones file. So, open this file and put the following lines to insert new domain (systemzone.com).
zone “systemzone.com” IN <
Note that the new domain (systemzone.com) and the old domain (systemzone.net) are pointing the same forward zone file (systemzone.net.for).
Editing Global Zone File to Keep New Domain’s Resource Records
According to our previous DNS configuration, the global forward zone file is systemzone.net.for. Currently, the forward zone file looks like below.
@ IN SOA ns1.systemzone.net. root.systemzone.net. (
@ IN NS ns1.systemzone.net.
@ IN A 192.168.40.100
ns1 IN A 192.168.40.100
@ IN SOA ns1.systemzone.net. root.systemzone.net. (
@ IN NS ns1.systemzone.net.
@ IN A 192.168.40.100
ns1 IN A 192.168.40.100
@ IN A 192.168.40.101
www IN A 192.168.40.101
webserver IN A 192.168.40.101
In the above lines, we have changed the $ORIGIN directive’s position for systemzone.net domain as well as we have added a new $ORIGIN directive for systemzone.com domain and have kept three host entries for the systemzone.com pointed server.
So, the above two steps describe how to add new domain to BIND DNS Server using global zone file. We will now see another method to add a new domain in BIND DNS Server.
Method 2: Adding New Domain Using Its Own Zone File
New domain in BIND DNS Server can be added creating a new zone file for that domain. In this case, we have to also insert new domain in zone file as well as have to create a new zone file for that domain. So, adding new domain in BIND DNS Server by creating new zone file can also be divided into the following two steps.
- Inserting new domain in BIND zone file and
- Creating new zone file for that domain.
Inserting New Domain in BIND Zone File
According to the previous DNS Server configuration, DNS Zone entries are kept in the named.rfc1912.zones file. So, open this file and put the following lines to insert new domain (systemzone.com).
zone “systemzone.com” IN <
Note that the new domain (systemzone.com) is now pointing a new forward zone file (systemzone.com.for) for its DNS Resource Records. So, we will now create this forward zone file and keep RRs for the new domain.
Creating New Zone File for New Domain
As we have declared new zone file for the new domain, we have to create this file now. So, issue the following command to create the declared forward zone file in the default BIND directory.
As this file has been created with the root user, we have to change group permission to named user. Otherwise BIND cannot access this file. To change group permission, issue the following command.
Now open the new forward zone file and insert the following lines and then save and exit the file.
@ IN SOA ns1.systemzone.net. root.systemzone.com. (
@ IN NS ns1.systemzone.net.
@ IN A 192.168.40.101
www IN A 192.168.40.101
webserver IN A 192.168.40.101
Adding new domain using its own zone file has been completed. It is always suggest adding a reverse DNS record (PTR) for every Host entry. According to the previous DNS configuration, the reverse zone file is systemzone.net.for. So, open this file and put the following PTR record at the bottom and then save and exit the file.
Now restart the BIND service and test your configuration.
Testing New Domain Entry
After adding new domain to BIND DNS Server successfully, we can now test domain entry with the following nslookup tool.
If you get the above result, your configuration for adding a new domain to BIND DNS Server has been completed successfully. Similarly, you can add as many domains as you want in your BIND DNS Server following the above methods.
If you face any confusion to follow the above steps properly, watch the below video about adding new domain to BIND DNS Server. I hope it will reduce your any confusion.
How to add new domains to BIND DNS Server has been discussed in this article. I hope you will now be able to add your desired domain in your BIND DNS Server. However, if you face any confusion to follow the above steps properly, feel free to discuss in comment or contact me from Contact page. I will try my best to stay with you.
Windows: DNS сервер BIND на Windows 7
Вместо файла hosts в Windows — проще установить свой DNS сервер BIND, управлять которым (и, главное — добавлять новые домены/субдомены) намного проще.
Лично у меня изменения в hosts применяются только после рестарта системы, не смотря на ipconfig /flushdns и другие попытки его «оживить».
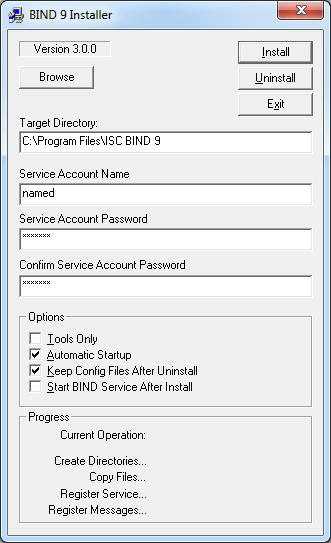
Распаковываем, и запускаем BINDInstall.exe:
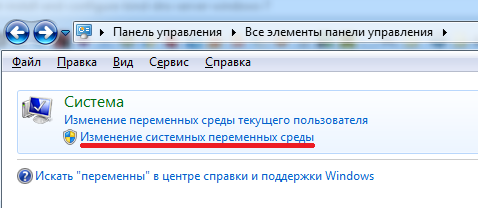
 Редактируем переменные окружения:
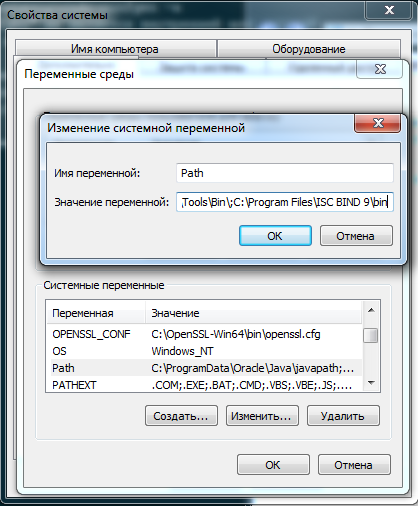
В PATH добавляем C:Program FilesISC BIND 9bin :
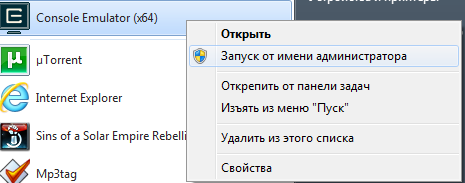
Запускаем cmd от имени администратора ( ConEmu в данном примере):
Генерируем ключ для управления BIND:
Переходим в каталог BIND-а:
В каталоге etc создаём файл named.conf :
- listen-on — на каких адресах слушать, 192.168.1.146 — адрес Win-машины;
- allow-transfer — кому разрешено выполнять рекурсивные запросы, в данном примере 192.168.1.1 — домашний роутер со своим DNS;
- forwarders — адреса DNS-серверов, на которые пересылать запросы о неизвестных зонах (провайдер, например);
Перезапускаем, что бы проверить что конфиг правильный:
Синтаксис файла можно проверить так:
В случае ошибки:
Создаём пустой файл:
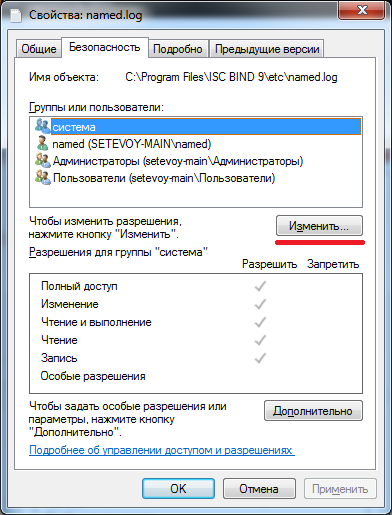
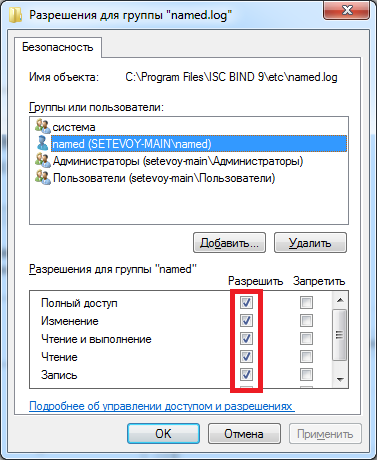
Кликаем по нему правой кнопкой — Свойства > Безопасность, жмём Изменить:
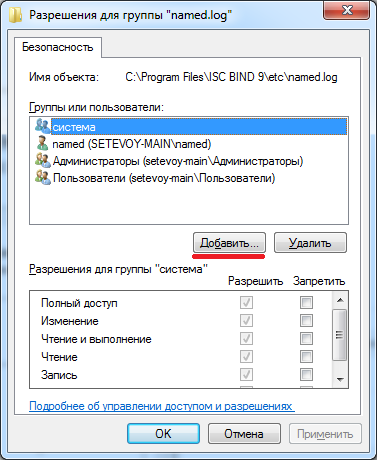 Дополнительно:
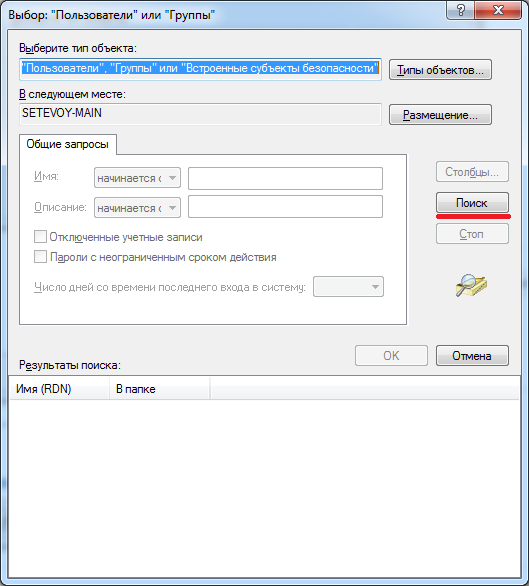 Находим named:
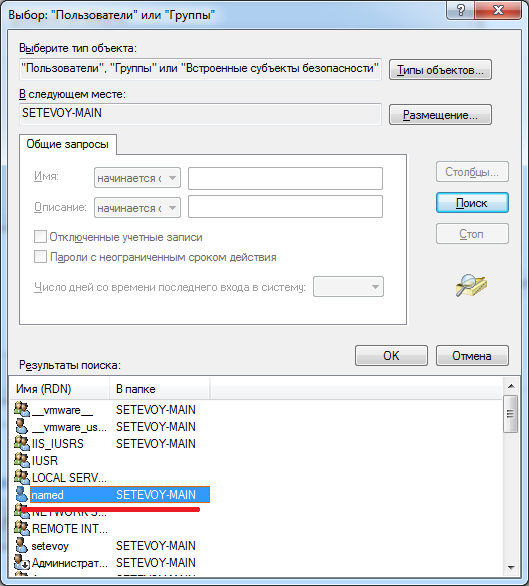 И устанавливаем полный доступ:
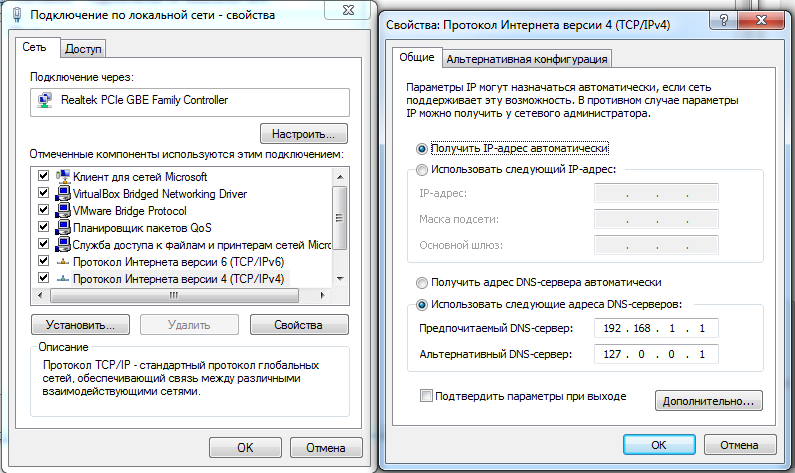
 Переходим в настройки сети и добавляем 127.0.0.1 в список DNS-серверов:
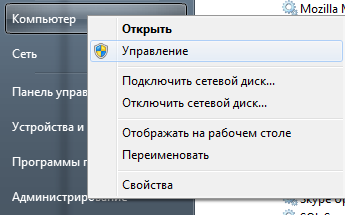
 Переходим в Управление:
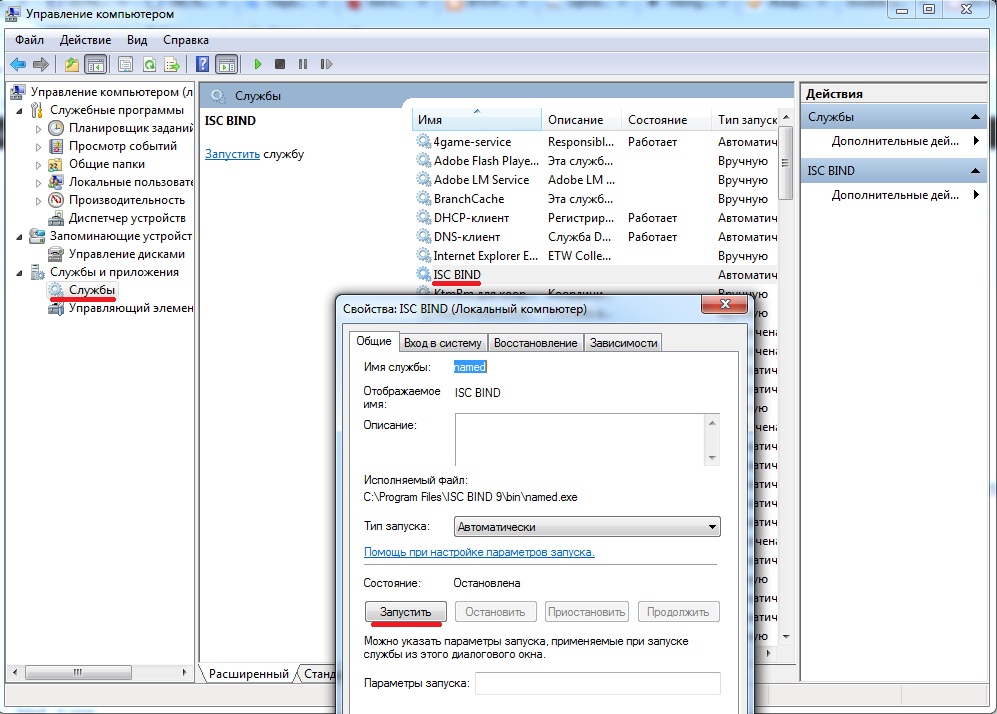
 Находим ISC BIND и запускаем:
 Проверяем порт:
Проверяем работу самого BIND:
Добавим локальный домен.
В конец файла named.conf добавляем:
Полное содержимое файла:
В него добавляем:
ВАЖНО: в конце описания зоны должна быть пустая строка.
ВАЖНО: при каждом изменении файла зоны — его Serial необходимо увеличить на 1: 2015030801 > 2015030802 и т.д.
ВАЖНО: при копировании отсюда — проверяйте кавычки — блог (или браузер?) иногда ставит «неправильные» (косые вместо прямых).
Проверяем файл зоны:
Перегружаем зоны BIND:
Нормальным dig -ом:
Настройка ничем не отличается от настройки на Linux/FreeBSD, кроме установки.
После настройки — уровень логгирования можно изменить на warning :
Question: Q: Cannot bind to windows domain
Mac book and imac, Mac OS X (10.6.3)
Posted on Apr 12, 2010 3:31 AM
All replies
Loading page content
Page content loaded
I have the same. It works with admitmac, but I don’t want to use additional software. Anybody a hint? I tried everything I could imagine or find on the internet.
Apr 20, 2010 12:13 PM
May 4, 2010 5:17 AM
May 4, 2010 5:26 AM
Maybe the tutorial in the blog How to Set Up a Mac on a Windows Domain might help everybody’s Domain problem.
Plus anyone putting a lone Mac into Windows Domains should bookmark the MacWindows.com. Their reader reports on the right side (of the main page) are a resource for great tips.
Message was edited by: satcomer
May 6, 2010 2:53 PM
I’ve tried just about everything I could think of or google for:
— disable smb signing
— allow unsigned LDAP communication
— modify dsHeuristics on the AD server
— disable offload of network card
— added local domain to the mac DNS search (just in case, should not be needed on 10.6)
— make sure that DNS is working well
— ping works, smb works, exchange works, all works,
— .
— except binding to the domain.
I’m sure I’m using the correct domain account.
Logging does not help much. One strange error message I get:
19/06/10 19:00:15 System Preferences[121] -[ODCAddServerSheetController handleOtherActionError: gotError: Error Domain=com.apple.OpenDirectory Code=4001 UserInfo=0x200476920 «Custom call 85 to Active Directory failed.», Operation was denied because the current credentials do not have the appropriate privileges.
So it looks like something on the SBS 2008 machine. But all is ok there, as far as I can see!
Also an extract of DirectoryServices.debug.log (replaced actual domain name with xxxxxx). Seems to fail after step 4, step 5 is never started.
DirectoryService.debug.log.8:2010-06-19 12:19:52 CEST — T[0x0000000101A81000] — Active Directory: Bind Step 1 — Searching for Forest/Domain information
DirectoryService.debug.log.8:2010-06-19 12:19:52 CEST — T[0x0000000101A81000] — Active Directory: xxxxxx.local — Start checking servers for site «any»
DirectoryService.debug.log.8:2010-06-19 12:19:52 CEST — T[0x0000000101A81000] — Active Directory: Total Servers «any» LDAP — 1, Kerberos — 1, kPasswd — 1
DirectoryService.debug.log.8:2010-06-19 12:19:52 CEST — T[0x0000000101A81000] — Active Directory: DomainConfiguration reachabilityNotification — Node: xxxxxx.local — resolves — enabled
DirectoryService.debug.log.8:2010-06-19 12:19:52 CEST — T[0x0000000101A81000] — Active Directory: Bind Step 2 — Finding nearest Domain controllers
DirectoryService.debug.log.8:2010-06-19 12:19:52 CEST — T[0x0000000101A81000] — Active Directory: Bind Step 3 — Verifying credentials
DirectoryService.debug.log.8:2010-06-19 12:19:52 CEST — T[0x0000000101A81000] — Active Directory: lockLDAPSession — unable to establish a connection to xxxxxx.local
DirectoryService.debug.log.8:2010-06-19 12:19:53 CEST — T[0x0000000101A81000] — Active Directory: Password verify for it@XXXXXX.LOCAL succeeded — cache MEMORY:tkZ2qa9
DirectoryService.debug.log.8:2010-06-19 12:19:53 CEST — T[0x0000000101A81000] — Active Directory: Bind Step 4 — Searching for existing computer
DirectoryService.debug.log.8:2010-06-19 12:19:53 CEST — T[0x0000000101A81000] — Active Directory: lockLDAPSession — unable to establish a connection to xxxxxx.local
DirectoryService.debug.log.8:2010-06-19 12:19:53 CEST — T[0x0000000101A81000] — Active Directory: Password verify for it@XXXXXX.LOCAL succeeded — cache MEMORY:5BSBZMr
If anybody still has an idea how to fix, I’d greatly appreciate.


