- Get started with native Android development on Windows
- Install Android Studio
- Create a new project
- Java or Kotlin
- Minimum API Level
- Instant app support and Androidx artifacts
- Project files
- Use C or C++ for Android game development
- Design guidelines
- Fluent Design System for Android
- Android и Windows породнятся при помощи Microsoft Project Latte
- В Windows 10 вскоре можно будет запускать мобильные приложения, созданные для Android
- Тестирование на устройстве или эмуляторе Android Test on an Android device or emulator
- Запуск на реальном устройстве Android Run on a real Android device
- Подготовка устройства к разработке Enable your device for development
- Запуск приложения на устройстве Run your app on the device
- Запуск приложения на виртуальном устройстве Android с помощью эмулятора Run your app on a virtual Android device using an emulator
- Включить поддержку виртуализации Enable virtualization support
- Эмулятор для разработки машинного кода с Android Studio Emulator for native development with Android Studio
- Эмулятор для кросс-платформенной разработки с помощью Visual Studio Emulator for cross-platform development with Visual Studio
- Установка эмулятора Android с помощью Visual Studio Install Android emulator with Visual Studio
Get started with native Android development on Windows
This guide will get you started using Windows to create native Android applications. If you would prefer a cross-platform solution, see Overview of Android development on Windows for a brief summary of some options.
The most straight-forward way to create a native Android app is using Android Studio with either Java or Kotlin, though it is also possible to use C or C++ for Android development if you have a specific purpose. The Android Studio SDK tools compile your code, data, and resource files into an archive Android package, .apk file. One APK file contains all the contents of an Android app and is the file that Android-powered devices use to install the app.
Install Android Studio
Android Studio is the official integrated development environment for Google’s Android operating system. Download the latest version of Android Studio for Windows.
- If you downloaded an .exe file (recommended), double-click to launch it.
- If you downloaded a .zip file, unpack the ZIP, copy the android-studio folder into your Program Files folder, and then open the android-studio > bin folder and launch studio64.exe (for 64-bit machines) or studio.exe (for 32-bit machines).
Follow the setup wizard in Android Studio and install any SDK packages that it recommends. As new tools and other APIs become available, Android Studio will notify you with a pop-up, or check for updates by selecting Help > Check for Update.
Create a new project
Select File > New > New Project.
In the Choose your project window, you will be able to choose between these templates:
Basic Activity: Creates a simple app with an app bar, a floating action button and two layout files: one for the activity and one to separate out text content.
Empty Activity: Creates an empty activity and a single layout file with sample text content.
Bottom Navigation Activity: Creates a standard bottom navigation bar for an activity. See the Bottom Navigation Component in Google’s material design guidelines.
Learn more about selecting an activity template in the Android Studio docs.
Templates are commonly used to add activities to new and existing app modules. For example, to create a login screen for your app’s users, add an activity with the Login Activity template.
The Android operating system is based on the idea of components and uses the terms activity and intent to define interactions. An activity represents a single, focused task that a user can do. An activity provides a window for building the user interface using classes based on the View class. There is a lifecycle for activities in the Android operating system, defined by a set of six callbacks: onCreate() , onStart() , onResume() , onPause() , onStop() , and onDestroy() . The activity components interact with one another using intent objects. Intent either defines the activity to start or describes the type of action to perform (and the system selects the appropriate activity for you, which can even be from a different application). Learn more about Activities, the Activity Lifecycle, and Intents in the Android docs.
Java or Kotlin
Java became a language in 1991, developed by what was then Sun Microsystems, but which is now owned by Oracle. It has become one of the most popular and powerful programming languages with one of the largest support communities in the world. Java is class-based and object-oriented, designed to have as few implementation dependencies as possible. The syntax is similar to C and C++, but it has fewer low-level facilities than either of them.
Kotlin was first announced as a new open-source language by JetBrains in 2011 and has been included as an alternative to Java in Android Studio since 2017. In May 2019, Google announced Kotlin as it’s preferred language for Android app developers, so despite being a newer language, it also has a strong support community and has been identified as one of the fastest growing programming languages. Kotlin is cross-platform, statically typed, and designed to interoperate fully with Java.
Java is more widely used for a broader range of applications and offers some features that Kotlin does not, such as checked exceptions, primitive types that are not classes, static members, non-private fields, wildcard-types, and ternary-operators. Kotlin is specifically designed for and recommended by Android. It also offers some features that Java does not, such as null references controlled by the type system, no raw types, invariant arrays, proper function types (as opposed to Java’s SAM-conversions), use-site variance without wildcards, smart casts, and more. The Kotlin documentation offers a more in-depth look at the comparison to Java.
Minimum API Level
You will need to decide the minimum API level for your application. This determines which version of Android your application will support. Lower API levels are older and therefore generally support more devices, but higher API levels are newer and therefor provide more features.

Select the Help me choose link to open a comparison chart showing the device support distribution and key features associated with the platform version release.

Instant app support and Androidx artifacts
You may notice a checkbox to Support instant apps and another to Use androidx artifacts in your project creation options. The instant apps support is not checked and the androidx is checked as the recommended default.
Google Play Instant apps provide a way for people to try an app or game without installing it first. These instant apps can be surfaced across the Play Store, Google Search, social networks, and anywhere you share a link. By checking the Support instant apps box, you are asking Android Studio to include the Google Play Instant Development SDK with your project. To learn more about Google Play Instant apps and how to create an instant-enabled app bundle, see the Android documentation.
AndroidX artifacts represents the new version of the Android support library and provides backwards-compatibility across Android releases. AndroidX provides a consistent namespace starting with the string androidx for all available packages.
AndroidX is now the default library. To uncheck this box and use the previous support library requires removing the lastest Android Q SDK. See Uncheck use Androidx artifacts on StackOverflow for instructions, but first note that the former Support Library packages have been mapped into corresponding androidx.* packages. For a full mapping of all the old classes and build artifacts to the new ones, see Migrating to AndroidX.
Project files
The Android Studio Project window, contains the following files (be sure that the Android view is selected from the drop-down menu):
app > java > com.example.myfirstapp > MainActivity
The main activity and entry point for your app. When you build and run your app, the system launches an instance of this Activity and loads its layout.
app > res > layout > activity_main.xml
The XML file defining the layout for the activity’s user interface (UI). It contains a TextView element with the text «Hello World»
app > manifests > AndroidManifest.xml
The manifest file describing the fundamental characteristics of the app and each of its components.
Gradle Scripts > build.gradle
There are two files with this name: «Project: My First App», for the entire project, and «Module: app», for each app module. A new project will initially only have one module. Use the module’s build.file to control how the Gradle plugin builds your app. Learn more in the Android docs, Configure your build article.
Use C or C++ for Android game development
The Android operating system is designed to support applications written in Java or Kotlin, benefiting from tooling embedded in the system’s architecture. Many system features, like Android UI and Intent handling, are only exposed through Java interfaces. There are a few instances where you may want to use C or C++ code via the Android Native Development Kit (NDK) despite some of the associated challenges. Game development is an example, since games typically use custom rendering logic written in OpenGL or Vulkan and benefit from a wealth of C libraries focused on game development. Using C or C++ might also help you squeeze extra performance out of a device to achieve low latency or run computationally intensive applications, such as physics simulations. The NDK is not appropriate for most novice Android programmers however. Unless you have a specific purpose for using the NDK, we recommend sticking with Java, Kotlin, or one of the cross-platform frameworks.
To create a new project with C/C++ support:
In the Choose your project section of the Android Studio wizard, select the Native C++* project type. Select Next, complete the remaining fields, then select Next again.
In the Customize C++ Support section of the wizard, you can customize your project with the C++ Standard field. Use the drop-down list to select which standardization of C++ you want to use. Selecting Toolchain Default uses the default CMake setting. Select Finish.
Once Android Studio creates your new project, you can find a cpp folder in the Project pane that contains the native source files, headers, build scripts for CMake or ndk-build, and prebuilt libraries that are a part of your project. You can also find a sample C++ source file, native-lib.cpp , in the src/main/cpp/ folder which provides a simple stringFromJNI() function returning the string «Hello from C++». Additionally, you will find a CMake build script, CMakeLists.txt , in your module’s root directory required for building your native library.
To learn more, see the Android docs topic: Add C and C++ code to your project. For samples, see the Android NDK samples with Android Studio C++ integration repo on GitHub. To compile and run a C++ game on Android, use the Google Play Game services API.
Design guidelines
Device users expect applications to look and behave a certain way. whether swiping or tapping or using voice-controls, users will hold specific expectations for what your application should look like and how to use it. These expectations should remain consistent in order to reduce confusion and frustration. Android offers a guide to these platform and device expectations that combines the Google Material Design foundation for visual and navigational patterns, along with quality guidelines for compatibility, performance, and security.
Fluent Design System for Android
Microsoft also offers design guidance with the goal of providing a seamless experience across the entire portfolio of Microsoft’s mobile apps.
Fluent Design System for Android design and build custom apps that are natively Android while still uniquely Fluent.
Android и Windows породнятся при помощи Microsoft Project Latte
В Windows 10 вскоре можно будет запускать мобильные приложения, созданные для Android
Microsoft работает над программным решением, которое позволит разработчикам переносить свои приложения для Android в Windows 10 практически без изменений кода, выпуская их в Microsoft Store. Данный проект называется Microsoft Project Latte, а функциональность, как и сообщалось ранее, будет добавлена в следующем году.
Компания раньше уже тестировала перенос приложений Android в Windows 10 с помощью проекта под кодовым названием Project Astoria, который так и не увидел свет. Project Latte работает на Windows Subsystem for Linux (WSL), при этом Microsoft потребуется предоставить свою собственную подсистему Android для фактического запуска приложений Android.
Microsoft объявила, что Windows Subsystem for Linux скоро получит поддержку приложений Linux с графическим интерфейсом пользователя, а также ускорение графического процессора, которое должно повысить производительность приложений, работающих через WSL.
Маловероятно, что Project Latte будет включать поддержку сервисов Google Play, поскольку Google не разрешает устанавливать Play Services на какие-либо устройства, кроме Android-устройств и Chrome OS. Это означает, что приложения, которым требуются API-интерфейсы Play Services, необходимо будет обновить, чтобы убрать эти зависимости, прежде чем их можно будет отправить в Windows 10.
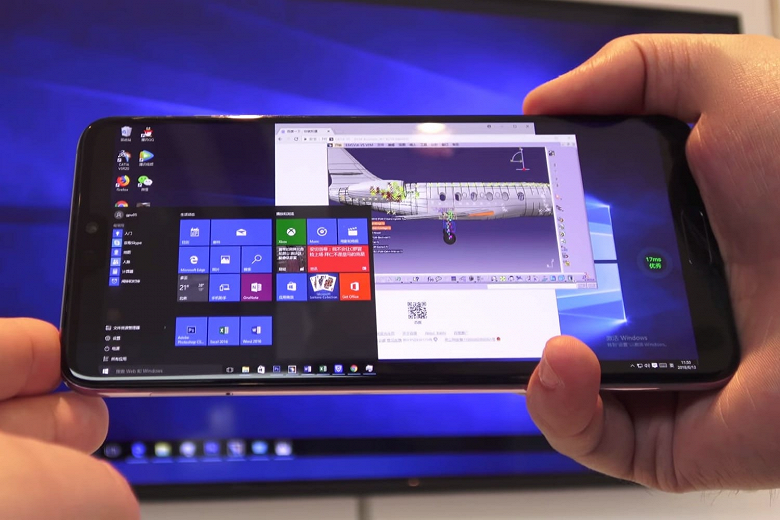
Сегодня пользователи могут запускать приложения Android на своих ПК через потоковую передачу приложений с помощью приложения «Ваш телефон», встроенного в Windows 10, но эта функциональность ограничена несколькими устройствами Samsung. Возможность устанавливать и запускать Android-приложения локально на ПК не будет зависеть от того, какой у вас телефон.
Источник добавляет, что Microsoft представит Project Latte в следующем году и запустит проект вместе с осенним обновлением Windows 10.
Тестирование на устройстве или эмуляторе Android Test on an Android device or emulator
Существует несколько способов тестирования и отладки приложения Android с помощью реального устройства или эмулятора на компьютере Windows. There are several ways to test and debug your Android application using a real device or emulator on your Windows machine. В этом разделе описаны некоторые рекомендации. We have outlined a few recommendations in this guide.
Запуск на реальном устройстве Android Run on a real Android device
Чтобы запустить приложение на реальном устройстве Android, сначала необходимо включить устройство Android для разработки. To run your app on a real Android device, you will first need to enable your Android device for development. Параметры разработчика на Android были скрыты по умолчанию, начиная с версии 4,2, и их включение может варьироваться в зависимости от версии Android. Developer options on Android have been hidden by default since version 4.2 and enabling them can vary based on the Android version.
Подготовка устройства к разработке Enable your device for development
Для устройства под управлением последней версии Android 9.0 +: For a device running a recent version of Android 9.0+:
- Подключите устройство к компьютеру разработки Windows с помощью USB-кабеля. Connect your device to your Windows development machine with a USB cable. Вы можете получить уведомление для установки драйвера USB. You may receive a notification to install a USB driver.
- Откройте экран параметров на устройстве Android. Open the Settings screen on your Android device.
- Выберите о телефоне. Select About phone.
- Прокрутите вниз и коснитесь пункта номер сборки семь раз, пока вы не станете разработчиком! Scroll to the bottom and tap Build number seven times, until You are now a developer! . is visible.
- Вернитесь на предыдущий экран, выберите система. Return to the previous screen, select System.
- Выберите Дополнительно, прокрутите вниз и нажмите кнопку Параметры разработчика. Select Advanced, scroll to the bottom, and tap Developer options.
- В окне Параметры разработчика прокрутите вниз, чтобы найти и включить отладку по USB. In the Developer options window, scroll down to find and enable USB debugging.
Сведения об устройстве, на котором работает более старая версия Android, см. в разделе Настройка устройства для разработки. For a device running an older version of Android, see Set Up Device for Development.
Запуск приложения на устройстве Run your app on the device
На панели инструментов Android Studio выберите свое приложение в раскрывающемся меню Run Configurations (конфигурации запуска ). In the Android Studio toolbar, select your app from the run configurations drop-down menu.
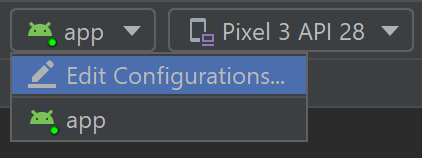
В раскрывающемся меню целевое устройство выберите устройство, на котором требуется запустить приложение. From the target device drop-down menu, select the device that you want to run your app on.

Выберите запустить ▷. Select Run ▷. Это приведет к запуску приложения на подключенном устройстве. This will launch the app on your connected device.
Запуск приложения на виртуальном устройстве Android с помощью эмулятора Run your app on a virtual Android device using an emulator
Первое, что нужно узнать о запуске эмулятора Android на компьютере Windows, это то, что независимо от интегрированной среды разработки (Android Studio, Visual Studio и т. д.) производительность эмулятора значительно улучшена за счет поддержки виртуализации. The first thing to know about running an Android emulator on your Windows machine is that regardless of your IDE (Android Studio, Visual Studio, etc), emulator performance is vastly improved by enabling virtualization support.
Включить поддержку виртуализации Enable virtualization support
Перед созданием виртуального устройства с помощью эмулятора Android рекомендуется включить виртуализацию, включив компоненты Hyper-V и платформы низкоуровневой оболочки Windows (ВХПКС). Before creating a virtual device with the Android emulator, it is recommended that you enable virtualization by turning on the Hyper-V and Windows Hypervisor Platform (WHPX) features. Это позволит процессору компьютера значительно повысить скорость выполнения эмулятора. This will allow your computer’s processor to significantly improve the execution speed of the emulator.
Для запуска платформы Hyper-V и низкоуровневой оболочки Windows компьютер должен: To run Hyper-V and Windows Hypervisor Platform, your computer must:
- Доступно 4 ГБ памяти Have 4GB of memory available
- Наличие 64-разрядного процессора Intel или ЦП AMD ризен с преобразованием адресов второго уровня (SLAT) Have a 64-bit Intel processor or AMD Ryzen CPU with Second Level Address Translation (SLAT)
- Запустите Windows 10 Build 1803 + (Проверьте номер сборки) Be running Windows 10 build 1803+ (Check your build #)
- Обновлены графические драйверы (диспетчер устройств > видеоадаптеры, > обновление драйвера) Have updated graphics drivers (Device Manager > Display adapters > Update driver)
Если компьютер не соответствует этим критериям, вы можете запустить гипервизор Intel HAXM или AMD. If your machine doesn’t fit this criteria, you may be able to run Intel HAXM or AMD Hypervisor. Дополнительные сведения см. в статье аппаратное ускорение для производительности эмулятора или в документации по эмулятору Android Studio. For more info, see the article: Hardware acceleration for emulator performance or the Android Studio Emulator documentation.
Убедитесь, что оборудование и программное обеспечение компьютера совместимы с Hyper-V, открыв командную строку и введя следующую команду: systeminfo Verify that your computer hardware and software is compatible with Hyper-V by opening a command prompt and entering the command: systeminfo

В поле поиска Windows (в нижнем левом углу) введите «компоненты Windows». In the Windows search box (lower left), enter «windows features». Выберите Включение или отключение компонентов Windows в результатах поиска. Select Turn Windows features on or off from the search results.
После появления списка компонентов Windows прокрутите экран, чтобы найти Hyper-V (включая средства управления и платформу) и платформу низкоуровневой оболочки Windows, убедитесь, что флажок установлен, чтобы включить обе функции, а затем нажмите кнопку ОК. Once the Windows Features list appears, scroll to find Hyper-V (includes both Management Tools and Platform) and Windows Hypervisor Platform, ensure that the box is checked to enable both, then select OK.
Перезагрузите компьютер при появлении соответствующего запроса. Restart your computer when prompted.
Эмулятор для разработки машинного кода с Android Studio Emulator for native development with Android Studio
При создании и тестировании собственного приложения Android рекомендуется использовать Android Studio. When building and testing a native Android app, we recommend using Android Studio. Когда приложение будет готово к тестированию, вы можете создать и запустить приложение, выполнив следующие действия. Once your app is ready for testing, you can build and run your app by:
На панели инструментов Android Studio выберите свое приложение в раскрывающемся меню Run Configurations (конфигурации запуска ). In the Android Studio toolbar, select your app from the run configurations drop-down menu.
В раскрывающемся меню целевое устройство выберите устройство, на котором требуется запустить приложение. From the target device drop-down menu, select the device that you want to run your app on.
Выберите запустить ▷. Select Run ▷. Запустится Android Emulator. This will launch the Android Emulator.
После установки приложения на устройстве эмулятора можно использовать параметр Применить изменения для развертывания определенных изменений кода и ресурсов без создания нового apk. Once your app is installed on the emulator device, you can use Apply Changes to deploy certain code and resource changes without building a new APK.
Эмулятор для кросс-платформенной разработки с помощью Visual Studio Emulator for cross-platform development with Visual Studio
Для компьютеров с Windows доступно множество вариантов эмулятора Android . There are many Android emulator options available for Windows PCs. Мы рекомендуем использовать эмулятор AndroidGoogle, так как он предоставляет доступ к последним образам ОС Android и Google Play службам. We recommend using Google’s Android emulator, as it offers access to the latest Android OS images and Google Play services.
Установка эмулятора Android с помощью Visual Studio Install Android emulator with Visual Studio
Если вы еще не установили его, скачайте Visual Studio 2019. If you don’t already have it installed, download Visual Studio 2019. Используйте Visual Studio Installer, чтобы Изменить рабочие нагрузки и убедиться, что у вас есть Рабочая нагрузка для разработки мобильных приложений на .NET. Use the Visual Studio Installer to Modify your workloads and ensure that you have the Mobile development with .NET workload.
Создайте новый проект. Create a new project. После настройки Android Emulatorможно использовать Android Device Manager для создания, дублирования, настройки и запуска различных виртуальных устройств Android. Once you’ve set up the Android Emulator, you can use the Android Device Manager to create, duplicate, customize, and launch a variety of Android virtual devices. Запустите Android Device Manager из меню Сервис с помощью средства: инструменты > Android > Android Device Manager. Launch the Android Device Manager from the Tools menu with: Tools > Android > Android Device Manager.
После открытия Android Device Manager выберите + создать , чтобы создать новое устройство. Once the Android Device Manager opens, select + New to create a new device.
Необходимо присвоить имя устройству, выбрать тип базового устройства из раскрывающегося меню, выбрать процессор и версию ОС, а также несколько других переменных для виртуального устройства. You will need to give the device a name, choose the base device type from a drop-down menu, choose a processor, and OS version, along with several other variables for the virtual device. Дополнительные сведения см. Android Device Manager главном экране. For more information, Android Device Manager Main Screen.
На панели инструментов Visual Studio выберите Отладка (присоединяется к процессу приложения, выполняемому в эмуляторе после запуска приложения) или режим выпуска (отключает отладчик). In the Visual Studio toolbar, choose between Debug (attaches to the application process running inside the emulator after your app starts) or Release mode (disables the debugger). Затем выберите виртуальное устройство в раскрывающемся меню устройство и нажмите кнопку Play ▷ ( воспроизвести ), чтобы запустить приложение в эмуляторе. Then choose a virtual device from the device drop-down menu and select the Play button ▷ to run your application in the emulator.


