- 5 Ways | How to Take a Picture on a Computer with Webcam
- How to Take a Picture on a Computer on Windows 10В
- Method 1. Taking Pictures with Webcam Using EaseUS RecExperts
- Method 2. Taking Pictures with WebcamUsing Windows Camera
- How to Take a Photo on a Computer on MacВ
- How to Take Picture from Webcam OnlineВ
- #1. Webcam Toy
- #2. Pixect
- ConclusionВ
- FAQs About How to Take a Photo on a ComputerВ
- How to use the Camera app
5 Ways | How to Take a Picture on a Computer with Webcam
«I need to take an identification photo that can be attached to my CV, but my camera is not working. What should I do?»
When we rely too heavily on electronic products, digital photography plays a more critical role in our daily lives. However, there are always somethings unpredicted. For example, if you need a real-time image when your camera and mobile phone can not work, how to deal with this situation?
In this kind of emergency, the last resort for you maybe your computer or laptop. But, do you know how to take a picture on a computer? If not, this post will guide you on taking photos with your Webcam on different devices.В
How to Take a Picture on a Computer on Windows 10В
If you are using a laptop equipped with an integrated Webcam, it’s pretty easy for you to take a picture. At the same time, you need toВ install one before continuing ifВ you have a computer without any camera.В After all the preparations have been done, let’s start the detailed steps.
Method 1. Taking Pictures with Webcam Using EaseUS RecExperts
Firstly, we need to download EaseUS RecExperts for Windows, an excellent tool that can satisfy most of your screen recording needs. It can capture what is shown on the Webcam and export it as a dynamic video or a static picture. By taking advantage of this functionality, you can take photos for yourself with ease.
Besides that, this intuitive software’s powerful functions also enable you to record a variety of materials. If you are curious about how to record gameplay on PC and how to record zoom meeting, download this recorder now, it will give you the best solutions.В
Stunning Features:
- Record a full or some specific area on a PC screen
- Upload your recording directly to major platforms, such as YouTube or Dropbox
- Record sound from computer and microphone audio respectively or together
- Enhance the recordings by adding text, lines, arrows, images
- Edit output videos with free video editor without watermark
If you need a beneficial tool that enables you toВ take Webcam photo, this recorder must be the suitable choice for you. Download it and have a try.
How to Take a Picture with Your Webcam Windows 10:
The following detailed tutorial will tell you the most efficient and simple way to do that.
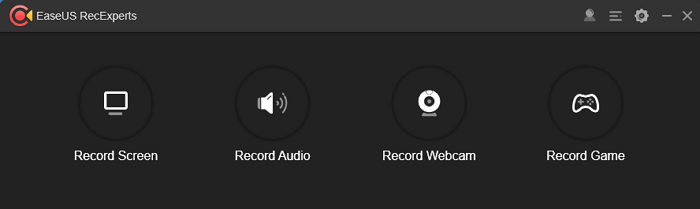
Step 1.В Launch EaseUS RecExperts. Choose «Record Screen» among those four options on the main interface.В
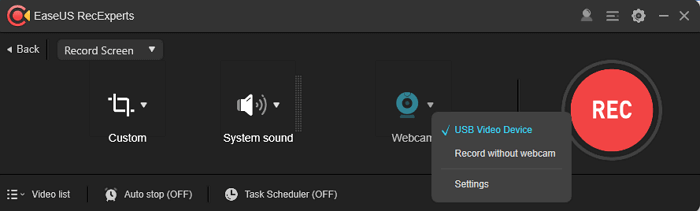
Step 2.В Click the icon of the Webcam, then select the Webcam that you plan to use. Click «Settings» to adjust the output resolution, position, and shape of your picture.В
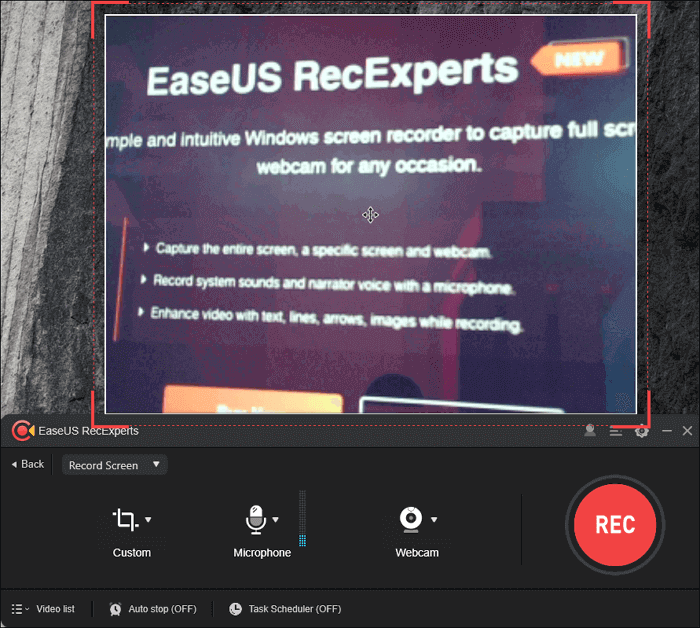
Step 3.В Drag the Webcam rectangle to adjust the size of your picture. After that, click Custom > Select region, choose the Webcam rectangle as your recording area.В
Then, click the «REC» button and wait for 3 seconds.В
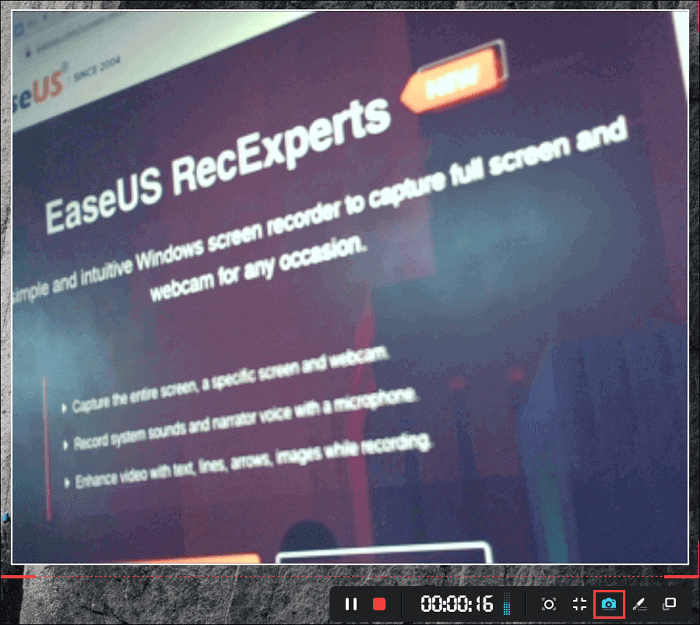
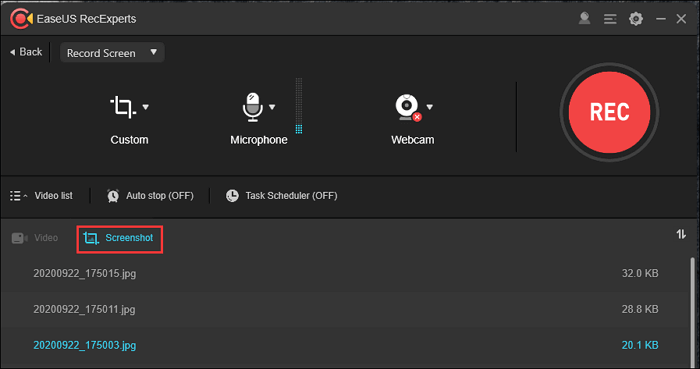
Step 4.В В Confirm the image that you want to take, then click the icon of a little camera on the toolbar at the right bottom. When you finish that, click the red small «Stop» button on the toolbar.В
Step 5.В Choose the Screenshot under the Video list, and you can see all the pictures you just took.В
Don’t be hesitate to try out the best screen recorder. Download it now.
Method 2. Taking Pictures with WebcamUsing Windows Camera
As is well known, there is a pre-installed application, which is named «Camera» on Windows 10 computers. The camera application is so single-function that you can only change your photo’s resolution and frame rate, rather than any other properties. That may cause inconvenience to you.В
How to Take Picture Using Webcam:
But if you value convenience as the essential element, you can check the following steps.В
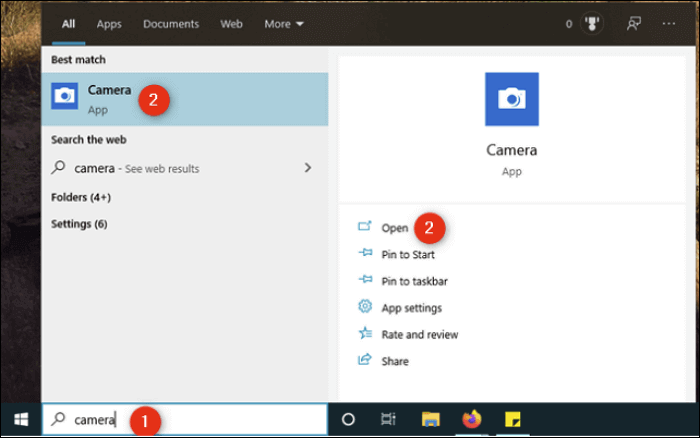
Step 1. Click the search box from the taskbar at the bottom left and type in the word «camera.» Then, click the Camera app to launch it.В
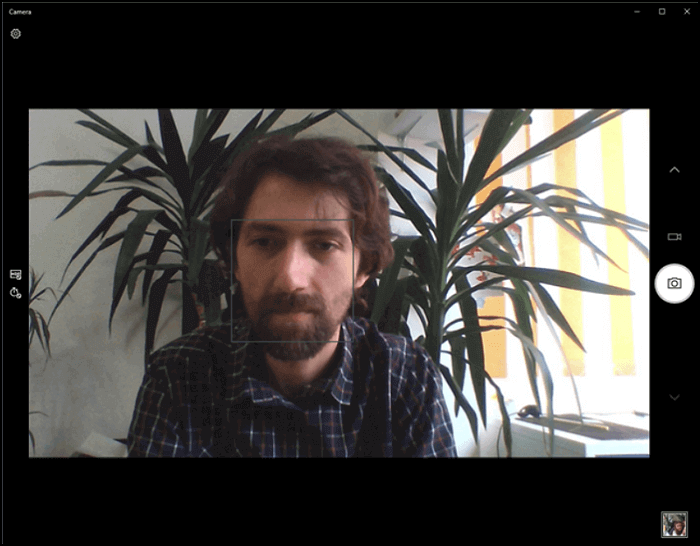
Step 2. Face your Webcam toward whatever you want to photograph. You should see your subject’s image on the screen.В
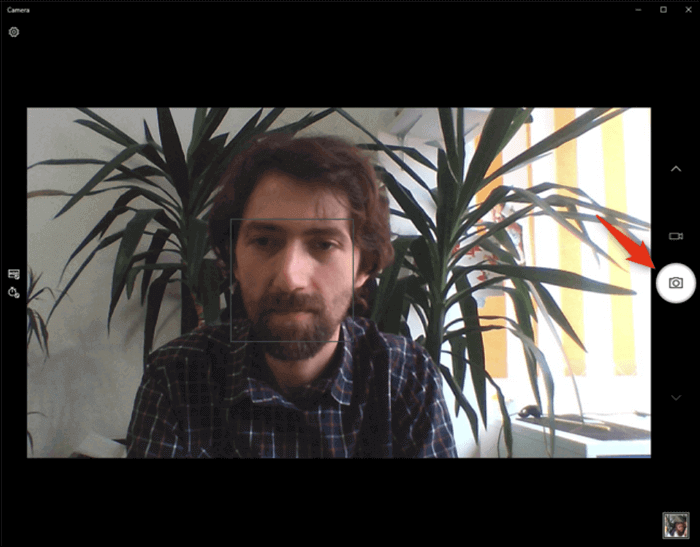
Step 3. Click the «Take Photo» button on the right side of the Camera app. After that, tap the thumbnail at the bottom right to check the picture that you just took.В
How to Take a Photo on a Computer on MacВ
If you are a MacBook user, it’s not a big problem for you to snap a few pictures with your friends using your computer. There is a built-in software in MacBook, and it is called Photo Booth.В
You can apply effects with real-time previews and easily snapshots using your front-facing FaceTime HD camera. Share with friends with just a tap.
Features:
- Take photos using both front-facing FaceTime HD camera and rear-facing camera
- Apply fun, real-time effects like Twirl, Light Tunnel, X-Ray, Squeeze, and Kaleidoscope to stylize your shots
- Tap to share using AirDrop, Mail, Messages, iCloud, or your favorite social network
How to Take Pictures with Your Webcam on Mac:
This tutorial will give you the most efficient way to take a picture with your MacBook.В
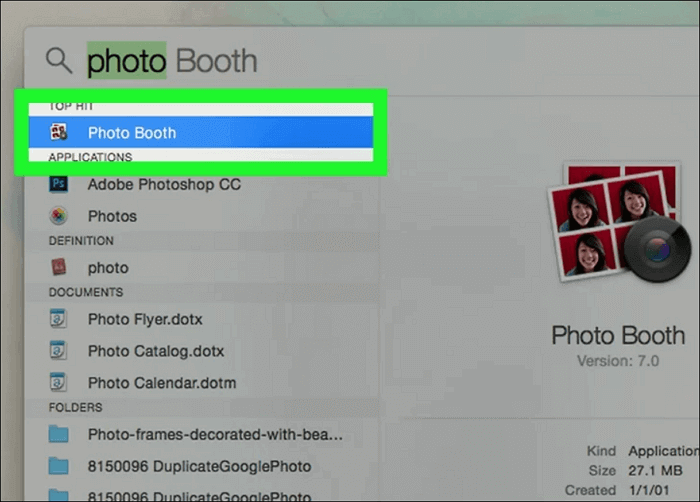
Step 1. Type the word «photo booth» into the spotlight, and then launch Photo Booth.
Step 2. Click the red button with the white camera icon. It should be located at the bottom-middle portion of the screen that appears.
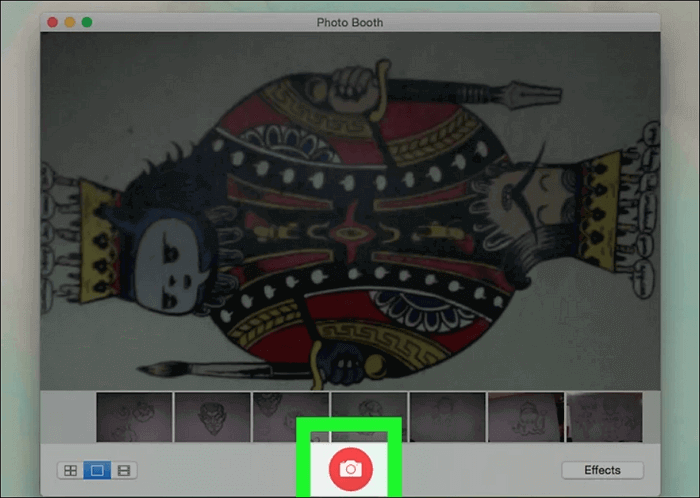
Your photo will then appear with the other images you’ve taken along the bottom of the screen.

Besides the pre-installed Mac program, you can also use a lightweight yet user-friendly third-party software named EaseUS RecExperts for Mac. Download it and take a pic with Webcam now.

How to Take Picture from Webcam OnlineВ
In addition to the applications we mentioned, some online camera tools can be easily used. If you want to add some special filters, overlays, and other effects to your picture, try to use those online tools.В
#1. Webcam Toy
It is a very trendy online Webcam recorder among young people all around the world. They usually utilize Webcam Toy to take selfies and share those pictures on social media platforms to surprise their friends.В
Features:В
- Various mirror effects and color effects
- Output pictures of high-resolution
- Powerful video and photo editing tools are available
- Easy-to-use interfaceВ
How to Take Pictures on PCВ with Webcam Toy:
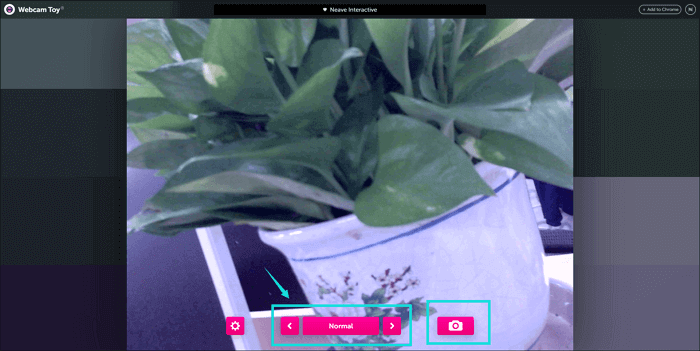
Step 1. Open the homepage of Webcam Toy. Click the «Ready? Smile!» button at the center of the user interface.

Step 2. You can tap the Effects option to select your favorite one, then click the camera’s icon to take a picture.В
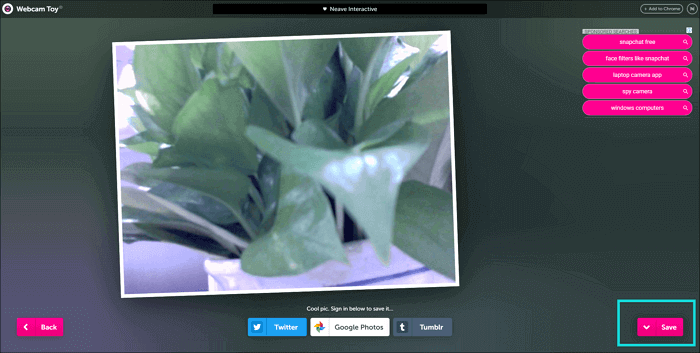
Step 3. Fewer seconds later, click the «Save» button at the bottom right and choose the folder to save your picture.В
Try: https://Webcamtoy.com/
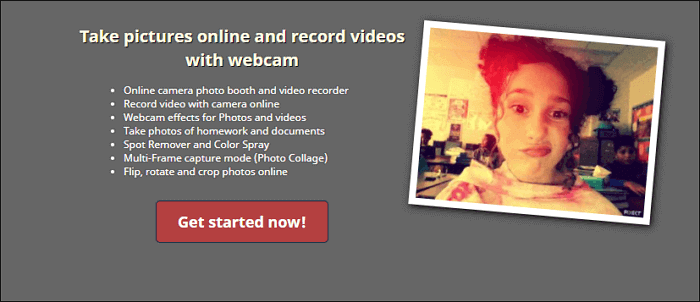
#2. Pixect
Pixect has more functions than another online Webcam recorder we mentioned above. You can use it to record both photos and videos. Therefore, if you want to show some dynamic scenes to your friends, Pixect could be a fantastic choice.В
Features:В
- Webcam effects for Photos and videos
- Spot Remover and Color Spray
- Multi-Frame capture modeВ
- Flip, rotate, and crop photos online
How to Take Picture with Webcam with Pixect:
Step 1. Open the homepage of Pixect and click the «Get started now!» at the center of the interface.
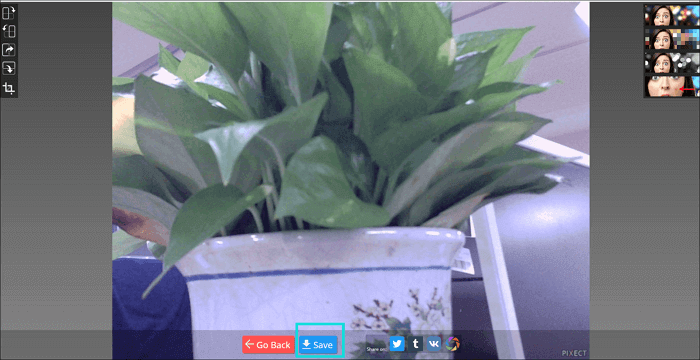
Step 2. Select the effect and photo collage, then click the camera icon to take a picture.В

Step 3. Click the «Save» button to save the picture you just took.
Try: https://www.pixect.com/
ConclusionВ
This post discussed several Webcam recording tools to help you take a picture when your camera or mobile phone can not work.В
All in all, EaseUS RecExperts is a suitable one. You can take beautiful pictures with this screen recorder by adjusting the Webcam properties until it’s perfect. Don’t be hesitate to download it!
FAQs About How to Take a Photo on a ComputerВ
If you still have some questions about taking pictures on your laptop, check these FAQs right now.
1. How do you take a screenshot on Windows?
Method 1. Press the PrtScn button to copy the screen to the clipboard.
Method 2. Press the Windows+PrtScn buttons on your keyboard to save the screen to a file.
Method 3. Use the built-in Snipping Tool.
Method 4. Use the Game Bar in Windows 10.
2. How to take a photo on a laptop?
How do IВ take a picture with my laptop? You may want to get the answer to that question. ToВ take picture with laptop, you only need toВ follow the tutorial below.
Step 1. Click the search box from the taskbar at the bottom left and type in the word «camera.» Then, click the Camera app to launch it.В
Step 2. Face your Webcam toward whatever you want to photograph. You should see your subject’s image on the screen.В
Step 3. Click the «Take Photo» button on the right side of the Camera app. After that, tap the thumbnail at the bottom right to check the picture that you just took.В
3. How do you take a picture on a computer?
How do you take a photo on a computer? There is a guide to get that done. Follow it to take a picture on a computer now.
Step 1. Launch EaseUS RecExperts. Choose «Record Screen» among those four options on the main interface.В
Step 2. Click the icon of the Webcam, then select the Webcam that you plan to use. Click «Settings» to adjust the output resolution, position, and shape of your picture.В
Step 3. Drag the Webcam rectangle to adjust the size of your picture. After that, click Custom > Select region, choose the Webcam rectangle as your recording area.В
Step 4.В Confirm the image that you want to take, then click the icon of a little camera on the toolbar at the right bottom. When you finish that, click the small red «Stop» button on the toolbar.В
Step 5. Choose the Screenshot under the Video list, and you can see all the pictures you just took.В
How to use the Camera app
If your PC has a built-in camera or a connected webcam, you can use the Camera app to take photos and videos. To find the Camera app, select Start > Camera.
Select any heading below. It’ll open to show more info about using your camera or webcam.
To find the Camera app, select Start > Camera. After you open the Camera app:
Select Photo or Video , then select it again to take a picture or start a video. If you are making a video, select Video again to finish recording.
To see your new photo or video, or ones you’ve taken before, select Start > Photos and then choose the Collection you want to see.
To change camera options for your camera, like the framing grid or photo quality, select Start > Camera > Settings .
If your device has more than one camera, like a front-facing and a rear-facing camera, here’s how to switch from one to the other:
Select Start > Camera > Change camera.
In Windows 10 the Camera app doesn’t include digital zoom, but you can get an effect similar to zooming if you take a photo and then crop it:
Select Start > P hotos .
Choose the photo you want to crop.
Select Crop & rotate .
Select Aspect ratio and pick from the preset options or drag the borders where you want them.
Select Save a copy > Save.
You can get the photos and videos you take with the Camera app to automatically save to OneDrive, so you can find them on any of your devices.
In the search box on the task bar, type File explorer and then select Open.
Select This PC, right-click on the Pictures folder, and then select Properties.
Select the Location tab, and then select Move.
Select OneDrive > Select Folder > Move.
In the search box on the task bar, type File Explorer and then select Open.
Select This PC, right-click on the Videos folder, and then select Properties.
Select the Location tab, and then select Move.
Select OneDrive > Select Folder > Move.
The Camera app can use latitude and longitude info if you take photos from a tablet or camera that uses location info and is connected to the internet or a mobile network. To do this:
Select Start > Settings > Privacy > Location .
Make sure that the location service is turned on, and then under Choose which apps can access your precise location, turn on Camera.
You can choose which apps use the camera. To block all apps from the camera:
Select Start > Settings > Privacy > Camera .
Turn off Allow apps to access your camera.
To turn on the camera for some apps, and turn it off for others:
Select Start > Settings > Privacy > Camera .
Turn on Allow apps to access your camera.
Toggle the switches to change which apps in this list have camera access turned on or off.
You can turn the camera off completely:
In the search box on the taskbar, type device manager, then select Device Manager in the list of results.
Select the arrow next to Cameras to expand the tree.
Right-click the camera you want to turn off.
Select Disable device.
To keep the Camera app from using the camera on your device, turn off the camera completely.
If you have problems with the Camera app after changing privacy settings, close it, then open it again.
If your built-in camera or connected camera has stopped working, here are some things you can try to get it working again:
Disconnect the camera from your PC, then reconnect it.
If that doesn’t help, there might be a problem with the camera’s drivers. You can install driver updates from your camera’s manufacturer, or you can use your PC’s default drivers.
To install updates from the manufacturer:
In the search box on the taskbar, type Device Manager and then select Open.
Select Cameras and then right-click on the webcam that’s having problems.
Select Scan for hardware changes, select the webcam again, and see what’s going on with your webcam in Device status. If it’s not working properly, contact the manufacturer for more info.
Restart your PC.
To install your PC’s default drivers:
In the search box on the taskbar, type Device Manager, then select Open.
Select Cameras and then right-click on the camera that’s having problems.
Select Update driver, then choose Search automatically for updated driver software.
When installation is complete, follow the instructions, then select Close.
Restart your PC.
If you don’t see your camera in Device Manager, see Camera does not work in Windows 10.
If the suggestions here don’t solve your problem, check the Music, photos, and video community page or the Devices & drivers community page in the Windows forum for solutions that other people have found for specific problems with hardware or error messages.
If your PC has a built-in camera or a connected webcam, you can use the Camera app to take photos and videos. To find the Camera app, select Start > Camera.
Select any heading below. It’ll open to show more info about using your camera or webcam.
After you open the Camera app, select the left arrow.
You can change some options for your camera in Settings, like showing grid lines to help you compose a photo, or including location info in your photos.
Open the Camera app.
Swipe in from the right edge of the screen, and then select Settings.
Adjust the settings for each option. These might include:
Change the photo aspect ratio or video quality.
Turn location info on or off.
Show or hide grid lines.
Turn video stabilization on or off.
Turn the microphone on or off.
Turn the video lamp on or off.
Change what happens when you tap the screen.
If your device has more than one camera, like a front-facing and a rear-facing camera, you can switch cameras before taking a photo or video.
Open the Camera app.
Swipe in from the bottom edge to see the app commands. If you’re using a mouse, right-click within the app.
Select Change camera.
If your device has a touchscreen, you can zoom in or out by using two fingers to pinch or stretch the image on your screen.
You can get an effect similar to zooming in if you take a photo and then crop it.
Swipe to the right or select the left arrow to see your recent photos and videos. Keep swiping or clicking the left arrow until you find the photo you want to crop.
Swipe in from the bottom edge to see the app commands. If you’re using a mouse, right-click within the app.
Select Aspect ratio and pick from the preset options or drag the borders where you want them.
Save the cropped photo. You can update the original photo or save a copy with your changes.
You can get the photos and videos you take with the Camera app to automatically save to OneDrive, where you can get to them from your other devices. You can choose what quality to use when uploading photos too.
Swipe in from the right edge of the screen, and select Settings > Change PC settings.
Go to OneDrive, and then Camera roll.
Select the settings to use for your photo and video uploads.
If your tablet or camera supports including location info and can connect to the internet or a mobile network when you take the photo, the Camera app can include latitude and longitude info with your photos.
Open the Camera app.
Swipe in from the right edge of the screen, and then select Settings.
Set Location info to On.
Turn the camera off for apps
You can choose to turn off the camera for specific apps while allowing other apps to use it, or you can turn the camera off completely.
Swipe in from the right edge of the screen, select Settings > Change PC settings.
Select Privacy > Webcam.
Set Let apps use my webcam to Off or turn it off for specific apps.
Disable the camera
Swipe in from the right edge of the screen, and then select Search.
Type Device Manager in the search box.
Select Device Manager.
Expand Imaging Devices.
Right-click the camera, and then select Disable.
Prevent the camera from being used when your PC is locked
Swipe in from the right edge of the screen, and then select Settings > Change PC settings.
Select PC and devices, and then select Lock screen.
Turn off Swipe down on the lock screen to use the camera.
Note: To keep the Camera app from using the camera, turn off the camera completely. Drag the app to the bottom of the screen and hold it there until the app flips over.
If you have problems with the Camera app after changing privacy settings, close it and re-open it.
If you’ve connected a camera to your PC and the camera stops working, here are some things you can try to get it working again:
Disconnect the camera from your PC, then reconnect it.
Close the app. Drag the app to the bottom of the screen and hold it there until the app flips over.
If that doesn’t help, there might be a problem with the camera’s drivers. You can install driver updates from your camera’s manufacturer, or you can use your PC’s default drivers.
To install updates from the manufacturer:
Swipe in from the right edge of the screen and then tap Search. (If you’re using a mouse, point to the lower-right corner of the screen, move the mouse pointer up, and then click Search.) Then enter Device Manager in the search box, select Settings, and select Device Manager in the results.
Expand Imaging devices.
Right-click the camera that’s having problems, and select Update Driver Software.
Select Search automatically for updated driver software, and then follow the on-screen instructions. This might include restarting your PC.
To install your PC’s default drivers:
Swipe in from the right edge of the screen, and then tap Search. (If you’re using a mouse, point to the lower-right corner of the screen, move the mouse pointer up, and then click Search.) Then enter Device Manager in the search box, select Settings, and select Device Manager in the results.
Expand Imaging devices.
Right-click the camera that’s having problems, and select Update Driver Software.
Select Browse my computer for driver software.
Select Let me pick from a list of device drivers on my computer.
Select USB Video Device, select Next, and then follow the on-screen instructions. This might include restarting your PC.
If the suggestions here don’t solve your problem, check the Music, photos, and video community page or the Devices & drivers community page in the Windows forum for solutions that other people have found for specific problems with hardware or error messages.


