- Fix: The Disk Check Could not be Performed Because Windows Cannot Access the Disk
- Solution 1: Check the connection between the hard drive and the computer
- Solution 2: Change the drive letter assigned to the affected hard drive
- Solution 3: Have the hard drive looked at professionally
- Here’s what you need to do if Windows cannot access the disk
- How can I fix Windows cannot access the disk USB drive error?
- 1. Check your drive connection
- 2. Change your drive letter
- 3. Run check disk in Command Prompt
- Thread: Windows Cannot Access Disk
- Windows Cannot Access Disk
- Error: «The disk check could not be performed because windows cannot access the disk.»
- Replies (2)
Fix: The Disk Check Could not be Performed Because Windows Cannot Access the Disk
 If a Windows user connects an external hard drive to their computer, the hard drive and its partitions show up in My Computer or Computer along with all the other drives connected to the computer. However, in some cases, the external hard drive does show up but cannot be opened and, when the user right-clicks on it and clicks on Properties, shows as having 0 bytes of Used space and 0 bytes of Free space. The first thing a user affected by this problem does, in most cases, is run CHKDSK – a built-in Windows utility designed to scan hard drives for errors and bad sectors and try to fix any that it finds.
However, when you try to run CHKDSK on a hard drive affected by this problem from either an elevated Command Prompt or by right-clicking on the drive and going in to Properties > Tools > Check now…, the error check fails and the following error message is displayed:
“The disk check could not be performed because Windows cannot access the disk.”
If you can’t run CHKDSK on an external hard drive that your computer, for some reason, can’t access, you can’t scan it for errors and bad sectors and try to fix them. In addition, there is also no telling if attempts at data recovery using recovery programs will yield any positive outcomes. On the bright side, however, the following are some of the most effective solutions that any Windows user affected by this problem can use to try to get rid of this error message and successfully run CHKDSK on the affected hard drive:
Solution 1: Check the connection between the hard drive and the computer
In some cases, the culprit behind the “The disk check could not be performed because Windows cannot access the disk.” error message can be as trivial as a loose connection between your computer and the affected hard drive. If you’re seeing this error message while trying to run CHKDSK, the first thing you should do is check the connection between the affected hard drive and the computer to make sure it’s secure and to make sure the cable connecting the two is good.
Solution 2: Change the drive letter assigned to the affected hard drive
The absolute most effective method that users in similar circumstances have used to successfully get rid of the “The disk check could not be performed because Windows cannot access the disk.” error message and successfully run CHKDSK on the affected hard drive is changing the drive letter assigned to the affected hard drive. Every hard drive connected to a Windows computer is assigned a specific letter of the alphabet, and Windows users can manually change the letters assigned to any and all of their hard drives. To change the drive letter assigned to the affected hard drive, you need to:
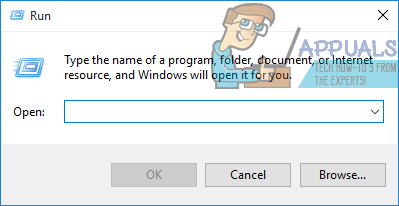
- Press the Windows Logo key + R to open a Run dialog.

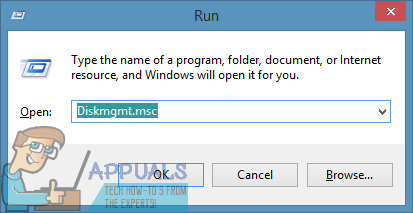
- Type diskmgmt.msc into the Run dialog and press Enter to launch the Disk Management utility.
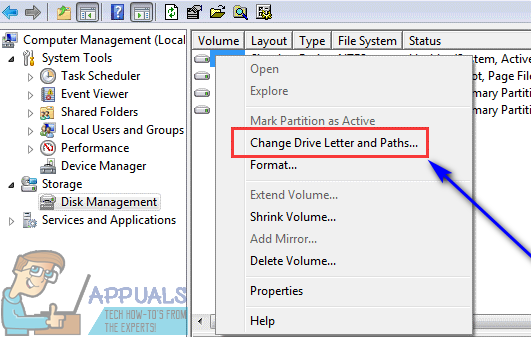
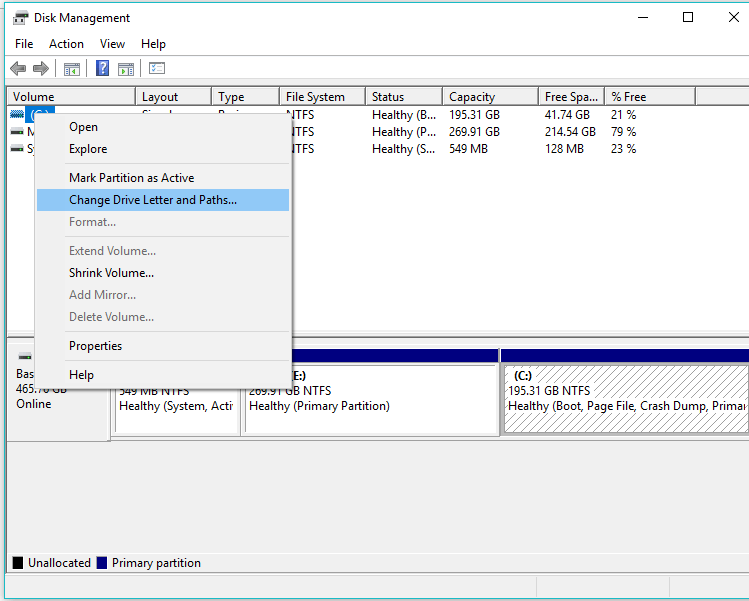
- In the list of drives connected to your computer, locate and right-click on the affected external hard drive, and click on Change Drive Letter and Paths….
- In the window that pops up, click on the current drive letter assigned to the drive to select it and click on Change.
- Open the dropdown menu located directly in front of Assign the following drive letter: and click on whatever new drive letter you want to be assigned to the drive to select it.
- Click on OK.
- Click on OK in the Change Drive Letter and Paths for X: () window.
- Close the Disk Management utility and restart your computer.
When the computer boots up, try running CHKDSK on the affected external hard drive and check to see if the problem persists.
Solution 3: Have the hard drive looked at professionally
If neither of the solutions listed and described worked for you, there might be a hardware issue at work here or the hard drive might just be dead or damaged beyond repair. If that’s the case, now would be the time to send the hard drive in to the professionals to have it looked at. If the affected external hard drive is under any kind of warranty, you should certainly send the hard drive in and claim its warranty.
Here’s what you need to do if Windows cannot access the disk

- Download Restoro PC Repair Tool that comes with Patented Technologies (patent available here).
- Click Start Scan to find Windows issues that could be causing PC problems.
- Click Repair All to fix issues affecting your computer’s security and performance
- Restoro has been downloaded by 0 readers this month.
Sometimes you can suddenly receive Windows cannot access the disk error. Usually, this type of error is associated with Windows Explorer, but it can be caused by improper operations, malware, or even a faulty power connection. However, there’s a way to fix this problem.
How can I fix Windows cannot access the disk USB drive error?
1. Check your drive connection
First things first, please ensure that all cables are properly connected between your storage devices and the computer. If you’re using external hard drives, go by unplugging that disk or try a different cable on a different USB port.
Next, you should restart your computer. In the event that this didn’t work, you should try connecting your storage device to other machines.
2. Change your drive letter
Sometimes you can fix Windows cannot access the disk error simply by changing the drive letter of the hard drive can sometimes fix this problem.
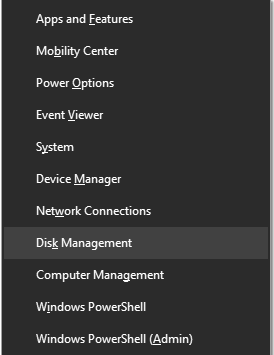
- Press Windows + X to open the Win + X menu.
- Click on Disk Management.
- In the Disk Management window, you will find a list of drives associated with your system. Select your hard drive from the list and right-click on it.
- Click on Change Drive Letter and Paths.
- Next, click on the letter currently associated with your drive and click on Change.
- Select a new drive letter from the drop-down menu and click.
- After you’ve completed this, restart your machine.
3. Run check disk in Command Prompt
If you’re still having Windows cannot access the disk error, you might want to try using chkdsk scan. But do keep in mind that if chkdsk tries to repair bad sectors, data on that drive might be lost.
- Click on the Start button and click on Programs and Accessories, then right-click Command Prompt and select Run as administrator.
- Type command the drive letter in Command Prompt and press Enter.
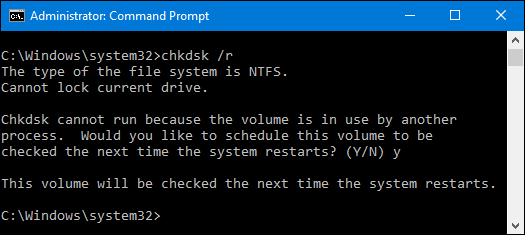
- Type chkdsk /r and press Enter (in the event that you are prompted to dismount and schedule chkdsk on next restart, press Y and press enter).
- Restart your computer.
- You’re all set.
Hint
If you fear losing valuable data, we recommend backing-up data or even performing data recovery solutions.
Always remember, the following issues might be affecting your drive, if it’s not accessible:
- Malware removes the drive letter.
- The system does not allocate letters for some special partitions, for example, the system reserved partition.
- Users remove the drive letter by mistake.
We hope you managed to fix Windows cannot access the disk error using one of our solutions. In the meantime, let us know what issues have you encountered with your disk drive.
RELATED STORIES TO CHECK OUT:
Thread: Windows Cannot Access Disk
Thread Tools
Display
Windows Cannot Access Disk
Whenever I try to mount an .iso image with DT Lite, and then open the drive with the .iso, I always get the notification ‘Windows cannot access this disc. The disc might be corrupt. Make sure that the disc uses a format Windows recognizes. If the disc is unformatted, you need format it before using it.’ I’ve mounted the .iso before with DT [it’s sat on my computer for months now], so I know it’s not the .iso’s problem.
I’m currently running Windows 7 64-bit edition.
Hello,
Are you sure your ISO file is not corrupted?
Is your problem reproducible for all images or for exact one?
In addition: where exactly is that image located (local, map drive etc.) ?
Last edited by Terramex : 07.08.2013 at 17:47
I’ve tried mounting another image with the same results, so I’m sure the ISO is not corrupted.
The image is located on my computer’s D: drive.
Can the ISO(s) be extracted with WinRAR (or the like) ?
Let’s hope it’s no spreading data corruption/dying disk drive.
Sorry, just to be on the safe side: D: is no map drive ?
Last edited by Terramex : 07.08.2013 at 19:40
Yes, the ISO can be extracted with WinRAR, and the drive is not a mapped drive (if I’m correct on what a map drive is — a drive that can be accessed by other computers on your network, correct?)
Can the ISO(s) be extracted with WinRAR (or the like) ?
Let’s hope it’s no spreading data corruption/dying disk drive.
Sorry, just to be on the safe side: D: is no map drive ?
This is one of the most recent posts online in regards to this issue. I’m running W7x64
I’m experiencing the same problem in which I can mount an image (I’ve tried 3 different programs including Daemon Tools, VCD, and Virtual CloneDrive by SlySoft). Explorer shows that there’s something in the drive but it’s inaccessible. You get «Windows can’t access this disc».
You can access the ISO through 7-ZIP / WinRAR and extract anything in the iso.
Clues or suggestions?
What’s the content of that image ?
Other images are working fine ?
Hey, Thanks for your quick response.
The content of the image could be anything both downloaded and self-created. I get the same behavior from any other images used.
I personally think that it might be the way the W7 is looking at VCDs and not a software issue.
What type of troubleshooting can we do to help determine where the issue is?
I have a desktop and a laptop, both use daemon tools and both eventually will get the «Windows cannot access this disk» message. I’m running Windows 7 x64 but this also happened on Windows 8 x64.
Once this issue occurs, nothing but a OS reinstall seems to fix the problem, i tried other mounting software like ultraIso, virtual clone drive, IM and none of those will mount a RAW partition DVD ROM which returns «Windows cannot access this disk» once you try to open it.
I have also tried to wipe SPTD by uninstalling and removing the registry keys but that does nothing too.
This is the fourth time that i have to reinstall my desktop and laptop because of this frustrating issue. There is no apparent solution for in on the web.
Any suggestions?
Error: «The disk check could not be performed because windows cannot access the disk.»
if i click properties on external hardisk , it has zero bytes free and used space, and if click the “check now” in tool tab under error checking it says ” The disk check could not be performed because windows cannot access the disk..
is there anything i can do the fix these ?? and be able to operate my external hard disk again? please help me
Original title: Hard disk Access Error
Replies (2)
![]()
Thank you for posting your query in Microsoft Community.
I can imagine the inconvenience you are experiencing and will certainly help you in the right direction to fix the issue. However, I would appreciate if you could answer a few questions to narrow down the issue in order to provide you with better assistance.
a. Did you make any significant hardware or software changes to the computer prior to this issue?
b. What is the make and model no. of the external hard disk drive (HDD)?
In order to diagnose and troubleshoot the root cause of the issue, I would suggest you to try the following methods and check if these are helpful.
Method 1:
I would suggest you to try changing the external hard drive’s drive letter and check if it helps:
a. Press Windows key + R, type diskmgmt.msc and click OK.
b. In the Disk Management window, right-click the drive that you want to change, and then click Change Drive Letter and Paths .
Note 1: You need to perform check disk operation on C: drive. So, the command to switch to C: drive would be chkdsk c: and followed by switches as given in the steps further.
b. /f = The /f switch is the most common of the chkdsk switches. It tells chkdsk to try and fix any errors it finds.
EX Type: chkdsk C:/f
Note 2: Answer Y when chkdsk asks you if you want to check the drive next time Windows boots (restarts).
c. /r = The /r switch tells chkdsk to attempt to recover any bad sectors of the hard drive if any are found. A bad sector is a spot on the hard drive that cannot hold saved data anymore.
EX Type: chkdsk c:/r
Note: Answer Y when chkdsk asks you if you want to check the drive next time Windows boots.
Warning: If check disk finds any bad sector, the data on the sector would be lost.
Hope this information is helpful. Do let us know if you need any further assistance, we will be glad to assist you.


