- Unable to access shared folder on Windows 10 [Super Guide]
- What to do if shared folder is not accessible on Windows 10?
- 1. Check the availability of the folder sharing setup on your PC
- 2. Enable network discovery
- 3. Check your PC’s credentials
- 4. Enable all Network services
- 5. Run the Shared Folder Troubleshooter
- Windows 7 File Sharing Problem
- Replies (8)
- How to connect to Windows 7 share from Windows 10 1803
Unable to access shared folder on Windows 10 [Super Guide]


Many Windows 10 users reported that Windows is unable to access the shared folder on their PC. This can be an issue, and in today’s article we’re going to show you how to fix this problem.
What can I do if I’m unable to access shared folder on Windows 10? First thing that you should do in order to fix this problem is to enable folder sharing and network discovery. To do that, just check your network settings window. If the problem is still there, make sure that the required services are running and are set to start automatically.
What to do if shared folder is not accessible on Windows 10?
- Check the availability of the folder sharing setup on your PC
- Enable network discovery
- Check your PC’s credentials
- Enable all Network services
- Run the Shared Folder Troubleshooter
1. Check the availability of the folder sharing setup on your PC
If you are unable to access a shared folder on Windows 10, the first thing to do is to check your system, to ascertain if the File Sharing setup is available. Normally, this setup is built-in on Windows; thus, it is usually present.
To run this check, follow the guidelines below:
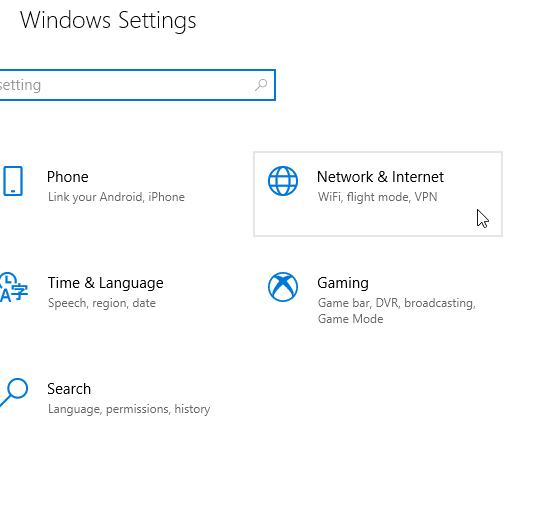
- Open the Start Menu and click on Settings.

- Select Network and Internet.
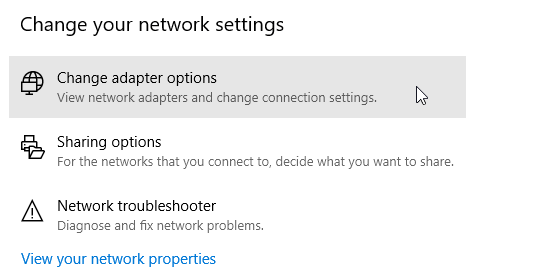
- Under Network and Internet, select Network and Sharing Center.
- Now click on Change adapter settings.
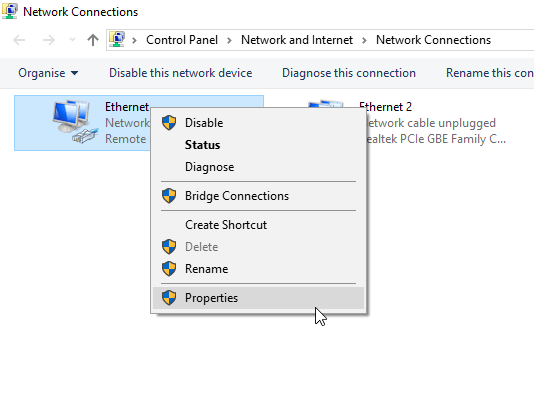
- Locate your network connection, right-click on it and select Properties.
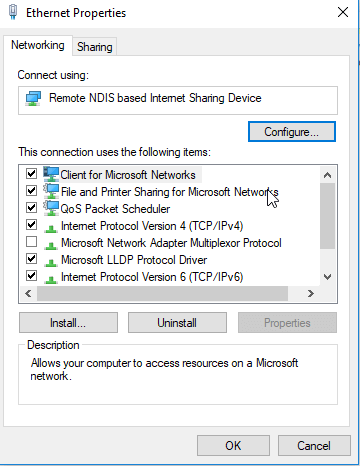
- Navigate to the This connection uses the following items area and then locate the File and Printer Sharing for Microsoft Networks.
- If the option is available, simply check the box next to it; otherwise, proceed.
- Click on the Install.
- Afterward, click OK.
- Exit the window and restart your PC.

If the problem persists, you can try the next fix.
2. Enable network discovery
In case you are experiencing the Windows 10 unable to access shared folder error, it is recommended you check if your PC‘s network is discoverable by other computers. To configure Network discovery on Windows 10, follow the simple steps below:
- Open the Settings app.
- Select Network and Internet.
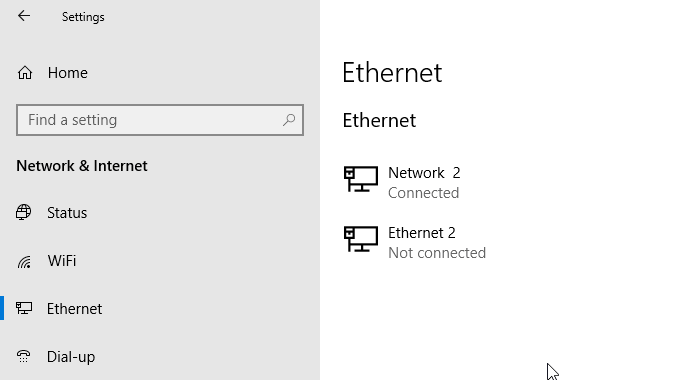
- In the left panel, click either Wi-Fi or Ethernet (depending on your connection type).
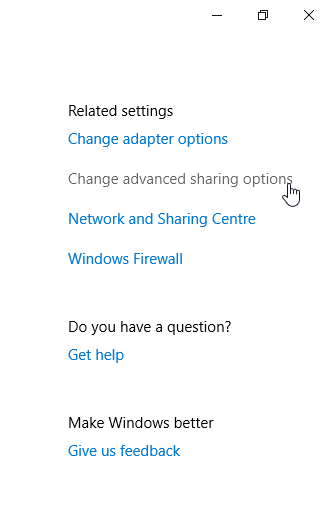
- Under the Related Settings menu, click on Change advanced sharing options.
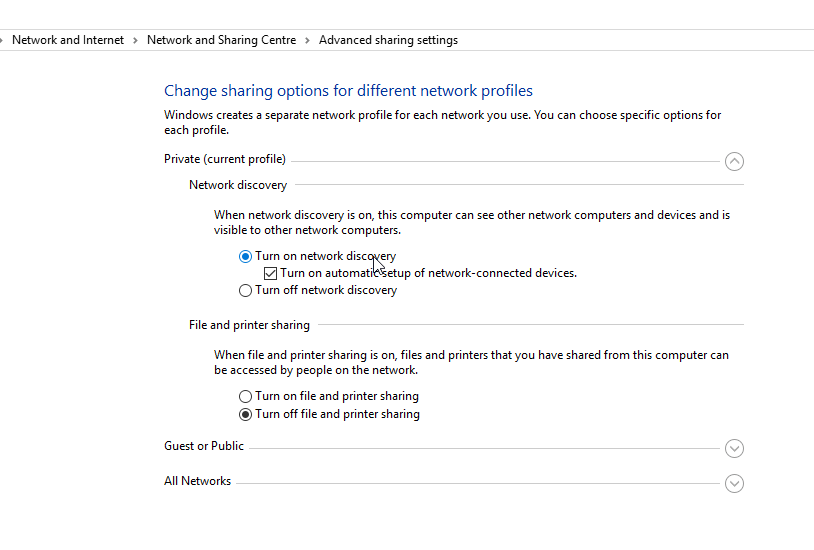
- Under Advanced options, check if the Make this PC discoverable option is enabled ( On). If it is not enabled (Off), simply enable it by toggling the button to On.
- Then click on Save changes
If the problem persists after making your PC discoverable, there is obviously another factor in play. Thus, you can try the next solution.
3. Check your PC’s credentials
If you’re unable to access the shared folder on your PC, it’s possible that you have issues with credentials. However, you can fix that by doing the following:
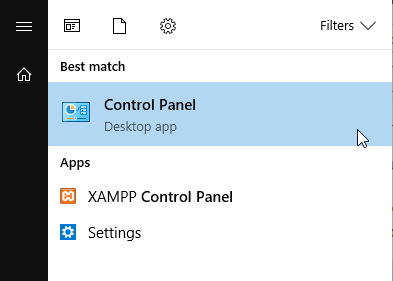
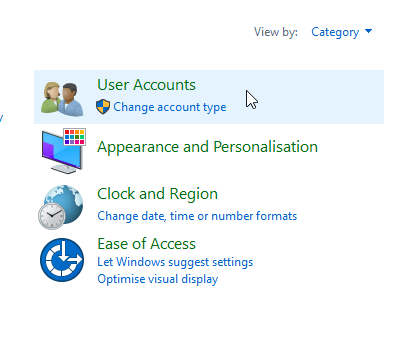
- Open the Start Menu and search for control panel.
- Select Control Panel.
- Navigate to User Accounts and click on it.
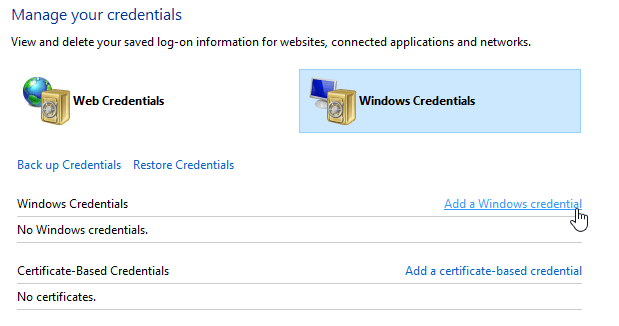
- Under User Accounts, locate and select Credential Manager.
- Locate and click on Windows Credentials.
- Select Add a Windows credential.
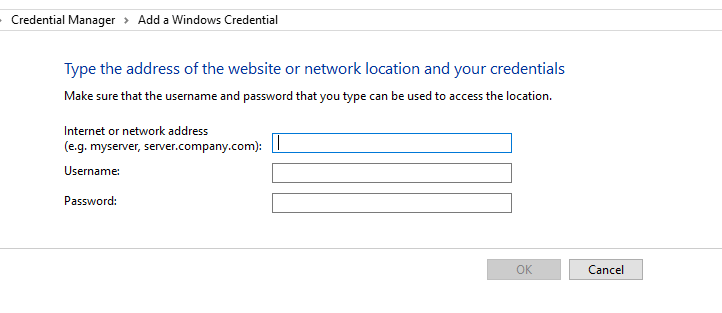
- Add other relevant details like Admin username, password and hosting PC‘s IP.
- Save changes by clicking OK.


If the problem persists after running this, you can try the next solution.
4. Enable all Network services
If you’re unable to access shared folder on your PC, ensure that you enable all relevant network services on your PC. Below is a list of relevant services that should be enabled and run automatically in order for file sharing to work:
- IPv6
- SSDP Discovery
- Publication
- Function Discovery Provider
- DNS Client
- Peer Networking Group
- Host
- Function Discovery Result
- UPnP Device Host
- Home Group Provider
- Home Group Listener.
If the problem persists, you can try the next solution.
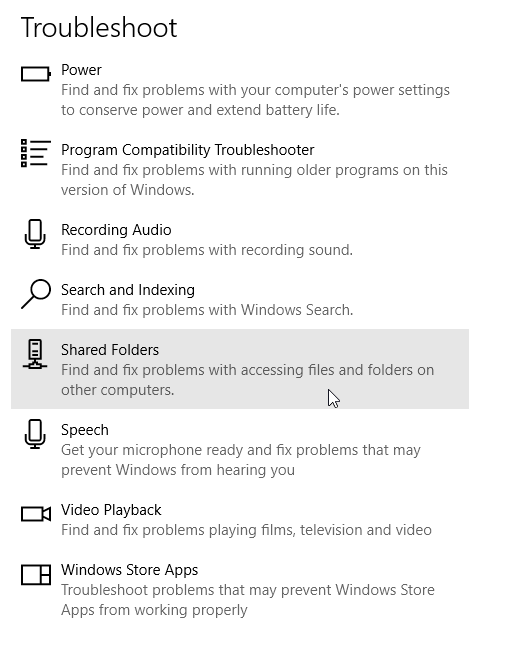
5. Run the Shared Folder Troubleshooter
There is a designated troubleshooter on Windows 10 that is specially designed for fixing errors such as this. If you’re still unable to access shared folders, running the troubleshooter might be helpful. You can do that by following these steps:
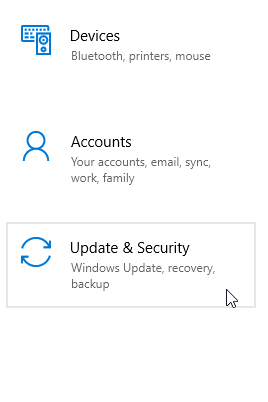
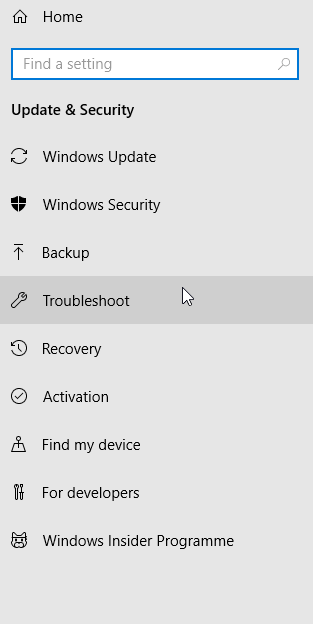
- Go to Settings. Locate and click on Update & Security.
- Select Troubleshoot > Shared Folders.
- Follow the on-screen instructions to finish up the process.
- Exit program and restart PC.
There you go, these are a couple of solutions that might help you fix Windows 10 unable to access shared folder. Feel free to let us know in the comments section if these solutions helped you fix the problem.
Windows 7 File Sharing Problem
Hi all. Thanks in advance for your help.
I’m trying to set up windows file and print sharing on my windows 7 pc. I can see my xp shares from win 7 but I can’t see win 7 from my xp box.
Both boxes are on the same workgroup. The win 7 box does not show up in the network neighborhood. I can ping buy ip address and name both ways. I’ve made sure that network discovery is on and password protection is off.
When I try to share the folder the shared icon does not appear by the folder. I set the share and premissions.
Replies (8)
Win7 when configured on peer-to-peer Network has three types of Sharing configurations.
HomeGroup Network = Works only between Win 7 computers. This type of configuration makes it very easy to Entry Level Users to start Network sharing.
Work Network = Basically similar to the previous methods of sharing that let you control what, how, and to whom folders would be shared with.
Public Sharing = Public Network (like Internet cafe) to reduce security risks.
For best results log to each computer’s System Screen and set all the computers to be on a Network with the same name while each computer has its own unique name.
Make sure that the Software Firewall on each computer allows free local traffic. If you use 3rd party Firewall On, Vista/XP Native Firewall should be Off, and the active Firewall has to adjusted to your Network IP numbers on what is some time called the Trusted Zone (consult your 3rd Party Firewall instructions
General example, http://www.ezlan.net/faq#trusted
Please Note that some 3rd party Software Firewalls keep blocking aspects of Local Traffic even it they are turned Off (disabled). If possible configure the Firewall correctly, or totally uninstall it to allow clean flow of local network traffic. If the 3rd party software is uninstalled or disables, make sure that Windows native Firewall is On .
Since you have a Network with Win 7 and other version of Windows you need to configure Win 7 as Work Network.
In the Network Center, clicking on the Network type opens the window to the right.
Choose your type of Network. Notice the check mark at the bottom, and check/uncheck it according to your needs.
Windows Native Firewall setting for Sharing XP — http://support.microsoft.com/kb/875357
Windows XP patch for Sharing with Vista (Not need for XP-SP3) — http://support.microsoft.com/kb/922120
When finished with the setting of the system it is advisable to Reboot all the hardware including the Router and all computers involved.
*Note. Some of the processes described above are done Not for Windows sake but to compensate for different Routers and the way their firmware works and stores the info about the computers that are Networked.
Jack, MVP-Networking. WWW.EZLAN.NET
Jack MVP, Microsoft Windows Desktop Experience-Networking.
How to connect to Windows 7 share from Windows 10 1803
I spent the last couple of days wading through a lot of material on this subject. I finally found the right solution and I thought I would share it so others would not need to go through the hassle of digging through the long complicated threads.
The real question is «How can I connect to a Windows 7 share without using Homegroup?» Essentially, that is what is needed because Windows 10 v1803 has stopped supporting homegroup.
There are a lot of complicated threads out there on this subject but I think the answer boils down to a few simple steps on the Windows 7 machine.
- Leave and disable Homegroup.
- Adjust advanced settings to enable folder sharing without using homegroup.
- Adjust your shares so that Everyone has Full Control over your shares.
There is a great youtube video that walks you through the steps:
(Note: the video misses one step, adding Everyone to the security of the share)
For your convenience I have documented the steps in the video here:
Leave and disable Homegroup
- Leave the homegroup:
- Go to Control Panel -> Network and Sharing Center
- Click Choose homegroup and sharing options
- Click Leave the homegroup.
- On the next dialog confirm by choosing Leave the homegroup
- Disable homegroup services:
- Go to Control Panel -> Administrative Tools -> Services
- Find the HomeGroup Listener and the HomeGroup Provider services
- For each service:
- Stop the service
- Set startup type to Disabled
Adjust advanced settings to enable folder sharing without using homegroup
- Go to Control Panel -> Network and Sharing Center
- Click Choose homegroup and sharing options
- Click Change advanced sharing settings.
- For Home or Work (current profile), make sure the following are selected:
- Enable file sharing for devices that use 40- or 56-bit encryption
- Turn off password protected sharing
- Use user accounts and passwords to connect to other computers
- For Public, make sure the following are selected:
- Enable file sharing for devices that use 40- or 56-bit encryption
- Turn off password protected sharing
Adjust your shares so that Everyone has Full Control over your shares
- Open a file explorer window, put \\localhost in the «address» bar. This should bring up a list of your shares.
- For each share you need to do 3 things, add Everyone to the list of those sharing, add Everyone to the list of permissions and add Everyone to the security. To do that right click the shared folder and choose properties.
- Add Everyone to the list of those sharing:
- Open the Sharing tab.
- Click Share.
- In the «File Sharing» dialog, verify that Everyone has Read/Write priviledges. If not add Everyone and set it to Read/Write priviledges.
- Add Everyone to the list of permissions:
- Go back to the Sharing tab.
- Click Advanced Sharing...
- Click the Permissions button
- In the «Permissions for » dialog, verify that Everyone has Full Control.
- If not, then click Add and enter Everyone into the text box. Click Check Names, Everyone should now be underlined.
- Go back to the previous dialog and make sure the Everyone group has Full Control, if not set it to Full Control.
- Add Everyone to the security
- Go back to the Sharing tab and open the Security tab.
- Verify Everyone is in the list of «Group or user names», if not click Edit. and then Click Add and add Everyone to the list.
- Make sure Everyone has Full control set to allow.
At this point you should be able to access your Windows 7 computer from your Windows 10 computer, the shared folders should be visible and you should be able to open them and navigate around.
I hope this can help you avoid investing the amount of time I invested!


