- Как изменить шрифт в Windows 10: 3 способа
- Содержание
- Изменение шрифта в Windows 10 с помощью редактора реестра
- Изменение шрифта в Windows 10 с помощью программы Winaero Tweaker
- Изменение шрифта в Windows 10 с помощью программы Advanced System Font Changer
- Восстановление до стандартных шрифтов
- How to change default system font on Windows 10
- How to change default font on Windows 10
- How to restore default system font on Windows 10
- Undo settings with Registry
- Undo settings with Restore point
- More Windows 10 resources
- Halo: MCC’s live service elements make it better, not worse
- Microsoft’s Surface Duo is not ‘failing up’
- Here’s what you can do if Windows 10 update KB5001330 is causing issues
- These are the best PC sticks when you’re on the move
- How to change default System Font in Windows 10
- Change default System Font in Windows 10
- Restore default system font on Windows 10
Как изменить шрифт в Windows 10: 3 способа
Стандартно в операционной системе Windows 10 для всех элементов используется шрифт Segoe UI. К сожалению, изменить его в настройках параметров ОС нельзя — такой возможности просто нет. Для изменения системного шрифта придётся прибегнуть к работе с реестром или запуску сторонних приложений, созданных специально для этих целей. Эта статья поможет изменить шрифт на компьютере с Windows 10 тремя способами разной степени сложности, плюс имеется отдельный пункт о том, как вернуть шрифт по умолчанию.
Содержание
Изменение шрифта в Windows 10 с помощью редактора реестра
Заменить стандартный шрифт в операционной системе можно при помощи редактора реестра — преимущество данного способа в том, что пользователю не нужно загружать дополнительный софт.
Перед тем, как приступить к процессу замены, пользователю нужно найти название нужного ему шрифта:
- откройте проводник;
- введите в адресную строку C:\Windows\Fonts;
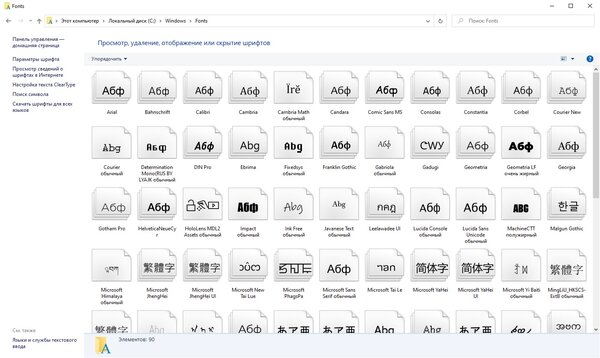
Теперь можно приступать к процессу замены стандартного системного шрифта.
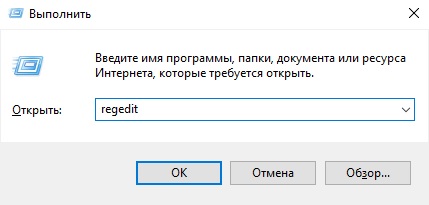
- нажмите клавиши Windows + R на клавиатуре;
- в появившемся окне введите команду regedit, после чего нажмите на кнопку «ОК»;
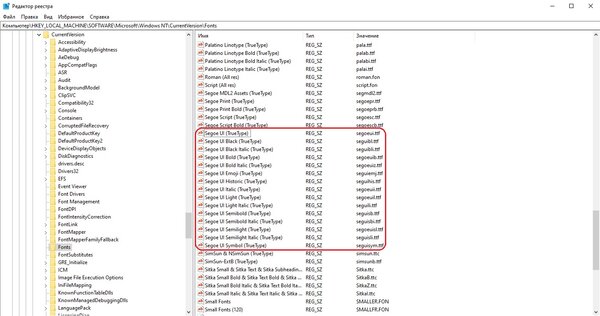
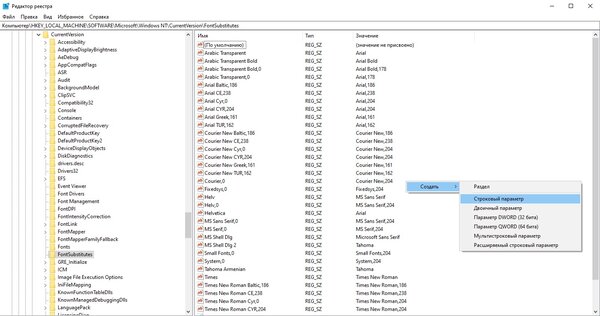
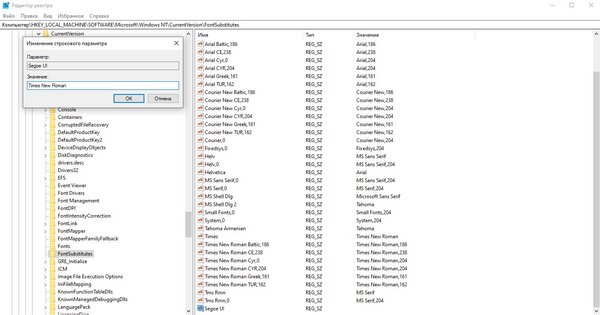
Важное уточнение: шрифт в меню «Пуск» и «Параметры» не меняется, он останется стандартным.
Изменение шрифта в Windows 10 с помощью программы Winaero Tweaker
Если пользователь по каким-то причинам не желает работать с редактором реестра, можно воспользоваться специальной полностью бесплатной программой Winaero Tweaker, которая позволяет настраивать внешний вид операционной системы Windows 10. Важно уточнить, что если предыдущий способ заменял все системные шрифты ОС на один выбранный вариант, то настройка при помощи ПО более гибкая.
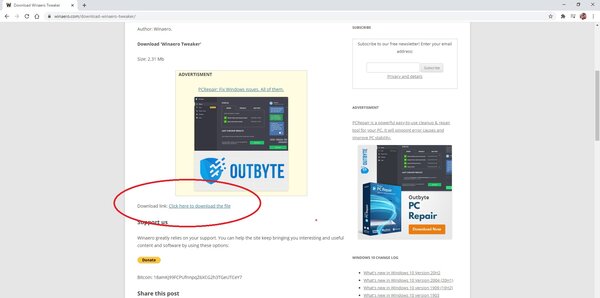
- перейдите на официальный сайт Winaero Tweaker;
- пролистайте вниз до ссылки Download Winaero Tweaker, кликните по ней;


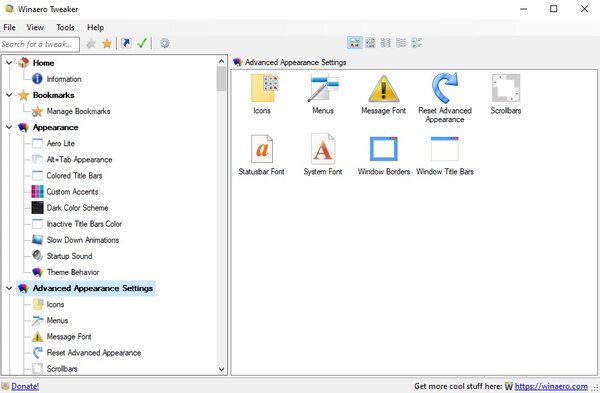
Пункт меню «Advanced Appearance Settings» позволяет настраивать шрифты отдельно для определённых элементов системы. То есть, пользователь может выбрать один шрифт для иконок, другой — для заголовков окон, а третий в качестве системного шрифта.
Список доступных для настройки элементов:
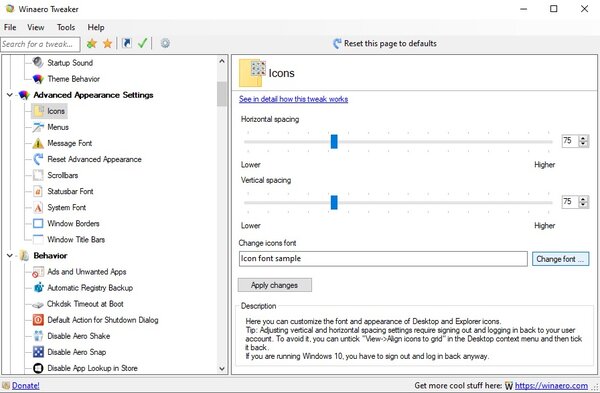
- Icons — подписи иконок;
- Menus — меню программ;
- Message Font — шрифт для сообщений программ;
- Statusbar Font — шрифт для строки состояния;
- System Font — системный шрифт (заменяет Segoe UI на любой другой);
- Window Title Bars — шрифт для заголовка окон.
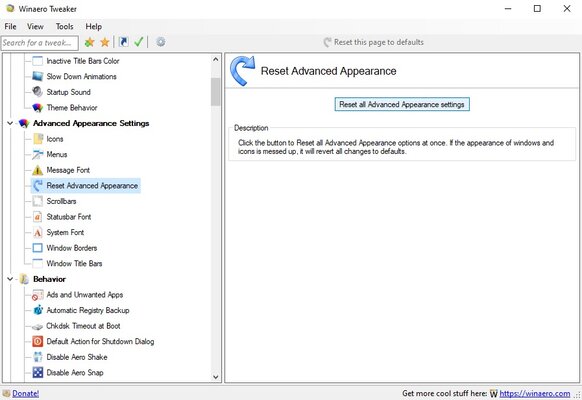
В случае, если пользователь захочет отказаться от изменённых шрифтов, нужно лишь открыть меню «Advanced Appearance Settings», кликнуть по пункту «Reset Advanced Appearance» и в окне справа нажать на единственную кнопку «Reset Advanced Appearance settings». После этого нужно перезагрузить компьютер.
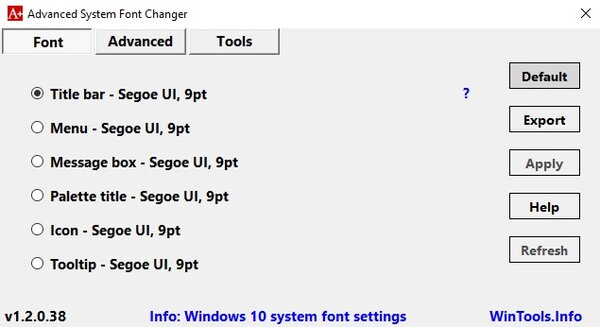
Изменение шрифта в Windows 10 с помощью программы Advanced System Font Changer
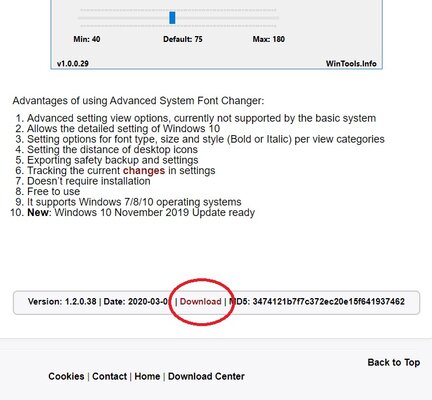
Если предыдущее приложение обладает целой россыпью функций для кастомизации операционной системы Windows 10, то программа Advanced System Font Changer создана специально для изменения системных шрифтов. Соответственно, интерфейс и сам процесс работы в данном случае немного проще.
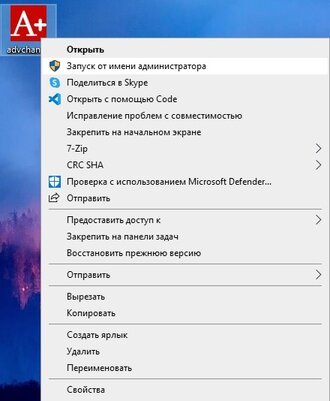
- скачайте программу Advanced System Font Changer с официального сайта разработчика;
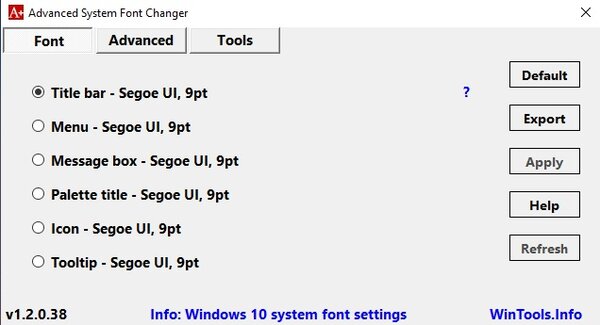
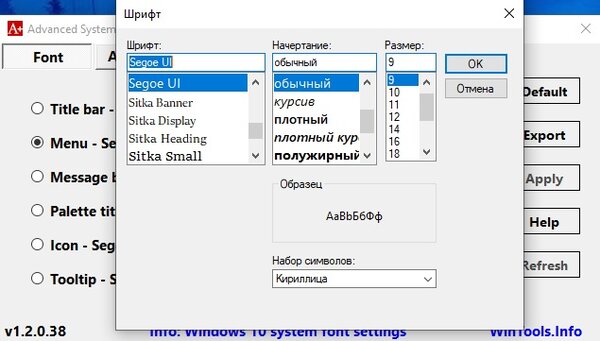
Список доступных для настройки элементов:
- Title bar — шрифт для заголовка окон;
- Menu — меню программ;
- Message box — шрифт для сообщений программ;
- Palette title — шрифт для заголовков панелей в окнах;
- Icon — подписи иконок;
- Tooltip — шрифт для строки состояния.
В случае, если пользователь захочет отказаться от изменённых шрифтов, ему нужно нажать на кнопку «Default» в правом верхнем углу приложения.
Восстановление до стандартных шрифтов
В случае, если после проделанных манипуляций пользователь захочет восстановить стандартный шрифт, нужно будет выполнить лишь несколько простых команд:
- откройте проводник;
- введите в адресную строку C:\Windows\Fonts;
- слева в меню кликните по пункту «Параметры шрифтов»;
How to change default system font on Windows 10
 Source: Windows Central
On Windows 10, you can change the default system font, but you now have to make changes to the Registry to complete this task.
In older versions like Windows 7, the Control Panel included personalization settings to change the system font for many visual elements on the desktop, such as File Explorer, icons, title bars, menus, message boxes, and more. However, for some reason, Windows 10 removed these settings, and you are now stuck with the default system font.
However, it is possible to change the «Segoe UI» default font on Windows 10, if that is something you want to do. Now, it just takes a few more steps using the Registry.
In this Windows 10 guide, we will walk you through the steps to change the default system font for most desktop elements.
How to change default font on Windows 10
To change the system font on Windows 10, use these steps:
Warning: This is a friendly reminder that editing the Registry is risky and can cause irreversible damage to your installation if you don’t do it correctly. It’s recommended to make a full backup of your PC before proceeding. Alternatively, you can create a system restore point, which will also help you revert the changes.
- Open Start.
- Search for Notepad and click the top result to open the text editor.
Copy and paste the following Registry code onto the file:
Select the font family you want to use.
 Source: Windows Central
Note the official name of the font family – for example, Courier New.
Source: Windows Central
In the Notepad text with the Registry code, replace «NEW-FONT-NAME» with the name of the font you want to use in the entire system – for example, Courier New.
 Source: Windows Central
Use the «Save as type» drop-down menu and select the All Files option.
Source: Windows Central
Right-click the newly created «.reg» file and select the Merge option.
 Source: Windows Central
Once you complete the steps, the new font should be available throughout the desktop visual elements, including File Explorer, message box, taskbar, and apps that use the system default font settings.
Although you can select from a lot of different fonts, it is recommended to choose a style that is easy to understand since fonts like Webdings or Wingdings use symbols, and they can cause issues to the installation.
How to restore default system font on Windows 10
If you change your mind, you can always restore the previous settings using the Registry or using a restore point.
Undo settings with Registry
To restore the default font settings on Windows 10, use these steps:
- Open Start.
- Search for Notepad and click the top result to open the text editor.
Copy and paste the following Registry code onto the file:
Use the «Save as type» drop-down menu and select the All Files option.
Source: Windows Central
Right-click the newly created «.reg» file and select the Merge option.
Source: Windows Central
After you complete the steps, the Windows 10 default font should rollback to the previous configuration.
Undo settings with Restore point
Alternatively, you could also use a previous restore point created before modifying the font settings to undo the changes. However, use this option as a last resort, since depending on when you are restoring the system, the feature may also undo other system changes you may have configured after the restore point was created.
To undo system changes, use these steps:
- Open Start.
- Search for Create a restore point and select the top result to open the app.
- Click the System Protection tab.
Click the System Restore button.
![]() Source: Windows Central
Source: Windows Central
Select the restore point you created before applying the settings.
Source: Windows Central
Once you complete the steps, the system will need to be restarted to finish the process.
More Windows 10 resources
For more helpful articles, coverage, and answers to common questions about Windows 10, visit the following resources:
![]()
Halo: MCC’s live service elements make it better, not worse
Halo: The Master Chief Collection is more popular than ever, but some fans don’t agree with the live service approach 343 Industries has taken with it. Here’s why those elements are, at the end of the day, great for the game and for Halo overall.
![]()
Microsoft’s Surface Duo is not ‘failing up’
Microsoft announced this week that it was expanding Surface Duo availability to nine new commercial markets. While Surface Duo is undoubtedly a work in progress, this is not a sign of a disaster. It’s also doesn’t mean that Surface Duo is selling a ton either. Instead, the reason for the expansion is a lot more straightforward.
![]()
Here’s what you can do if Windows 10 update KB5001330 is causing issues
In this guide, we’ll show you the steps to get rid of the update KB5001330 to fix profile, gaming, and BSoD problems with the Windows 10 October 2020 Update and May 2020 Update.
![]()
These are the best PC sticks when you’re on the move
Instant computer — just add a screen. That’s the general idea behind the ultra-portable PC, but it can be hard to know which one you want. Relax, we have you covered!
How to change default System Font in Windows 10
If you’re tired of using the default system font on Windows 10, you can change it to your desired font with a simple registry tinkering. This will change the default system fonts of the desktop icons like Recycle bin, including title bar, message box, and others.
In the older version (Windows 7 or lower version) changing the default system font was not a big deal. It was quite easy and straightforward through personalization settings in the Control Panel. But for some reason, these settings were removed and users remained stuck with the default system font. You had to do just this:
- Right-click the mouse on a blank area of the screen and choose the Customize.
- Click Color and appearance of windows.
- Then, click Open classic appearance properties for additional color options.
- Next click the Advanced button.
- Pull down the list item and choose the element you want to change the font, icon, for example.
- Then pull down the Font list and choose the font to use. Then define its size and horns (bold or italic).
- Then repeat the operation for the other elements to customize. Finally, click on the OK button and then click Apply. The change is immediate and you don’t have to restart your computer.
In this article, we will show how to change the default system font on Windows 10, including the way to restore the default system font using the Registry Editor. Before you proceed, one thing you must know that without having a proper skill, editing a registry is dangerous. It can damage your system permanently which might be irreversible. So, if you have a little knowledge of what you’re doing then you can skip it and ask a skilled person to complete the adjustment.
Change default System Font in Windows 10
Before you go ahead and use the steps, do remember to create a system restore point first.
To get started, open Notepad first. You can open it using the Run command. Simply press Windows+R keys to launch the Run dialog box, type Notepad in the text field, then hit Enter to open the Notepad app.
In the Notepad app, copy and paste the following text code:
Now, open the Settings app and click on the Personalization category.
In the left pane, select the Fonts tab. You will see a large collection of the font family on the right.
Select the font you want to use from the list and also note its Official name. For example – Book Antiqua.
Now replace “NEW_FONT” with the font name you have selected from the Settings page. Because I prefer the font name “Book Antiqua” to be used in the entire system so, you can see the above image, I have replaced the “NEW_FONT” with the Book Antiqua in the registry code.
After replacing the font name in the Notepad, click on the File menu and then select the “Save as” option. On the Save as page, switch “Save as type” to All Files.
Name the file, choose the preferred location of your file, and then click the Save button. The file name must have the .reg extension. For instance – I have named my file my_font. So, the name of my file with the .reg extension should be “my_font.reg”.
Now go to the location where the .reg file has been saved. Then right-click on it and select the Merge option from the context menu.
Click Yes and then hit the OK button to save the changes.
After performing the above steps, restart your computer and the new font will substitute in the entire system.
Restore default system font on Windows 10
If you want the previous configuration on your Windows device, you can revert the changes using the following instructions:
Open the Start menu, type Notepad, then select the top of the result to open the Notepad text editor.
In the Notepad app area, copy and paste the following text code:
Now click on the File menu and then select the “Save as” option. On the Save as page, use the drop-down menu to switch “Save as type” to All Files.
Thereafter you have to name the file, choose the preferred location to save the file, and then click the Save button. Save the file with the .reg extension. For example – I have named my file restore_my_font. So, the name of my file with the .reg extension should be “restore_my_font.reg”.
Now go to the location where you have saved the restore_my_font.reg file. Then do a right-click on it and select the Merge option from the context menu.
Click Yes then hit the OK button to save the changes.
Once you have done, restart your computer and it will revert your system configuration to the default font.
TIP: Advanced System Font Changer lets you change System Font in Windows 10.


