- How to Change Windows 10 Downloads Folder Location
- Changing Windows 10 Download Folder Location
- Conclusion
- How to change the download location in Windows 10, 8, 7
- Change default download location on PC
- How do I change the default save location in Windows 10?
- Run a System Scan to discover potential errors
- How to Change the Default Download Location in Windows 10
- Put your Microsoft Edge downloads (almost) wherever you want
- What to Know
- How to Change Default Download Location in Windows 10 for Microsoft Edge
How to Change Windows 10 Downloads Folder Location
As all of us know that our computer systems are not loaded with an infinite memory, therefore the storage space of every component runs out in some instance. Our hard disk is divided into certain components such as drives, folders, files etc. One of the most commonly used components is the Downloads folder. Every Windows 10 user visits or makes use of this folder almost on daily basis. All the files that you download from the Internet go straight into the Downloads folder so it is not possible for it to stay spacious all the time.
It gets troublesome when your Downloads folder runs out of space because it takes away your ability to download anything. In this situation, there must be a way through which you can change the default Downloads folder location so that your downloads can be placed in some other folder. In this article, we will explain to you the method through which you can change the Windows 10 Downloads folder location.
Changing Windows 10 Download Folder Location
In order to change the Windows 10 Downloads folder location, you will need to perform the following steps:
First, you will need to create a new folder anywhere on your hard disk where you want to keep your downloads now. You can also keep your downloads to an already existing folder but it is always better to create a new one. I am creating a new folder named Downloads in my D drive. For doing this, just click on This PC and then go to your D drive. Right-click anywhere in the empty space of the File Explorer window in order to launch a cascading menu. Click on New and then click on the Folder option from the sub-cascading menu. Finally, name the newly created folder according to your own choice.
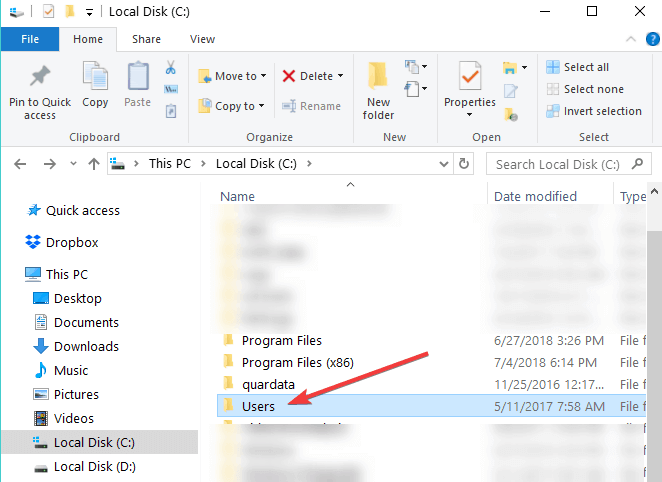
After creating the new folder, type file explorer in the search section of your taskbar and click on the search result to launch a new file explorer window. The newly opened File Explorer window is shown in the following image:
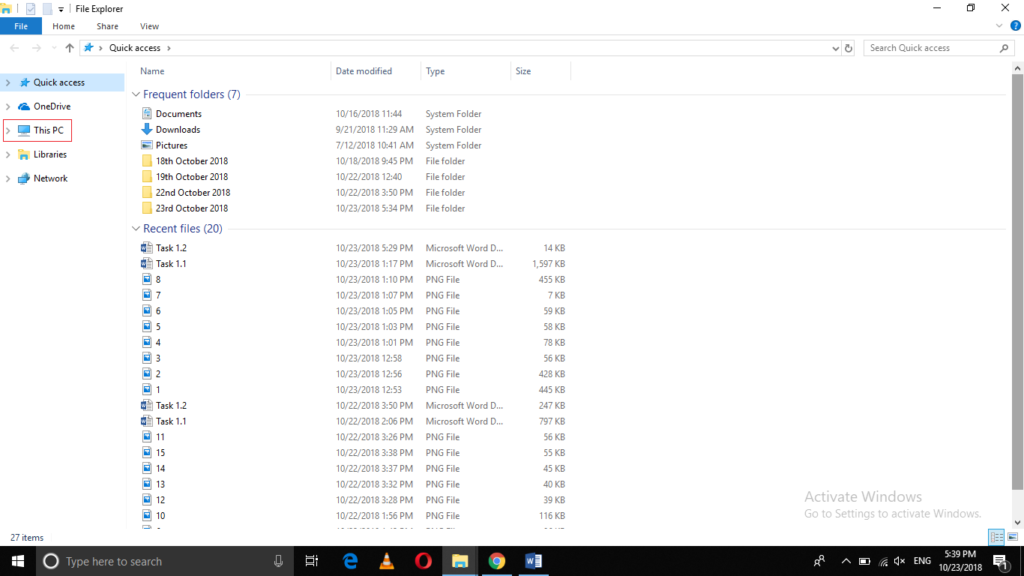
Click on This PC as highlighted in the image shown above.
 Downloads» width=»750″ height=»422″ srcset=»https://www.faqforge.com/wp-content/uploads/2018/10/word-image-227-1024×576.png 1024w, https://www.faqforge.com/wp-content/uploads/2018/10/word-image-227-300×169.png 300w, https://www.faqforge.com/wp-content/uploads/2018/10/word-image-227-768×432.png 768w, https://www.faqforge.com/wp-content/uploads/2018/10/word-image-227.png 1366w» sizes=»(max-width: 750px) 100vw, 750px»/>
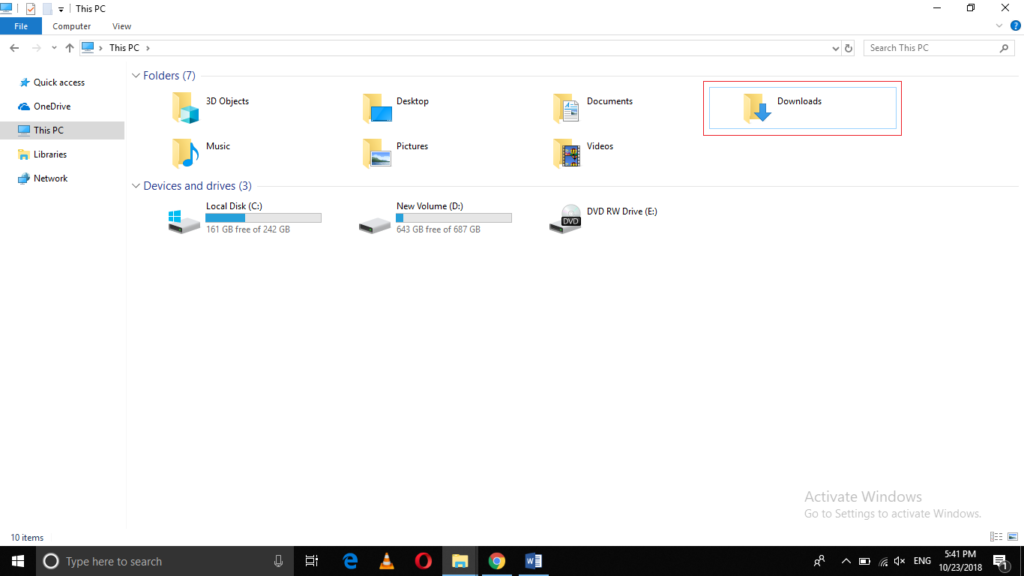
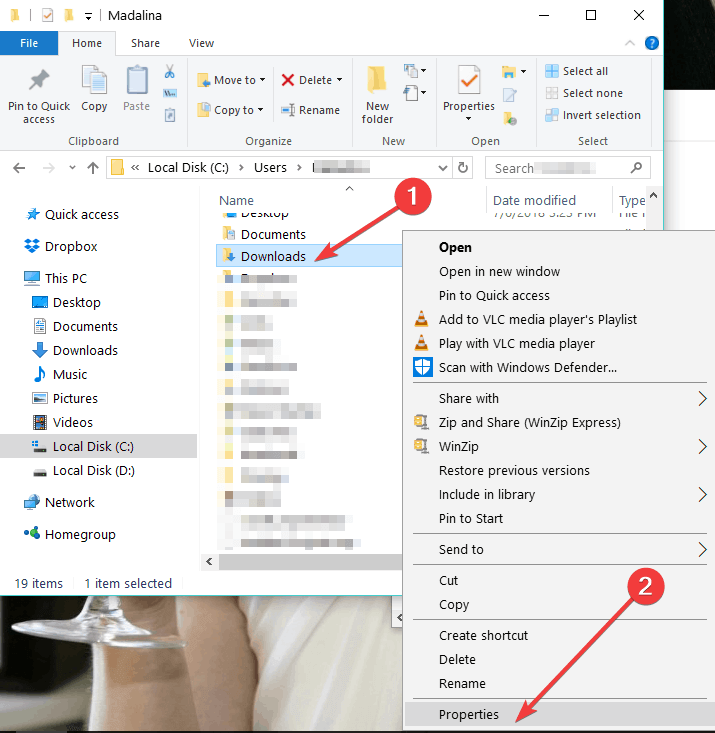
Now right click on the Downloads folder in order to launch a cascading menu as shown in the image below:
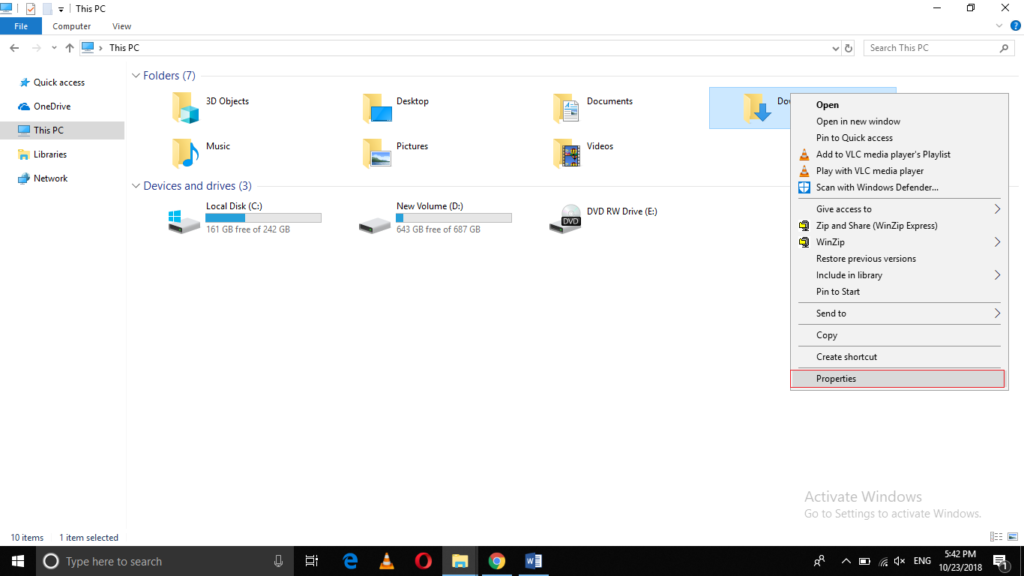
Click on the Properties option from this menu in order to launch the Downloads Properties window as shown in the following image:
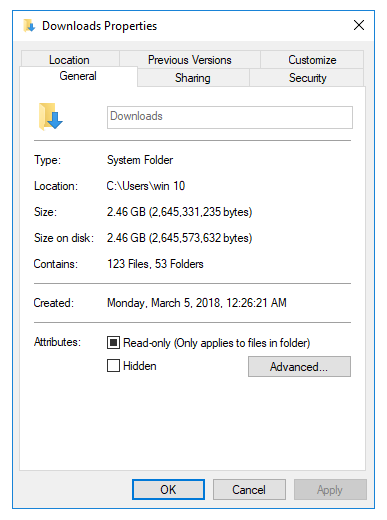
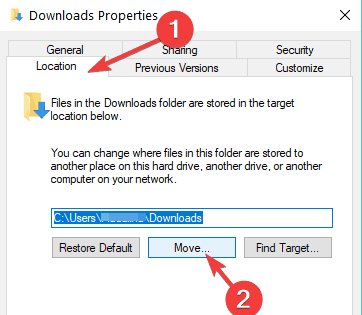
Now click on the Locations tab from the Downloads Properties window.
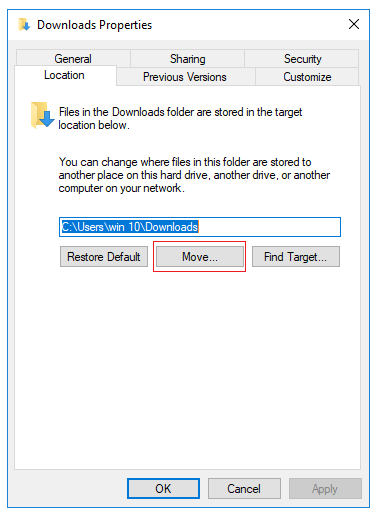
Click on the Move button as highlighted in the image shown above.
As soon as you will click on it, Windows 10 will prompt you to select the new folder in which you want to place your downloads from now on. Just browse through your hard disk in order to find your newly created download folder as shown in the image below:
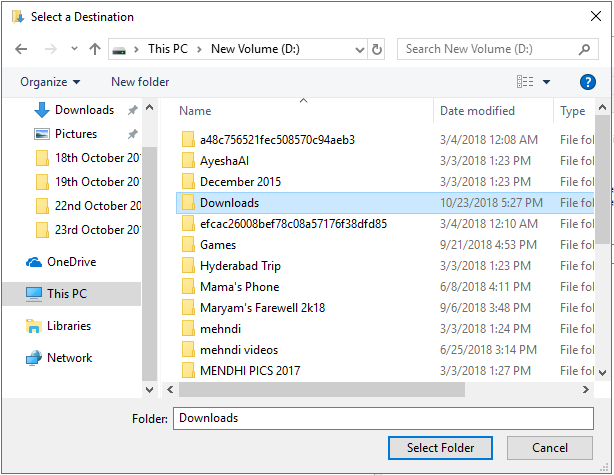
After locating your desired folder, click on the Select Folder button.
After pressing the Select Folder button, the path of your new folder will immediately appear in the Downloads folder path textbox as shown in the following image:
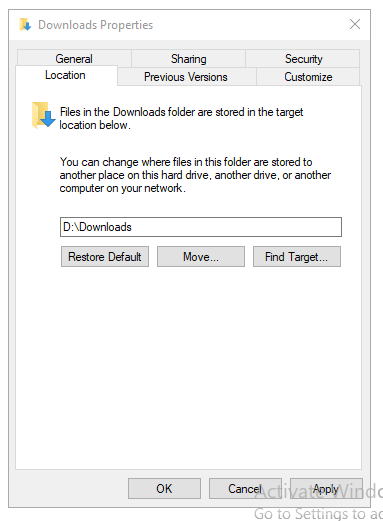
Click on the Apply button and finally click on the OK button in order to save your settings.
Conclusion
By following the method discussed in this article, you can easily change the location of the default Windows 10 Downloads folder anytime you want. However, if you feel at any time that you do not want your downloads to go into the new folder anymore then you can easily get back to the default download location. For doing this, simply right click on the Windows 10 Downloads folder and click on the Restore Default button from the Downloads Properties window in order to have the default Downloads location again.
How to change the download location in Windows 10, 8, 7


- Download Restoro PC Repair Tool that comes with Patented Technologies (patent available here).
- Click Start Scan to find Windows issues that could be causing PC problems.
- Click Repair All to fix issues affecting your computer’s security and performance
- Restoro has been downloaded by 0 readers this month.
Has it ever happened to you that when trying to download a file, folder or perhaps a program in Windows 8, Windows 7 or Windows 10, you didn’t had enough free disk space to do so ?Well, this is mainly because Windows 8, 7 and Windows 10, like any other Microsoft operating systems, have the default download location folder set in your C:/ drive where you also have your operating system. This is the reason why, most probably, you won’t have that much space available.
Tn the tutorial below, you’ll learn how easy it is to change the download location in Windows 8, 7 or Windows 10 in only five minutes of your time. Also, you can change the download location folder even when the message pops up saying that you don’t have enough free disk space on the partition. So, without wasting any more time, let’s begin the tutorial and set our new directory for our downloaded items.
Change default download location on PC
- After you power up the Windows 7, 8 or Windows 10 PC, you will have to left click on the desktop icon you will have in the start screen.
- Now after you get to your desktop feature right click on the “Windows Explorer” icon presented in the lower left side of the screen.
- Now from the menu that pops up you will need to left click on the “Desktop” icon.
Note: You can also access the “Desktop” by double clicking (left clicking) on My Computer or This PC (depending on your OS version) and after the window with “My Computer” is opened you can left click on the “Desktop” icon in the left side of the screen. - Now, after you selected the “Desktop”, some icons will be shown in the right side of the window and you will need to double click (left click) on the folder with the name of your account.

- In the folder you opened that had your account name, you will have to right click on “Downloads” folder presented there.
- After you right clicked the “Downloads” folder you will need to left click on “Properties”.
- Now that the “Properties” window is open, you will need to left click on the “Location” tab presented in the upper side of that window.
- Now that you have selected the “Location” tab you can see the path where the download items are going .
- Left click on the “Move…” button you have under the specified path.
- Now after you left clicked on “Move…” you will have to write there yourself the drive where you want your items to be downloaded and also in which folder.
Note: If the folder you have written does not exist after you left click on the “Apply” button situated in the lower right side of the screen you will be asked if you want to create that download folder and you will left click on “OK” to confirm. - Another “Move folder” window will appear which it will show you the old and the new location where you will have to left click on the “Yes” button situated in the lower right side of the screen.
- Now, you will have to left click on the “OK” button in the “Download Properties” window.
- Go to your new location where you selected to download your files and check if Windows 7, 8 or Windows 10 system has made a “Downloads” folder there.
Note: Reboot your Windows 7, 8 or Windows 10 device if it hasn’t created the “Downloads” folder to the new directory and check again after power up.
- RELATED: Can’t rename folders in Windows 10 [Fix]
How do I change the default save location in Windows 10?
If Windows 10 is your OS of choice, you can also change the download folder save location from the Settings page:
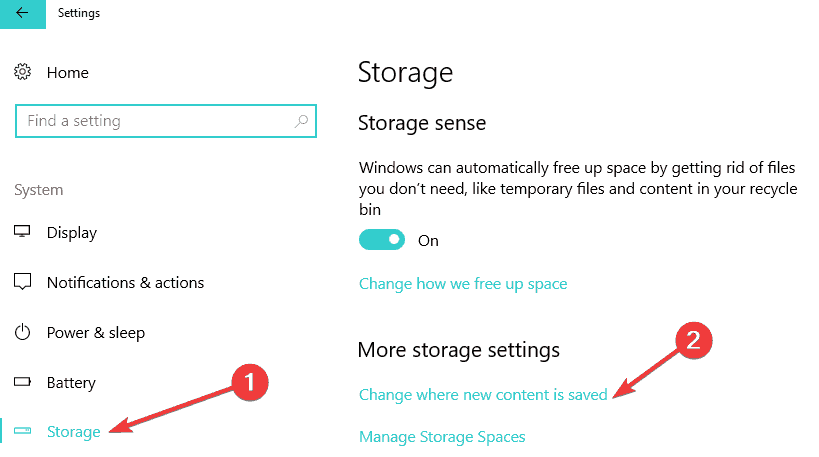
- Go to Settings > System > select Storage
- Now, click on the option ‘Change where new content is saved’
- Set your preferred download location for each item category.
Run a System Scan to discover potential errors


So, now you can go and download your files or programs in Windows 7, 8 or Windows 10 without having to worry about the download location. Share your thoughts on this article in the comments below and feel free to list your suggestions on what we can do to help you further in your Windows 7, 8 or Windows 10 computer.
Also, the location where a Windows 10 update is saved on your computer is tricky, but for that, you can check this fresh guide here on where’s the default download folder for the Windows 10 versions.
RELATED STORIES TO CHECK OUT:
How to Change the Default Download Location in Windows 10
Put your Microsoft Edge downloads (almost) wherever you want
:max_bytes(150000):strip_icc()/FionnaAgomuoh-30535f20b89a4c12867880cbc58bfd07.jpg)
:max_bytes(150000):strip_icc()/WorkBadgePhoto-61c0b98ef5a74e4a85851a8f706dbd65.jpg)
What to Know
- Edge: Select Main menu >Settings >Downloads. Under Location, select Change. Go to the preferred destination, choose Select Folder.
- Windows 10: Go to Settings >System >Storage >Change where new content is saved. Choose the default locations for various filetypes.
- It may take some time for files to move from an old path to a new path.
Many users enjoy the updated features of Microsoft Edge, but one feature missing from the original Internet Explorer is the ability to change the download location directly from the browser. In this guide, we show you how to do that on any Windows 10 device.
How to Change Default Download Location in Windows 10 for Microsoft Edge
Microsoft Edge has an easy way of setting the download location. There are also some additional settings in the Windows 10 settings to change where other files are kept.
Open Microsoft Edge.
:max_bytes(150000):strip_icc()/010-how-to-change-the-default-download-location-in-windows-10-aef9aff63c3b47c19ee338598b166e4c.jpg)
Select Settings and more (the 3 horizontal dots) in the upper-right corner or press Alt+X.
:max_bytes(150000):strip_icc()/MicrosoftEdgeMoreOptions-ac9d34ec3e9a48e79046383729ecc947.jpg)
Select Settings.
:max_bytes(150000):strip_icc()/msedgesettingsinddmenu-20d87a592a8b4150aa483c86496a8c7e.jpg)
Select Downloads from the menu bar. Under the Location heading, select Change.
Browse to your desired location, then select Select Folder.
:max_bytes(150000):strip_icc()/msselectfolder-9f84eab541c64829bc3fa1b3253081cd.jpg)
It’s best to change the default download location when you set up a new Windows 10 computer, reset your computer, or have only a few files in your original Downloads folder. It may take some time for the files to move from the old path to the new path.
If you want to change the default location for various filetypes in Windows 10, follow these steps:
Open Settings. Either go to the Start Menu and select Settings, or press Windows key+I.
Select System.
On the left side, select Storage.
Under More storage settings, select Change where new content is saved.
:max_bytes(150000):strip_icc()/changewherenewcontentsaved-9cfeee53388940148feb8fd4c57d8f33.jpg)
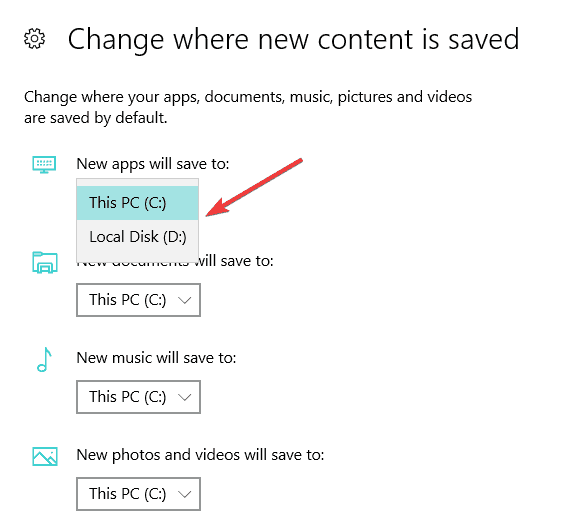
In the Change where new content is saved window, choose the default location of various files such as new apps, new documents, new music, and others.
:max_bytes(150000):strip_icc()/optionsnewcontent-5c1496f7bb0c4318bd750611c7a4be6a.jpg)
Select the drop-down arrow next to an item you want to change, then choose the appropriate drive.


