- Bad Sector Repair: How to Fix Bad Sectors on HDD in Windows 10/8/7
- HDD Bad Sector OverviewВ
- What Is Bad Sector
- Two types of Bad Sectors
- How to Check Bad Sectors in Hard Disk on Windows 10/8/7
- How to Fix BadВ Bad Sectors on HDD inВ Windows 10
- First Thing to Do: Back Up and Clone HDD to a Good Hard Drive (Skip Bad Sectors)
- Repair Soft/Logical Bad Sectors in WindowsВ
- Hard/Physical Bad SectorsВ Repair
- Summary of Bad Sector Repair
- More Information About Bad Sectors
- 1. What are the symptoms of bad sectors?
- 2. What are the causes of hard bad sectors?
- 3. What are the causes of soft bad sectors
- 4. How to avoid bad sectors?
- Fix File System Errors in Windows 7/8/10 with Check Disk Utility (CHKDSK)
- Run GUI chkdsk on Windows
- Run chkdsk via Command Prompt
Bad Sector Repair: How to Fix Bad Sectors on HDD in Windows 10/8/7
What to do when aВ hard disk hasВ bad sectors? This guide includes the best solutions to repair bad sectors on hardВ drive and protect your data effectively.
Occasionally, when one or more bad sectors come upon aВ hard disk, the disk will go bad. When this happens, the data in those bad sectors may be lost, but the data on the rest of the disk will be unaffected and the disk is still completely usable. In order to help you performВ bad sectors repair on hard drive and rescue your data as soon as possible, we suggest you follow through with the tips below before you take action to repair bad sectors.
HDD Bad Sector OverviewВ
Before you start, learn the basic information of bad sectors to pick a better solution and remove bad sectors from your drive.
What Is Bad Sector
According to Wikipedia and professional IT sites, the bad sector is defied a permanently managed storage unit on a hard disk. Once the sector gets damaged, all saved information in that section is lost. Usually, the operating system like Windows 10/8/7 will skip the bad sector once it’s found and marked.
Two types of Bad Sectors
Basically, there are two types of bad sectors — Hard bad sector (also called Physical bad sector) and Soft bad sector (also known as the Logical bad sector).
Hard bad sector is mainly caused by physical damage (in 1,2 causes), such as manufacturing error, physical broken, etc. While the soft bad sector is usually related to software issues (in the 3rd cause) such as improper operations on hard drive, file system error, etc.
Due to the different causes of bad sectors, the ways to repairing bad sectors are also varied. Continue reading, you will find the best solutions to repair bad sectors on your hard drive in Windows 10/8/7.
How to Check Bad Sectors in Hard Disk on Windows 10/8/7
Although we have explained that bad sectors can be defined as physical and logical bad sectors, you may still don’t know how to distinguish them. Here is a simple rule for you to tell the difference: whether you can check bad sectors on your drive.
If you can run a disk checking andВ get the basic information about bad sectors, it’s highly possible that your drive is having soft bad sectors. If not, the situation will become worse and it could be the hard bad sectors.
To know about the amount of the bad sectors clearly, a professional and free disk managementВ tool is recommended — EaseUS Partition Master Free. It can check for bad sectors on a hard disk on Windows 10/8/7 for free with one click.
Besides, it has comprehensive hard drive partitioning options, such as resize/move partitions, create, merge, format, and wipe partitions. You can also use it to convert FAT32 to NTFS without losing data,В convert MBR disk to GPT disk, or vice versa.В
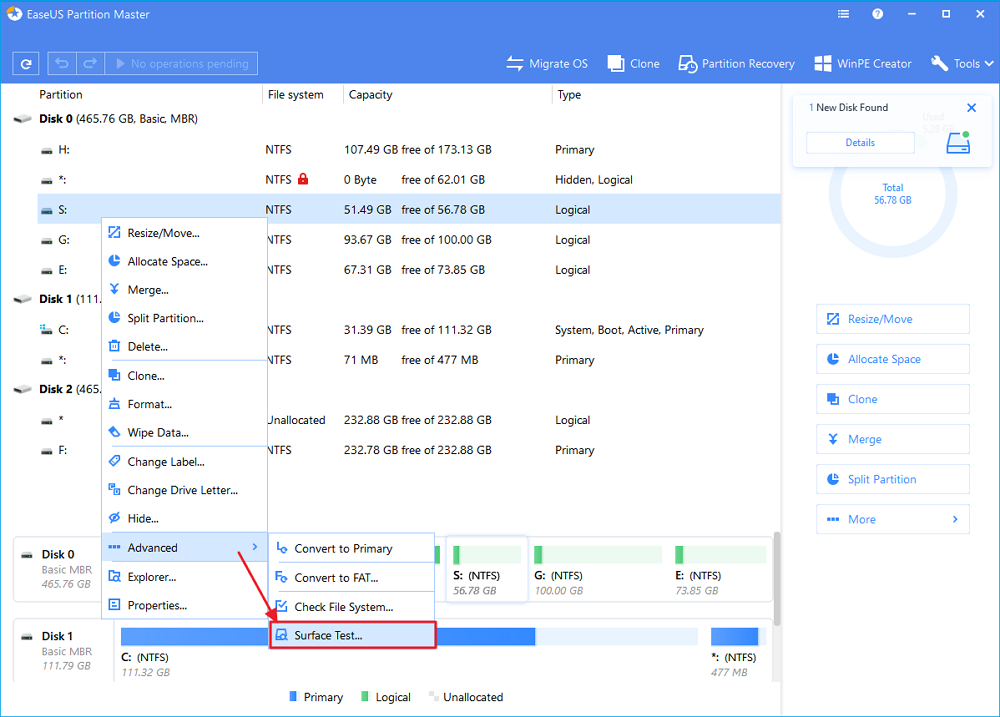
Step 1. Download EaseUS Partition Master and install it. Right-click the disk that you want to check, and then click «Surface test».
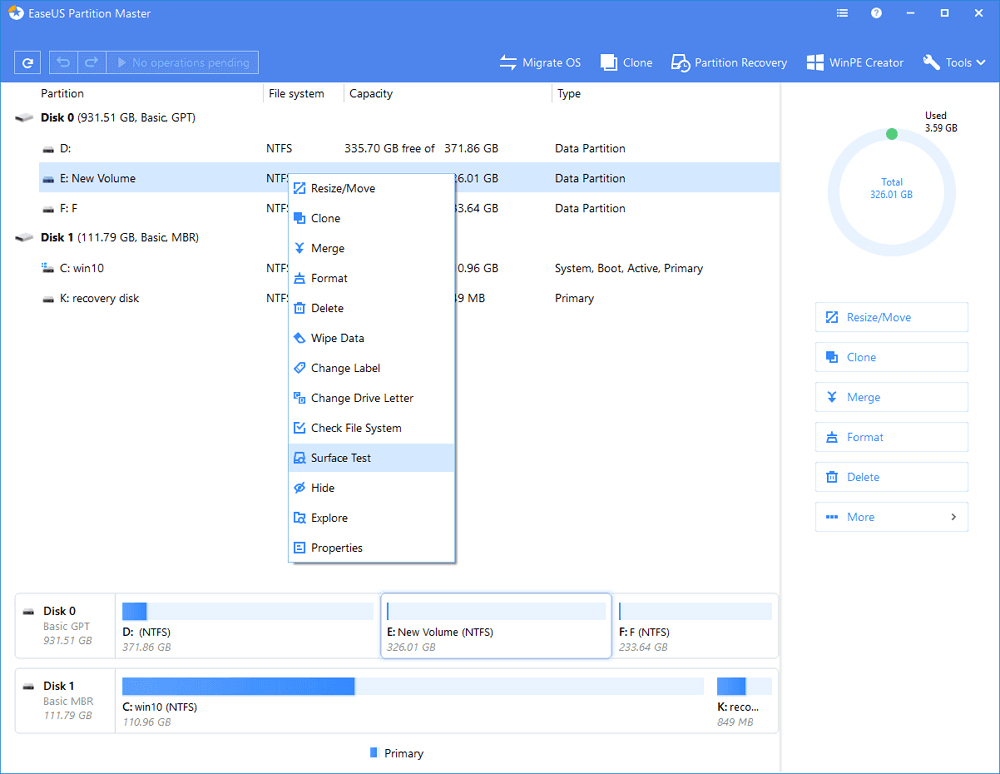
Step 2.В The operation will be immediately performed. Bad sectors will be marked as red.
When there are too many bad sectors, the scanning process will be stuck. Wait patiently. After the process, you could know exactly how many bad sectors are there.
How to Fix BadВ Bad Sectors on HDD inВ Windows 10
As youВ know that when the operating system detects bad sectors, it would mark them as unusable no matter it’s logical or physical bad sectors. As a result, data loss and the loss of disk capacity are unavoidable.В Then, how to fix and remove bad sectors from the hard disk? Read on forВ in-depth tutorials.В
First Thing to Do: Back Up and Clone HDD to a Good Hard Drive (Skip Bad Sectors)
If the disk contains many soft bad sectors, always stuck or slow to load data on the computer, or the drive is failing due to physical bad sectors, it is impossible to repairВ bad sectors.В The wise choice is to back up and save your data at first. But how to copy a hard drive with bad sectors?
EaseUS Disk Copy,В a powerful disk cloning software,В can skip the bad sectors and cloneВ disk toВ make a full copy of your hard drive.
Support Windows 10/8.1/8/7/Vista/XP
Some key features of EaseUS disk cloning software:
- Transfer OS to new hard drive without reinstalling Windows and applications
- Clone a larger HDD to a smaller SSD
- Clone hard drive to USB flash drive easily
Download and apply this disk copy software to upgrade and clone HDDВ withВ bad sectors to a healthy hard drive without effort.
EaseUS Disk Copy
Replace the Disk with a Good one
If your computer can’t boot into your operating system,В create a bootable USBВ in advance, and then followВ the steps below to copy your data.В Remember to connect theВ new hard drive to the computer as a storage device.
Step 1: Choose «Disk mode» and select the smaller hard drive as the source disk.

Step 2: Choose the bigger hard drive to save the data and then click «Next».
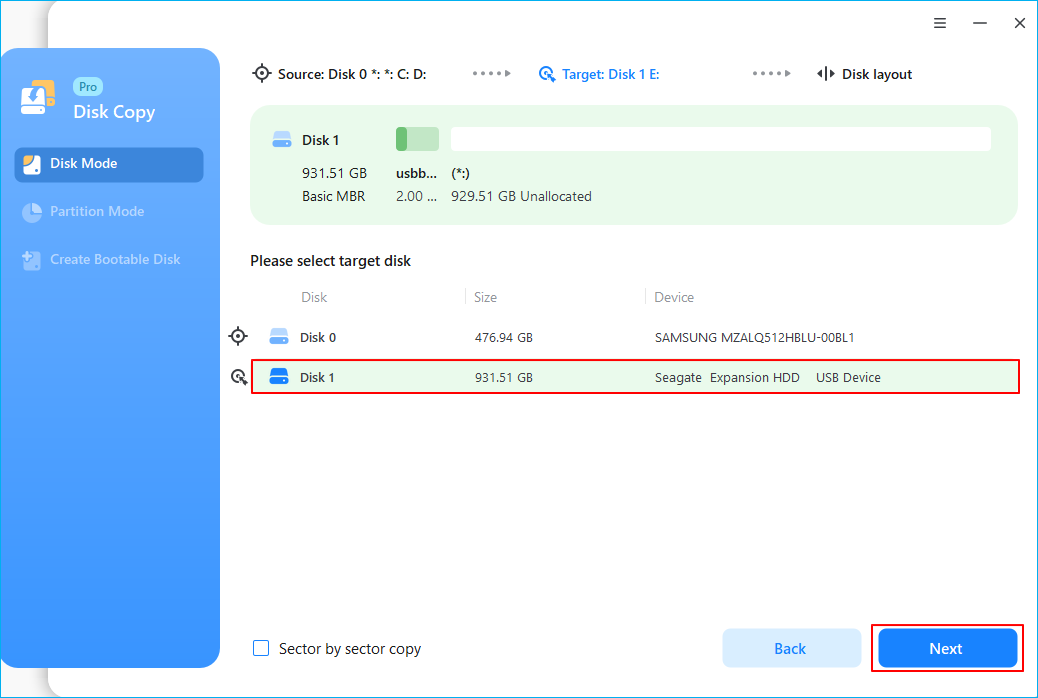
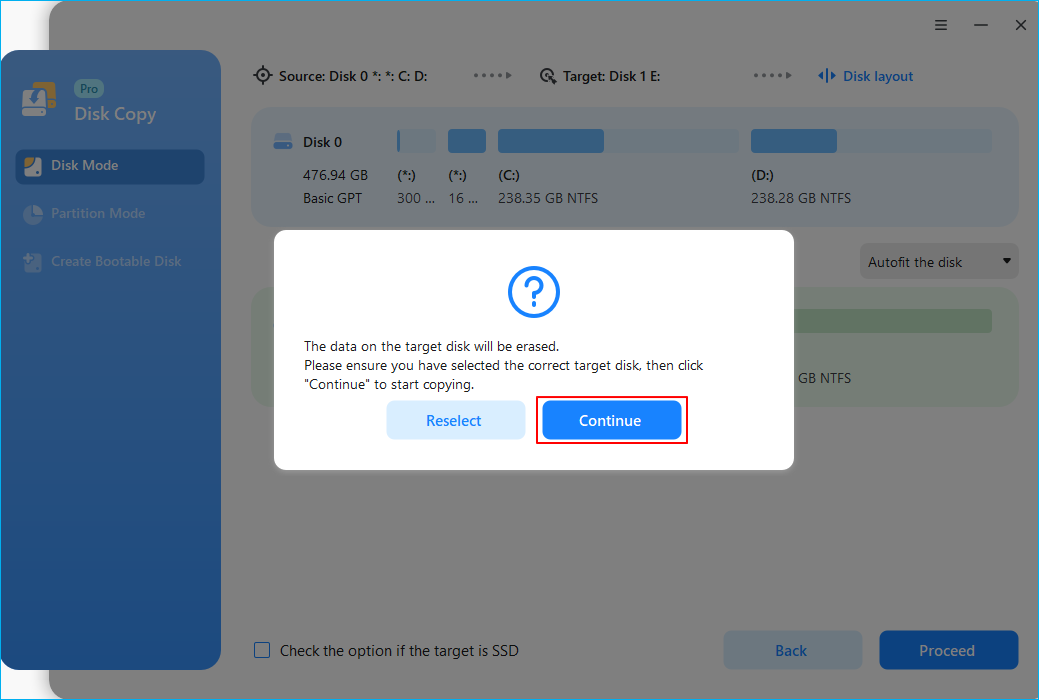
Step 3: A warning message tells you that the data on the destination disk will be overwritten. Click “OK” to continue if you do not have important data on the destination disk.
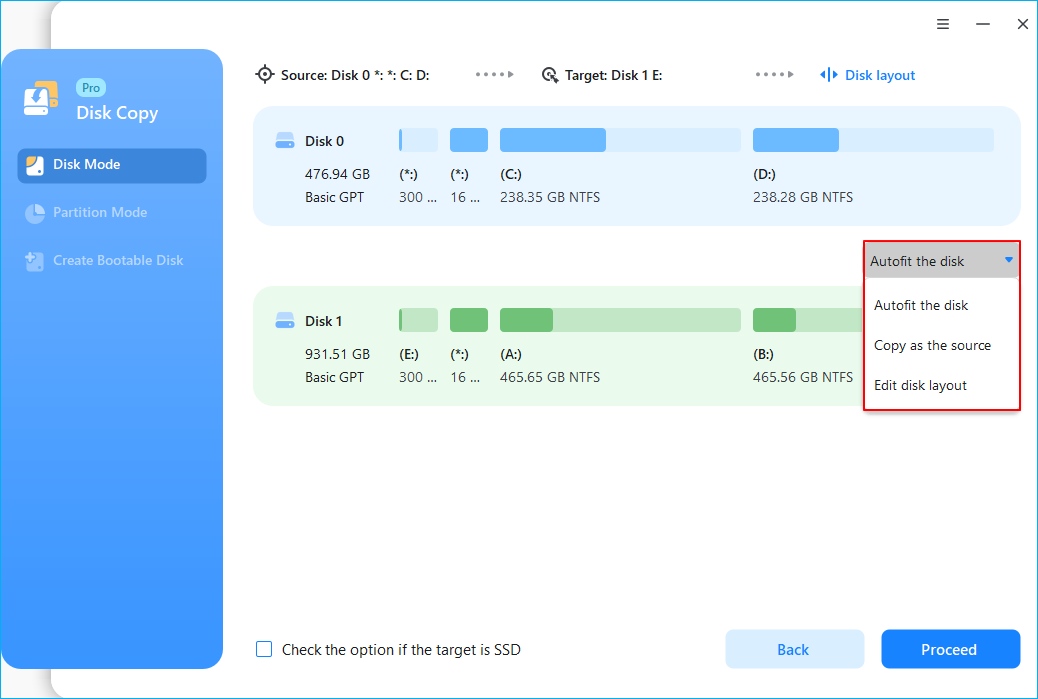
Step 4: Edit the disk layout and then click «Proceed» to continue.
- «Autofit the disk» resize the layout on destination disk according to the size of it to make the disk as the best status.
- «Copy as the source» doesn’t change anything on destination disk and the layout is same as source disk.
- «Edit disk layout» allows you to manually resize/move partition layout on this destination disk.
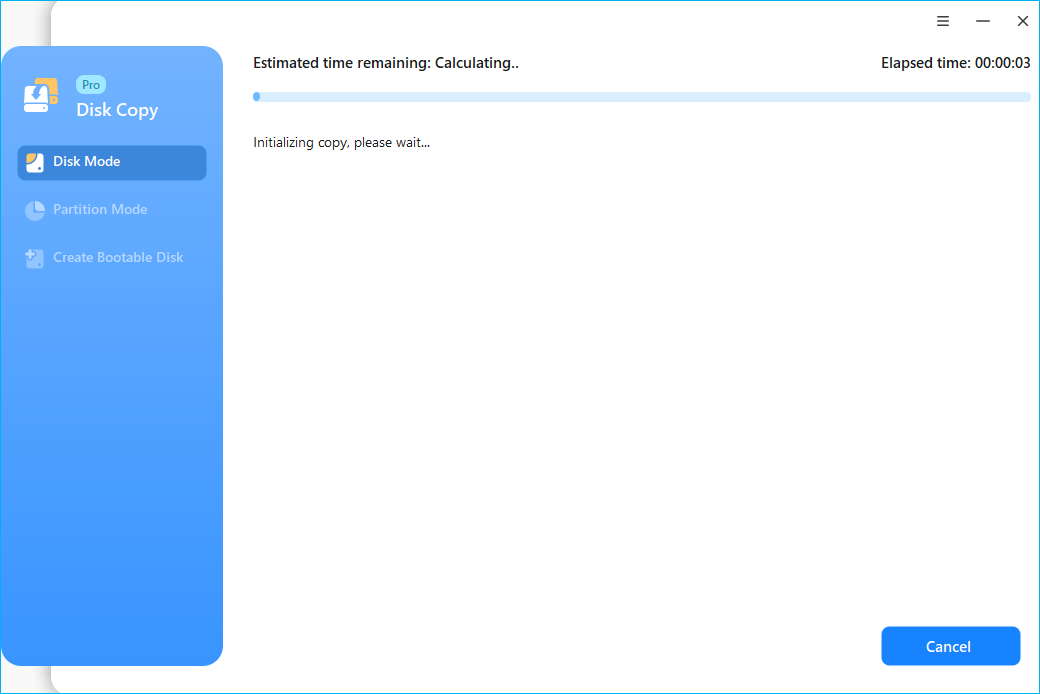
Step 5: Wait for the process to complete.
When the cloning process finishes, shut down your computer, insert the newly upgrade hard drive into your computer and replace the old drive. If it’s a system drive, set the computer to boot from a new hard drive instead of the old one in BIOS.
Support Windows 10/8.1/8/7/Vista/XP
Repair Soft/Logical Bad Sectors in WindowsВ
If your hard drive is experiencing one or more bad sectors, still accessible, follow our instructions to fix yourВ problem and remove bad sectorsВ permanently fromВ hard disk with bad sectors repair tools.В
В 1. Run CHKDSK Command and Format Hard Drive
If there only a few bad sectors on your drive, you can run CHKDSK command and format the drive to repair those bad sectors:
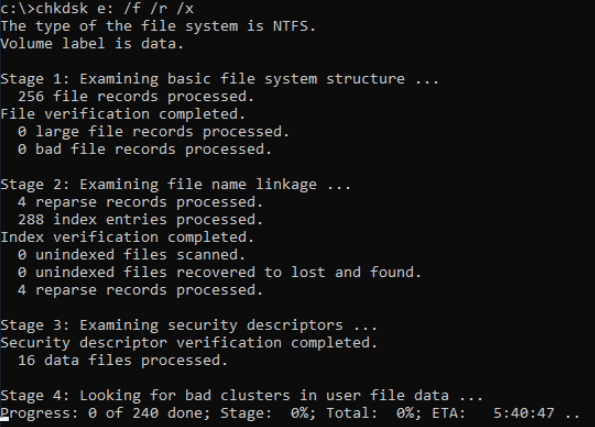
Step 1. Run the CHKDSK command to fix soft bad sectors.
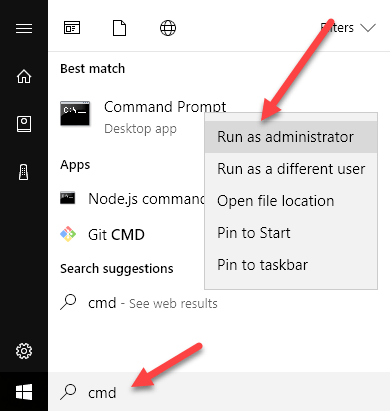
1. Press the Windows key and type cmd.
2. Right-clickВ «CommandВ Prompt»В andВ chooseВ «RunВ asВ administrator».
3. Type chkdsk E: /f /r /x and hit Enter. (Replace E with the drive letter of your hard drive.)
Step 2. Format hard drive to usable again
1. Open Windows File Explorer, locate and right-click on your hard drive.
2. Select «Format», reset the file system as NTFS, tick «Quick Format» and click «Start».
After this, you can save your data back to your hard drive and use it again.
2. Use a free disk check and repair tool to fix bad sectorsВ
EaseUS partition management software offers the simplest methodВ to check and fixВ hard drive errors. You can apply its Check File System option to checkВ and repair hard disk partition errors in Windows 10.
В in Windows 10, 8, or other Windows OS with one-click. Just download and start EaseUS partition management software, locate the hard disk, then run the check file system.
Hard/Physical Bad SectorsВ Repair
Mostly, when your hard drive contains hard bad sectors, you cannot repair bad sectors by using normal solutions. The only possible way is to low-level format the drive, resetting the hard drive blocks, clusters, and sectors.
A low-level format is also called a physical format. Modern hard drives are low-level formatted at the factory for the life of the drive. A PC cannot perform an LLF on a modern IDE/ATA or SCSI hard disk, and doing so would destroy the hard disk. That is to say, you can’t repair a bad sector.
To resolve this issue, you have two choices:
1. Send your hard drive to the manufacturer or a local repair center, customize for low-level format.
2. Choose to clone the disk with bad sectors to a good hard driveВ to avoid the hard disk getting worse with more bad sectors.
Summary of Bad Sector Repair
This page provides the complete guide to help youВ fix bad sectors on HDD. To removeВ bad sectors from hard disk permanently, you can use the Windows CHKDSK command or EaseUS free partitioning software. With theВ two bad sector repair tools, you can efficientlyВ fix and repair bad sectors on the hard drive, external storage devices.
In contrast to logical bad sectors, if there are physical bad sectors on your hard drive, it’s almost impossible to repair your hard disk. You need to replace it with a new hard HDD. So, to avoid data loss,В when you find bad sectors on your disk, be sure to use EaseUS disk clone software to copy and make a backup of your data.В
Support Windows 10/8.1/8/7/Vista/XP
More Information About Bad Sectors
Some people may also have questions about diagnosing if bad sectors are on your drive. You may judge from the following two factors:
1. What are the symptoms of bad sectors?
When you meet one of the following symptoms, your hard drive or external storage devices may contain bad sectors:
- Strange friction sound when booting or running hard drive.
- System pops up an error message, like «Sector not found» or «General error in reading drive C», etc.
- Disk won’t format, getting an error.
- Scandisk (a diagnostic utility) automatically runs when the system is booted.
- Some operations are stuck or become random to a certain process.
2. What are the causes of hard bad sectors?
1. Hard drive was shipped from the factory with bad sectors. (e.g. SSD disk)
2. Physical damage, like:
- Manufacturing error
- Accidental drop, break, etc.
- The touch of the hard drive header to the platter
- Dust
3. What are the causes of soft bad sectors
- Software issue, like:
- Sudden shutdown of the computer
- Sectors that contain data don’t match the error-correction code
- Viruses, malware messes computers, cause bad sectors.
4. How to avoid bad sectors?
Some of you may also want to know how to protect the drive from bad sector errors. Here are some tips:
- Run Disk Check or CHKDSK command on your drive regularly to remove soft bad sectors.
- Run virus cleaner software to remove viruses and malware.
- Execute proper operations on your drive, for example: close all running programs before shutting down the computer.
Fix File System Errors in Windows 7/8/10 with Check Disk Utility (CHKDSK)
Something every PC user should know
Check Disk (chkdsk) is a tool used to verify file system integrity and is also used to locate bad sectors on hard drives. It also helps in recovering corrupted data whenever a system failure occurs that involves data integrity (i.e. power failure).
Check Disk can examine FAT16, FAT32 and NTFS drives and automatically repair errors. Below are the steps in Windows 7, Windows 8 and Windows 10 for running chkdsk on your system.
Run GUI chkdsk on Windows
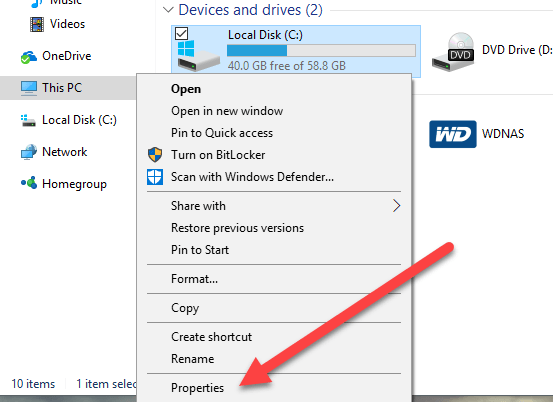
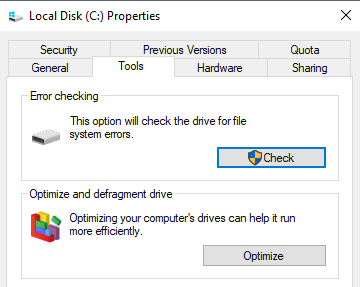
Open Windows Explorer and right-click on the drive that you want to check. At the bottom, go ahead and click on Properties.
Click on the Tools tab and you’ll see a Check button in the Error checking section. In Windows 7, the button is Check Now.
Windows 7 users will get popup that gives you the options to automatically fix errors and to scan for bad sectors. It’s a good idea to check both if you want chkdsk to try and repair the problems when they are found.
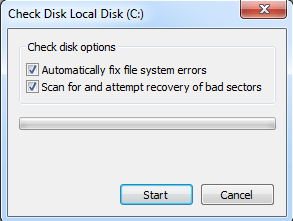
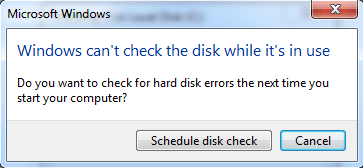
For Win 7 users, if you check both the boxes and click Start, you will get another dialog asking if you want to schedule the scan when the system restarts. You’ll only see this message if you are trying to scan the system partition where Windows is installed.
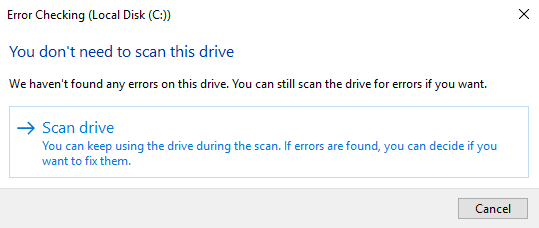
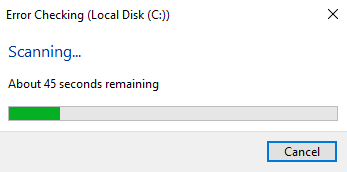
For Windows 10 users, none of those options are available. Instead, a popup dialog will appear and it may say that you don’t need to scan the drive because Windows hasn’t found any errors. However, if you want to perform a scan, go ahead and click on Scan drive.
The scanning process will begin and it shouldn’t take very long. Note that this method via the GUI interface isn’t as thorough as the command line version (which is what runs in Windows 7 when you schedule the scan). I’ll talk about that in the next section below.
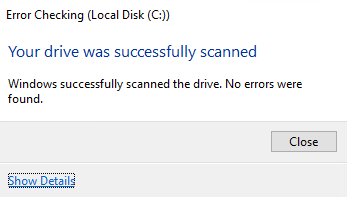
When the scan is complete, you’ll get a message on whether or not there were any errors on the drive. You can click Show Details, which will take you to the Event Viewer program and load up the Application log.
If any errors were detected, Windows would give you a couple of options, one of which would be to try and repair the disk. The second way to run chkdsk in Windows 10 and the better way, in my opinion, is to use the command prompt. For Windows 7 users, the scheduled scan on reboot will be the better scan.
Run chkdsk via Command Prompt
In order to run chkdsk from the command line, you need to open an administrator command prompt. Just click on Start, type in cmd and then right-click on it and choose Run as administrator.
At the prompt, go ahead and type in the following command:
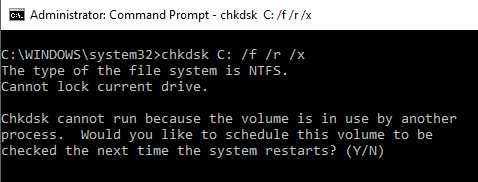
If you are scanning the drive that Windows is currently running from, you’ll get a message that Chkdsk cannot run because the volume is in use by another process. Type in Y to schedule the volume to be checked the next time the system restarts.
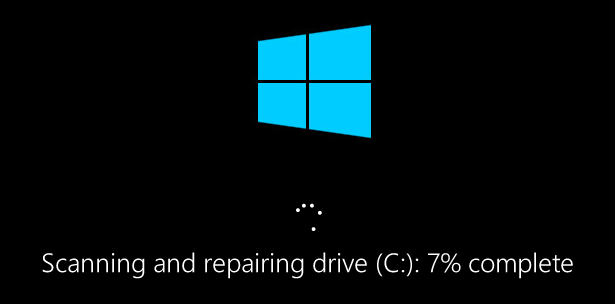
Restart your computer and you’ll see a message to press any key to skip disk checking. Obviously, don’t press anything, otherwise the scan will be cancelled.
This scan will take much longer than the scan from within Windows and there’s a much better chance that it will find errors on the disk, if any exist. If there are no errors, it will simply exit out and boot up Windows normally. If there are errors, you’ll see a summary of the errors and whether they were repaired or not.
If you don’t see the summary, log into Windows and open the Event Viewer. Go to Application log and scroll down till you see an event with Source as Wininit and Event ID 1001.
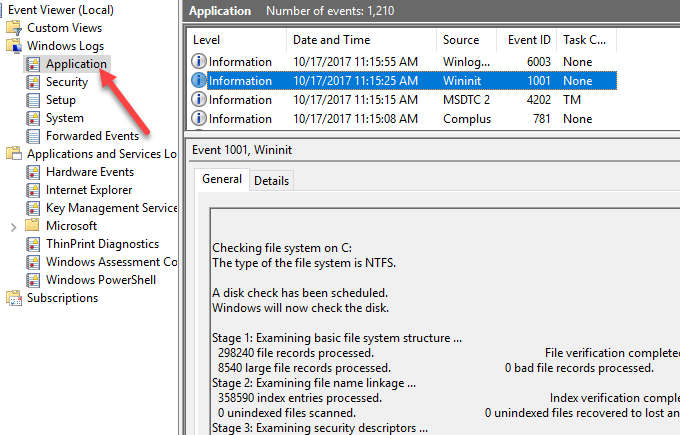
It will give you all the details about the scan here. If your drive does have errors on it, you need to make sure you copy any critical data off as quickly as possible. Even if the errors are fixed, it doesn’t mean your drive is working properly. It could fail at any moment and you shouldn’t take any risks with your data. Backup as much data as you can as soon as possible. If you have any questions, feel free to comment. Enjoy!
Founder of Help Desk Geek and managing editor. He began blogging in 2007 and quit his job in 2010 to blog full-time. He has over 15 years of industry experience in IT and holds several technical certifications. Read Aseem’s Full Bio


