- Windows check dns cache
- Support
- What Is DNS Cache and How to Flush It
- What is DNS cache?
- Checking your DNS cache
- How to flush DNS cache
- Summary
- Supercharge your content delivery рџљЂ
- Flush DNS Cache
- Windows
- How to Flush DNS in Windows 10?
- Option 1 – Command Prompt
- Option 2 – Windows PowerShell
- How to Flush DNS in Windows 8 and 8.1?
- How to Flush DNS in Windows 7 and Windows Vista?
- Shortcut
- Windows 98/NT/2000/XP Flush DNS
- Mac OS
- macOS 11 (Big Sur)
- macOS 10.15 (Catalina)
- macOS 10.14 (Mojave)
- macOS 10.13 (High Sierra)
- OS X 12 (Sierra) and later
- OS X 11 (El Capitan) and OS X 12 (Sierra)
- OS X 10.10 (Yosemite)
- OS X 10.9 (Mavericks)
- OS X 10.7 (Lion) and 10.8 (Mountain Lion)
- OS X 10.5 (Leopard) and 10.6 (Snow Leopard)
- OS X 10.4 (Tiger)
- Linux Flush DNS
- Ubuntu & Debian
- Others
- Mobile Devices
- iPhone
- iOS Devices
- Android
- TV Devices
- Google Chrome Browser
- For Webmasters/ Developers
Windows check dns cache

Как очистить кэш на компьютере
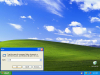
Добрый день уважаемые читатели блога pyatilistnik.org, ранее мы узнали как очистить кэш на компьютере, но не рассмотрели вопрос, как просмотреть содержимое DNS-кэша в Windows, иногда данная информация, очень полезна. Давайте исправим данную несправедливость. открываем с вами cmd, делается это просто нажимаем кнопку Win+R, откроется панель выполнить и в ней печатаем cmd. После чего жмем enter и открывается командная строка, в некоторых версиях Windows, потребуется ее открыть с правами администратора, это нужно учитывать.
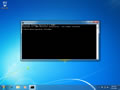
Пишем волшебную команду

Как просмотреть содержимое DNS-кэша в Windows-01
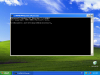
Перед вами появится полный список кэша который сейчас есть на компьютере, что он представляет это адрес сайта и его ip, а также TTL

Как просмотреть содержимое DNS-кэша в Windows-02
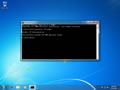
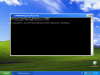
Зачастую при выводе кэша, он полностью не умещается в выводе и для этого используется параметр more. Введите следующую команду

Как просмотреть содержимое DNS-кэша в Windows-03
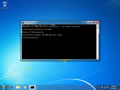
Как вы можете заметить, теперь чтобы посмотреть содержимое следующего вывода вам нужно нажать клавишу пробел

Как просмотреть содержимое DNS-кэша в Windows-04
Вот так вот просто можно решить какую нибудь сетевую проблему с неправильным разрешением имен в вашем DNS server. Подведем итоги, введя несколько несложных команд можно просмотреть содержимое DNS-кэша в Windows. Надеюсь уважаемые читатели данная статья оказалась для вас полезной, до новых встреч.
Support
Find answers, guides, and tutorials to supercharge your content delivery.
What Is DNS Cache and How to Flush It
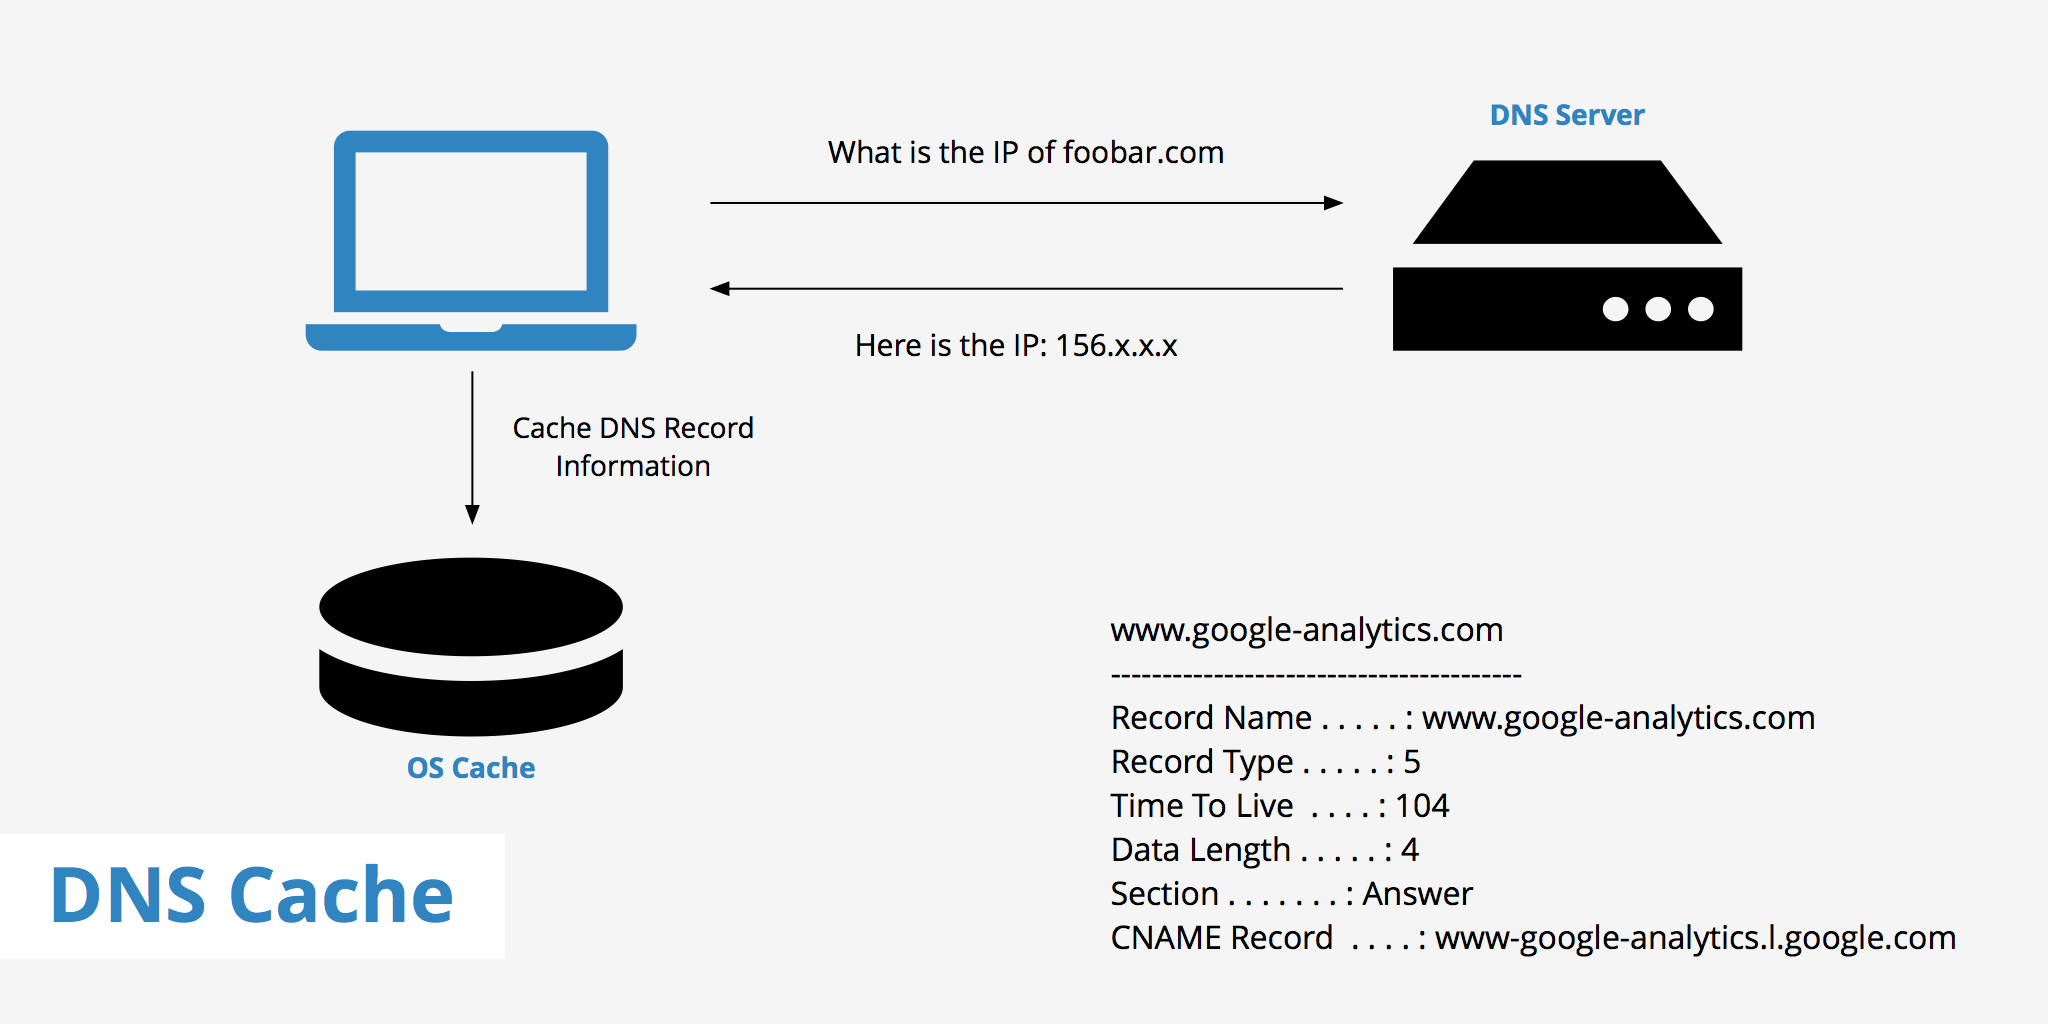
We’ve covered the topic of what a DNS server is in the past and explained how they work. Basically, a DNS server is used to resolve a particular domain to its IP equivalent. However, this process takes time since once a new website request is made, the client must ask the resolver, which asks the root server, which asks the TLD server, for information. Needless to say, each additional check, adds extra time that the visitor must wait to receive a response.
Luckily, there is a mechanism in place to help reduce the frequency of which a website visitor’s browser must request a complete DNS lookup. This is called DNS cache. In this article, we’ll further explain what DNS cache is as well as outline how to flush your DNS cache.
What is DNS cache?
DNS cache refers to the temporary storage of information about previous DNS lookups on a machine’s OS or web browser. Keeping a local copy of a DNS lookup allows your OS or browser to quickly retrieve it and thus a website’s URL can be resolved to its corresponding IP much more efficiently. The basic function of different cache types is all more or less the same. However, if you need a more comprehensive explanation of cache, check out our cache definition article.
DNS caching does not only occur at the OS and browser level. In fact, as mentioned above, a DNS lookup involves various steps. During a new DNS lookup, the lookup passes through the resolver, root server, and TLD server. At each step, information is gathered and cached for later use. Therefore, even if the local DNS cache is empty, the resolver may have a cached copy of the required information thus, avoiding the need to go through the complete DNS lookup process.
Checking your DNS cache
You can check your operating system’s logs to see which DNS records are cached locally. The process for this will vary depending upon which operating system you use however, we’ve outlined how to achieve this on both Windows and Mac.
- Window — The process for viewing your DNS cache entries in Windows is pretty simple. Simply open your command prompt and enter the following command: ipconfig /displaydns .
- Mac — The process for viewing your DNS cache entries on a Mac is a little different. You’ll need to first open the Console app, select your device from the left sidebar and enter: any:mdnsresponder into the search bar. Next, open your command line and enter the following command: sudo killall -INFO mDNSResponder . You should then be able to go back to your console app and see the list of cached DNS records. For example, the screenshot below shows a cached CNAME record for edge.skype.com.
Additionally, you can also check your DNS cache entries on certain browsers. For example, if you’re using Chrome, you can enter: chrome://net-internals/#dns into your address bar which will return your browser’s current list of cached DNS records.
How to flush DNS cache
Depending upon your operating system or browser, the method used to flush your DNS cache will vary. As for why you would want to flush your DNS cache, this may vary as well. A couple of reasons include:
- Troubleshooting connectivity issues
- Troubleshooting and/or resolving DNS spoofing (e.g. DNS cache poisoning) issues
- Resolving stale content issues (e.g. if a website has moved servers)
At the time of writing this article, we’ve gathered the latest operating system versions of both Mac and Windows and outlined the instructions below to clear your OS’s DNS cache.
- Windows — Open your command prompt or click Run when you open your start menu. Then, enter the following command: ipconfig /flushdns . If the command succeeds, you will receive the following message «Successfully flushed the DNS Resolver Cache.».
- Mac — Open your command line interface or Terminal and enter the following command: sudo killall -HUP mDNSResponder . You may need to enter your administrator password. If the command succeeds the system will not return any output.
Additionally, to clear the DNS cache in Chrome browsers, navigate to chrome://net-internals/#dns and click the «Clear Host Cache» button.
Certain DNS servers such as Google’s Public DNS even allow you to flush the cache of a domain. Therefore, if you’ve recently changed DNS servers for your site and want to ensure that everyone who is using Google’s Public DNS will receive the latest version of your site you can use their flush cache tool.
Learn more about this tool in their FAQ section.
Summary
DNS cache is a very efficient way to avoid having to complete an entire DNS lookup each time you visit a site. Instead, this process will only need to occur the first time you visit the site and upon subsequent requests, your machine will use the OS’s and browser’s cached DNS information until it expires or is flushed.
If you need to flush or check your DNS cache for any one of the reasons mentioned above, simply follow the instructions that relate your specific OS.
Supercharge your content delivery рџљЂ
Try KeyCDN with a free 14 day trial, no credit card required.
Flush DNS Cache
Modern browsers, OS, and DNS clients store cache of IP addresses and other DNS information automatically. When a computer visits a website for the first time, it stores the website’s DNS information in the cache, and on the next visit of the same website, it looks in the cache to see if the web site’s information is present to use. An old version of a site opens if the website’s DNS information has changed since the computer’s last visit.
Flushing the cache removes all the data stored in the cache, forcing the computer to find the new DNS information for the website. It is usually done to speed up the process and minimize requests for the same hostnames. When IP addresses are changed, or bad results are cached, its necessary to clear the DNS cache. DNS cache can be cleared via command line or from browsers also. Steps to flush DNS Cache for major operating systems and browsers are as below.
Windows
How to Flush DNS in Windows 10?
Command Prompt and Windows Powershell, which is a new addition to Windows, can be used to clear DNS cache.
Option 1 – Command Prompt
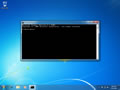
To reset the DNS resolver cache, perform the following steps:
- Click the Start button, then type cmd
- Right-click Command Prompt , then choose Run as Administrator .
- Type ipconfig /flushdns then press Enter . (be sure there is a space before the slash)
A command box will flash on the screen for a split second, and the DNS Resolver cache is cleared.
Besides, there are some other related commands that you might be interested in:
- ipconfig /displaydns: It displays your current DNS cache under Windows IP configuration.
- ipconfig /registerdns: To register your DNS cache recorded in the Hosts file.
- ipconfig /release: To release the current IP address settings.
- ipconfig /renew: To reset and request a new IP address.
Option 2 – Windows PowerShell
- Select the Start button, then type powershell
- Select Windows PowerShell
- Type the following command, then press Enter:
- Clear-DnsClientCache
How to Flush DNS in Windows 8 and 8.1?
Because of the system security policies run cmd as administrator user and follow below steps to flush DNS cache.
- Press Windows key + X and select the Command Prompt (Admin) option from the Power User menu.
- Type in the command ipconfig /flushdns and press Enter

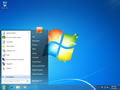
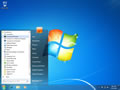
How to Flush DNS in Windows 7 and Windows Vista?
To flush DNS on an upgraded version of Windows is almost as easy as it is in the previous versions but due to Microsoft’s upgraded security system requirements, you must run the command prompt with administrator privileges.
- To flush DNS through the command prompt , navigate as shown ( Start > All Programs > Accessories > Command Prompt )
- to have administrator privileges , you must do right click on the command prompt application and choose Run as Administrator .
- Type in the command ipconfig /flushdns and press Enter
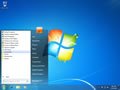
Shortcut
Type in cmd into the Windows Vista / Windows 7 start menu search field and then right click on the cmd.exe result instead of navigating through the various sub-menus.
Windows 98/NT/2000/XP Flush DNS
Given below steps will help you to clear your windows DNS cache.
- To access command prompt ( Start > Run > ).
- Type the cmd and hit Enter
- In the CMD window that you just opened, Type in the command ipconfig /flushdns
![]()
Mac OS
Flushing the DNS in Mac OS X is an easy process, but the steps taken will depend on which version of OS X is running as your operating system. First, make sure you open the Terminal on your computer. Once opened, run the command below that corresponds to your version of OS X.
macOS 11 (Big Sur)
macOS 10.15 (Catalina)
macOS 10.14 (Mojave)
macOS 10.13 (High Sierra)
OS X 12 (Sierra) and later
OS X 11 (El Capitan) and OS X 12 (Sierra)
OS X 10.10 (Yosemite)
Versions 10.10.4+
Versions 10.10.1, 10.10.2, 10.10.3
OS X 10.9 (Mavericks)
OS X 10.7 (Lion) and 10.8 (Mountain Lion)
OS X 10.5 (Leopard) and 10.6 (Snow Leopard)
OS X 10.4 (Tiger)
Linux Flush DNS
Ubuntu & Debian
Most Ubuntu and Debian systems run a system that uses systemd-resolve daemon; you will need to do the following.
- Open up a command terminal (either as root or run with sudo)
- Run the command in the terminal: systemd-resolve —flush-caches
- Optional. You can verify that this ran correctly by running the command: systemd-resolve —statistics
Others
If you are running the nscd Name Service Cache Daemon, then you will need to do the following.
- Open up a command terminal (either as root or run step 2 with sudo )
- Run the command in the terminal: /etc/init.d/nscd restart
Mobile Devices
iPhone
There are three options available to flush DNS cache in iPhone.
Toggle the Airplane mode
The easiest solution is to toggle the Airplane mode in iPhone. For this
- Open the «Settings».
- You will see the icon of an airplane. Click that to toggle on.
- Again click that icon to toggle off.
Reboot your iPhone
- Rebooting your device also clears your DNS cache.
Dump Network Settings
That will clear your DNS cache but will also immediately disable your Wi-Fi connection.
- Open the «Settings».
- Click on «General».
- Click «Reset», then «Reset Network Settings».
- Your device is then rebooted.
iOS Devices
- Press and hold both the Sleep/Wake and Home buttons for at least 10 seconds, until you see the Apple logo.
Android
Flush DNS cache in Chrome
Open the Chrome browser
- In the URL bar, type in chrome://net-internals/#dns
- In the left pane, click «DNS».
- In the right pane, click the «Clear host cache» button.
Clear the cache of your browser
In your android phone
- Go to Settings > Apps.
- Select the browser app you are using.
- Here go to «Storage» and tap on «Clear Cache».
Use Wi-Fi to Remove DNS Cache
- Settings on your Android device.
- Open Wi-Fi and then long-press the network you want to modify DNS for.
- Tap on «Modify network».
- A pop-up will appear, and you need to tap on «Advanced options».
- Select IP settings as «Static». By default, it should be DHCP.
- Go to DNS settings and manually enter the DNS servers. It is better to use Google DNS.
- In DNS 1: enter the primary DNS server, and in DNS 2: enter the secondary DNS server.
- Save your settings.
TV Devices
- Step 1. Close apps: Close the app completely. Make sure it is not running in the background as well.
- Step 2. Open App: Open the app again. DNS Cache should is cleared.
Google Chrome Browser
This method can be used for the Chrome browser regardless of the operating system.
- Start Google Chrome.
- In the address bar, type chrome://net-internals/#dns . Google Chrome displays a list of hosts in its internal DNS cache.
- Click Clear host cache.
- In the address bar, type chrome://net-internals/#sockets .
- Click Close idle sockets , and then click Flush socket pools .
For Webmasters/ Developers
DNS cache can be cleared on the client-side, but the same can be done on DNS Serves aswell to speed up the DNS Propagation process. It can be achieved in the following ways:
Public DNS services like Google, Cloudflare, OpenDNS, VeriSign enable users to request a DNS flush for specific domains.


