- Check out, check in, or discard changes to files in a library
- How can I detect changes to files from Windows?
- 3 Answers 3
- How to check File History progress status?
- Replies (16)
- Tracking changes in Windows registry
- 10 Answers 10
- 5 Ways To Monitor Log or Text File Changes in Real Time
- Monitor Text Files In Real Time With A Third Party Utility
- Monitor Text File Changes In real Time Using Notepad++
- Monitor A Text File From Windows PowerShell In Real Time
- Monitor A Text File From Command Prompt In Real Time
Check out, check in, or discard changes to files in a library
If you want to make changes to a file on a site and you want to make sure no one else can edit it, check out the file. When you have the file checked out, you can edit it online or offline, and save it—multiple times, if necessary.
When you finish editing and check the file back into the library, other people can see your changes and edit the file, if they have permission. And, if you decide not to make or keep any changes in the file, you can simply discard your checkout so you don’t affect version history.
Tip: If you want to edit an Office document at the same time as other people (also called co-authoring), don’t check out the document. Just open it and edit it. We recommend turning on versioning for the library first, though, just in case someone makes a mistake later and you need to restore an earlier version of the document. For more information about co-authoring, see Document collaboration and co-authoring.
When you want to check out and edit a document, whether it’s working online, or downloading, do it in the following sequence:
Check out the document
Open the document in a supported app or download
Edit the document
Save the document or upload
Check in the document
Tip: Check out these YouTube videos from Microsoft Creators to learn more about working in SharePoint. If you’re managing a library, you may also find these videos on documents and libraries helpful.
Some libraries are set up to require checkout of files. If checkout is required, you will be prompted to check out any files that you want to edit. When you are finished with the file, you need to check it back in or discard the checkout.
If checkout isn’t required in the library, you don’t need to check it out as long as you don’t mind letting other people edit at the same time as you.
Tip: If your team plans to use co-authoring, we recommend turning on at least major versioning in the library, just in case someone makes a mistake and uploads a document of the same name in a library where everyone is co-authoring. This way, if you lose changes, you can restore a previous version of the document. See Enable and configure versioning for a list or library for more info.
Go to the library where your file is saved. If you’re looking at a view of the library on another page, you may have to click the title of the library first. For example, you may have to click Documents first to go to the Documents library.
Select the file, or files, that you want to check out, and then select Check out.
In the classic experience, find Check Out on the Files tab in the ribbon.
When the file is checked out, the icon next to the file name is partially covered by a green, downward-pointing arrow  . This tells you, or anyone else, that the file is checked out. If you point to the icon of any checked-out file, you can see the name of the document and the name of the person who has it checked out.
Your files and any changes you make to them, will not be available to your colleagues until you check the files back into your library.
If you downloaded your document to work locally, you’ll want to upload it before checking it. in. See Upload files to a library to see how to do this.
Go to the library where your file is saved. If you’re looking at a view of the library on another page, you may have to click the title of the library first. For example, you may have to click Documents first to go to the Documents library.
Select the file, or files, that you want to check in, then select Check in.
Note: In the classic experience, find Check In on the Files tab in the ribbon.
In the Comments area, add a comment that describes the changes you made. This step is optional but recommended as a best practice. Check-in comments are especially helpful when several people work on a file. Moreover, if versions are being tracked in your organization, the comment becomes part of the version history, which may be important to you in the future, if you need to restore to an earlier version of the file.
Click OK. The green arrow disappears from the file icon when the file is checked back in.
If you check out a file and don’t make changes to it, or you make changes that you don’t want to keep, you can simply discard the checkout, rather than saving the file. If your organization tracks versions, a new version is created each time you check a file back into the library. By discarding the checkout, you can avoid making new versions when you haven’t made any changes to the file.
Go to the library where your file is saved. (If you’re looking at a view of the library on another page, you may have to click the title of the library first. For example, you may have to click Documents first to go to the Documents library.)
Select the file, or files, that you want to discard changes for, click Files and then click Discard Checkout.
Click OK to finish discarding the checkout. The green arrow disappears from the file icon when the file is checked back in.
If you have permission, you can check a file back in that was checked out by someone else.
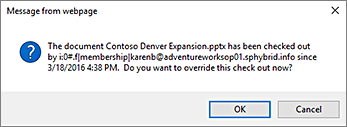
When you check-in the file, you’ll get a warning dialog that the it is checked out to another user. Select OK if you want to override and check it in.
If you need to get to a file but it’s checked out, you can view which user has it checked out so you can contact them. To see the user, hover your mouse cursor over the document’s icon to get a tooltip pop-up that contains the name of the user that has it checked out.
You can check files in one at a time, or in a batch. When you check multiple files in, they will all have the same setting for retaining the check out, or comments. Follow these steps.
In the document library, select all the files you want to check in by clicking on the check mark to the left of the document’s icon.
Select Check in.
Note: In the classic experience, find Check In on the Files tab in the ribbon.
In the Comments area, add a comment that describes the changes you made. This comment will be used on all the files you’re checking in.
Click OK. The green arrow disappears from the file icon when the file is checked back in.
How can I detect changes to files from Windows?
I want to track changes for files inside a directory, and notify web services whenever they change.
On a Mac, I know I can react to file system events, like creating it, modifying it, etc.
Which would be the best way to do this in Windows? Which language do you advise for this? (I will be building a basic UI for it).
3 Answers 3
The native (C++/C) API is ReadDirectoryChangesW. In .Net (C# etc) this is encapsulated in the FileSystemWatcher class. C# is much easier to program for, there is some sample code at that URL.
These APIs are both subject to occasional missed events. There’s no solution to this that I am aware of, not any easy alternative. If your directory is not changing that often, it likely will work just fine for you.

C# has a class System.IO.FileSystemWatcher which will probably do what you want. More details on the MDSN. For C++, see this StackOverflow question.
With Java we can Use the WatchService to detect the kind of events have occurred in a specific file or even directory.
The Implementation is easy as You can just get WatchService from FileSystem as follow:
1- Get the WatchService: WatchService watchService = FileSystems.getDefault().newWatchService();
2- Use the WatchService in Your file:
How to check File History progress status?
Replies (16)
* Please try a lower page number.
* Please enter only numbers.
* Please try a lower page number.
* Please enter only numbers.
The new File History feature on Windows 8 operating system automatically backs up files that are in your libraries, contacts, favorites, Microsoft SkyDrive and on your desktop. If the originals are lost, damaged, or deleted, you can restore all of them. You can also find different versions of your files from a specific point in time. Over time, you’ll have a complete history of your files.
But unfortunately, this feature does not have a progress bar on its interface to show the progress of the backup task performed by it. However, normally when you open the File History window, it shows the status of the backup process as when the last file was copied to the backup drive. You will also have a “Run Now” link to start the File History backup process. You may please have a look at this screenshot given below.
Hope this is helpful.
16 people found this reply helpful
Was this reply helpful?
Sorry this didn’t help.
Great! Thanks for your feedback.
How satisfied are you with this reply?
Thanks for your feedback, it helps us improve the site.
How satisfied are you with this reply?
Thanks for your feedback.
Egregious oversight in leaving out a progress bar. How long will it take? Hours? Days? Weeks? Months?
Are there any log files for confirmation it actually worked? Listings of files and versions for Sarbane Oxley requirements? Any error logs if a file is not backed up (Like Outlook PST files, now placed in My Documnents by default (and by mistake, as redirected files for My Documents creates a direct circumvention of Microsoft best practices. by design) Get with it guys, believing you have a backup when you don’t is worse than knowing you do not have a backup. If you are going to sell a «PRO» edition of the product, how about putting in some professional features. Or should we just set it and forget it and trust our life stuff to Microsoft?
166 people found this reply helpful
Was this reply helpful?
Sorry this didn’t help.
Great! Thanks for your feedback.
How satisfied are you with this reply?
Thanks for your feedback, it helps us improve the site.
How satisfied are you with this reply?
Thanks for your feedback.
Thank you so much for providing us your feedback about the File History feature in Windows 8/8.1 operating system.
As mentioned in my previous post, the File History feature does not have a progress bar on its interface to show the progress of the backup task performed by it. However, normally when you open the File History window, it shows the status of the backup process as when the last file was copied to the backup drive.
Now, if something goes wrong in File History and if the backup process is not completed successfully, then you’ll see a message in the desktop that appears in the notification area on the taskbar. You can tap or click the notification to open Action Center and fix the problem. If you miss the notification, you can open Action Center in Control Panel.
If you really want to get into the workings of File History, you can open its Event Viewer, which shows all the minute and specific details of what the feature has been doing on the computer. The “Open File History event logs to view recent events or errors” link available in the File History Advanced Settings lets you examine the operational records of this feature to ensure if it is working correctly on the computer or to troubleshoot any problems, it may come across.
Unlike, most of the Backup and Restore applications which uses the brute-force method of checking for changes in directories or files by scanning the entire volume; File History takes the advantage of the NTFS change journal.
“The NTFS change journal records any changes made to any files stored on an NTFS volume. Instead of scanning the volume, which involves opening and reading directories, File History opens the NTFS change journal and quickly scans it for any changes. Based on this information, it creates a list of files that have changed and need to be copied. The process is quick and efficient.”
For more details, you may please refer to the TechNet article given below:
Also, refer to these articles:
Hope this is helpful. Please get back to us if you have any further queries on this.
Tracking changes in Windows registry
Is there a way to track changes in Windows registry? I’d like to see what changes in the registry are made during installation of various programs.
10 Answers 10
Can monitor registry changes made by specific program.
UPDATE: Just download NirLauncher (which includes all applications from NirSoft). It is one of the best additions to your Windows toolbox. https://launcher.nirsoft.net/


Process Monitor allows you to monitor file and registry activity of various processes.
Regarding WMI and Registry:
There are three WMI event classes concerning registry:
- RegistryTreeChangeEvent
- RegistryKeyChangeEvent
- RegistryValueChangeEvent
But you need to be aware of these limitations:
With RegistryTreeChangeEvent and RegistryKeyChangeEvent there is no way of directly telling which values or keys actually changed. To do this, you would need to save the registry state before the event and compare it to the state after the event.
You can’t use these classes with HKEY_CLASSES_ROOT or HKEY_CURRENT_USER hives. You can overcome this by creating a WMI class to represent the registry key to monitor:
and use it with __InstanceOperationEvent derived classes.
So using WMI to monitor the Registry is possible, but less then perfect. The advantage is that it is possible to monitor the changes in ‘real time’. Another advantage could be WMI permanent event subscription:
a method to monitor the Registry ‘at all times’, ie. event if your application is not running.
5 Ways To Monitor Log or Text File Changes in Real Time
Whether you are a general computer user, a professional or just a hobbyist, something that gets created a lot in Windows is log files or text files that report what a particular application or built in operation has been doing. A log file could be anything from a progress report by a small utility, to a connection activity log for your server to Windows Event log files or even Windows update logs.
Sometimes you might need to monitor a text or log file to see if it is creating any error reports or failure notices while the software is running. Loading the file into Windows Notepad will show you the content of the file but it will not refresh the contents in real time to show new entries while the file is open. With just using Notepad the file would constantly need manually closing and reopening.
A solution is to use another method that can automatically show the contents of a text or log file in real time, much like the Tail command included in Linux and Unix. There’s a few ways to accomplish this task in Windows, here we show you how.
Monitor Text Files In Real Time With A Third Party Utility
One obvious way to monitor log or text files is to use a separate tool to do it for you. There are several programs around with varying levels of sophistication and quite a few have the word “Tail” in their name to reflect the fact they are doing what the Unix Tail command does. We’ve chosen a couple of tools which are quite simple to use with enough options for the average user.
mTail
mTail is free for personal use and you are encouraged to donate if you plan to use the program in a business environment. There are some quite useful features and a few advanced functions but for simple monitoring all you have to do is browse for or drop a text file onto the window and press Start.

In addition to a filter which will exclude lines that don’t include the keyword (that can be inverted), there’s also an alerter. The alerter pops up a separate window, plays a sound, sends an email or runs an external program when a keyword is found. The built in loaded text file manager allows you to set a number of individual parameters for each text or log file you want the program to monitor. mTail is also portable.
SnakeTail
SnakeTail is a small, open source and optionally portable program that can monitor standard text or log files and has the option to monitor the Event log files directly from the File menu. The program is tabbed so more than one file can be monitored at the same time. There is also the option to save a file monitoring session and return to it later on.

The SnakeTail user interface is quite simple to use and you only have to drop a file onto the window to start monitoring. In the View Options you can create highlighted keywords with text coloring and the ability to launch an external program if the keyword is found. You can cycle through the highlights with Alt+Up/Down. There’s also a simple bookmarking system to remember specific lines.
Monitor Text File Changes In real Time Using Notepad++
Notepad++ is great alternative to Notepad and one of the best free text editors around with a lot of powerful and very useful features. Although the program is not setup to monitor file changes in real time by default, with just a few setting changes it can be made to behave that way. When you normally open a file in Notepad++ and its content is changed by an external source, a window will popup with the prompt “This file has been modified by another program. Do you want to reload it?”.

Every time the file is updated you will be shown the popup. If this prompt is turned off the file will automatically be reloaded silently every time it gets updated. In Notepad++ go to Settings > Preferences > MISC. and check the Update silently and Scroll to the last line after update boxes. The second box is optional and scrolls to the end of the file every time it’s updated and reloaded.

This method has a drawback because the file will only auto update if the Notepad++ window has focus, it won’t update if the program is in the background. When you bring the window back into focus the file will update itself.
Notepad++ Monitoring In The Background
If you want to have the text file update automatically while the Notepad++ window is not in focus, an alternative solution is the Document Monitor plugin. It’s a bit of a compromise because the update period is not real time but every 3 seconds. Go to Plugins > Plugin Manager > Show Plugin Manager, check Document Monitor in the list and click Install.

Load the text file or select its opened tab and click Plugins > Document Monitor > Start monitoring. The plugin will scan the text or log file for changes every 3 seconds and automatically scroll to the end to show the updates, even while Notepad++ is not the active window.
Monitor A Text File From Windows PowerShell In Real Time
PowerShell has been integrated into Windows since Windows 7 although separate installer packages are available for XP and Vista. There are more advanced commands available in PowerShell as opposed to the Windows command line and one of those commands is a built in option for PowerShell to monitor a text file and show the changes. The command itself is quite simple and works on all versions of PowerShell:
The above has a problem though because it outputs the entire contents of the text file in the console before outputting any extra lines that are added. To get around this you can add a tail argument although you need to be running PowerShell 3 or above to use it. Windows 7 has version 2 by default so will need a newer PowerShell, Windows 8, 8.1 and 10 have PowerShell 3 or newer included, so will be OK.
Get-content pathtotextfile -Tail 0 -Wait

With the inclusion of Tail the file will start being monitored from the end and not show the contents of the text file first. If you want to include xx number of lines at the end of the file then change 0 to the required number. It’s also possible to filter lines containing specific text.
Get-content pathtotextfile -Tail 0 -Wait | where
With this command only lines containing ERROR in the text will be shown and in the above image only line three would be displayed. You can of course change the text in quotes to anything you want to help filter the lines you want to see.
Monitor A Text File From Command Prompt In Real Time
Although there are no built in command line tools that can monitor a text file for changes in real time, there are some around based on the Unix Tail command. Unxutils is a small suite of tools that have been ported from Unix to work in Windows. Download the UnxUpdates.zip, extract it and place Tail.exe and optionally Grep.exe in \Windows, \System32 or another folder found in the system PATH variables. The command is similar to the second option above:

The -n argument is similar to the PowerShell -tail argument and simply starts reading from the end of the text file. To only include lines containing a specific keyword make use of the Grep command.
tail -n 0 -f pathtotextfile | Grep Error
One issue with nearly all available ported Unix Tail utilities is they are quite old, this one dates to 2003. It does though seem to work fine in Windows 7 and 10 under basic testing.


