- Windows clean up usb
- DriveCleanup v1.6.1 – by Uwe Sieber
- How to clean the USB-C port on your phone or laptop without damaging the device
- Check out the products mentioned in this article:
- Anker Powerline+ II USB-C Cable ($13.99 at Amazon)
- innoGadgets 10x Anti Dust Plugs ($6.95 at Amazon)
- How to properly clean a USB-C port
- How to keep your USB-C port clean in the future
- How to: Perform a Clean Install or Reinstall of Windows 10
Windows clean up usb

На новые компьютеры стало всё сложнее устанавливать старые операционные системы в основном из-за отсутствия драйверов usb 3.0 в установочном образе загрузочной флешки. При попытке установить появляется такое сообщение:
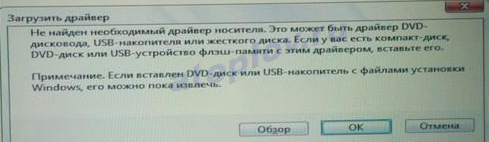
Не найден необходимый драйвер носителя. Это может быть драйвер DVD-дисковода, USB-накопителя или жесткого диска. Если у вас есть компакт-диск, DVD-диск или USB-устройство флэш-памяти с этим драйвером,вставьте его.
Примечание. Если вставлен DVD-диск или USB-накопитель с файлами установки Windows, его можно пока извлечь.
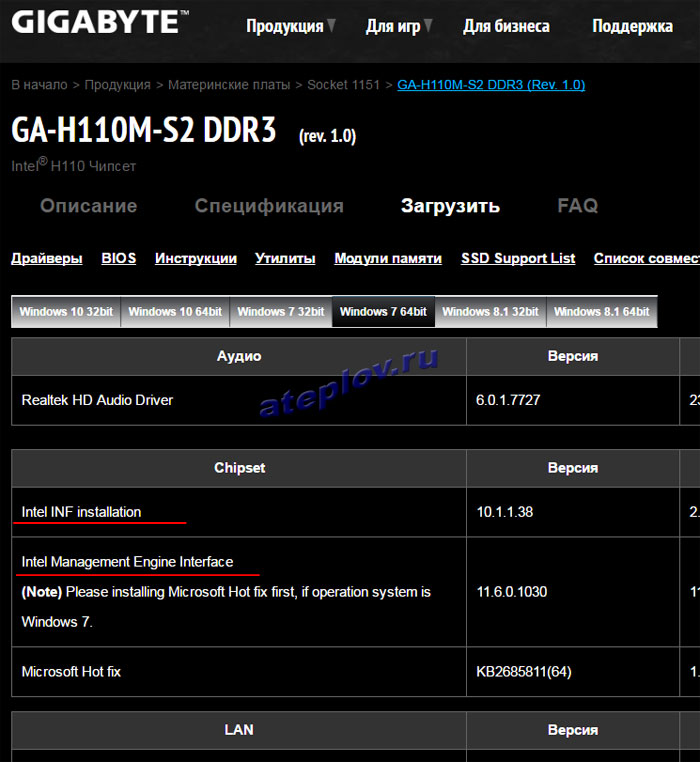
Проблема появилась при установке Windows 7 64-разрядной версии с загрузочной флешки на ПК с материнской платой GIGABYTE GA-H110M-S2 DDR3.
Решилось проблема таким образом. На сайте GIGABYTE я увидел, что чипсет у платы Intel:
На официальном сайте Intel по этой ссылке есть утилита для встраивания usb 3.0 драйверов в загрузочную флешку Windows 7, Windows 8.1 и Windows 10 под названием Windows 7* USB 3.0 Creator Utility:
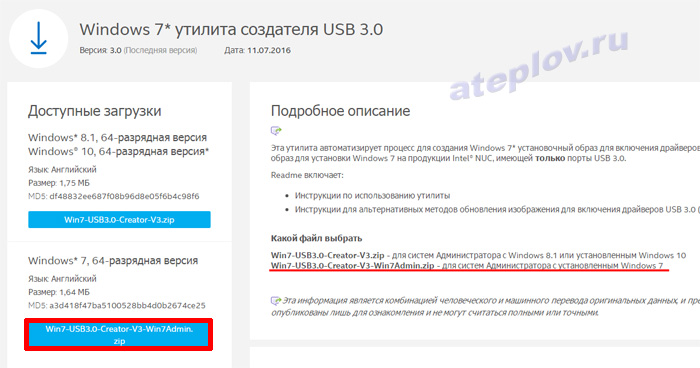
Скачиваем Win7-USB3.0-Creator-V3-Win7Admin.zip и распаковываем:
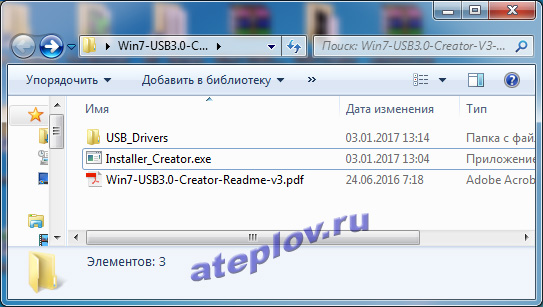
Вставляем загрузочную флешку с Windows 7 и запускаем Installer_Creator.exe. Выбираем вашу флешку и нажимаем Create Image:
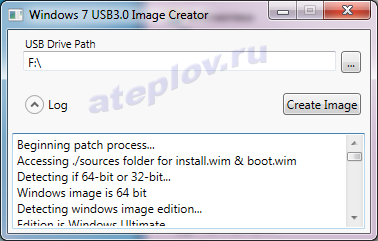
В логе пишется процесс установки. Образ у меня перезаписывался минут 15, дождитесь окончания, не выключайте программу.Вот содержимое моего лога:
Beginning patch process.
Accessing ./sources folder for install.wim & boot.wim
Detecting if 64-bit or 32-bit.
Windows image is 64 bit
Detecting windows image edition.
Edition is Windows Ultimate.
Creating mount directory
Determining number of images
Number of images detected: 4
Mounting install.wim image:1
Adding USB 3.0 Drivers to install.wim image: 1
Unmounting and committing install.wim image: 1
Mounting install.wim image:2
Adding USB 3.0 Drivers to install.wim image: 2
Unmounting and committing install.wim image: 2
Mounting install.wim image:3
Adding USB 3.0 Drivers to install.wim image: 3
Unmounting and committing install.wim image: 3
Mounting install.wim image:4
Adding USB 3.0 Drivers to install.wim image: 4
Unmounting and committing install.wim image: 4
Mounting boot.wim image:1 WinPe
Unmounting and committing boot.wim image:1 WinPe
Mounting boot.wim image:2 Windows Startup
Adding USB 3.0 Drivers to boot.wim image:2 Windows Startup
Unnmounting and committing boot.wim image:2 Windows Startup
Cleaning up mount directory
Update finished!
После этого снова пробуем ставить Windows 7 с встроенными USB 3.0 драйверами!
Если драйверы вам не подошли попробуйте подсунуть утилите свои драйверы в соответствующие папки утилиты: USB_Drivers\x64 и USB_Drivers\x86 в зависимости от разрядности устанавливаемой ОС.
DriveCleanup v1.6.1 – by Uwe Sieber

Немецкая консольная утилита, для удаления из реестра Windows, информации о ранее подключённых устройствах. Вот что мне в ней нравиться, так это то, что ничего в ней нажимать не надо, достаточно просто запустить её и она всё сделает сама.
Работает со следующими устройствами:
– USB hubs
– USB mass storage devices (флешки)
– USB Disk devices
– USB CDROM devices
– USB Floppy devices
– USB Storage Volumes
– USB WPD devices (Vista, Win7, Win8 and higher only)
Ищет и стирает данные в следующих разделах реестра:
– HKEY_LOCAL_MACHINE\SYSTEM\MountedDevices
– HKEY_LOCAL_MACHINE\SYSTEM\CurrentControlSet\Enum
– HKEY_LOCAL_MACHINE\SYSTEM\CurrentControlSet\Control\UsbFlags
– HKEY_LOCAL_MACHINE\SYSTEM\CurrentControlSet\Control\DeviceClasses
– HKEY_CURRENT_USER\Software\Microsoft\Windows\CurrentVersion\Explorer\MountPoints2
– HKEY_CURRENT_USER\Software\Microsoft\Windows\CurrentVersion\Explorer\MountPoints2\CPC\Volume
Утилита в меру гибкая и поддерживает следующие ключи:
no params: cleanup all
-t test mode
-n no wait for keypress when finished if started standalone
-u only USB mass storage devices
-d only USB Disk devices
-c only USB CDROM devices
-f only USB Floppy devices
-v only USB Storage Volume devices
-r only registry items of USB volumes
-w only USB WPD devices
Программа совместима со следующими операционными системами: Windows XP и выше.
В дистрибутиве утилиты, имеются отдельные файлы для 32 и 64 разрядных операционных систем.
В данном случае, утилита подтёрла инфу в реестре о двух флешках, одна из которых Alcor, вторая Innostor.
show=1
DriveCleanup V1.1.0 (Win32)
Uninstalls non present USB hubs, USB storage devices, Disks, CDROMs, Floppies, storage volumes and WPD devices
and deletes their registry items
Freeware by Uwe Sieber
removing USB device ‘USB\VID_058F&PID_6387\C3F52A8C’
OK
removing USB device ‘USB\VID_1F75&PID_0903\000002’
OK
removing Disk device ‘USBSTOR\DISK&VEN_GENERIC&PROD_FLASH_DISK&REV_8.07\C3F52A8C&0’
OK
removing Disk device ‘USBSTOR\DISK&VEN_USBDEV&PROD_DATA_GUARDIAN&REV_1.00\000002&0’
OK
removing volume ‘STORAGE\REMOVABLEMEDIA\8&2EE0015B&0&RM’
OK
removing volume ‘STORAGE\REMOVABLEMEDIA\9&6F43818&0&RM’
OK
Regkey delete HKCU\SYSTEM\CurrentControlSet\Control\UsbFlags\1f7509030001
OK
Removed 2 USB devices
Removed 0 USB hubs
Removed 2 Disk devices
Removed 0 CDROM devices
Removed 0 Floppy devices
Removed 2 Storage volumes
Removed 1 Items from registry
How to clean the USB-C port on your phone or laptop without damaging the device
USB-C ports — especially USB-C ports on smartphones — are constantly at risk of getting filled with dust, dirt, and other debris.
It’s not hard to understand why. If you frequently put your phone in your pocket or a bag port-side down, loose debris can be forced into the small opening.
If this is the case for you, you might notice that the USB cable doesn’t confidently snap into place anymore, or you might have trouble charging your phone. If so, it’s time to clean the USB-C port.
Here’s how to do just that, without damaging your device.
Check out the products mentioned in this article:
Anker Powerline+ II USB-C Cable ($13.99 at Amazon)
innoGadgets 10x Anti Dust Plugs ($6.95 at Amazon)
How to properly clean a USB-C port
If you need to clean your USB-C port, do so with care. Never insert metal objects like knife blades or safety pins, as metal can scratch delicate contacts and even short out your device.
Instead, what you’ll need is a can of compressed air and a toothpick or plastic dental floss pick.
1. Start with the can of compressed air. Air can loosen and blow out debris without the need to insert anything in the port, so try this first. Use the straw-like attachment to blast air into the port. Use short, controlled bursts, and hold the can straight up so you don’t blow any of the liquid contained in the can.
2. If the compressed air doesn’t expel all the debris, move on to a toothpick. Start by whittling it thinner with a knife (a modeling knife is ideal). A standard toothpick is too thick to fit in the port. If you prefer, a disposable plastic dental pick also works well. The pick at the end of disposable dental floss is usually much thinner than a toothpick, and is ideal for the job.
3. Carefully insert the thinned toothpick or dental pick in the port and use it to snag and pull out debris on both sides of the central electrical contact in the middle of the port. Work carefully and be sure you don’t bend or damage the electrical connection.
4. Finish by blowing compressed air into the port one more time to eject any debris you loosened with the toothpick or dental pick.
How to keep your USB-C port clean in the future
If you have frequent problems with your USB-C port getting dirty, try changing the way you carry or transport your device. The easiest solution is to insert it in your pocket or bag upside down, so the port goes in last and isn’t being driven towards dirt and debris.
Some people apply a small length of tape over the port to keep it clean when it isn’t in use. Alternatively, here’s a more elegant but inexpensive solution: You can buy a plug that you can insert in the USB-C port to keep out debris.
There are a number of options available, such as this 10-pack of USB-C anti-dust plugs from innoGadgets.
How to: Perform a Clean Install or Reinstall of Windows 10
Please be sure to follow me on Twitter @adacosta for the latest tips, tricks and updates in the world of Windows 10. —
Technical Level : Intermediate
Summary
If you have installed a recent release of Windows in the past 5 years, you pretty much know what it will be like to install Windows 10. In this article, we take a look at performing a clean install. This includes starting a clean install from within a running version of Windows or a hard disk/SSD with no previous Windows installations.
Details
- Perform a clean install by booting from install media (DVD or USB thumb drive)
- Perform a clean install using Reset in Windows 10 orWindows 10 Refresh Tools (Start Fresh)
- Perform a clean install from within a running version of Windows 7, Windows 8/8.1 or Windows 10
Previously, Windows 7, Windows 8.0 and Windows 8.1 users needed to have either of those versions of Windows installed and activated in order to qualify for the free upgrade offer. For users who needed to perform a clean install of Windows 10 from the outset, it was a two step process of first validating the machine through the upgrade routine, ensure the Windows 10 Upgrade was activated, then proceed to perform a Reset.
Starting with versions Windows 10 1511 or later, users no longer have to go through this process.
What is the Digital Entitlement or Digital License?
When you upgrade from a previous version of Windows, what happens is the hardware, (your PC), will get a digital license. This is a unique signature of the computer which is stored on Microsoft Activation Servers. The Windows 7 or Windows 8 genuine license you were previously running will be exchanged for a diagnostics product key.
Anytime you need to reinstall Windows 10 on that machine, just proceed to reinstall Windows 10. It will automatically reactivate. The only exception where this applies is dependent on the license you upgraded from. If you change your motherboard and originally you upgraded from a Windows 7 OEM or Windows 8 OEM license, then your Digital Entitlement will be invalidated. You will need to purchase a new full version license.
So, there is no need to know or get a product key, if you need to reinstall Windows 10, you can use your Windows 7 or Windows 8 product key or use the reset function in Windows 10.
Perform a Clean Install on an Empty Hard Disk/SSD or Reinstall by Booting from Install Media (DVD or USB Thumb Drive)
Once you have your Windows 10 installation media ready, all you need to do is boot from the disc or USB thumb drive to begin setup. If you don’t have install media, see instructions: How to download official Windows 10 ISO files
Review the following guide for instructions and details about configuring your BIOS or UEFI boot settings for DVD, CD, USB or SD Card.
Once your computer is set to boot from the DVD, you should see this option. If you are installing from a retail Windows 10 USB thumb drive, you will be asked to select either 32 or 64 bit Windows 10. Learn more here

The Windows logo will appear on screen, this might be here for a while, as long as you see the animating dots, everything should be ok.

Select your Language, Time and Keyboard method then click Next.
Click Install now
Windows 10 setup will prompt you for a product key during installation a couple times. If you originally upgraded from Windows 7 or Windows 8/8.1 click the option ‘I don’t have a key’ and ‘Do this later’ . If you have a Windows 10 product key, you can proceed to enter it.
Setup will also prompt you to select the edition you have a license for — Home or Pro. Please make sure you choose the right edition. If you choose the wrong edition, your only option will be to perform a clean install again.
The copy of Windows 10 you download and upgrade from will correspond with the edition of Windows you have installed, if it does not, this is why you might be experiencing problems activating:
- Windows 7 Starter, Home Basic, Home Premium, Windows 8.0 Core, Windows 8.1 Core should install Windows 10 Home
- Windows 7 Professional, Windows 7 Ultimate, Windows 8.0 Pro, Windows 8.1 Pro should install Windows 10 Pro
Wait while setup prepares to copy files
Accept the license terms then click Next
Click Custom: Install Windows only (advanced)
NOTE : Sometimes Windows 10 setup can become confused if it see’s a thumb drive. You might get a driver missing error or something to that effect. If you do, restart setup, but this time, when you arrive at the following screen, disconnect your thumb drive then go through Custom options. When setup is ready copy files, it will prompt you to reconnect the installation source (your USB).
Select the drive then click New
NOTE : If you have multiple partitions listed, select each one (starting at the bottom), then click delete until there is only a single (one) unallocated drive displayed in the window.
Select the unallocated drive listed, click New, click Apply then OK
This will split the drive into multiple partitions, select the Primary partition then click Next.
NOTE: The System Reserved partition is where recovery files are kept for diagnostics and repairing damaged Windows 10 files; or even reinstall Windows 10.
Wait while Windows installs
When this phase of setup is complete, Windows will automatically restart then reboot into setup again.
Windows is detecting and installing your hardware. After this is complete, Windows will restart one last time.
Out of Box Experience
The Out of Box Experience page is where you get to configure detailed settings in Windows, which includes creating a user account, configure privacy, sync PC settings and install modern applications.
Learn more about setting up your Windows 10 Installation:
There you go, Windows 10 has successfully installed!
Install the Latest Windows Updates immediately
Start > Settings > Update and Security > Windows Update then click Check for Updates
Perform a Clean Install Using Reset, Recovery Drive or Refresh Tools (Start Fresh) in Windows 10
If you already have Windows 10 installed, you can use the built in Reset function, Recovery Drive or Refresh Tools (Start Fresh) in Windows 10 do so. Learn how in the following article:
How to Perform a Clean Install by Starting Setup from Within a Running Version of Windows 10
If you are running Windows 7 or Windows 8.0, Windows 8.1 or Windows 10, launch Windows 10 setup using ISO Media:
During setup, at the Ready to install screen, click Change what to keep link
Select Nothing
Click Next to being the installation
How do I check my activation status?
Click Start > Settings (press Windows key + i) > Update & security > Activation
Depending on the version of Windows 7 installed, 1507, 1511, 1607, you will see different wording beside the activation status:
Windows 10 1507 (build 10240)
Windows 10 1511 (build 10586)
Windows 10 1607 (build 14393) or later.
If you experience problems with product activation, please review:


