- Windows commands
- Prerequisites
- Command shell overview
- Command-line reference A-Z
- Windows Terminal Tips and Tricks
- On first launch
- Customization
- Global profile settings
- Custom color schemes
- Custom command line
- Old school fonts
- Places for background images
- Functionality
- wt.exe command line arguments
- Panes
- Copy and paste
- Defining key bindings and actions
- Send input commands
- WSL starting directory
- Cheers
- Программа командной строки для захвата Command-Line Capture Tool
- Синтаксис Syntax
- Параметры Parameters
- Примечания Remarks
- Примеры Examples
- Захват графических данных из классического приложения Capture graphics information from a desktop app
- Захват графических данных из приложения UWP Capture graphics information from a UWP app.
- Захват определенных кадров или кадров в течение определенного интервала Capture specific frames or frames between specific times.
- Захват кадров в интерактивном режиме Capture frames interactively.
- Воспроизведение файла журнала графики Play back a graphic log file
- Воспроизведение в режиме исходных данных Play back in raw mode
- Воспроизведение с помощью WARP или аппаратного устройства Play back using WARP or a hardware device
- Проверка файла журнала графики относительно WARP Validate a graphics log file against WARP
- Преобразование файла журнала графики в файлы PNG Convert a Graphics Log file to PNGs
- Преобразование файла журнала графики в XML Convert a Graphics Log file to XML
Windows commands
All supported versions of Windows (server and client) have a set of Win32 console commands built in.
This set of documentation describes the Windows Commands you can use to automate tasks by using scripts or scripting tools.
Prerequisites
The information that is contained in this topic applies to:
- Windows Server 2019
- Windows Server (Semi-Annual Channel)
- Windows Server 2016
- Windows Server 2012 R2
- Windows Server 2012
- Windows Server 2008 R2
- Windows Server 2008
- Windows 10
- Windows 8.1
Command shell overview
The Command shell was the first shell built into Windows to automate routine tasks, like user account management or nightly backups, with batch (.bat) files. With Windows Script Host you could run more sophisticated scripts in the Command shell. For more information, see cscript or wscript. You can perform operations more efficiently by using scripts than you can by using the user interface. Scripts accept all Commands that are available at the command line.
Windows has two command shells: The Command shell and PowerShell. Each shell is a software program that provides direct communication between you and the operating system or application, providing an environment to automate IT operations.
PowerShell was designed to extend the capabilities of the Command shell to run PowerShell commands called cmdlets. Cmdlets are similar to Windows Commands but provide a more extensible scripting language. You can run Windows Commands and PowerShell cmdlets in Powershell, but the Command shell can only run Windows Commands and not PowerShell cmdlets.
For the most robust, up-to-date Windows automation, we recommend using PowerShell instead of Windows Commands or Windows Script Host for Windows automation.
You can also download and install PowerShell Core, the open source version of PowerShell.
Incorrectly editing the registry may severely damage your system. Before making the following changes to the registry, you should back up any valued data on the computer.
To enable or disable file and directory name completion in the Command shell on a computer or user logon session, run regedit.exe and set the following reg_DWOrd value:
To set the reg_DWOrd value, use the hexadecimal value of a control character for a particular function (for example, 0 9 is Tab and 0 08 is Backspace). User-specified settings take precedence over computer settings, and command-line options take precedence over registry settings.
Command-line reference A-Z
To find information about a specific command, in the following A-Z menu, click the letter that the command starts with, and then click the command name.
Windows Terminal Tips and Tricks
October 15th, 2020
Windows Terminal comes with a lot of features that allow you to customize it and interact with it in a way that feels most comfortable to you. Let’s run through some tips and tricks that could help you set up your terminal in a way that’s perfect for you. At the time of this blog post, Windows Terminal is on version 1.3 and Windows Terminal Preview is on version 1.4.
On first launch
When you first install Windows Terminal, you will be greeted with a Windows PowerShell prompt. Windows Terminal ships with Windows PowerShell, Command Prompt, and Azure Cloud Shell profiles by default.
In addition to these profiles, if you have any Windows Subsystem for Linux (WSL) distributions installed, the terminal will automatically create profiles for those distros as well. If you would like to install additional WSL distros on your machine, you can do so after installing terminal and on your next terminal launch, the profiles for those distros should automatically appear. These profiles will have Tux as their icon, however you can change the icon of the distro in your settings to match whichever distro you have. You can find more information about WSL on the WSL docs site.
👉 Note: You will have to download the distro icons as they do not come shipped inside the terminal.
Customization
Windows Terminal comes with a large set of default settings, including color schemes and keyboard shortcuts. If you’d like to view the default settings file, you can hold Alt and click on the Settings button inside the dropdown menu.
Global profile settings
Windows Terminal provides you the option of applying a setting to every profile without having to duplicate the setting for each profile entry. This can be done by adding a setting inside the «defaults» array inside the «profiles» object. A list of all possible profile settings can be found on the Profile settings page on our docs site.
Custom color schemes
Windows Terminal comes with an assortment of color schemes by default. However, there are unlimited possibilities when it comes to color schemes. A great place to find additional terminal schemes is terminalsplash.com.
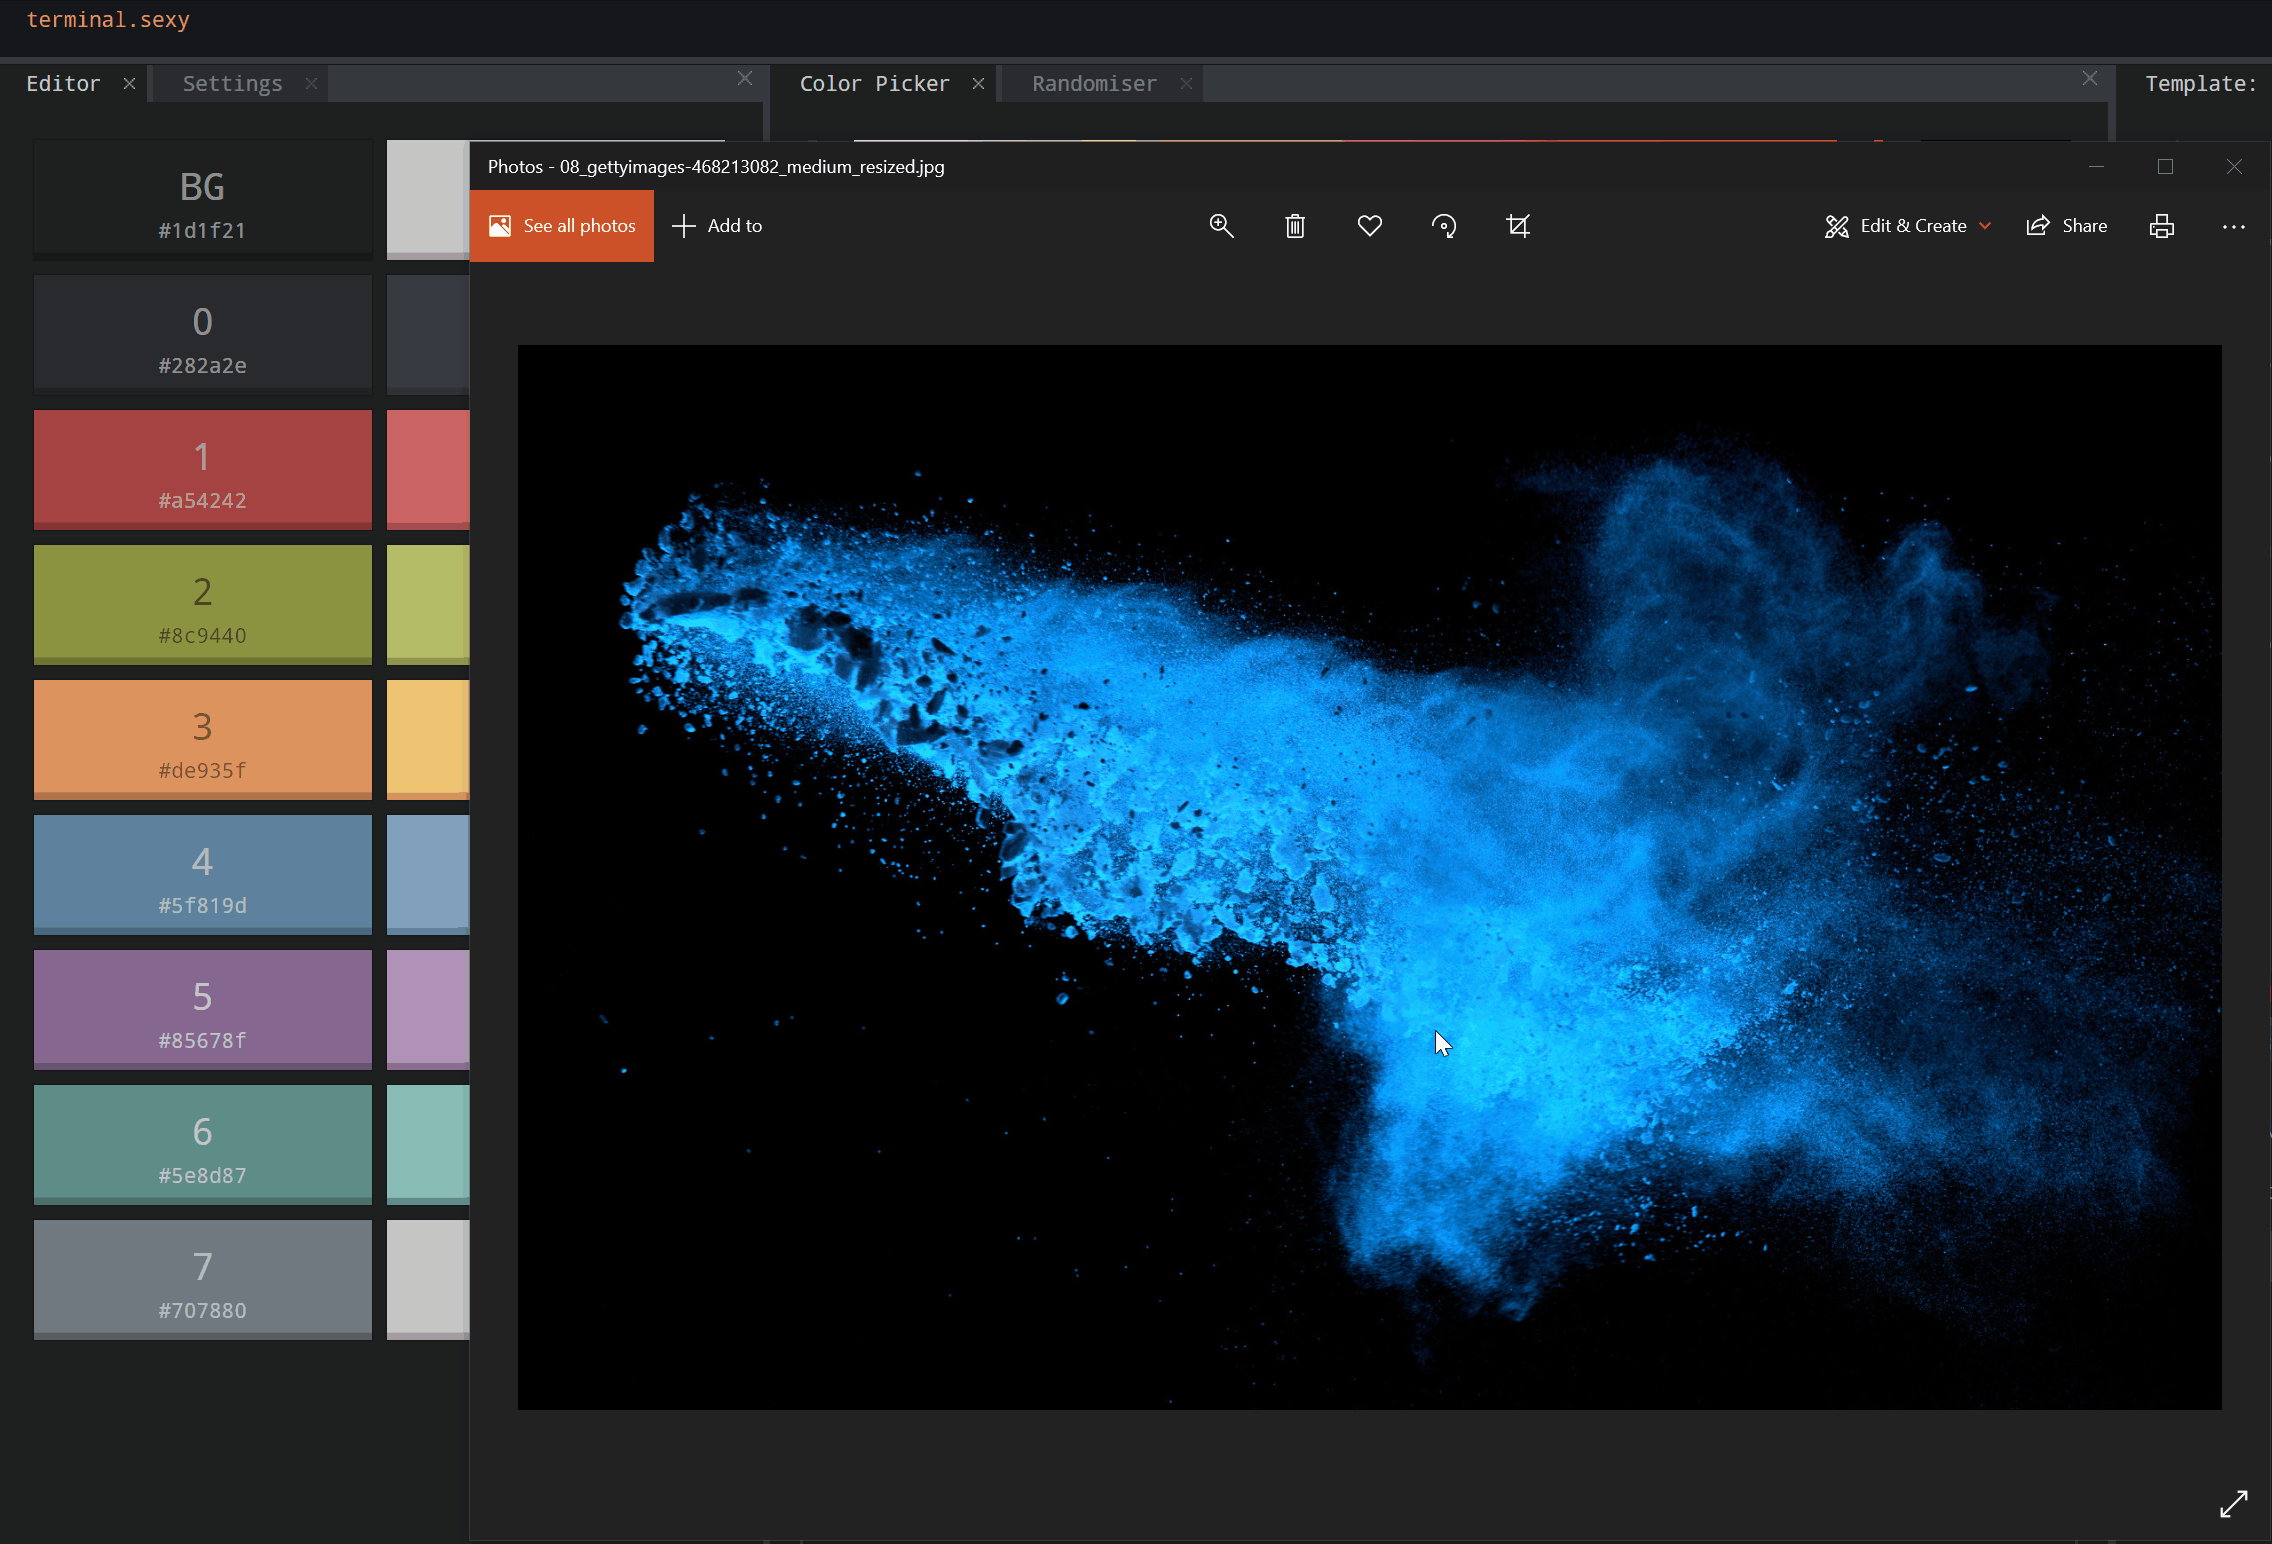
If you’d like to create your own color scheme, terminal.sexy is a great tool for creating and visualizing your own color schemes.
💡 Tip: You can match your custom color scheme to a background image by using the PowerToys color picker to grab hex codes for colors to use inside your scheme. PowerToys can be installed using winget with winget install powertoys .
Custom command line
You can give your command line some style with Oh my Posh and Terminal-Icons. These tools allow you to customize what your prompt looks like with colors, glyphs, and emojis. To get Oh my Posh with Posh-Git and PSReadline up and running, you can follow this tutorial.
Oh my Posh recently came out with Oh my Posh 3, which has a lot more customization options and is not only exclusive to PowerShell. After going through the tutorial linked above, you can upgrade to V3 with the following command:
You can add a bit more flair to your shell by adding custom icons with Terminal-Icons. The image below is also using a custom Posh theme to add emojis to the prompt line.
👉 Note: You will need to set your font to a Nerd Font in order to get the Terminal Icons to appear.
Old school fonts
For those of you who are fans of the retro terminal effect, a great place to find old school fonts is at https://int10h.org/oldschool-pc-fonts/.
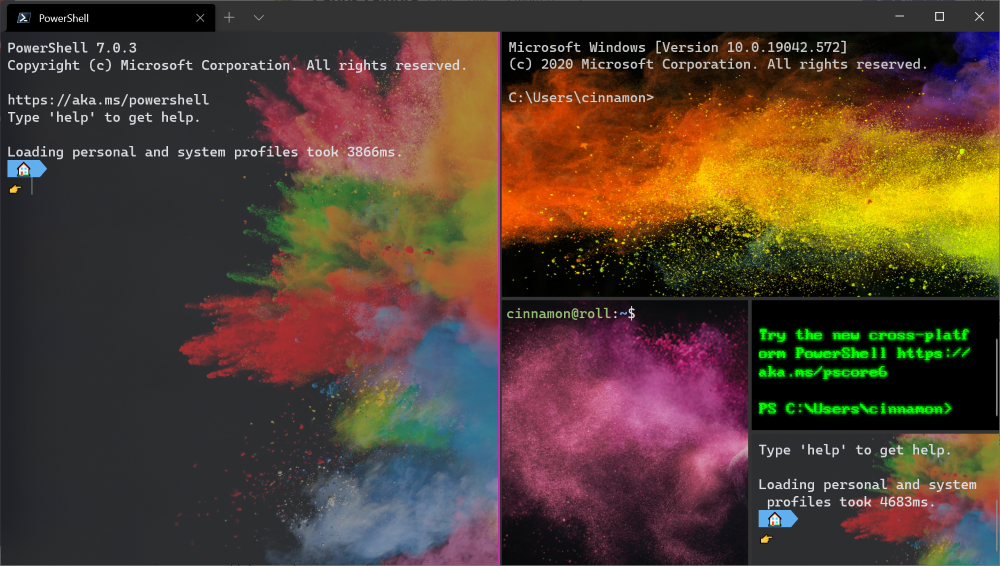
Places for background images
Desktop wallpapers often look great inside Windows Terminal as background images. Some great places to find background images are Windows Themes as well as WallpaperHub. Windows Terminal supports both images and gifs for background images.
Another popular option is placing the logo of the shell you are using as the background image, to help identify which shell you are in. You can set where the background image is placed with «backgroundImageAlignment» in your settings. More information on background image settings can be found on our docs site.
Functionality
wt.exe command line arguments
You can launch your terminal in a specific configuration by using the wt.exe command. Some options you can set are tab and pane arrangements as well as their starting directories and profiles. You can save a custom command as a shortcut and pin it to your taskbar to open your desired configuration.
If you use the wt.exe command inside the command palette, it will take effect in your current terminal window, rather than spinning up a new terminal instance.
This example will open the PowerShell profile in the current working directory in a new tab with a vertical pane running your default profile.
wt -p «PowerShell» -d . ; split-pane -V
Full documentation about wt command line arguments can be found on our docs site.
Panes
Windows Terminal has pane support for profiles. You can open a new pane of a profile by either holding Alt and clicking on the profile in the dropdown, or by using the following keyboard shortcuts:
Automatic pane split of current profile
Horizontal pane split of default profile
Alt + Shift + Minus
Vertical pane split of default profile
Alt + Shift + Plus
You can also move focus around your panes by holding Alt and using the arrow keys. Lastly, you can resize your panes by holding Alt + Shift and using the arrow keys. You can find more information about panes on our docs site.
Copy and paste
In Windows Terminal, the default keyboard shortcuts for copy and paste are Ctrl + C and Ctrl + V , respectively. If you do not have a selection, Ctrl + C will act as normal as the break command.
You can customize which keys you’d like to copy and paste with by editing the «copy» and «paste» key bindings. If you delete these key bindings from your settings.json, the terminal will default to Ctrl + Shift + C and Ctrl + Shift + V . This can be especially helpful for WSL users who need Ctrl + C and Ctrl + V free to use for their shells.
You can also choose which formatting is copied to your clipboard along with newline characters with the «copyFormatting» and «singleLine» actions associated with the copy command. Full documentation on clipboard integration commands can be found on our docs site.
Defining key bindings and actions
A large portion of the customizable properties inside Windows Terminal come from key bindings and actions. Commands inside the «actions» array will automatically be added to your command palette. If you’d like to also use them with key bindings, you can add «keys» to them to invoke them with the keyboard. A full list of every possible command can be found on the Actions page of our docs site.
Send input commands
Windows Terminal gives you the ability to send input to your shell with a key binding. This can be done with the following structure inside your «actions» array.
Sending input to the shell with a keyboard shortcut can be useful for commands you run often. One example would be clearing your screen:
Navigating to the parent directory with a key binding may also be helpful.
You can also use this functionality to run builds or test scripts.
WSL starting directory
As of now, Windows Terminal defaults to setting WSL profiles’ starting directory as the Windows user profile folder. To set your WSL profile to start in the
folder, you can add the following line to your profile settings, replacing DISTRONAME and USERNAME with the appropriate fields.
Cheers
We hope you learned a few tips and tricks about Windows Terminal throughout this blog post. We are currently planning another release for the month of November, so keep your eyes peeled for that one! If you have any questions or feedback, feel free to reach out to Kayla (@cinnamon_msft) on Twitter. For more information about Windows Terminal, you can check out our docs site.

Kayla Cinnamon
Program Manager, Windows Terminal, Console, Command Line, & Cascadia Code
Программа командной строки для захвата Command-Line Capture Tool
DXCap.exe — это программа командной строки для захвата и воспроизведения данных диагностики графики. DXCap.exe is a command-line tool for graphics diagnostics capture and playback. Она поддерживает все функциональные уровни Direct3D версий 10–12. It supports Direct3D 10 through Direct3D 12 across all feature levels.
Синтаксис Syntax
Параметры Parameters
-file filename В режиме захвата ( -c ) параметр filename определяет имя файла журнала графики, в который записываются графические данные. -file filename Under capture mode ( -c ), filename specifies the name of the graphics log file that graphics information is recorded to. Если параметр filename не задан, графические данные по умолчанию записываются в файл с именем — — .vsglog . If filename isn’t specified, graphics information is recorded to a file named — — .vsglog by default.
В режиме проверки (-v) параметр filename определяет имя файла журнала графики, который необходимо проверить. Under validation (-v) mode, filename specifies the name of the graphics log file to be validated. Если параметр filename не задан, повторно используется журнал графики, который проверялся в последний раз. If filename isn’t specified, the graphics log that was last validated is used again.
-frame«frames В режиме захвата параметр frames определяет кадры, которые необходимо захватить. -frame frames Under capture mode, frames specifies the frames that you want to capture. Первый кадр имеет номер 1. The first frame is 1. Чтобы указать несколько кадров, можно перечислить их через запятую или использовать диапазоны. You can specify several frames by using commas and ranges. Например, если frames — 2, 5, 7-9, 15 , записываются кадры 2 , 5 , 7 , 8 , 9 и 15 . For example, if frames is 2, 5, 7-9, 15 , then frames 2 , 5 , 7 , 8 , 9 , and 15 are captured.
Используйте -frame manual , чтобы указать, что кадры будут захватываться вручную путем нажатия клавиши PRINT SCREEN. Use -frame manual to specify that frames will be captured manually by pressing the Print Screen key. Кадры можно захватывать, когда приложение запущено. Чтобы остановить захват кадров, вернитесь в интерфейс командной строки и нажмите клавишу ВВОД. Frames can be captured when the app starts; to stop capturing frames, return to the command line interface and press enter.
-period«periods В режиме захвата параметр periods определяет интервал времени (в секундах), в течение которого необходимо захватывать кадры. -period periods Under capture mode, periods specifies the ranges of time, in seconds, during which you want to capture frames. Чтобы указать несколько периодов, можно перечислить их через запятую или использовать диапазоны. You can specify several periods by using commas and ranges. Например, если параметр periods имеет значение 2.1-5, 7.0-9.3 , то захватываются кадры, отрисовываемые в течение интервалов от 2.1 до 5 секунд и от 7 до 9.3 секунд. For example if periods is 2.1-5, 7.0-9.3 , then frames that are rendered between 2.1 and 5 seconds, and between 7 and 9.3 seconds are captured.
-c«app [ args. ] Режим захвата. -c app [ args. ] Capture mode. В режиме захвата параметр app определяет имя приложения, из которого необходимо захватить графические данные. args. определяет дополнительные параметры командной строки для этого приложения. Under capture mode, app specifies the name of the app that you want to capture graphics information from; args. specifies additional command-line parameters to that app.
-p [ filename ] Режим воспроизведения ( -p ). -p [ filename ] Playback mode ( -p ). В режиме воспроизведения параметр filename определяет имя файла журнала графики, который необходимо воспроизвести. Under playback mode, filename specifies the name of the graphics log file to be played back. Если параметр filename не задан, повторно используется журнал графики, который воспроизводился в последний раз. If filename isn’t specified, the graphics log that was last played back is used again.
-debug В режиме воспроизведения параметр -debug указывает на то, что воспроизведение должно выполняться с включенным уровнем отладки Direct3D. -debug Under playback mode, -debug specifies that playback should be played with the Direct3D debug layer enabled.
-warp В режиме воспроизведения параметр -warp указывает на то, что воспроизведение должно выполняться с помощью программной отрисовки WARP. -warp Under playback mode, -warp specifies that playback should be played using the WARP software renderer.
-hw В режиме воспроизведения параметр -hw указывает на то, что воспроизведение должно выполняться с помощью аппаратных средств GPU. -hw Under playback mode, -hw specifies that playback should be played using GPU hardware.
-config В режиме воспроизведения параметр -config отображает любые сведения о компьютере, который использовался для записи файла журнала графики. -config Under playback mode, -config displays any information about the machine that was used to capture the graphics log file.
-rawmode В режиме воспроизведения параметр -rawmode указывает на то, что воспроизведение должно осуществляться без изменения записанных событий. -rawmode Under playback mode, -rawmode specifies that playback should be performed without modification to the recorded events. В обычном режиме воспроизведения в воспроизводимые данные могут вноситься небольшие изменения с целью упростить отладку и ускорить воспроизведение. Under normal operation, playback mode might make minor changes to playback to simplify debugging and speed up playback. Например, вместо выполнения команд цепочки буферов выходные данные цепочки буферов могут имитироваться. For example, it may simulate swap chain output rather than executing swap chain commands. Обычно воспроизведение не является проблемой, но может потребоваться воспроизведение таким образом, чтобы оно было более точным для записанного события. Usually this playback is not a problem, but you might need playback to occur in a way that’s more faithful to the recorded event. Например, этот параметр можно использовать для восстановления режима полноэкранной отрисовки в приложении, которое было захвачено при работе в полноэкранном режиме. For example, you can use this option to restore full-screen rendering behavior to an app that was captured while running in full-screen mode.
-toXML [ xml_filename ] В режиме воспроизведения параметр xml_filename определяет имя файла, в который записывается XML-представление воспроизводимых данных. -toXML [ xml_filename ] Under playback mode, xml_filename specifies the name of the file where an XML representation of playback is written to. Если параметр xml_filename не задан, XML-представление записывается в файл, имя которого совпадает с именем воспроизводимого файла, но с расширением .xml . If xml_filename is not specified, the XML representation is written to a file named the same as the file being played back, but given an .xml extension.
-v Режим проверки. -v Validation mode. В режиме проверки захваченные кадры воспроизводятся на оборудовании и в WARP, а результаты сравниваются с помощью функции сравнения изображений. Under validation mode, captured frames are played back on both hardware and WARP, and their results are compared using an image comparison function. С помощью этой возможности можно быстро выявить проблемы с драйвером, влияющие на отрисовку. You can use this feature to quickly identify driver issues that affect your rendering.
-examine«events В режиме проверки параметр events определяет набор событий графики, непосредственные результаты которых необходимо сравнить. -examine events Under validation mode, events specifies the set of graphics events whose immediate results are compared. Например, параметр -examine present,draw,copy,clear ограничивает сравниваемые события только теми, которые относятся к указанным категориям. For example, -examine present,draw,copy,clear limits the comparison to only the events belonging to those categories.
Мы рекомендуем начать сравнение с набора -examine present,draw,copy,clear так как при этом будет выявлено большинство проблем, а времени потребуется значительно меньше, чем при сравнении более полного набора событий. We recommend starting with -examine present,draw,copy,clear because this will reveal most issues but take significantly less time than a more extensive set of events. При необходимости вы можете указать другой набор событий для проверки, чтобы выявить другие проблемы. If necessary, you can specify a larger or different set of events to validate those events and reveal other kinds of issues.
-haltonfail В режиме проверки параметр -haltonfail останавливает проверку при обнаружении различий между аппаратной отрисовкой и отрисовкой WARP. -haltonfail Under validation mode, -haltonfail halts validation when differences are detected between the hardware and WARP renderer. Проверка возобновляется после нажатия клавиши. Validation resumes after a key is pressed.
-exitonfail В режиме проверки параметр -exitonfail немедленно прерывает проверку при обнаружении различий между аппаратной отрисовкой и отрисовкой WARP. -exitonfail Under validation mode, -exitonfail exits validation immediately when differences are detected between the hardware and WARP renderer. При выходе из программы таким образом в среду возвращается значение 0 ; в противном случае возвращается значение 1 . When the program exits in this way, it returns 0 to the environment; otherwise it returns 1 .
-showprogress В режиме проверки параметр -showprogress выводит сведения о ходе выполнения сеанса проверки. -showprogress Under validation mode, -showprogress displays progress information about the validation session. Ход отрисовки WARP показан слева, а ход аппаратной отрисовки — справа. WARP progress is displayed on the left; hardware progress is displayed on the right.
-e search_string Перечисление установленных приложений UWP. -e search_string Enumerates the UWP apps that are installed. Эту информацию можно использовать для захвата информации из приложений UWP с помощью командной строки. You can use this information to perform command-line captures with UWP apps.
-info Выводит информацию о компьютере и библиотеках DLL захвата. -info Displays information about the machine and capture DLLs.
Примечания Remarks
Программа DXCap.exe работает в трех режимах. DXCap.exe operates in three modes:
Режим захвата (-c). Графические данные захватываются из работающего приложения и записываются в файл журнала графики. Capture mode (-c) Capture graphics information from a running app and record it to a graphics log file. Возможности захвата и формат файла аналогичны используемым в Visual Studio. The capture capabilities and file format are identical to those of Visual Studio.
Режим воспроизведения (-p). Воспроизведение ранее захваченных событий графики из существующего файла журнала графики. Playback mode (-p) Playback previously captured graphics events from an existing graphics log file. По умолчанию воспроизведение осуществляется в окне, даже если файл журнала графики был захвачен из полноэкранного приложения. By default, playback occurs in a window, even when the graphics log file was captured from a fullscreen app. Воспроизведение осуществляется в полноэкранном режиме только в том случае, если файл журнала графики был захвачен из полноэкранного приложения и указан параметр -rawmode . Playback occurs in full-screen only when the graphics log file was captured from a fullscreen app and -rawmode is specified.
Режим проверки ( -v ). Проверка поведения отрисовки путем воспроизведения захваченных кадров на оборудовании и в WARP и последующего сравнения результатов с помощью функции сравнения изображений. Validation mode ( -v ) Validates rendering behavior by playing back captured frames on both hardware and WARP, then comparing their results by using an image comparison function. С помощью этой возможности можно быстро выявить проблемы с драйвером, влияющие на отрисовку. You can use this feature to quickly identify driver issues that affect your rendering.
Помимо этих режимов, программа dxcap.exe выполняет еще две функции, которые не предусматривают захват или воспроизведение графических данных. In addition to these modes, dxcap.exe performs two other functions that do not perform capture or playback of graphics information.
Функция перечисления ( -e ). Выводит подробные сведения о приложениях Магазина Windows, установленных на компьютере. Enumeration function ( -e ) Displays details about the UWP apps that are installed on the machine. Эти сведения включают в себя имя пакета и идентификатор appid, определяющий исполняемый файл приложения UWP. These details include the package name and appid that identify the executable file in a UWP app. Для захвата графических данных из приложения Магазина Windows с помощью программы DXCap.exe используйте имя пакета и идентификатор appid вместо имени исполняемого файла, которое используется при захвате данных из классического приложения. To capture graphics information from a windows store app using DXCap.exe, use the package name and appid instead of the executable filename that’s used when you capture a desktop app.
Функция сведений ( -info) ). Выводит подробные сведения о компьютере и библиотеках DLL захвата. Info function ( -info) Displays details about the machine and capture DLLs.
Примеры Examples
Захват графических данных из классического приложения Capture graphics information from a desktop app
Чтобы указать приложение, из которого нужно захватить графические данные, используйте параметр -c . Use -c to specify the app from which you want to capture graphics information.
Чтобы указать дополнительные параметры командной строки для приложения, из которого захватываются данные, добавьте их после имени файла приложения. Specify additional command-line parameters to the app that you’re capturing from by including them after the app’s filename.
Команда в приведенном выше примере захватывает графические данные из классической версии браузера Internet Explorer во время просмотра веб-страницы по адресу www.fishgl.com, которая использует API WebGL для отрисовки трехмерного содержимого. The command in the example above captures graphics information from the desktop version of Internet Explorer while viewing the webpage located at www.fishgl.com which uses the WebGL API to render 3-D content.
Так как аргументы командной строки, находящиеся после имени приложения, передаются в него, аргументы, предназначенные для программы DXCap.exe, необходимо указать перед параметром -c . Because command line arguments that appear after the app are passed to it, you must specify the arguments intended for DXCap.exe before using the -c option.
Захват графических данных из приложения UWP Capture graphics information from a UWP app.
Вы можете захватывать графические данные из приложения UWP. You can capture graphics information from a UWP app.
Захват данных из приложения UWP с помощью программы DXCap.exe осуществляется так же, как из классического приложения Windows, но вместо указания приложения по имени файла приложение UWP указывается по имени пакета и идентификатору исполняемого файла внутри этого пакета. Using DXCap.exe to capture from a UWP app is similar to using it to capture from a Windows desktop app, but instead identifying a desktop app by its filename, you identify a UWP app by its package name and the name or ID of the executable inside that package that you want to capture from. Чтобы узнать, как идентифицируются приложения UWP, установленные на компьютере, используйте программу DXCap.exe с параметром -e , чтобы перечислить их. To make it easier to find out how to identify the UWP apps that are installed on your machine, use the -e option with DXCap.exe to enumerate them:
Вы можете указать дополнительную строку поиска, чтобы найти конкретное приложение. You can provide an optional search string to help find the app that you’re looking for. Если указана строка поиска, программа DXCap.exe перечисляет приложения UWP, имена пакетов, имена приложений или идентификаторы приложений которых совпадают со строкой. When the search string is provided, DXCap.exe enumerates the UWP apps whose package name, app name or app IDs match the search string. При поиске не учитывается регистр. The search is case-insensitive.
Приведенная выше команда перечисляет приложения UWP, которые соответствуют строке «map». Ниже приведены результаты ее выполнения. The command above enumerates UWP apps that match «map»; here is the output:
Пакет «Microsoft.BingMaps»: InstallDirectory: C:\Program Files\WindowsApps\Microsoft.BingMaps_2.1.2914.1734_x64__8wekyb3d8bbwe FullName : Microsoft.BingMaps_2.1.2914.1734_x64__8wekyb3d8bbwe UserSID : S-1-5-21-2127521184-1604012920-1887927527-5603533 Name : Microsoft.BingMaps Publisher : CN=Microsoft Corporation, O=Microsoft Corporation, L=Redmond, S=Washington, C=US Version : 2.1.2914.1734 Launchable Applications: Id: AppexMaps Exe: C:\Program Files\WindowsApps\Microsoft.BingMaps_2.1.2914.1734_x64__8wekyb3d8bbwe\Map.exe IsWWA: No AppSpec (to launch): DXCap.exe -c Microsoft.BingMaps_2.1.2914.1734_x64__8wekyb3d8bbwe,AppexMaps. В последней строке выходных данных для каждого перечисленного приложения приводится команда, с помощью которой можно захватить графические данные из него. Package «Microsoft.BingMaps»: InstallDirectory : C:\Program Files\WindowsApps\Microsoft.BingMaps_2.1.2914.1734_x64__8wekyb3d8bbwe FullName : Microsoft.BingMaps_2.1.2914.1734_x64__8wekyb3d8bbwe UserSID : S-1-5-21-2127521184-1604012920-1887927527-5603533 Name : Microsoft.BingMaps Publisher : CN=Microsoft Corporation, O=Microsoft Corporation, L=Redmond, S=Washington, C=US Version : 2.1.2914.1734 Launchable Applications: Id: AppexMaps Exe: C:\Program Files\WindowsApps\Microsoft.BingMaps_2.1.2914.1734_x64__8wekyb3d8bbwe\Map.exe IsWWA: No AppSpec (to launch): DXCap.exe -c Microsoft.BingMaps_2.1.2914.1734_x64__8wekyb3d8bbwe,AppexMaps The last line of output for each enumerated app displays the command you can use to capture graphics information from it.
Захват определенных кадров или кадров в течение определенного интервала Capture specific frames or frames between specific times.
Чтобы указать кадры, которые необходимо захватить, через запятую и с помощью диапазонов, используйте параметр -frame . Use -frame to specify the frames that you want to capture using commas and ranges:
Либо используйте параметр -period , чтобы указать набор интервалов времени, в течение которых должны захватываться кадры. Or, use -period to specify a set of time ranges during which to capture frames. Интервалы времени указываются в секундах; можно задать несколько интервалов. Time ranges are specified in seconds, and multiple ranges can be specified:
Захват кадров в интерактивном режиме Capture frames interactively.
Чтобы начать захват кадров в интерактивном режиме, используйте -manual . Use -manual to capture frames interactively. Чтобы начать захват, нажмите клавишу ВВОД. Чтобы остановить захват, нажмите клавишу ВВОД еще раз. Press the Enter key to start capture, and press the Enter key again to stop.
Воспроизведение файла журнала графики Play back a graphic log file
Чтобы воспроизвести ранее захваченный файл журнала графики, используйте параметр -p . Use -p to play back a previously captured graphics log file.
Чтобы воспроизвести последний захваченный журнал графики, не указывайте имя файла. Leave out the filename to play back the graphics log that was captured most recently.
Воспроизведение в режиме исходных данных Play back in raw mode
Чтобы воспроизвести захваченные команды в исходном виде, используйте параметр -rawmode . Use -rawmode to play back captured commands exactly as they occurred. В обычном режиме воспроизведения некоторые команды эмулируются. Например, файл журнала графики, захваченный из полноэкранного приложения, будет воспроизводиться в окне. При включении режима исходных данных будет предпринята попытка воспроизведения этого файла в полноэкранном режиме. Under normal playback, certain commands are emulated, for example, a graphics log file captured from a full screen app will play back in a window; with raw mode enabled, the same file will attempt to play back in full screen.
Воспроизведение с помощью WARP или аппаратного устройства Play back using WARP or a hardware device
Вам может потребоваться принудительно воспроизвести файл журнала графики, захваченный на аппаратном устройстве, с помощью WARP или принудительно воспроизвести журнал, захваченный в WARP, с помощью аппаратного устройства. You might want to force play back of a graphics log file captured on a hardware device to use WARP, or force playback of a log captured on WARP to use a hardware device. Для воспроизведения с помощью WARP используйте параметр -warp . Use -warp to play back using WARP.
Для воспроизведения с помощью аппаратных средств используйте параметр -hw . Use -hw to play back using hardware.
Проверка файла журнала графики относительно WARP Validate a graphics log file against WARP
В режиме проверки файл журнала графики воспроизводится как на оборудовании, так и в WARP, после чего результаты сравниваются. Under validation mode, the graphics log file is played back on both hardware and WARP, and their results are compared. Это может помочь определить ошибки отрисовки, вызванные драйвером. This can help you identify rendering errors that are caused by the driver. Чтобы проверить правильность работы графического оборудования в сравнении с WARP, используйте параметр -v. Use -v to validate correct behavior of graphics hardware against WARP.
Чтобы уменьшить количество сравнений, вы можете указать подмножество команд для сравнения; остальные команды будут игнорироваться. To reduce the amount of comparisons, you can specify a subset of commands for validation to compare and other commands will be ignored. Чтобы указать команды, результаты которых нужно сравнить, используйте параметр -examine. Use -examine to specify the commands whose results you want to compare.
Преобразование файла журнала графики в файлы PNG Convert a Graphics Log file to PNGs
Для просмотра и анализа кадров из файла журнала графики программа DXCap.exe может сохранять захваченные кадры как файлы изображений PNG. To view or analyze frames from a graphics log file, DXCap.exe can save captured frames as .png (Portable Network Graphics) image files. Для получения захваченных кадров в виде файлов PNG используйте параметр -screenshot в режиме воспроизведения. Use -screenshot to under playback mode to output captured frames as .png files.
Чтобы указать кадры, которые необходимо получить, используйте параметр -frame с параметром -screenshot . Use -frame with -screenshot to specify the frames that you want to output.
Преобразование файла журнала графики в XML Convert a Graphics Log file to XML
Для обработки и анализа журналов графики с помощью привычных средств, таких как FindStr или XSLT, программа DXCap.exe преобразовать файл журнала графики в формат XML. To process and analyze graphics logs using familiar tools like FindStr or XSLT, DXCap.exe can convert a graphics log file to XML. Чтобы преобразовать журнал в формат XML вместо его воспроизведения, используйте параметр -toXML в режиме воспроизведения. Use -toXML under playback mode to convert the log to XML instead of playing it back.
По умолчанию выходные данные XML записываются в файл с тем же именем, что и у файла журнала, но с расширением XML. By default, the XML output is written to a file with the same name as the graphics log, but which has been given a .xml extension. В приведенном выше примере файл XML получит имя regression_test_12.xml. In the example above, the XML file will be named regression_test_12.xml. Чтобы присвоить файлу XML другое имя, укажите его после параметра -toXML . To give the XML file a different name, specify it after -toXML .
Получившийся файл будет содержать код XML наподобие следующего: The resulting file will contain XML that looks similar to this:


