- Windows Terminal Tips and Tricks
- On first launch
- Customization
- Global profile settings
- Custom color schemes
- Custom command line
- Old school fonts
- Places for background images
- Functionality
- wt.exe command line arguments
- Panes
- Copy and paste
- Defining key bindings and actions
- Send input commands
- WSL starting directory
- Cheers
- Windows commands
- Prerequisites
- Command shell overview
- Command-line reference A-Z
- How to Highlight Text in PDF with commandline (windows)?
- 1 Answer 1
- WinDbg Command-Line Options
- Parameters
Windows Terminal Tips and Tricks
October 15th, 2020
Windows Terminal comes with a lot of features that allow you to customize it and interact with it in a way that feels most comfortable to you. Let’s run through some tips and tricks that could help you set up your terminal in a way that’s perfect for you. At the time of this blog post, Windows Terminal is on version 1.3 and Windows Terminal Preview is on version 1.4.
On first launch
When you first install Windows Terminal, you will be greeted with a Windows PowerShell prompt. Windows Terminal ships with Windows PowerShell, Command Prompt, and Azure Cloud Shell profiles by default.
In addition to these profiles, if you have any Windows Subsystem for Linux (WSL) distributions installed, the terminal will automatically create profiles for those distros as well. If you would like to install additional WSL distros on your machine, you can do so after installing terminal and on your next terminal launch, the profiles for those distros should automatically appear. These profiles will have Tux as their icon, however you can change the icon of the distro in your settings to match whichever distro you have. You can find more information about WSL on the WSL docs site.
👉 Note: You will have to download the distro icons as they do not come shipped inside the terminal.
Customization
Windows Terminal comes with a large set of default settings, including color schemes and keyboard shortcuts. If you’d like to view the default settings file, you can hold Alt and click on the Settings button inside the dropdown menu.
Global profile settings
Windows Terminal provides you the option of applying a setting to every profile without having to duplicate the setting for each profile entry. This can be done by adding a setting inside the «defaults» array inside the «profiles» object. A list of all possible profile settings can be found on the Profile settings page on our docs site.
Custom color schemes
Windows Terminal comes with an assortment of color schemes by default. However, there are unlimited possibilities when it comes to color schemes. A great place to find additional terminal schemes is terminalsplash.com.
If you’d like to create your own color scheme, terminal.sexy is a great tool for creating and visualizing your own color schemes.
💡 Tip: You can match your custom color scheme to a background image by using the PowerToys color picker to grab hex codes for colors to use inside your scheme. PowerToys can be installed using winget with winget install powertoys .
Custom command line
You can give your command line some style with Oh my Posh and Terminal-Icons. These tools allow you to customize what your prompt looks like with colors, glyphs, and emojis. To get Oh my Posh with Posh-Git and PSReadline up and running, you can follow this tutorial.
Oh my Posh recently came out with Oh my Posh 3, which has a lot more customization options and is not only exclusive to PowerShell. After going through the tutorial linked above, you can upgrade to V3 with the following command:
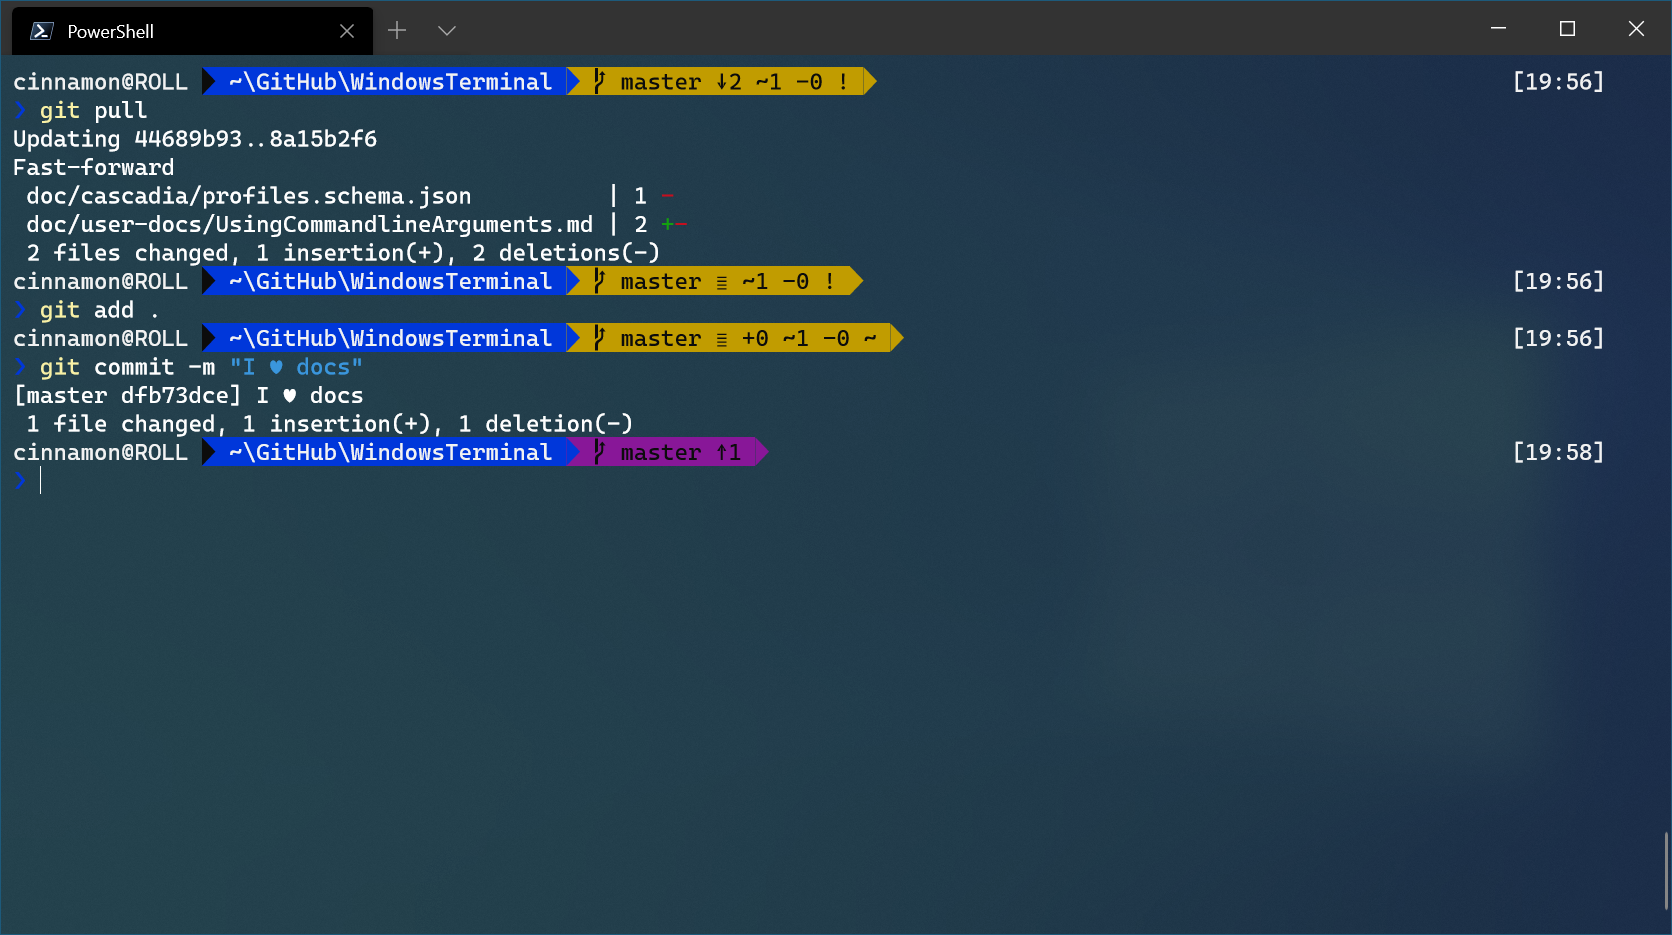
You can add a bit more flair to your shell by adding custom icons with Terminal-Icons. The image below is also using a custom Posh theme to add emojis to the prompt line.
👉 Note: You will need to set your font to a Nerd Font in order to get the Terminal Icons to appear.
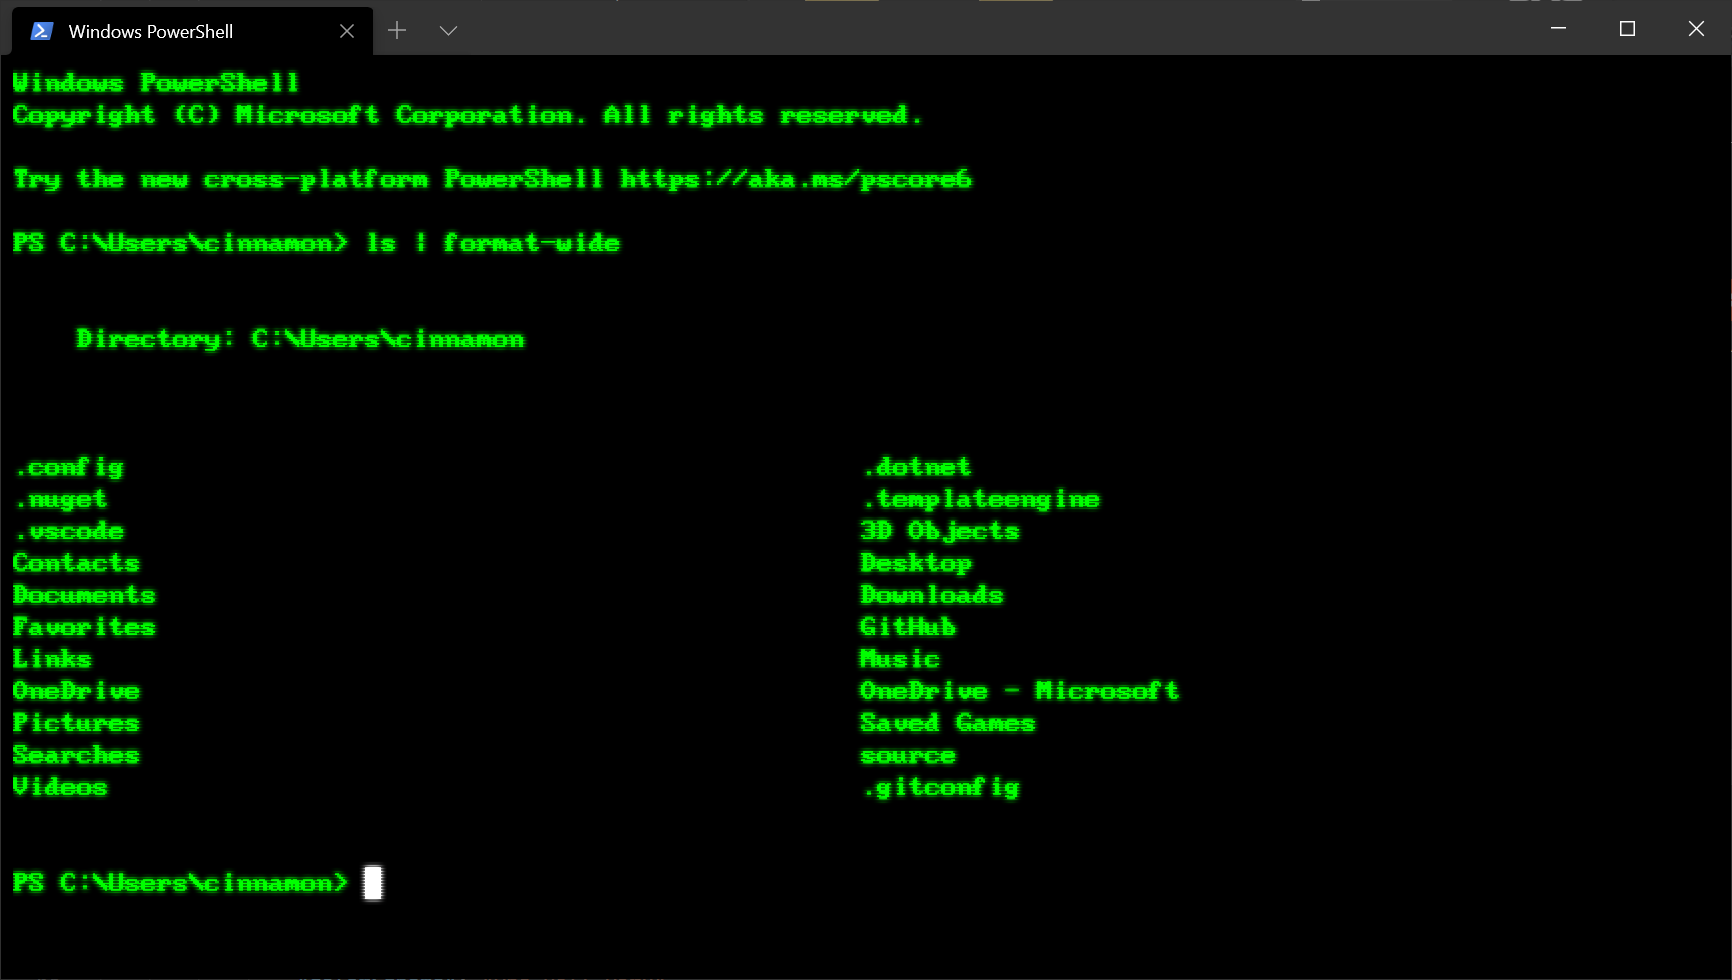
Old school fonts
For those of you who are fans of the retro terminal effect, a great place to find old school fonts is at https://int10h.org/oldschool-pc-fonts/.
Places for background images
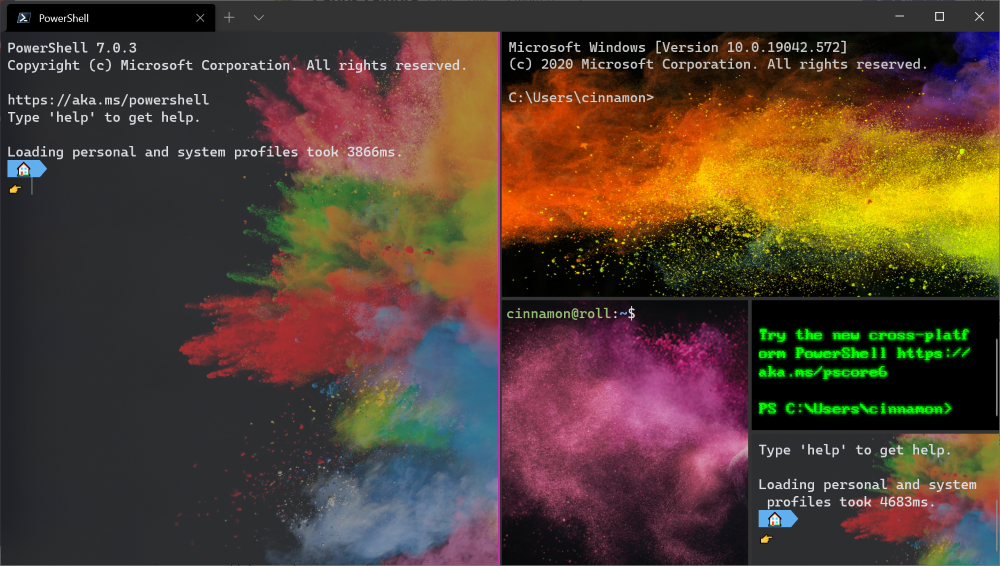
Desktop wallpapers often look great inside Windows Terminal as background images. Some great places to find background images are Windows Themes as well as WallpaperHub. Windows Terminal supports both images and gifs for background images.
Another popular option is placing the logo of the shell you are using as the background image, to help identify which shell you are in. You can set where the background image is placed with «backgroundImageAlignment» in your settings. More information on background image settings can be found on our docs site.
Functionality
wt.exe command line arguments
You can launch your terminal in a specific configuration by using the wt.exe command. Some options you can set are tab and pane arrangements as well as their starting directories and profiles. You can save a custom command as a shortcut and pin it to your taskbar to open your desired configuration.
If you use the wt.exe command inside the command palette, it will take effect in your current terminal window, rather than spinning up a new terminal instance.
This example will open the PowerShell profile in the current working directory in a new tab with a vertical pane running your default profile.
wt -p «PowerShell» -d . ; split-pane -V
Full documentation about wt command line arguments can be found on our docs site.
Panes
Windows Terminal has pane support for profiles. You can open a new pane of a profile by either holding Alt and clicking on the profile in the dropdown, or by using the following keyboard shortcuts:
Automatic pane split of current profile
Horizontal pane split of default profile
Alt + Shift + Minus
Vertical pane split of default profile
Alt + Shift + Plus
You can also move focus around your panes by holding Alt and using the arrow keys. Lastly, you can resize your panes by holding Alt + Shift and using the arrow keys. You can find more information about panes on our docs site.
Copy and paste
In Windows Terminal, the default keyboard shortcuts for copy and paste are Ctrl + C and Ctrl + V , respectively. If you do not have a selection, Ctrl + C will act as normal as the break command.
You can customize which keys you’d like to copy and paste with by editing the «copy» and «paste» key bindings. If you delete these key bindings from your settings.json, the terminal will default to Ctrl + Shift + C and Ctrl + Shift + V . This can be especially helpful for WSL users who need Ctrl + C and Ctrl + V free to use for their shells.
You can also choose which formatting is copied to your clipboard along with newline characters with the «copyFormatting» and «singleLine» actions associated with the copy command. Full documentation on clipboard integration commands can be found on our docs site.
Defining key bindings and actions
A large portion of the customizable properties inside Windows Terminal come from key bindings and actions. Commands inside the «actions» array will automatically be added to your command palette. If you’d like to also use them with key bindings, you can add «keys» to them to invoke them with the keyboard. A full list of every possible command can be found on the Actions page of our docs site.
Send input commands
Windows Terminal gives you the ability to send input to your shell with a key binding. This can be done with the following structure inside your «actions» array.
Sending input to the shell with a keyboard shortcut can be useful for commands you run often. One example would be clearing your screen:
Navigating to the parent directory with a key binding may also be helpful.
You can also use this functionality to run builds or test scripts.
WSL starting directory
As of now, Windows Terminal defaults to setting WSL profiles’ starting directory as the Windows user profile folder. To set your WSL profile to start in the
folder, you can add the following line to your profile settings, replacing DISTRONAME and USERNAME with the appropriate fields.
Cheers
We hope you learned a few tips and tricks about Windows Terminal throughout this blog post. We are currently planning another release for the month of November, so keep your eyes peeled for that one! If you have any questions or feedback, feel free to reach out to Kayla (@cinnamon_msft) on Twitter. For more information about Windows Terminal, you can check out our docs site.

Kayla Cinnamon
Program Manager, Windows Terminal, Console, Command Line, & Cascadia Code
Windows commands
All supported versions of Windows (server and client) have a set of Win32 console commands built in.
This set of documentation describes the Windows Commands you can use to automate tasks by using scripts or scripting tools.
Prerequisites
The information that is contained in this topic applies to:
- Windows Server 2019
- Windows Server (Semi-Annual Channel)
- Windows Server 2016
- Windows Server 2012 R2
- Windows Server 2012
- Windows Server 2008 R2
- Windows Server 2008
- Windows 10
- Windows 8.1
Command shell overview
The Command shell was the first shell built into Windows to automate routine tasks, like user account management or nightly backups, with batch (.bat) files. With Windows Script Host you could run more sophisticated scripts in the Command shell. For more information, see cscript or wscript. You can perform operations more efficiently by using scripts than you can by using the user interface. Scripts accept all Commands that are available at the command line.
Windows has two command shells: The Command shell and PowerShell. Each shell is a software program that provides direct communication between you and the operating system or application, providing an environment to automate IT operations.
PowerShell was designed to extend the capabilities of the Command shell to run PowerShell commands called cmdlets. Cmdlets are similar to Windows Commands but provide a more extensible scripting language. You can run Windows Commands and PowerShell cmdlets in Powershell, but the Command shell can only run Windows Commands and not PowerShell cmdlets.
For the most robust, up-to-date Windows automation, we recommend using PowerShell instead of Windows Commands or Windows Script Host for Windows automation.
You can also download and install PowerShell Core, the open source version of PowerShell.
Incorrectly editing the registry may severely damage your system. Before making the following changes to the registry, you should back up any valued data on the computer.
To enable or disable file and directory name completion in the Command shell on a computer or user logon session, run regedit.exe and set the following reg_DWOrd value:
To set the reg_DWOrd value, use the hexadecimal value of a control character for a particular function (for example, 0 9 is Tab and 0 08 is Backspace). User-specified settings take precedence over computer settings, and command-line options take precedence over registry settings.
Command-line reference A-Z
To find information about a specific command, in the following A-Z menu, click the letter that the command starts with, and then click the command name.
How to Highlight Text in PDF with commandline (windows)?
I’m looking for a way to highlight words (e.g.»some words 2«) or better the whole line with the given words in it, in some onesided PDFs. It will be part of a Batch-process on Windows, so i need a command line way to do this. I’ve looked at Ghostscript, but can not see how it is to be used.
hope i didnt made something wrong — i looked into other questions, mainly Add comments to PDF files automagically with regular expressions but this helped me not really, also english is not my native language — as you maybe have noticed already.
Thanks in advance
1 Answer 1
Ghostscript can’t do this. Generalized text tools also can’t because (1) most PDF’s have the text commands in compressed blocks, and (2) text often is not ‘encoded’ in any standard way. Sometimes the font provides a ToUnicode map, but often not even that and (3) what looks like text may not even be text — it may just be bitmapped images.
A tool like ‘mutool clean -d’ and «expand» a PDF so that (1) is solved — text commands can be found in the PDF, but you still may have things like:
instead of Hello because of (2). And then there’s the other way kerned text is done in PDF, even if standard encoding is used:
[(H) 120 (e) 80 (l) 95 (l) 95 (o)] TJ
It might be possible, but very difficult, and would require programming, and still would not address (3) (that would require OCR of the bitmapped text).
WinDbg Command-Line Options
First-time users of WinDbg should begin with the Debugging Using WinDbg section.
The WinDbg command line uses the following syntax:
Descriptions of the WinDbg command-line options follow. All command-line options are case-sensitive except for -j. The initial hyphen can be replaced with a forward-slash (/).
If the -remote or -server option is used, it must appear before any other options on the command line. If an executable is specified, it must appear last on the command line; any text after the executable name is passed to the executable program as its own command-line parameters.
Parameters
-server ServerTransport
Creates a debugging server that can be accessed by other debuggers. For an explanation of the possible ServerTransport values, see Activating a Debugging Server. When this parameter is used, it must be the first parameters on the command line.
-remote ClientTransport
Creates a debugging client, and connects to a debugging server that is already running. For an explanation of the possible ClientTransport values, see Activating a Debugging Client. When this parameter is used, it must be the first parameters on the command line.
-premote SmartClientTransport
Creates a smart client, and connects to a process server that is already running. For an explanation of the possible SmartClientTransport values, see Activating a Smart Client.
-a Extension
Sets the default extension DLL. The default is kdextx86.dll or kdexts.dll. There must be no space after the «a», and the .dll file name extension must not be included. For details, and other methods of setting this default, see Loading Debugger Extension DLLs.
-b
This option is no longer supported.
-c « command «
Specifies the initial debugger command to run at start-up. This command must be enclosed in quotation marks. Multiple commands can be separated with semicolons. (If you have a long command list, it may be easier to put them in a script and then use the -c option with the $ -clines lines
Sets the approximate number of commands in the command history which can be accessed during remote debugging. For details, and for other ways to change this number, see Using Debugger Commands.
-d
(Kernel mode only) After a reboot, the debugger will break into the target computer as soon as a kernel module is loaded. (This break is earlier than the break from the -b option.) See Crashing and Rebooting the Target Computer for details and for other methods of changing this status.
-ee <masm|c++>
Sets the default expression evaluator. If masm is specified, MASM expression syntax will be used. If c++ is specified, C++ expression syntax will be used. If the -ee option is omitted, MASM expression syntax is used as the default. See Evaluating Expressions for details.
-failinc
Causes the debugger to ignore any questionable symbols. When debugging a user-mode or kernel-mode minidump file, this option will also prevent the debugger from loading any modules whose images can’t be mapped. For details and for other methods of controlling this, see SYMOPT_EXACT_SYMBOLS.
-g
(User mode only) Ignores the initial breakpoint in target application. This option will cause the target application to continue running after it is started or WinDbg attaches to it, unless another breakpoint has been set. See Initial Breakpoint for details.
-G
(User mode only) Ignores the final breakpoint at process termination. Typically, the debugging session ends during the image run-down process. This option will cause the debugging session to end immediately when the child terminates. This has the same effect as entering the command sxd epr. For more information, see Controlling Exceptions and Events.
-hd
(User mode only) Specifies that the debug heap should not be used.
-I[S]
Installs WinDbg as the postmortem debugger. For details, see Enabling Postmortem Debugging.
After this action is attempted, a success or failure message is displayed. If S is included, this procedure is done silently if it is successful; only failure messages are displayed.
The -I parameter must not be used with any other parameters. This command will not actually start WinDbg, although a WinDbg window may appear for a moment.
-IA[S]
Associates WinDbg with the file extensions .dmp, .mdmp, and .wew in the registry. After this action is attempted, a success or failure message is displayed. If S is included, this procedure is done silently if it is successful; only failure messages are displayed. After this association is made, selecting and holding (or right-clicking) a file with one of these extensions will start WinDbg.
The -IA parameter must not be used with any other parameters. This command will not actually start WinDbg, although a WinDbg window may appear for a moment.
-IU KeyString
Registers debugger remoting as an URL type so that users can auto-launch a debugger remote client with an URL. KeyString has the format remdbgeng://RemotingOption . RemotingOption is a string that defines the transport protocol as defined in the topic Activating a Debugging Client. If this action succeeds, no message is displayed; if it fails, an error message is displayed.
The -IU parameter must not be used with any other parameters. Although a WinDbg window may appear for a moment, this command will not actually start WinDbg.
-i ImagePath
Specifies the location of the executables that generated the fault. If the path contains spaces, it should be enclosed in quotation marks.
-j
Allow journaling.
-k [ConnectType]
(Kernel mode only) Starts a kernel debugging session. For details, see Live Kernel-Mode Debugging Using WinDbg. If -k is used without any ConnectType options following it, it must be the final entry on the command line.
-kl
(Kernel mode only) Starts a kernel debugging session on the same machine as the debugger.
-kx ExdiOptions
(Kernel mode only) Starts a kernel debugging session using an EXDI driver. EXDI drivers are not described in this documentation. If you have an EXDI interface to your hardware probe or hardware simulator, please contact Microsoft for debugging information.
-log<o|a> LogFile
Begins logging information to a log file. If the specified log file already exists, it will be overwritten if -logo is used. If loga is used, the output will be appended to the file. For more details, see Keeping a Log File in WinDbg.
-lsrcpath
Sets the local source path for a remote client. This option must follow -remote on the command line.
-n
Noisy symbol load: Enables verbose output from symbol handler. For details and for other methods of controlling this, see SYMOPT_DEBUG.
-noinh
(User mode only) Prevents processes created by the debugger from inheriting handles from the debugger. For other methods of controlling this, see Debugging a User-Mode Process Using WinDbg.
-noprio
Prevents any priority change. This parameter will prevent WinDbg from taking priority for CPU time while active.
-noshell
Prohibits all .shell commands. This prohibition will last as long as the debugger is running, even if a new debugging session is begun. For details, and for other ways to disable shell commands, see Using Shell Commands.
-o
(User mode only) Debugs all processes launched by the target application (child processes). By default, processes created by the one you are debugging will run as they normally do.
-openPrivateDumpByHandle Handle
Specifies the handle of a crash dump file to debug.
-p PID
Specifies the decimal process ID to be debugged. This is used to debug a process that is already running.
-pb
(User mode only) Prevents the debugger from requesting an initial break-in when attaching to a target process. This can be useful if the application is already suspended, or if you wish to avoid creating a break-in thread in the target.
-pd
(User mode only) Causes the target application not to be terminated at the end of the debugging session. See Ending a Debugging Session in WinDbg for details.
-pe
(User mode only) Indicates that the target application is already being debugged. See Re-attaching to the Target Application for details.
-pn Name
Specifies the name of the process to be debugged. (This name must be unique.) This is used to debug a process that is already running.
-pr
(User mode only) Causes the debugger to start the target process running when it attaches to it. This can be useful if the application is already suspended and you wish it to resume execution.
-psn ServiceName
Specifies the name of a service contained in the process to be debugged. This is used to debug a process that is already running.
-pt Seconds
Specifies the break timeout, in seconds. The default is 30. See Controlling the Target for details.
-pv
(User mode only) Specifies that the debugger should attach to the target process noninvasively. For details, see Noninvasive Debugging (User Mode).
-Q
Suppresses the «Save Workspace?» dialog box. Workspaces are not automatically saved. See Using Workspaces for details.
-QS
Suppresses the «Reload Source?» dialog box. Source files are not automatically reloaded.
-QSY
Suppresses the «Reload Source?» dialog box and automatically reloads source files.
-QY
Suppresses the «Save Workspace?» dialog box and automatically saves workspaces. See Using Workspaces for details.
-robp
This allows CDB to set a breakpoint on a read-only memory page. (The default is for such an operation to fail.)
-sdce
Causes the debugger to display File access error messages during symbol load. For details and for other methods of controlling this, see SYMOPT_FAIL_CRITICAL_ERRORS.
-secure
Activates Secure Mode.
-ses
Causes the debugger to perform a strict evaluation of all symbol files and ignore any questionable symbols. For details and for other methods of controlling this, see SYMOPT_EXACT_SYMBOLS.
-sflags 0x Number
Sets all the symbol handler options at once. Number should be a hexadecimal number prefixed with 0x — a decimal without the 0x is permitted, but the symbol options are binary flags and therefore hexadecimal is recommended. This option should be used with care, since it will override all the symbol handler defaults. For details, see Setting Symbol Options.
-sicv
Causes the symbol handler to ignore the CV record. For details and for other methods of controlling this, see SYMOPT_IGNORE_CVREC.
-sins
Causes the debugger to ignore the symbol path and executable image path environment variables. For details, see SYMOPT_IGNORE_NT_SYMPATH.
-snc
Causes the debugger to turn off C++ translation. For details and for other methods of controlling this, see SYMOPT_NO_CPP.
-snul
Disables automatic symbol loading for unqualified names. For details and for other methods of controlling this, see SYMOPT_NO_UNQUALIFIED_LOADS.
-srcpath SourcePath
Specifies the source file search path. Separate multiple paths with a semicolon (;). If the path contains spaces, it should be enclosed in quotation marks. For details, and for other ways to change this path, see Source Path.
-sup
Causes the symbol handler to search the public symbol table during every symbol search. For details and for other methods of controlling this, see SYMOPT_AUTO_PUBLICS.
-T Title
Sets WinDbg window title.
-v
Enables verbose output from debugger.
-W Workspace
Loads the given named workspace. If the workspace name contains spaces, enclose it in quotation marks. If no workspace of this name exists, you will be given the option of creating a new workspace with this name or abandoning the load attempt. For details, see Using Workspaces.
-WF Filename
Loads the workspace from the given file. Filename should include the file and the extension (usually .wew). If the workspace name contains spaces, enclose it in quotation marks. If no workspace file with this name exists, you will be given the option of creating a new workspace file with this name or abandoning the load attempt. For details, see Using Workspaces.
-WX
Disables automatic workspace loading. For details, see Using Workspaces.
-y SymbolPath
Specifies the symbol search path. Separate multiple paths with a semicolon (;). If the path contains spaces, it should be enclosed in quotation marks. For details, and for other ways to change this path, see Symbol Path.
-z DumpFile
Specifies the name of a crash dump file to debug. If the path and file name contain spaces, this must be surrounded by quotation marks. It is possible to open several dump files at once by including multiple -z options, each followed by a different DumpFile value. For details, see Analyzing a User-Mode Dump File or Analyzing a Kernel-Mode Dump File with WinDbg.
-zp PageFile
Specifies the name of a modified page file. This is useful if you are debugging a dump file and want to use the .pagein (Page In Memory) command. You cannot use -zp with a standard Windows page file — only specially-modified page files can be used.
executable
Specifies the command line of an executable process. This is used to launch a new process and debug it. This has to be the final item on the command line. All text after the executable name is passed to the executable as its argument string. For details, see Debugging a User-Mode Process Using WinDbg.
-?
Pops up this HTML Help window.
When you are running the debugger from the command line, specify arguments for the target application after application’s file name. For instance:


