- How to generate a template file for command line conversions
- Generate a conversion template file from the MSIX Packaging Tool
- Manually edit the conversion template file
- Conversion template parameter reference
- Windows commands
- Prerequisites
- Command shell overview
- Command-line reference A-Z
- Windows Terminal Tips and Tricks
- On first launch
- Customization
- Global profile settings
- Custom color schemes
- Custom command line
- Old school fonts
- Places for background images
- Functionality
- wt.exe command line arguments
- Panes
- Copy and paste
- Defining key bindings and actions
- Send input commands
- WSL starting directory
- Cheers
How to generate a template file for command line conversions
With the MSIX Packaging Tool, you can perform the conversion in two ways: through the interactive UI or through our command line option. When using the command line, you need to provide a template file so that the conversion works with your specific settings and needs. This article will help guide you through the process of generating a template file that works for you.
There are two ways that you can get a template file that works for you:
- You can use the UI of the MSIX Packaging Tool. In the settings of the tool, you can specify that you want to generate a conversion template file with each MSIX package that you create.
- You can take a sample template and manually enter the configurations that you need for each conversion.
Generate a conversion template file from the MSIX Packaging Tool
- Launch the MSIX Packaging Tool.
- Go to the settings in the top right corner of the application.
- Make sure that the ‘Generate a command line file with each package’ option is selected.
- Make any other changes or modifications to your settings that you need (e.g. exclusion items, exit codes).
- Save the settings
- Go through the Application Package workflow using an installer.
- If you don’t select an installer, you will not be able to generate a conversion template file.
- If you are using an exe, you will need to pass a silent flag to your installer to generate the conversion template file.
- At the end of the conversion, you will have a template file configured based on the installer you chose, and your current settings which you can now re-use for future conversions.
- By default, the conversion template file will be saved in the same location as your MSIX package, but you can specify a separate save location for your template file on the Create package page.
- You will still need to make some modifications based on what MSIX you want output at the end of each conversion.
Manually edit the conversion template file
You can manually edit the template parameters for the conversion template file to generate a template file that works for you. When generating the conversion template file, pay attention to which features you add into the template file, as some may require an additional schema references in order to work.
Conversion template parameter reference
Here is the complete list of parameters that you can use in the Conversion template file.
| ConversionSettings | Description |
|---|---|
| Settings:: AllowTelemetry | [optional] Enables telemetry logging for this invocation of the tool. |
| Settings:: ApplyAllPrepareComputerFixes | [optional] Applies all recommended prepare computer fixes. Cannot be set when other attributes are used. |
| Settings:: GenerateCommandLineFile | [optional] Copies the template file input to the SaveLocation directory for future use. |
| Settings:: AllowPromptForPassword | [optional] Instructs the tool to prompt the user to enter passwords for the Virtual Machine and for the signing certificate if it is required and not specified. |
| Settings:: EnforceMicrosoftStoreVersioningRequirements | [optional] Instructs the tool to enforce the package versioning scheme required for deployment from Microsoft Store and Microsoft Store for Business. |
| Settings:: ServerPortNumber | [optional] Used when connecting to a remote machine. Requires v2 of the template schema. |
| Settings:: AddPackageIntegrity | [optional] Adds Package Integrity to every generated MSIX. Requires v5 of the template schema. |
| ValidInstallerExitCodes | [optional] 0 or more ValidInstallerExitCode elements. Requires v2 of the template schema. |
| ValidInstallerExitCodes:: ValidInstallerExitCode | [optional] Specify any installer exit codes that the tool might not be familiar with or require a reboot. Requires v2 of the template schema. |
| ValidInstallerExitCodes:: ValidInstallerExitCode:: Reboot | [optional] Specify whether an exit code should trigger a reboot during conversion. Requires v3 of the template schema. |
| ExclusionItems | [optional] 0 or more FileExclusion or RegistryExclusion elements. All FileExclusion elements must appear before any RegistryExclusion elements. |
| ExclusionItems::FileExclusion | [optional] A file to exclude for packaging. |
| ExclusionItems::FileExclusion::ExcludePath | Path to file to exclude for packaging. |
| ExclusionItems::RegistryExclusion | [optional] A registry key to exclude for packaging. |
| ExclusionItems::RegistryExclusion:: ExcludePath | Path to registry to exclude for packaging. |
| PrepareComputer::DisableDefragService | [optional] Disables Windows Defragmenter while the app is being converted. If set to false, overrides ApplyAllPrepareComputerFixes. |
| PrepareComputer:: DisableWindowsSearchService | [optional] Disables Windows Search while the app is being converted. If set to false, overrides ApplyAllPrepareComputerFixes. |
| PrepareComputer:: DisableSmsHostService | [optional] Disables SMS Host while the app is being converted. If set to false, overrides ApplyAllPrepareComputerFixes. |
| PrepareComputer:: DisableWindowsUpdateService | [optional] Disables Windows Update while the app is being converted. If set to false, overrides ApplyAllPrepareComputerFixes. |
| SaveLocation | [optional] An element to specify the save location of the tool. If not specified, the package will be saved under the Desktop folder. |
| SaveLocation::PackagePath | [optional] The path to the file or folder where the resulting MSIX package is saved. |
| SaveLocation::TemplatePath | [optional] The path to the file or folder where the resulting command line template is saved. |
| Installer::Path | The path to the application installer. |
| Installer::Arguments | [optional] The arguments to pass to the installer. The tool will automatically run MSI installers silently using argument «/qn /norestart INSTALLSTARTMENUSHORTCUTS=1 DISABLEADVTSHORTCUTS=1». NOTE: You must pass the arguments to force your installer to run silently if you are using .exe installers. |
| Installer::InstallLocation | [optional] The full path to your application’s root folder for the installed files if it were installed (e.g. «C:\Program Files (x86)\MyAppInstalllocation»). |
| VirtualMachine | [optional] An element to specify that the conversion will be run on a local Virtual Machine. |
| VirtualMachine::Name | The name of the virtual machine to be used for the conversion environment. |
| VirtualMachine::Username | The user name for the virtual machine to be used for the conversion environment. |
| RemoteMachine | [optional] An element to specify that the conversion will be run on a remote machine. Requires v2 of the template schema. |
| RemoteMachine:: ComputerName | The name of the remote machine to be used for the conversion environment. Requires v2 of the template schema. |
| RemoteMachine:: Username | The user name for the remote machine to be used for the conversion environment. Requires v2 of the template schema. |
| RemoteMachine:: EnableAutoLogon | [optional] This will auto log you back in when performing a conversion that requires a restart on a remote machine so your conversion continues seamlessly. Requires V3 of the template schema. |
| PackageInformation::PackageName | The Package Name for your MSIX package. |
| PackageInformation::PackageDisplayName | The Package Display Name for your MSIX package. |
| PackageInformation::PublisherName | The Publisher for your MSIX package. |
| PackageInformation::PublisherDisplayName | The Publisher Display Name for your MSIX package. |
| PackageInformation::Version | The version number for your MSIX package. |
| PackageInformation::PackageDescription | [optional] The description for your MSIX package. Requires v4 of the template schema. |
| PackageInformation:: MainPackageNameForModificationPackage | [optional] The Package identity name of the main package name. This is used when creating a modification package that takes a dependency on a main (parent) application. |
| SigningInformation | [optional] An element to specify signing information for Device Guard signing. Requires v4 of the template schema. |
| SigningInformation:: DeviceGuardSigning | [optional] An element to specify Device Guard signing information. Requires v4 of the template schema. |
| DeviceGuardSigning:: TokenFile | The Azure AD access token required for Device Guard signing in JSON format. Requires v4 template schema. |
| DeviceGuardSigning:: TimestampUrl | [optional] Provides a timestamp at the time of signing with Device Guard to ensure that your application will install beyond the lifetime of the certificate. Requires v4 of the template schema. |
| Applications | [optional] 0 or more Application elements to configure the Application entries in your MSIX package. |
| Application::Id | The App ID for your MSIX application. This ID will be used for the Application entry detected that matches the specified ExecutableName. You can have multiple Application ID values for executables in the package. This value is the unique identifier of the application within the package. This value is sometimes referred to as the package-relative app identifier (PRAID). The ID must be unique within the package (the same ID cannot be used more than once in the same package). However, the ID must not be unique globally. There may be another package on the system that uses the same ID. Windows commandsAll supported versions of Windows (server and client) have a set of Win32 console commands built in. This set of documentation describes the Windows Commands you can use to automate tasks by using scripts or scripting tools. PrerequisitesThe information that is contained in this topic applies to:
Command shell overviewThe Command shell was the first shell built into Windows to automate routine tasks, like user account management or nightly backups, with batch (.bat) files. With Windows Script Host you could run more sophisticated scripts in the Command shell. For more information, see cscript or wscript. You can perform operations more efficiently by using scripts than you can by using the user interface. Scripts accept all Commands that are available at the command line. Windows has two command shells: The Command shell and PowerShell. Each shell is a software program that provides direct communication between you and the operating system or application, providing an environment to automate IT operations. PowerShell was designed to extend the capabilities of the Command shell to run PowerShell commands called cmdlets. Cmdlets are similar to Windows Commands but provide a more extensible scripting language. You can run Windows Commands and PowerShell cmdlets in Powershell, but the Command shell can only run Windows Commands and not PowerShell cmdlets. For the most robust, up-to-date Windows automation, we recommend using PowerShell instead of Windows Commands or Windows Script Host for Windows automation. You can also download and install PowerShell Core, the open source version of PowerShell. Incorrectly editing the registry may severely damage your system. Before making the following changes to the registry, you should back up any valued data on the computer. To enable or disable file and directory name completion in the Command shell on a computer or user logon session, run regedit.exe and set the following reg_DWOrd value: To set the reg_DWOrd value, use the hexadecimal value of a control character for a particular function (for example, 0 9 is Tab and 0 08 is Backspace). User-specified settings take precedence over computer settings, and command-line options take precedence over registry settings. Command-line reference A-ZTo find information about a specific command, in the following A-Z menu, click the letter that the command starts with, and then click the command name. Windows Terminal Tips and TricksOctober 15th, 2020 Windows Terminal comes with a lot of features that allow you to customize it and interact with it in a way that feels most comfortable to you. Let’s run through some tips and tricks that could help you set up your terminal in a way that’s perfect for you. At the time of this blog post, Windows Terminal is on version 1.3 and Windows Terminal Preview is on version 1.4. On first launchWhen you first install Windows Terminal, you will be greeted with a Windows PowerShell prompt. Windows Terminal ships with Windows PowerShell, Command Prompt, and Azure Cloud Shell profiles by default. In addition to these profiles, if you have any Windows Subsystem for Linux (WSL) distributions installed, the terminal will automatically create profiles for those distros as well. If you would like to install additional WSL distros on your machine, you can do so after installing terminal and on your next terminal launch, the profiles for those distros should automatically appear. These profiles will have Tux as their icon, however you can change the icon of the distro in your settings to match whichever distro you have. You can find more information about WSL on the WSL docs site. 👉 Note: You will have to download the distro icons as they do not come shipped inside the terminal. CustomizationWindows Terminal comes with a large set of default settings, including color schemes and keyboard shortcuts. If you’d like to view the default settings file, you can hold Alt and click on the Settings button inside the dropdown menu. Global profile settingsWindows Terminal provides you the option of applying a setting to every profile without having to duplicate the setting for each profile entry. This can be done by adding a setting inside the «defaults» array inside the «profiles» object. A list of all possible profile settings can be found on the Profile settings page on our docs site. Custom color schemesWindows Terminal comes with an assortment of color schemes by default. However, there are unlimited possibilities when it comes to color schemes. A great place to find additional terminal schemes is terminalsplash.com. If you’d like to create your own color scheme, terminal.sexy is a great tool for creating and visualizing your own color schemes. 💡 Tip: You can match your custom color scheme to a background image by using the PowerToys color picker to grab hex codes for colors to use inside your scheme. PowerToys can be installed using winget with winget install powertoys .
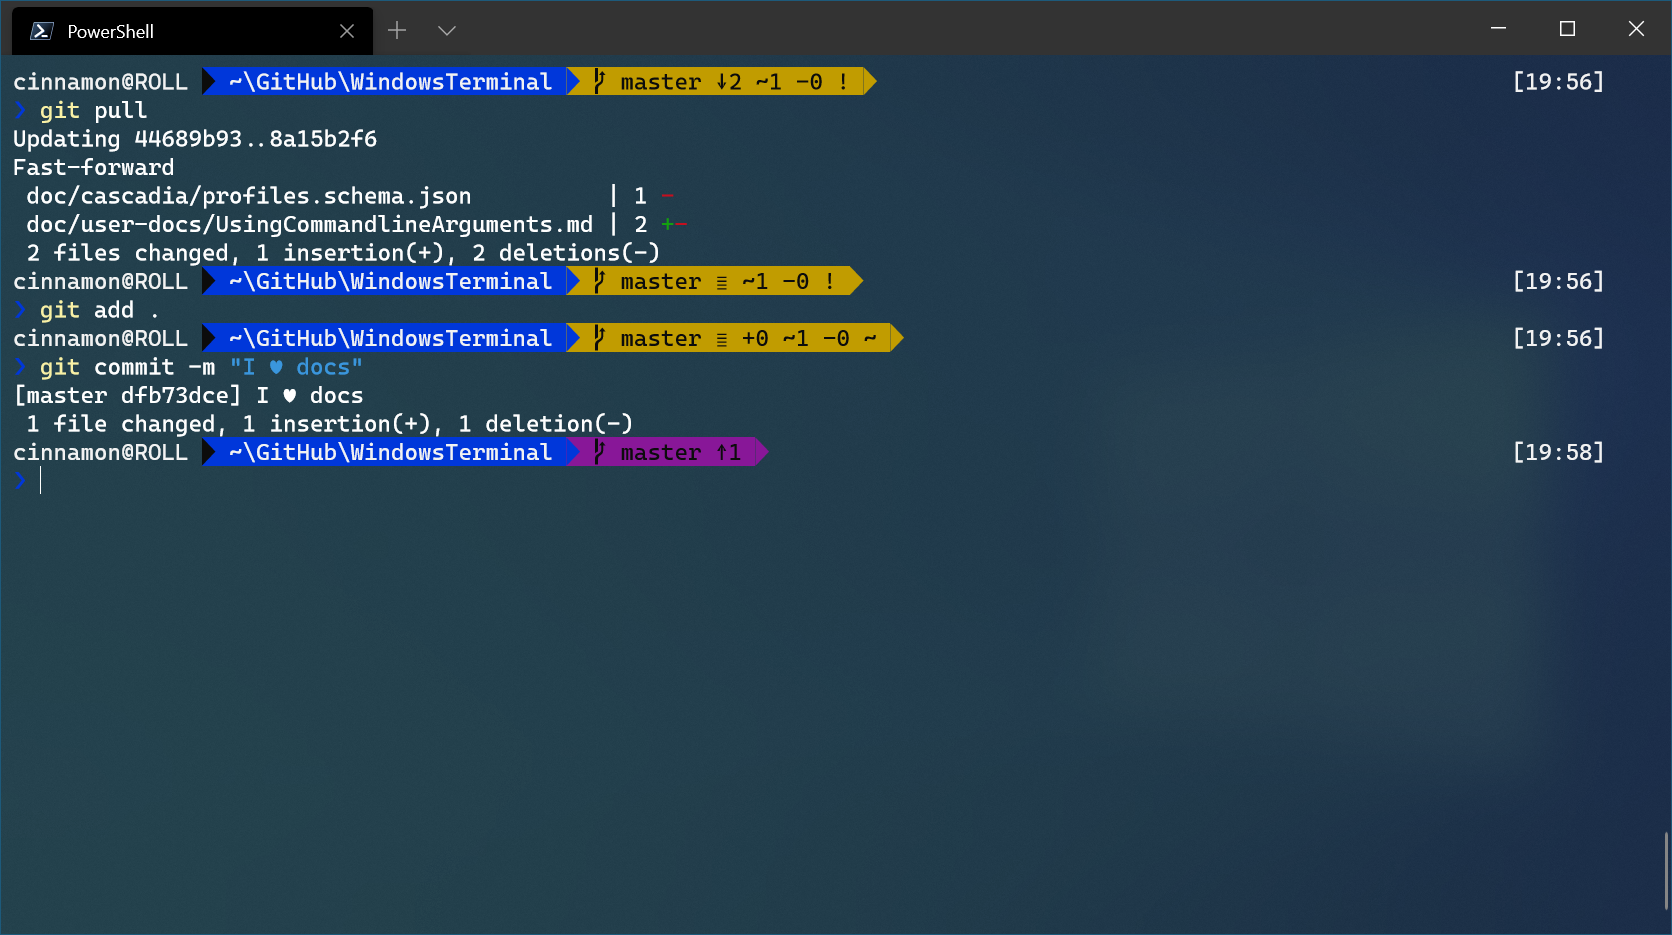
Custom command lineYou can give your command line some style with Oh my Posh and Terminal-Icons. These tools allow you to customize what your prompt looks like with colors, glyphs, and emojis. To get Oh my Posh with Posh-Git and PSReadline up and running, you can follow this tutorial. Oh my Posh recently came out with Oh my Posh 3, which has a lot more customization options and is not only exclusive to PowerShell. After going through the tutorial linked above, you can upgrade to V3 with the following command:
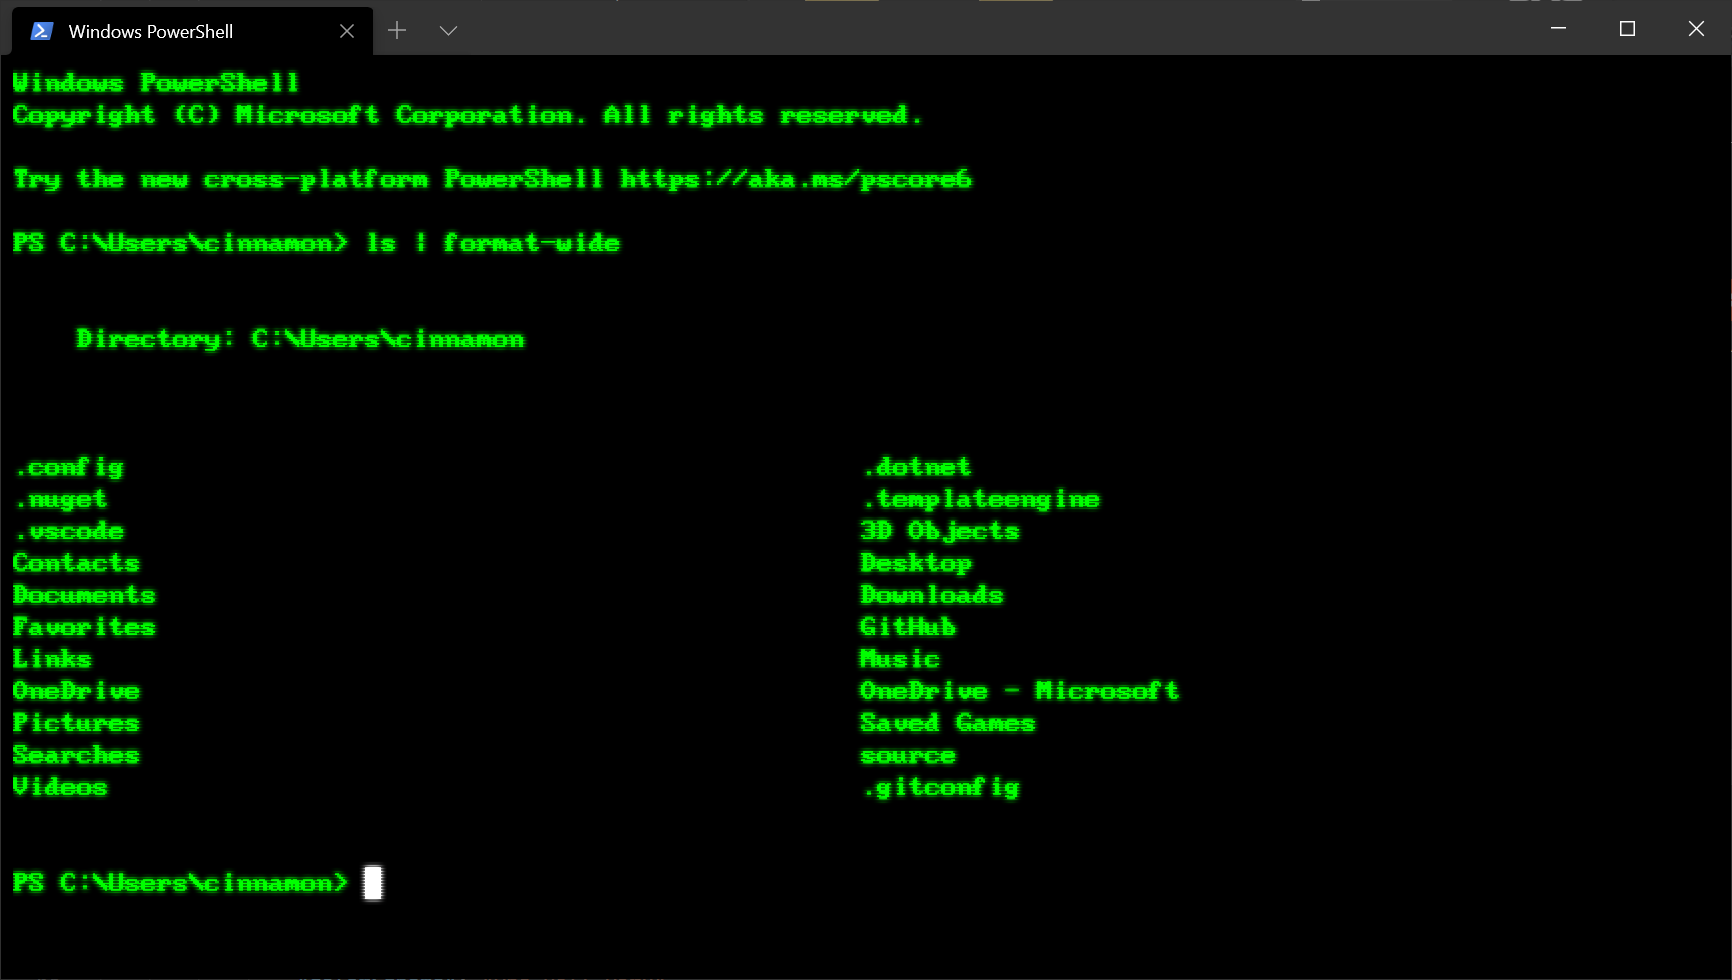
You can add a bit more flair to your shell by adding custom icons with Terminal-Icons. The image below is also using a custom Posh theme to add emojis to the prompt line. 👉 Note: You will need to set your font to a Nerd Font in order to get the Terminal Icons to appear. Old school fontsFor those of you who are fans of the retro terminal effect, a great place to find old school fonts is at https://int10h.org/oldschool-pc-fonts/.
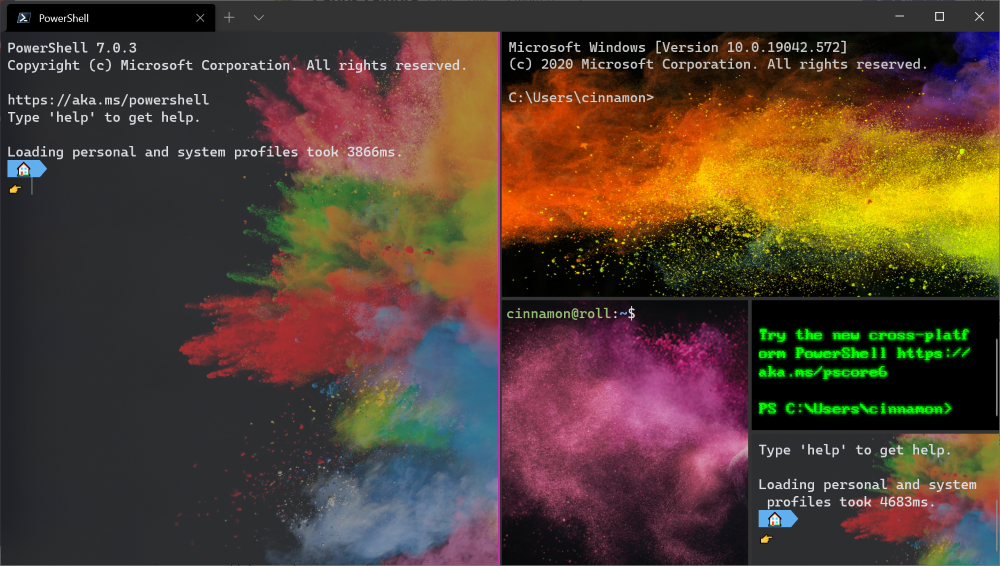
Places for background imagesDesktop wallpapers often look great inside Windows Terminal as background images. Some great places to find background images are Windows Themes as well as WallpaperHub. Windows Terminal supports both images and gifs for background images. Another popular option is placing the logo of the shell you are using as the background image, to help identify which shell you are in. You can set where the background image is placed with «backgroundImageAlignment» in your settings. More information on background image settings can be found on our docs site. Functionalitywt.exe command line argumentsYou can launch your terminal in a specific configuration by using the wt.exe command. Some options you can set are tab and pane arrangements as well as their starting directories and profiles. You can save a custom command as a shortcut and pin it to your taskbar to open your desired configuration. If you use the wt.exe command inside the command palette, it will take effect in your current terminal window, rather than spinning up a new terminal instance. This example will open the PowerShell profile in the current working directory in a new tab with a vertical pane running your default profile. wt -p «PowerShell» -d . ; split-pane -V Full documentation about wt command line arguments can be found on our docs site. PanesWindows Terminal has pane support for profiles. You can open a new pane of a profile by either holding Alt and clicking on the profile in the dropdown, or by using the following keyboard shortcuts: Automatic pane split of current profile Horizontal pane split of default profile Alt + Shift + Minus Vertical pane split of default profile Alt + Shift + Plus You can also move focus around your panes by holding Alt and using the arrow keys. Lastly, you can resize your panes by holding Alt + Shift and using the arrow keys. You can find more information about panes on our docs site.
Copy and pasteIn Windows Terminal, the default keyboard shortcuts for copy and paste are Ctrl + C and Ctrl + V , respectively. If you do not have a selection, Ctrl + C will act as normal as the break command. You can customize which keys you’d like to copy and paste with by editing the «copy» and «paste» key bindings. If you delete these key bindings from your settings.json, the terminal will default to Ctrl + Shift + C and Ctrl + Shift + V . This can be especially helpful for WSL users who need Ctrl + C and Ctrl + V free to use for their shells. You can also choose which formatting is copied to your clipboard along with newline characters with the «copyFormatting» and «singleLine» actions associated with the copy command. Full documentation on clipboard integration commands can be found on our docs site. Defining key bindings and actionsA large portion of the customizable properties inside Windows Terminal come from key bindings and actions. Commands inside the «actions» array will automatically be added to your command palette. If you’d like to also use them with key bindings, you can add «keys» to them to invoke them with the keyboard. A full list of every possible command can be found on the Actions page of our docs site. Send input commandsWindows Terminal gives you the ability to send input to your shell with a key binding. This can be done with the following structure inside your «actions» array. Sending input to the shell with a keyboard shortcut can be useful for commands you run often. One example would be clearing your screen: Navigating to the parent directory with a key binding may also be helpful. You can also use this functionality to run builds or test scripts. WSL starting directoryAs of now, Windows Terminal defaults to setting WSL profiles’ starting directory as the Windows user profile folder. To set your WSL profile to start in the folder, you can add the following line to your profile settings, replacing DISTRONAME and USERNAME with the appropriate fields. CheersWe hope you learned a few tips and tricks about Windows Terminal throughout this blog post. We are currently planning another release for the month of November, so keep your eyes peeled for that one! If you have any questions or feedback, feel free to reach out to Kayla (@cinnamon_msft) on Twitter. For more information about Windows Terminal, you can check out our docs site.
Kayla CinnamonProgram Manager, Windows Terminal, Console, Command Line, & Cascadia Code |