- Использование средства проверки системных файлов для восстановления отсутствующих или поврежденных системных файлов
- Запуск средства проверки системных файлов (SFC.exe)
- Дополнительная информация
- Windows 7 installation hangs on compatibility check
- Windows 10 Compatibility Check – Test System, Software & Driver [MiniTool Tips]
- Summary :
- Quick Navigation :
- It Is Necessary to Check for Windows 10 Compatibility
- Check Windows 10 System Requirements
- Check Which Graphics Card You Are Using
- Go Beyond System Requirements to Ensure Windows 10 Compatibility
- Check Software Compatibility
- Check Hardware Specifications and Driver Compatibility
- Run Windows 10 Compatibility Checker
- Option 1: Use Windows 10 Compatibility Appraiser Manually
- Option 2: Use Windows Update Assistant
- Option 3: Run Media Creation Tool
- Upgrade Your PC to Windows 10
- Back up Files
- Clean Install Windows 10 on Your Old Machine
- Bottom Line
- Windows 10 Compatibility Check FAQ
- ABOUT THE AUTHOR
Использование средства проверки системных файлов для восстановления отсутствующих или поврежденных системных файлов
Если некоторые функции Windows не работают или Windows завершает работу, используйте средство проверки системных файлов для сканирования Windows и восстановления файлов.
Несмотря на то, что приведенные ниже шаги могут показаться сложными на первом этапе, просто выполните их по порядку, и мы попробуем помочь вам.
Запуск средства проверки системных файлов (SFC.exe)
выполнив указанные ниже действия.
Откройте командную строку с повышенными привилегиями. Для этого выполните указанные ниже действия, в зависимости от версии операционной системы:
Пользователям Windows 10, Windows 8.1 или Windows 8 перед запуском средства проверки системных файлов нужно запустить систему обслуживания образов развертывания и управления ими (DISM). (Если на вашем компьютере установлена система Windows 7 или Windows Vista, перейдите сразу к шагу 3.)
Введите следующую команду и нажмите клавишу ВВОД. Выполнение команды может занять несколько минут.
DISM.exe /Online /Cleanup-image /Restorehealth
Важно! При запуске этой команды DISM обращается к Центру обновления Windows, чтобы получить файлы для устранения повреждений. Но если поврежден клиент Центра обновления Windows, используйте работающий экземпляр Windows в качестве источника восстановления либо параллельную папку Windows из сетевого расположения или со съемного носителя, например DVD-диска Windows, в качестве источника файлов. Для этого введите в командной строке такую команду:
DISM.exe /Online /Cleanup-Image /RestoreHealth /Source: C:\RepairSource\Windows /LimitAccess
Примечание. Вместо заполнителя C:\RepairSource\Windows укажите расположение вашего источника восстановления. Дополнительные сведения об использовании средства DISM для восстановления Windows см. в статье Восстановление образа Windows.
Введите в командной строке приведенную ниже команду и нажмите клавишу ВВОД:

Команда sfc /scannow проверит все защищенные системные файлы и заменит поврежденные файлы их кэшированной копией, расположенной в сжатой папке по адресу %WinDir%\System32\dllcache.
Заполнитель %WinDir% представляет собой папку операционной системы Windows. Например, C:\Windows.
Примечание. Не закрывайте это окно командной строки, пока проверка не завершится на 100 %. Результаты проверки будут показаны после завершения данного процесса.
После завершения процесса проверки на экране может появиться одно из приведенных ниже сообщений:
Защита ресурсов Windows не обнаружила нарушений целостности.
Это значит, что отсутствующие и поврежденные системные файлы не обнаружены.
Защита ресурсов Windows не может выполнить запрошенную операцию.
Для устранения этой проблемы выполните сканирование с помощью средства проверки системных файлов в безопасном режиме, убедитесь, что папки PendingDeletes и PendingRenames находятся в папке %WinDir%\WinSxS\Temp.
Защита ресурсов Windows обнаружила поврежденные файлы и успешно их восстановила. Сведения см. в журнале CBS.Log %WinDir%\Logs\CBS\CBS.log.
Для просмотра подробных сведений о сканировании и восстановлении системных файлов перейдите к разделу Как просмотреть подробные сведения процесса работы средства проверки системных файлов.
Защита ресурсов Windows обнаружила поврежденные файлы, но не может восстановить некоторые из них. Сведения см. в журнале CBS.Log %WinDir%\Logs\CBS\CBS.log.
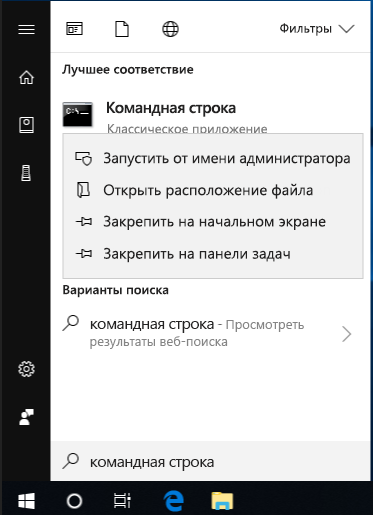
Проведите пальцем от правого края экрана к центру и коснитесь кнопки Поиск. Либо, если вы используете мышь, переместите указатель в правый нижний угол экрана и щелкните кнопку Поиск. Введите запрос Командная строка в поле Поиск, щелкните правой кнопкой мыши элемент Командная строка, затем выберите команду Запуск от имени администратора. Если система запросит пароль администратора или подтверждение, введите пароль или нажмите кнопку Разрешить.

Для этого нажмите кнопку Пуск, введите запрос Командная строка или cmd в поле Поиск, щелкните правой кнопкой мыши элемент Командная строка, а затем выберите команду Запуск от имени администратора. При получении запроса на ввод пароля администратора или подтверждения введите пароль или нажмите кнопку Разрешить.
Дополнительная информация
Чтобы ознакомиться с подробными сведениями, включенными в файл CBS.Log, вы можете скопировать сведения в файл Sfcdetails.txt с помощью команды Findstr, а затем просмотреть их в этом файле. Для этого выполните указанные ниже действия.
Откройте командную строку с повышенными привилегиями, как это описано на шаге 1.
Введите в командной строке приведенную ниже команду и нажмите клавишу ВВОД:
Примечание. В файле Sfcdetails.txt содержатся сведения о каждом запуске средства проверки системных файлов на компьютере. Он также содержит информацию о файлах, которые не были исправлены средством проверки системных файлов. Проверьте дату и время записей, чтобы определить проблемные файлы, обнаруженные при последнем запуске средства проверки системных файлов.
Откройте файл Sfcdetails.txt на рабочем столе.
В файле Sfcdetails.txt используется следующий формат:
Сведения о дате и времени SFC В следующем примере файла журнала содержится запись для одного файла, который не удалось исправить: 2007-01-12 12:10:42, Info CSI 00000008 [SR] Cannot repair member file [l:34<17>]»Accessibility.dll» of Accessibility, Version = 6.0.6000.16386, pA = PROCESSOR_ARCHITECTURE_MSIL (8), Culture neutral, VersionScope neutral, PublicKeyToken =
Как вручную заменить поврежденный системный файл гарантированно работоспособной копией файла.
После определения, какой системный файл поврежден и не может быть восстановлен, с помощью подробных сведений в файле Sfcdetails.txt, выясните расположение поврежденного файла, затем вручную замените поврежденный файл его гарантировано работоспособной копией. Для этого выполните указанные ниже действия.
Примечание. Гарантировано работоспособную копию системного файла можно взять с другого компьютера, на котором установлена такая же, как на вашем компьютере версия Windows. Чтобы убедиться в работоспособности системного файла, который вы планируете скопировать на другом компьютере, можно провести процесс проверки средством проверки системных файлов.
Распространите на поврежденный системный файл права собственности администратора. Для этого скопируйте, а затем вставьте (или введите) в командную строку с повышенными привилегиями приведенную ниже команду, затем нажмите клавишу ВВОД:
takeown /f Путь_и_имя_файла Примечание. Заполнитель Путь_и_имя_файла представляет собой путь и имя файла для поврежденного файла. Например, введите takeown /f C:\windows\system32\jscript.dll. 
Предоставьте администраторам полный доступ к поврежденному системному файлу. Для этого скопируйте и вставьте (или введите) приведенную ниже команду и нажмите клавишу ВВОД:
icacls Путь_и_имя_файла /GRANT ADMINISTRATORS:F Примечание. Заполнитель Путь_и_имя_файла представляет собой путь и имя файла для поврежденного файла. Например, введите icacls C:\windows\system32\jscript.dll /grant administrators:F.
Замените поврежденный системный файл гарантировано работоспособной копией файла. Для этого скопируйте и вставьте (или введите) приведенную ниже команду и нажмите клавишу ВВОД:
Copy Исходный_файл Расположение Примечание. Заполнитель Исходный_файл представляет собой путь и имя гарантировано работоспособной копии файла на вашем компьютере, а заполнитель Расположение представляет собой путь и имя поврежденного файла. Например, введите copy E:\temp\jscript.dll C:\windows\system32\jscript.dll.
Если описанные выше действия не помогли, возможно, потребуется переустановить Windows. Дополнительные сведения см . в разделе Варианты восстановления Windows10.
Windows 7 installation hangs on compatibility check
Troubleshooting Tips To Solve Common Problems When Windows 7 Does Not Install — try any you haven’t done yet.
1. Run Windows Upgrade Advisor to see if there are any known issues that might affect the installation and fix them.
http://windows.microsoft.com/en-US/windows/downloads/upgrade-advisor
2. Disable all security software: anti-virus, firewall etc. Remember to enable afterwords.
3. Make sure your computer has the most recent BIOS and drivers. Updating the BIOS can be risky, only do this if nothing else works.
4. Disconnect all external devices except keyboard and mouse before installing.
5. If using a video card and the computer has integrated video use that and remove the video card.
6. Unplug your computer from the internet, if you have wireless disable it.
7. RAM (memory) — reduce the amount of RAM. 1GB if installing 32bit, 2GB for 64bit, then replace RAM if the upgrade is successful. Also if you just added new RAM make sure it’s compatible.
8. If you have multiple hard drives remove all except the one you’re installing Windows 7 on, then replace after Windows 7 is installed.
9. If you downloaded Windows 7 and burned it to a DVD try burning it again at the slowest speed possible. It’s also possible the download may have errors, you could try downloading it again.
10. If you clicked on «Upgrade» to start the install make sure you are taking a supported upgrade path. You can NOT do an in place upgrade: A) XP to Windows 7, B) changing bit type ex: 32 to 64 bit, C) changing languages, D) downgrading editions ex:Vista Ult. to 7 Pro, or E) Vista Home to 7 Pro.
11. Check your RAM (memory) for errors. May take awhile, only do if nothing else worked.
A) Insert the Windows 7 DVD and restart the computer.
B) Boot from the Windows 7 DVD.
C) Choose your language, then click Next.
D) Click on «Repair your computer» then select the operating system to repair.
E) Click the Memory Diagnostics link on the System Recovery menu.
F) The computer will restart and your memory checked for any errors.
12. Disable Startup Programs:
A) Click Start, type MSCONFIG in the Start Search box, and then press Enter.
OK User Account Control permission and enter password if any
If using XP: Click Start, click Run, then type: MSCONFIG and click OK.
B) On the General tab, click Selective Startup.
C) Right below Selective Startup, uncheck the «Load Startup Items» check box.
D) Click the Services tab, click the «Hide All Microsoft Services» box, then click Disable All.
E) Click OK, then restart the computer.
F) Attempt the upgrade again.
(NOTE: if the upgrade doesn’t work and you continue to use XP/Vista turn your security software back on, then also return to MSCONFIG and on the General tab, click «Normal Startup» then click OK to exit.)
Windows 10 Compatibility Check – Test System, Software & Driver [MiniTool Tips]
By Vera | Follow | Last Updated March 03, 2021
Summary :

Can you run your computer on Windows 10? It is necessary to check your PC for Windows 10 compatibility. Well then, how to perform a Windows 10 compatibility check? After reading this post written by MiniTool, you can know some simple ways for the test.
Quick Navigation :
It Is Necessary to Check for Windows 10 Compatibility
Nowadays Windows 10 operating system has become most popular due to its powerful features although it sucks in some aspects.
Most users choose to upgrade to the new system from Windows Vista/XP/7/8. However, many Windows update problems happen. One of the reasons is that your machine is not compatible with Windows 10. The software, apps, and drivers on your device don’t work for the system. In particular, a bad driver can wreak havoc your system.
So, you need to first perform a Windows 10 compatibility check before a system update. This mainly aims to avoid troubles of downloading the OS and running the setup tool only to figure out whether obvious compatibility problems exist. Besides, Windows 10 compatibility test can give you a choice to consider solutions before upgrading to Windows 10 when some compatibility issues are found.
In the following parts, let’s go to see how to do check Windows 10 compatibility.
Check Windows 10 System Requirements
Microsoft officially states some minimum requirements for Windows 10 on its website so that you can make sure if your computer can run the new operating system, as shown below.
- Processor: 1 gigahertz (GHz) or faster processor or System on a Chip (SoC)
- RAM: 1 gigabyte (GB) for 32-bit, 2 GB for 64-bit
- Hard drive space: 16 GB for 32-bit OS / 32 GB for 64-bit OS
- Graphics card: DirectX 9 or later with WDDM 1.0 driver
- Display: 800×600
Although these are the minimum requirements, it’s best to always exceed these values to avoid any obstacle when using the upgraded system in the future.
You can check your computer’s specifications by following ways mentioned in our previous post — How to Check PC Full Specs Windows 10 in 5 Ways. If your PC meets the minimum requirements or exceeds in some way, you should be all right.
If the PC can’t meet system requirements, you cannot upgrade your machine to Windows 10 unless you take a hardware upgrade into account. That is, you may need to update CPU, increase the RAM, buy a new graphics card or get a large hard drive to build a suitable environment for your PC to run Windows 10 without any compatibility problems.
Most of these requirements mentioned above are simple, but for the graphics card, it requires the DirectX version. So, firstly you need to know which graphics card you are using so as to know if it satisfies DirectX.
Check Which Graphics Card You Are Using
Step 1: Open the Run box by hitting Win + R keys.
Step 2: Input dxdiag and click OK.
Step 3: Go to the Display tab and you can see much information about your graphics card.
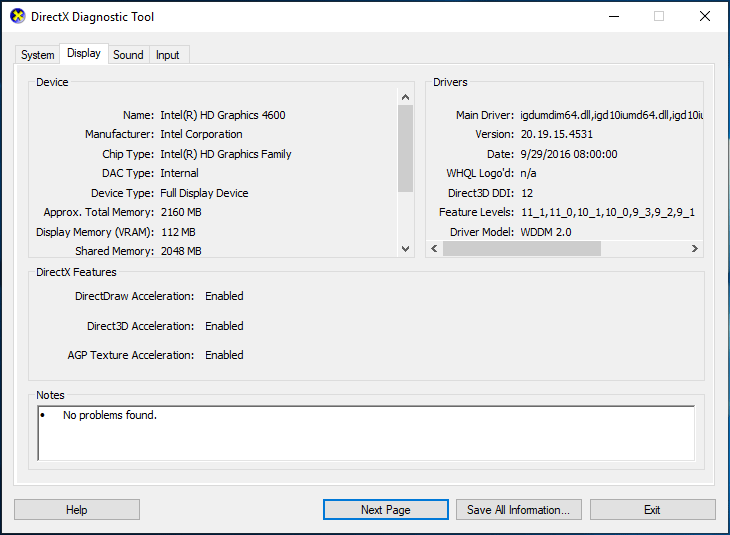
Step 4: Go to the Internet and check if the specifications of your graphics card support DirectX9 or later.
Go Beyond System Requirements to Ensure Windows 10 Compatibility
In addition to system requirements, you should also check software compatibility and driver compatibility. This is very important. If you don’t do the checks, once you start the upgrade, the Windows 10 installation process will be stopped when some errors and compatibility issues are found.
To avoid trouble, check the software and driver compatibility now.
Check Software Compatibility
It has been a long time since the release of Windows 10. Most of the software suppliers have already rolled out the new versions of their popular software and they are compatible with Windows 10. Just update your software if you haven’t updated them.
For critical and frequently-used apps, you can go to the developer website to know if they have the current version of Windows 10.
Check Hardware Specifications and Driver Compatibility
When upgrading from Windows Vista/XP/7/8 to Windows 10, you should consider the hardware requirements. Driver issues can be troublesome, especially during your system update.
So, it is necessary to download updated drivers from the hardware manufacturers’ websites and install them after or before installing Windows 10 update to ensure the system can run flawlessly without any issue.
Run Windows 10 Compatibility Checker
When referring to Windows 10 compatibility check, you may be wondering about the answer to this question “is my computer compatible with Windows 10”. You can choose to use a tool to directly know if you can run Windows 10 on the computer. The following are some options for you.
Option 1: Use Windows 10 Compatibility Appraiser Manually
Microsoft Compatibility Appraiser can scan Windows 7/8/8.1 app files on your computer to assess the compatibility with Windows 10 if you perform an upgrade.
Step 1: Input cmd to the search box and right-click it to choose Run as administrator.
Step 2: Type the command — schtasks.exe /Run /TN «\Microsoft\Windows\Application Experience\Microsoft Compatibility Appraiser» and press Enter.
This app can take up to 15 minutes to perform a full scan. If you cannot run Windows 10 on the machine, the message “Windows 10 will not run on” will display on the screen and you can see the critical issues that stop Windows 10 from running.
Sometimes you cannot run this command line with an error. In this case, you can try another tool.
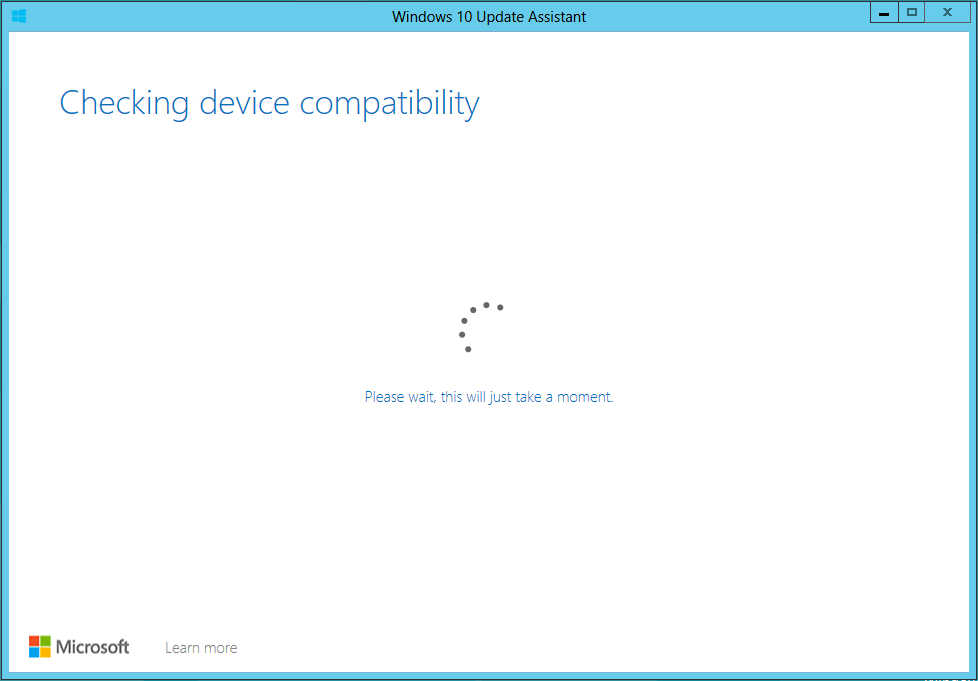
Option 2: Use Windows Update Assistant
You can run Windows Update Assistant on your machine and check if it meets the system requirements of Windows 10. After launching this tool, you need to accept the license terms, and then this tool will check device compatibility. After a few seconds, a result will be shown to you.

Windows 10 Update Assistant tool has been updated to install the Windows 10 May 2019 Update (version 1903), and here are details.
Option 3: Run Media Creation Tool
In addition, you can download Media Creation Tool offered by Microsoft. If the app detects that your PC is too old to run Windows 10, it will give you a notification and stop right here. If no notification is sent to you, this means the system is compatible and you can perform a Windows 10 update.

After finishing Windows 10 compatibility check, you know clearly if you can run Windows 10 on your machine. What to do next if the machine meets all the requirements? Upgrade the old version of the Windows operating system to Windows 10 now.
Upgrade Your PC to Windows 10
Windows Update Assistant and Media Creation Tool can work on some of your machines and help you perform the in-place upgrade without damaging your files. However, sometimes you fail to use these two tools to finish the update along with some errors although your machine meets system requirements and hardware requirements.
Besides, some older operating systems like Vista cannot support Update Assistant and Media Creation Tool. To successfully update your device to Windows 10, performing a clean install is recommendable no matter you are using Windows XP/Vista/7/8. This can avoid many troubles.
Do you want to upgrade Vista to Windows 10 since you think it is outdated? How to do Windows Vista upgrade? This post will walk you through a full guide.
Back up Files
To back up your files within simple clicks, you can use a piece of professional data backup software. Here, MiniTool ShadowMaker is worth trying. This backup program is compatible with many operating systems, for example, Windows 7/8/10, etc. It can be used to back up your data easily via two modes – imaging backup and file sync.
Now, download MiniTool ShadowMaker Trial Edition and install it to the computer that needs to upgrade to Windows 10.
See how to back up files via imaging (as an example):
Step 1: Launch MiniTool ShadowMaker.
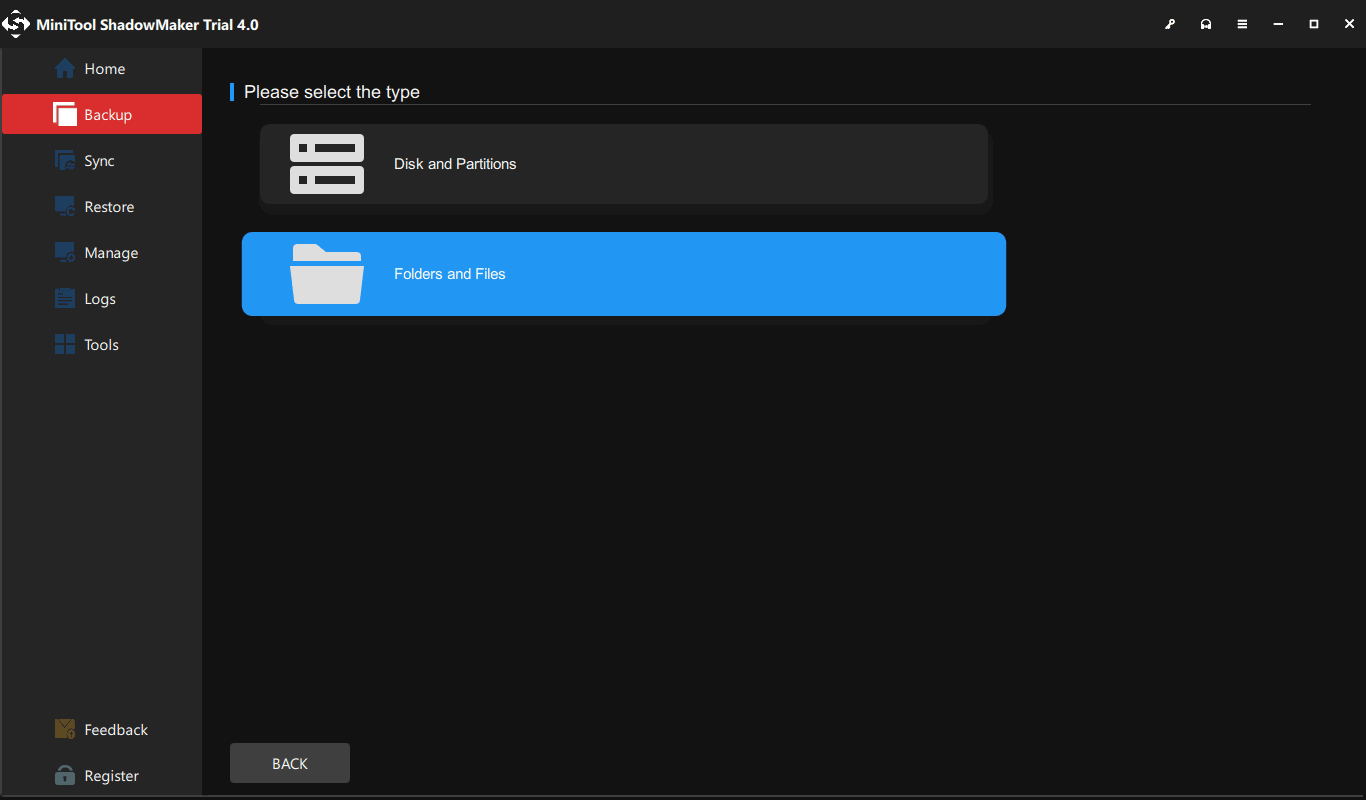
Step 2: Go to Backup, click Source > Folders and Files and choose items that you want to back up.
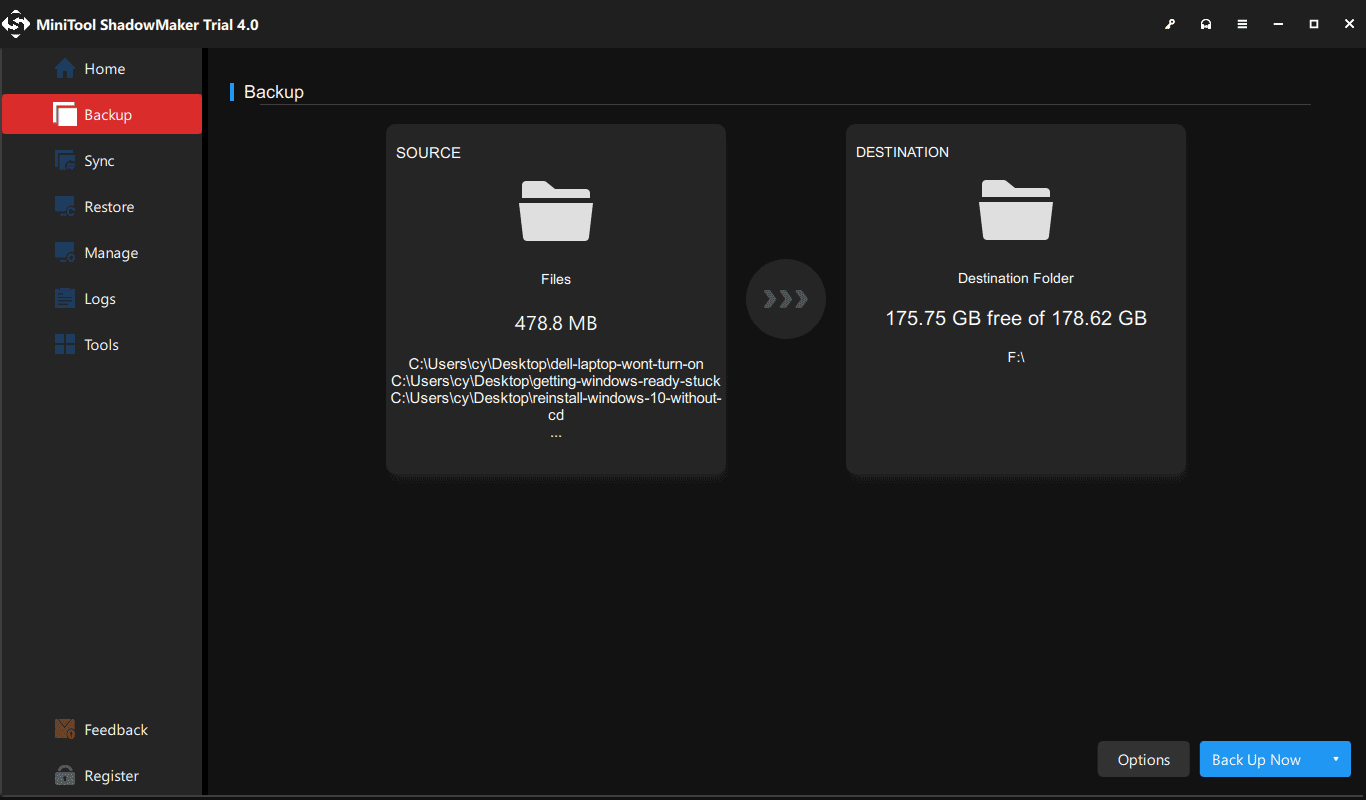
Step 3: Decide where you want to save the backed up files to.
Step 4: Start the file backup by hitting Back up now.
Clean Install Windows 10 on Your Old Machine
See how to upgrade your old operating system to Windows 10:
Step 1: Download an ISO file of Windows 10 from the Internet and create a bootable USB drive or CD/DVD disc.
Step 2: Connect the bootable device to your computer and boot it to BIOS so that you can change the boot order to boot the computer from your USB drive or disc.
Step 3: Select the language, time and currency format and keyboard.
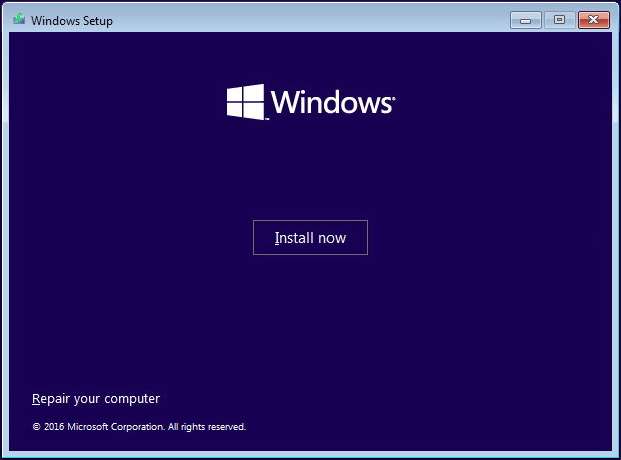
Step 4: Click Install now button when seeing the following interface.
Step 5: Input the license key of Windows 10 you have bought.
Step 6: Choose a Windows 10 edition.
Step 7: After accepting license terms, choose to install Windows only.
Step 8: Delete Drive 0 Partition 0 and install Windows 10 on it.

Step 9: Follow the on-screen guide to finish the Windows installation. After that, customize the new system based on your needs and you can enjoy powerful features.
Bottom Line
Is your computer compatible with Windows 10? You can perform a Windows 10 compatibility check by following the operations mentioned in this post. Once you find your PC satisfies system requirements and hardware requirements after checking for Windows 10 compatibility, you can take action to upgrade to the new operating system.
In addition, if you have any questions or suggestions, you can leave your idea to the comment part below. Also, you can contact us via [email protected] .
Windows 10 Compatibility Check FAQ
Microsoft shows you the Windows 10 minimum system requirements:
- Processor: 1 gigahertz (GHz) or faster processor or SoC.
- RAM: 1 gigabyte (GB) for 32-bit or 2 GB for 64-bit.
- Hard disk space: 16 GB for 32-bit OS 20 GB for 64-bit OS.
- Graphics card: DirectX 9 or later with WDDM 1.0 driver.
- Display: 800×600.
ABOUT THE AUTHOR

Position: Columnist
Vera is an editor of the MiniTool Team since 2016 who has more than 5 years’ writing experiences in the field of technical articles. Her articles mainly focus on disk & partition management, PC data recovery, video conversion, as well as PC backup & restore, helping users to solve some errors and issues when using their computers. In her spare times, she likes shopping, playing games and reading some articles.


