- How To Use Computer Management in Windows XP
- IN THIS TASK
- Summary
- References
- How to open the Computer-Management in Windows 8.1 or 10?
- There are several ways to open, find or start the Computer Management in Windows Here are four methods to open the Computer Management in Windows 8.1 / 10.
- How to Run Computer Management by Command Line or Search Box
- Option 1: Run Computer Management by compmgmt.msc.
- Option 2: Run Computer Management by MMC.
- Option 3: Open Computer Management via My Computer.
- How to Use the Computer Management Administrative Tool on Windows 7 and 8
- Accessing the Computer Management Administrative Tool
- All Important System Management Tools Stored in One Panel
- Managing Disk Partitions on Your Hard Drive
- Managing Services Running on Windows
- Why Use the Computer Management Administrative Tool
How To Use Computer Management in Windows XP
IN THIS TASK
Summary
This article describes how to use the Computer Management tool in Microsoft Windows XP.
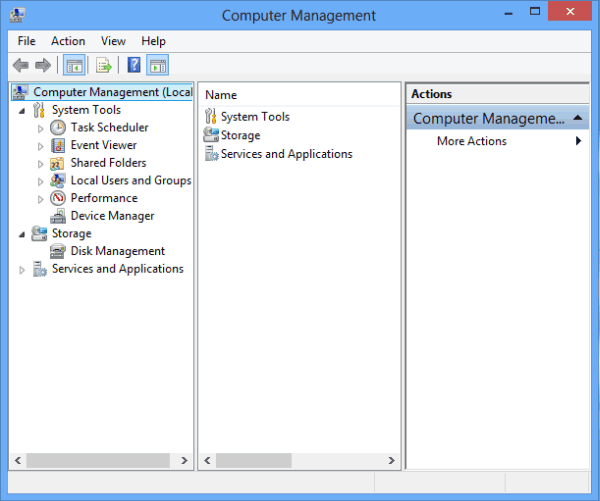
Computer Management is a collection of Windows administrative tools that you can use to manage a local or remote computer. The tools are organized into a single console, which makes it easy to view administrative properties and to gain access to the tools that are necessary to perform your computer-management tasks.
The Computer Management console consists of a window divided into two panes. The left pane contains the console tree; the right pane contains details. When you click an item in the console tree, information about that item is displayed in the details pane. The information that is displayed is specific to the item that you select.
The administrative tools in Computer Management are grouped into the following three categories in the console tree:
Services and Applications
Each category includes several tools or services.
Use the Event Viewer tool to manage and view events that are recorded in the Application, Security, and System logs. You can monitor the logs to track security events and to identify possible software, hardware, and system problems.
Use the Shared Folders tool to view connections and resource in use on the computer. You can create, view, and manage shares, view open files and sessions, and close files and disconnect sessions.
Local Users and Groups
Use the Local Users and Groups tool to create and manage your local user accounts and groups. Local Users and Groups is available only in Windows XP Professional.
Performance Logs and Alerts
Use the Performance Logs and Alerts tool to configure performance logs and alerts to monitor and collect data about your computer’s performance.
Use Device Manager to view the hardware devices installed in your computer, update device drivers, modify hardware settings, and troubleshoot device conflicts.
Use the Removable Storage tool to track your removable storage media and manage the libraries, or data-storage systems, that contain them.
Use the Disk Defragmenter tool to analyze and defragment volumes on your hard disks.
Use the Disk Management tool to perform disk-related tasks such as converting disks or creating and formatting volumes. Disk Management helps you manage your hard disks, and the partitions or volumes that they contain.
Use Services to manage services on local and remote computers. You can start, stop, pause, resume, or disable a service.
Use WMI Control to configure and manage the Windows Management Instrumentation (WMI) service.
Use Indexing Service to manage the Indexing service, and to create and configure additional catalogs to store index information.
NOTE: The actual set of tools and services that is listed in Computer Management depends on the services that are installed on the host computer.
NOTE: You must be logged on as Administrator or as a member of the Administrators group view and modify most properties and perform most computer-management tasks.
To start and use Computer Management on the local computer:
Click Start, and then click Control Panel. Click Performance and Maintenance, click Administrative Tools, and then double-click Computer Management.
The Computer Management window for the local computer is displayed. «Computer Management (Local)» is displayed at the root of the console tree.
In the console tree, expand System Tools, Storage, or Services and Applications to view the tools and services in each of these containers.
Click the item that you want (for example, Event Viewer) to use the tool, and then view the information that is associated with it.
NOTE: You must be logged on as Administrator or as a member of the Administrators group to view and modify most properties and perform most computer-management tasks.
To connect to and use Computer Management on another computer:
Click Start, and then click Control Panel. Click Performance and Maintenance, click Administrative Tools, and then double-click Computer Management.
Right-click Computer Management (Local), and then click Connect to another computer.
Click Another Computer, and then type the name of the computer that you want to manage remotely, or click Browse to locate the computer. Click OK and then click OK to return to the Computer Management window. The Computer Management window of the remote computer is displayed. The name of the remote computer is displayed at the root of the console tree.
In the console tree, expand System Tools, Storage, or Services and Applications to view the tools and services in each of these containers.
Click the item that you want (for example, Event Viewer) to use the tool, and then view the information that is associated with it.
To use Computer Management Help or to use the Help files for any of the individual administrative tools that are contained in Computer Management:
Start Computer Management.
Use either of the following steps:
In the console tree, right-click the item that you want (for example, Computer Management or Device Manager), and then click Help.
Click the item in the console tree (for example, Device Manager or Computer Management), and then click Help on the Action menu.
References
For more information about how to use Computer Management, see Computer Management Help. (In the Computer Management window, click Computer Management, and then click Help on the Action menu.)
For more information about how to use any of the administrative tools in Computer Management, see the Help file for the individual item. (In the Computer Management window, click the item in the console tree, and then click Help on the Action menu.
For additional information about how to use Event Viewer, click the article number below to view the article in the Microsoft Knowledge Base:
308427 How To View and Manage Event Logs in Event Viewer
How to open the Computer-Management in Windows 8.1 or 10?
There are several ways to open, find or start the Computer Management in Windows Here are four methods to open the Computer Management in Windows 8.1 / 10.
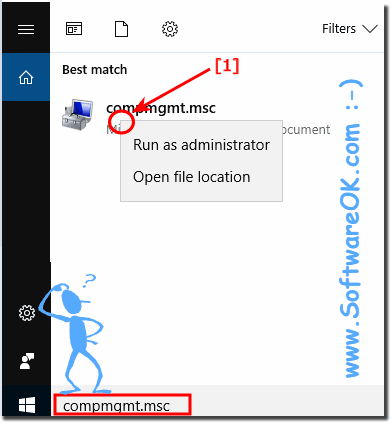
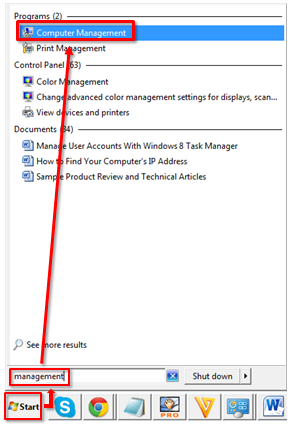
1.) # Methode-1 Open the Computer Management in Windows 8 with key [Win-Logo]+[R] eg RUN (command) — Window!
Start «RUN» in Windows-8 with keys [Win-Logo]+[R] and type in »(Edit-Box) «compmgmt.msc» and press [ENTER] to RUN the «Computer Management» in Windows-8. (see Image-1) and (see Image-2)
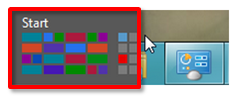
2.) # Methode-2 Launch Computer Management via start menu in Win-8!
PS: for this you have to activate the Start Menu in Windows-8. See here: . activate Windows 8 Start Menu
»  «Start», » »
  «Control Panel», »
  «Administrative Tools», » »
  «Computer Management»
That’s it!
The management console is the main Windows software tool with which you can configure the system and monitor its operation. For this purpose, snap-in are used-small program modules that control various Windows settings.
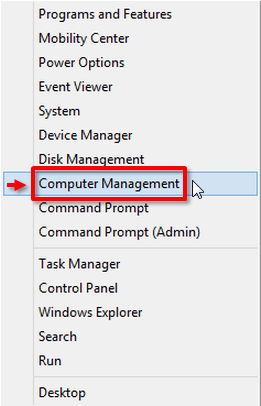
3.) # Methode-3 Launch Computer-Management via key [Win-Logo]+[X]!
Press the key combination [Win-Logo]+[X], here simply click on «Computer-Management» (. see Image Arrow-1) and open directly «Computer-Management (. see Image).
Tip: To access the remote computer management, right-click the Computer Management icon in the left part of the console window and in the All Tasks section select the Connect to another computer item. Click Browse and in the Select: Computer window specify the user name or network name of the computer you want to access.
4.) # Methode-4 Desktop Shortcut to get the computer management on windows 8!
- Press the key combination [Win-Logo]+[D] to see the Windows-8 Desktop.
- Click the right mouse button on an empty (free) space on the Windows-8 Desktop
- In right click context menu, select New Shortcut
- Then in the called input box simply enter the text: compmgmt.msc
- Then just follow the link name, this would be a «Computer-Management» or «PC» attached as a link name;).
Tip:
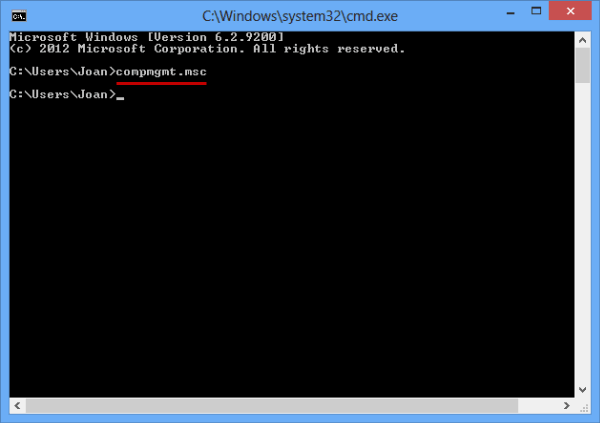
The file compmgmt.msc is located in the folder C:\Windows\system32. You can find it using the Find command in the Start menu. In the drop-down menu, select the Files and Folders section, go to the corresponding link in the left part of the windows and enter the name of the compmgmt.msc file in the corresponding field.
| (Image-4) Find Computer Management in Windows 8.1 or 10! |
 |

5.) # Computer management in Windows 10 via settings!
1. Please open the Windows 10 settings simply Windows-Logo + I and enter the text «tools» .
2. And select Administrative Tools
3. And start the click on the Computer Management
How to Run Computer Management by Command Line or Search Box
Computer Management is a system tool with friendly user interface which allows you to view event log, view and manage computer devices, manage user accounts etc. This guide shows you three ways to enter Computer Management.
Video guide on how to run Computer Management on Windows 8:
Option 1: Run Computer Management by compmgmt.msc.
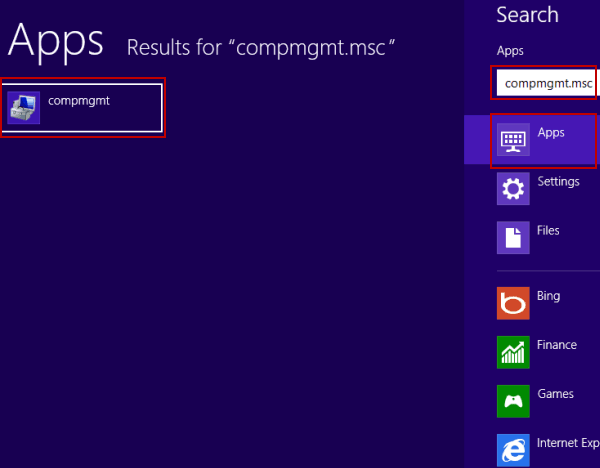
In search box, type compmgmt.msc, choose Apps and then run compmgmt, as shown below.
Or you can run it via Command Prompt.
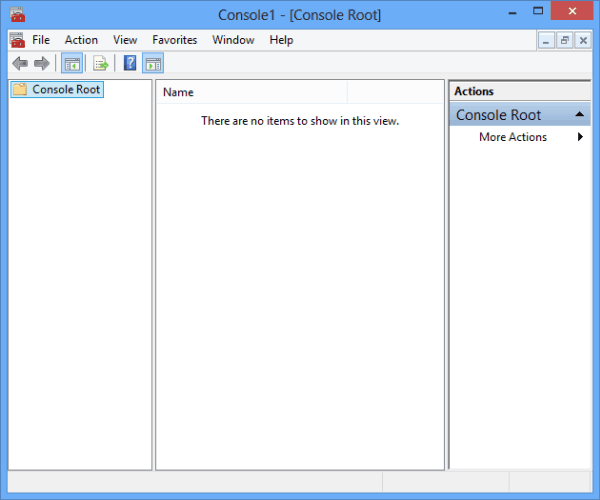
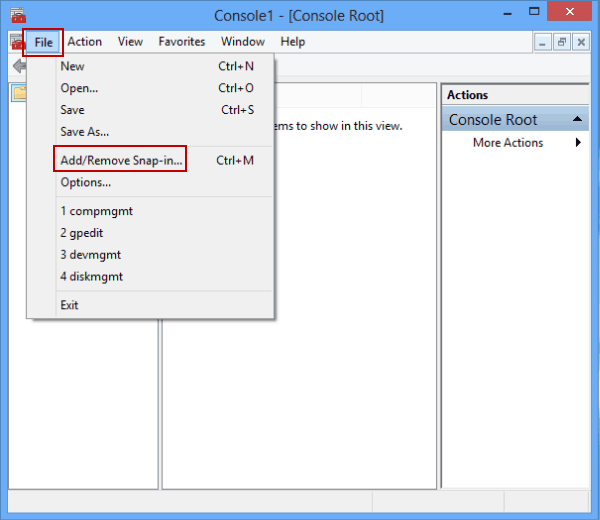
Option 2: Run Computer Management by MMC.
Step 1: In search box, type MMC to open MMC panel.
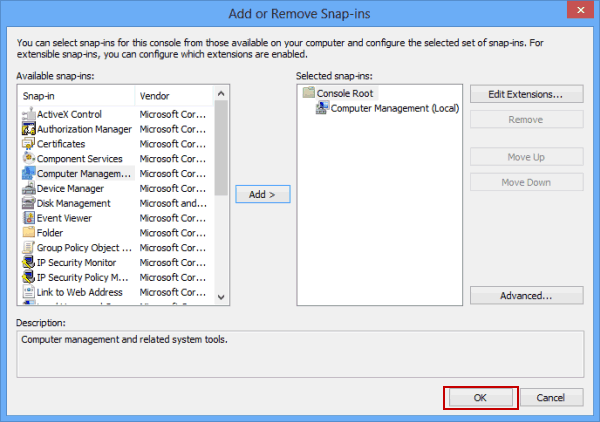
Step 2: Open File and tap Add/Remove Snap-in to open Add or Remove Snap-ins panel.
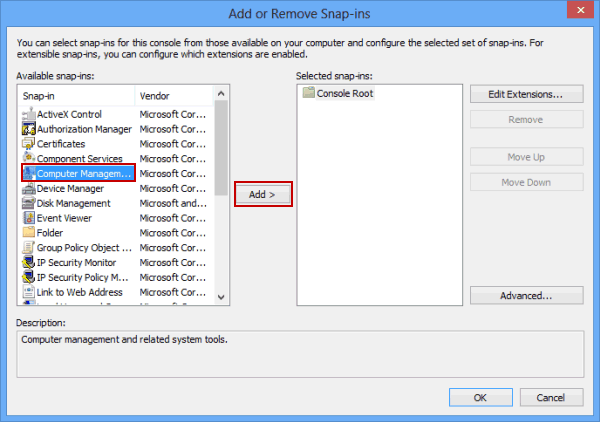
Add or Remove Snap-ins panel is shown as follows.
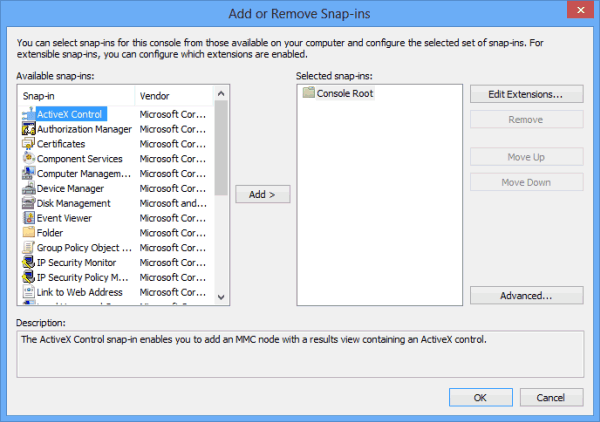
Step 3: In Snap-in list, find and choose Computer Management, click Add button to add it to the selected snap-ins.
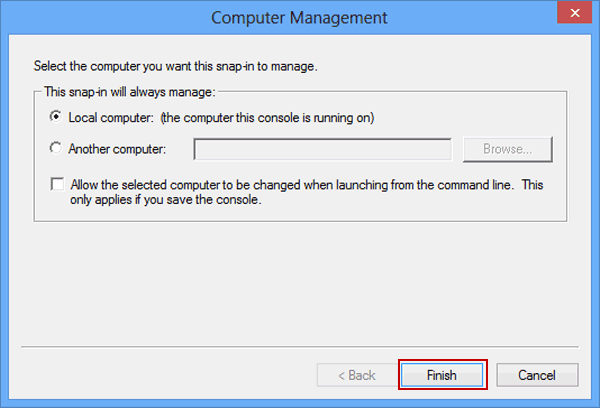
Step 4: Make sure Local computer is chosen and click Finish.
Step 5: Click OK to confirm adding Computer Management to the selected snap-ins.
Step 6: Double-click Computer Management to run it.

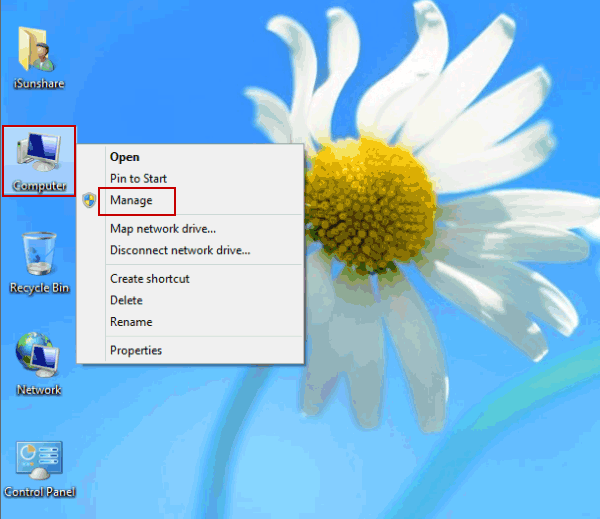
Option 3: Open Computer Management via My Computer.
Right-click Computer, choose Manage, and you will see Computer Management instantly.
Related Articles:

iSunshare is dedicated to providing the best service for Windows, Mac, Android users who are in demand for password recovery and data recovery.
How to Use the Computer Management Administrative Tool on Windows 7 and 8
Windows 7 and Windows 8 offers a variety of tools which are readily available on your computer so you can administer every aspect of your operating system easily. One administrative tool that is less popular and seldom used by most users is the “Computer Management” administrative tool. What is this tool used for? Find out the answers by reading this article towards the end. This tutorial will focus on showing you the things that you can do with the Computer Management utility and hopefully influence you to use it more often so you can easily manage your system anytime you want.
Accessing the Computer Management Administrative Tool
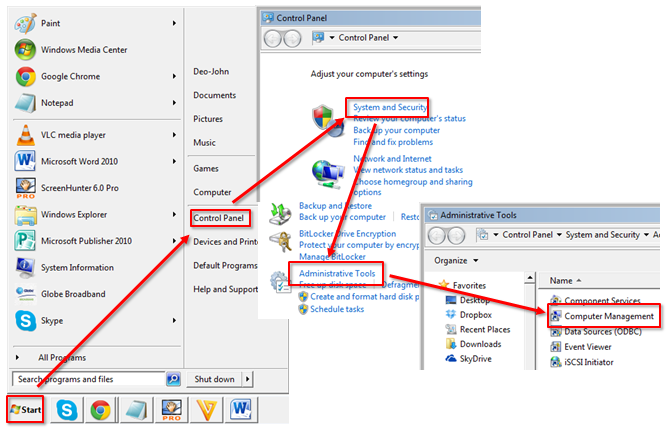
First thing that you need to learn is how to get to this tool on your Windows 7 or Windows 8 computer. On both Windows Operating System versions (Windows 7 and 8), you can access the “Computer Management” utility by clicking on the “Start” button and choosing the “Control Panel” item from the start menu. After that, select the “System and Security” category then click on “Administrative Tools”. On the Administrative Tools Window, click on the “Computer Management” shortcut
Alternatively on Windows 7, you can also open the Computer Management administrative tool by typing the word “management” on the start menu “Search Box” then click on the “Computer Management” item under the “Programs” category of the search results.
Opening it on Windows 8 is quite different. First, you need to hover the mouse pointer towards the bottom left corner of the screen or if you are using a touch screen device, you should touch the same portion of the screen and wait until a “Start” tile shows up.
Once you see the “Start” tile, right-click or press and hold on it until the hidden administrative menu pops out. From this menu, you should find the shortcut that will lead you to the “Computer Management” tool by just clicking or tapping on it.
Another way of opening the same menu that you see above is by pressing on the keyboard shortcut for it which is the “Windows Key + X” combination.
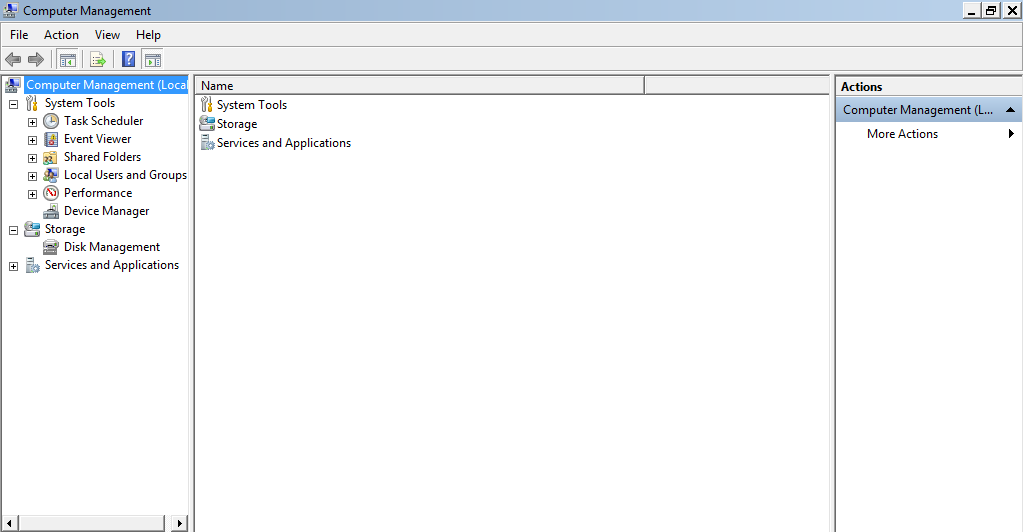
Once the “Computer Management” Window opens, you should see a Window that looks exactly like the screenshot below.
Now, it is time to dig a bit deeper to what the Computer Management Tool offers and discover the things that you can do with it in order to manage your Windows machine more effectively.
All Important System Management Tools Stored in One Panel
After opening the Computer Management Utility, you will notice that it is divided into three primary sections which are “System Tools, Applications and Services & Application”. Among these three, the largest section is the “System Tools” which incorporates a lot of useful utilities in it.
First tool that you would see is the “Task Scheduler” utility where you will be able to manage, schedule and even create new tasks for your machine.
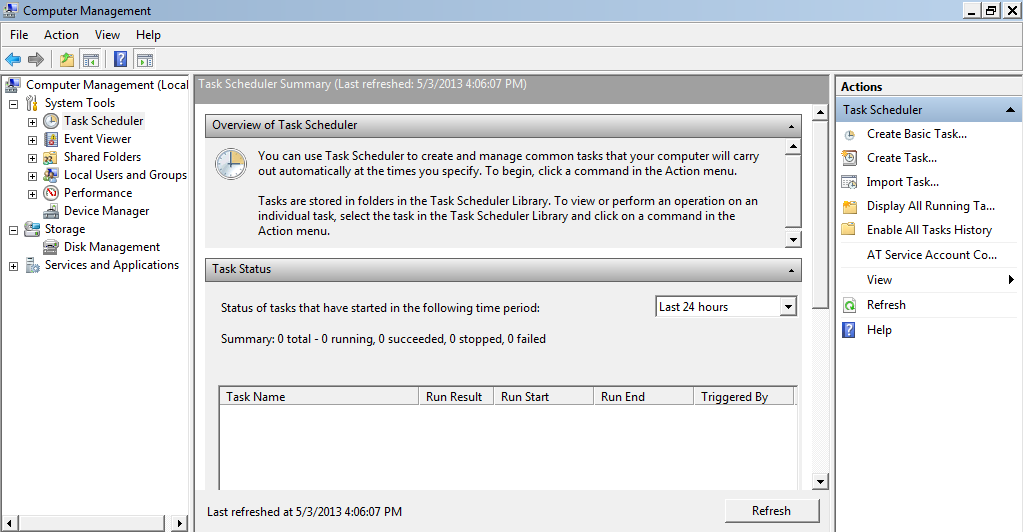
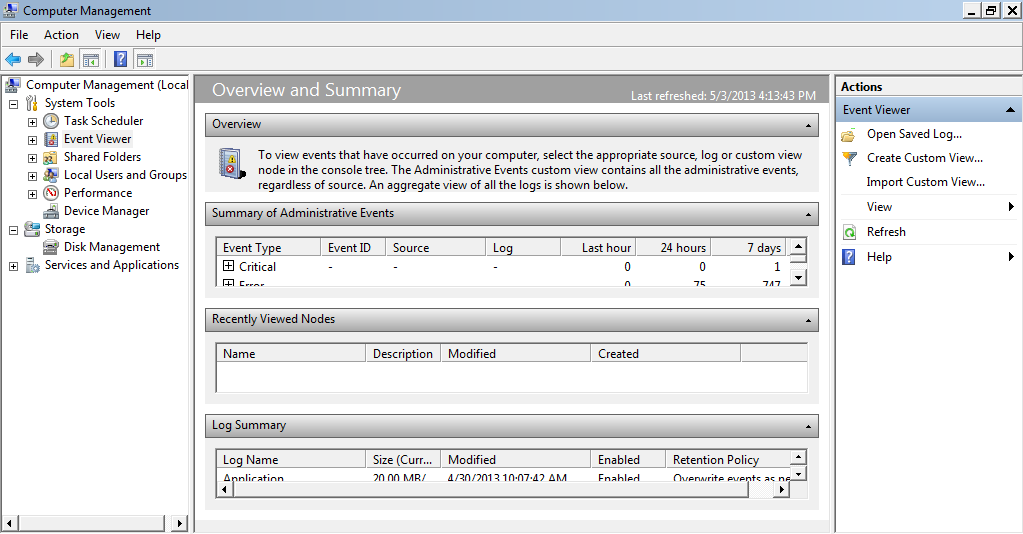
The second tool that you’ll find available within the “Computer Management” utility is the one called “Event Viewer”. With this tool, you will be able to view some logs about the events that happened which Windows was able to store and record. You can also see some logs about the applications and programs that you installed on your computer. Creating a custom view that you designed yourself in order to view some specific information to help you troubleshoot and identify possible problems is also available in the “Events Viewer” section.
Another tool which is the third on the list is the “Shared Folders” section. From here, you can see all the files and folders that you allowed to be shared to other users on your network and as well as those that you restricted from being accessed. You can also view the sessions and other files that a specific user on your network has made active.
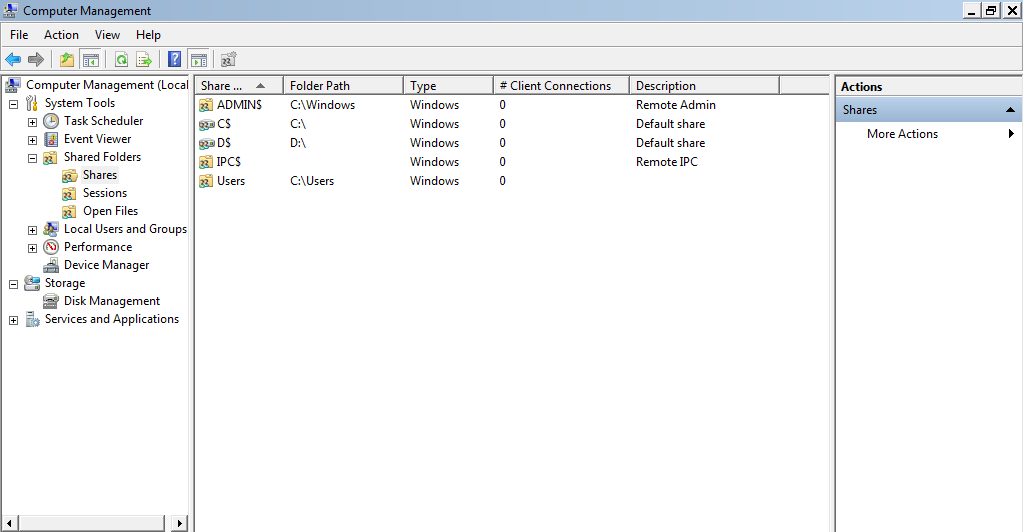
From this section, you can also manage other aspects of your shared folders to make Windows work and function the way you want it to.
The next item on the list which is also a very useful tool is the “Local Users and Groups” section. You can take advantage of this tool in order to manage the defined user groups and other user accounts as well as the different groups that each account is a member to.
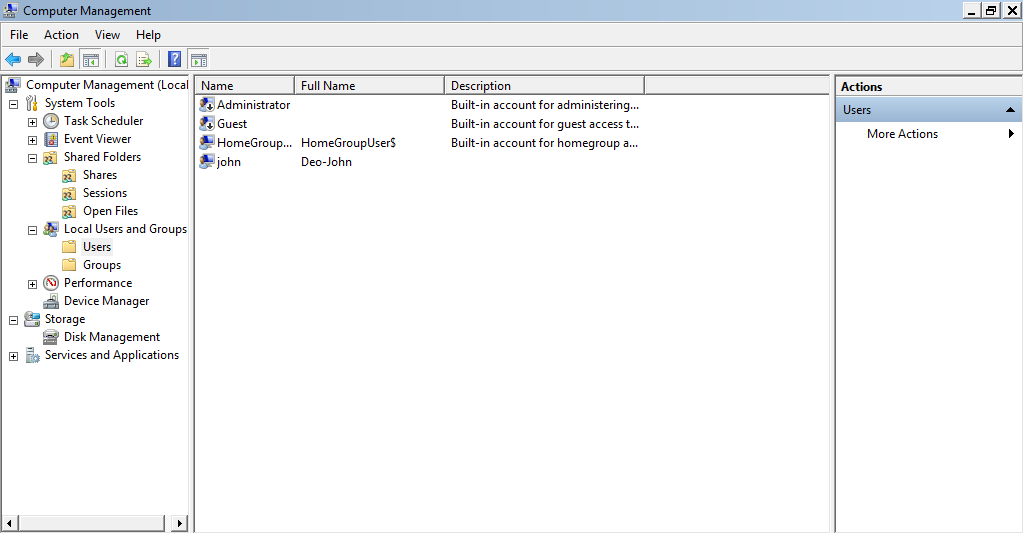
The “Local Users and Groups Tool” is not found on the Windows 7 Home Edition, the basic Editions of Windows 8 and as well as Windows 8 RT.
The tool next to “Local Users and Groups” is the “Performance Monitor”. This tool works with the “Event Viewer” in order to make you understand the performance of your computer and how everything works. You’ll also see if a problem is going on and identify what causes it.

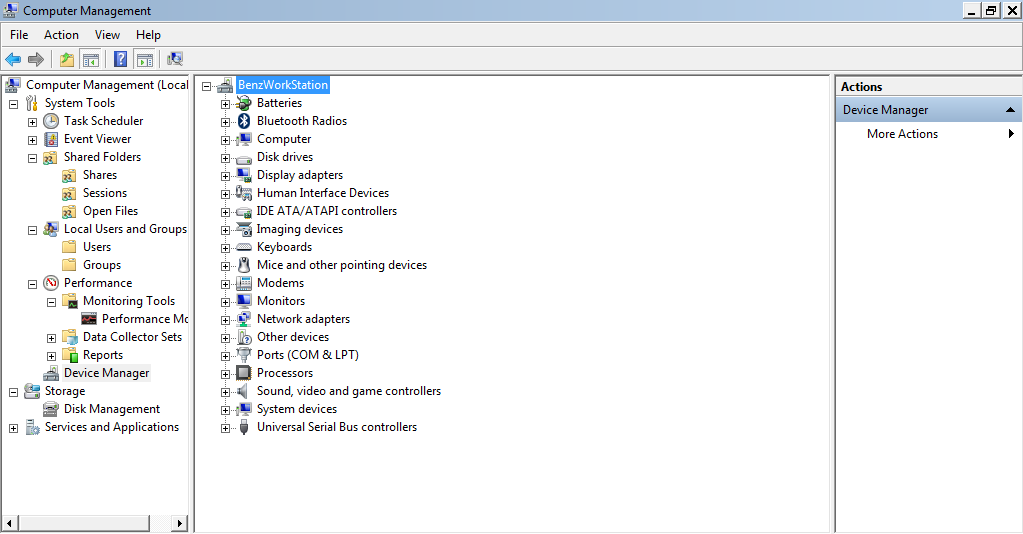
Finally, we will come to the last tool under the “System Tools” category which is the “Device Manager”. With this tool, you can see all the devices and other related components that makes up your computer. You will also see whether a component lacks a driver or if it already has a driver but still needs to be updated. By going to this section, you will be able to identify all missing drivers and manage devices so everything works smoothly anytime.
Managing Disk Partitions on Your Hard Drive
The section that is labelled “Storage” contains only the “Disk Management” tool which you can use to create partitions or delete one.
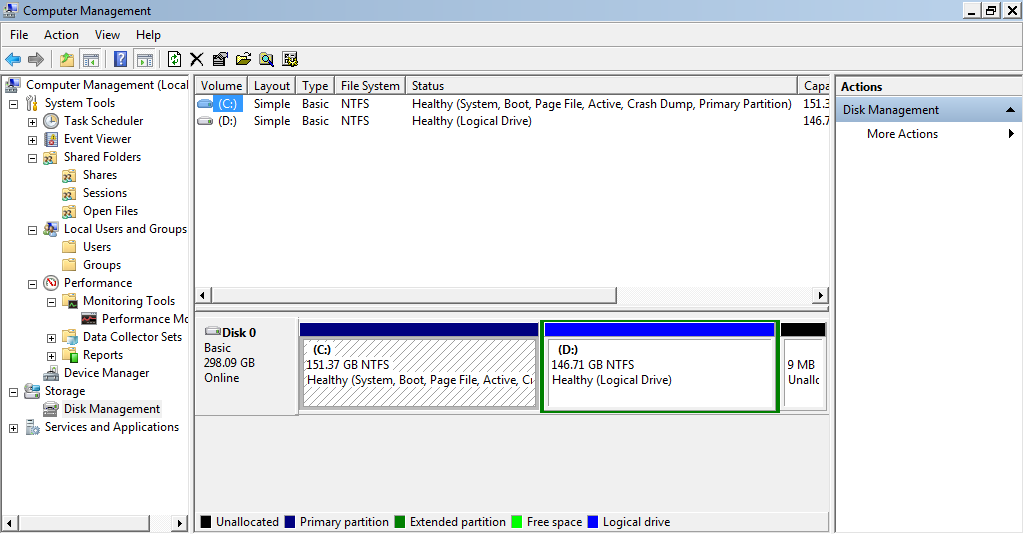
If you want a partition which you can use to have another operating system installed on your computer then you can use this tool to create a space that is enough to accommodate a new Operating system in it. A new partition can also be used to store some backup files which are otherwise vulnerable to being lost or corrupted if kept in only one partition that bears everything in it.
Managing Services Running on Windows
Lastly, you will see the “Services and Applications” section at the bottom. With this tool, you will be able to employ management to all the services that runs within your Windows machine.
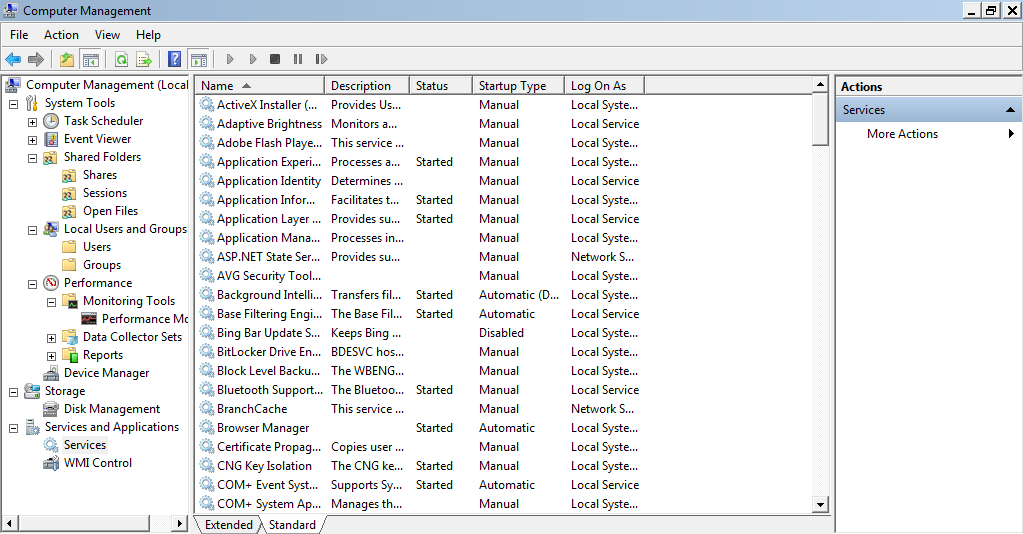
The “Services and Applications” section not only monitors the services that are unique to Windows but also those that are run by third party software and applications that you installed on your computer.
Why Use the Computer Management Administrative Tool
The simple answer is “why not”? As you’ve seen in the discussion that is presented and explained above, the “Computer Management” utility is one of the most useful tool where you can easily access almost all system management utilities in Windows in just a few clicks. Using this valuable tool really saves me time and effort since I don’t have to jump from one Window to another just to access a specific area on my computer which I want to monitor, manage and fix problems on. If you are tired of opening the tools mentioned above one by one in separate Windows then you should start being comfortable in using the “Computer Management” tool which is readily available on your Windows machine and I’m sure that you’ll love it the same as I do!
That’s it! you now learned the things that you can do with the “Computer Management” tool. If you have any tip regarding this tool or you have problems with regards to using one of the tools included in it then please feel free to post it as a comment on this article.


