Windows console applications. Text editors
Initially, all text editors did not have a graphical interface. And work with text almost from the outset was one of the main types of user activity on computer. With the invention and spread of low-level and especially high-level programming languages, text editor has become an important working tool of professionals. Then, other users had to use text editors for their daily tasks. So by the time the programs with GUI started to be widespread, the concept of text editor was already well developed, there were mature, well-designed and implemented specimens of applications for text editing without graphical user interface. So the text-based versions coexisted with GUI-based ones for very long and still graphical user interface programs have not replaced the console / text-based applications.
While the average user is not aware of their existence, having no idea about the power of vim or emacs and often no knowledge even of MS-DOS Editor, built in all the 32-bit versions of Windows, none the less, console text editors continue to exist and be developed. As it is the case with the text web browsers, the main line of text-based text editors development is in Linux and other *nix systems world. But there are several interesting applications under Windows as well.
Console text editor. Version for Windows, DOS, OS/2, Linux, some other *nix systems.
Syntax highlighting support for: C, C++, Java, Perl, Sh, Pascal, SQL, Assembly, PHP, Python, REXX, Ada, Fortran, IDL, LinuxDoc, TeX, TeXInfo, HTML, etc. ASCII table. Various facilities for coding and errors handling.
Copying words, characters or text blocks is in the same mode and by the same keyboard shortcuts (except Ctrl+A) as in major Windows text editors with graphical user interface. Plus, there may be other variations.
Консольные приложения для Windows. Текстовые редакторы
Изначально все текстовые редакторы не имели графического интерфейса. А работа с текстом почти с самого начала была одним из основных видов деятельности пользователя на компьютере. С изобретением и распространением развитых низкоуровневых и особенно высокоуровневых языков программирования, текстовый редактор стал важным рабочим инструментом профессионалов. Затем и другие пользователи стали применять текстовые редакторы для своих повседневных задач. Поэтому ко времени начала распространения программ с графическим интерфейсом концепция текстового редактора была уже хорошо разработана, имелись зрелые, хорошо продуманные и реализованные образцы приложений без графического интерфейса для работы с текстом. Отчего очень долго текстовые версии сосуществовали с графическими и до сих пор приложения с GUI не вытеснили консольные.
Хотя средний пользователь не знает о их существовании, ему неизвестна мощь vim или emacs, часто неизвестен даже встроенный во все 32-битные версии Windows MS-DOS Editor, тем не менее, текстовые редакторы продолжают существовать и развиваться. Как и в случае с текстовыми веб браузерами, основная линия развития консольных текстовых редакторов находится в среде Linux и других *nix систем. Но и под Windows есть несколько интересных приложений.
Консольный текстовый редактор. Версии для Linux, некоторых других *nix систем, DOS, Windows, OS/2.
Поддержка подсветки синтаксиса нескольких компьютерных языков: C, C++, Java, Perl, Sh, Pascal, SQL, Assembly, PHP, Python, REXX, Ada, Fortran, IDL, LinuxDoc, TeX, TeXInfo, HTML и другие. Таблица ASCII символов. Разнообразные приспособления для работы с кодом и обращения с ошибками, могущих возникнуть в процессе.
Копирование слов, символов или блоков текста осуществляется таким же образом и с использованием тех же горячих клавиш (кроме Ctrl+A), что и у текстовых редакторов Windows c графическим интерфейсом. Хотя так же возможны и другие варианты.
Консольный VIM в Windows
Введение
Бывают ситуации, когда очень хочется использовать любимый редактор, но под рукой нету *nix операционных систем, либо разработка ведётся на Windows.
Первое что приходит на ум — использование Windows версии gVim, но в этом случае возникает куча проблем с установкой плагинов, переносом конфигов и адаптации всего и вся. Что-то не будет компилироваться без бубна (например Ctrl-p), а что-то падать во время работы.
Cygwin и Mintty спешат на помощь
Качаем с сайта и устанавливаем последнюю версию Cygwin.
При установке выбираем любое зеркало из списка доступных.
Выбираем следующие пакеты:
- git
- Vim
- ruby
- libsasl2
- ca-certificates
Пока пакеты качаются и ставятся, самое время добыть удобный терминал. Мой выбор пал на mintty. Установка осуществляется копированием mintty.exe в папку bin Cygwin-а.
Для того, чтобы всё выглядело прилично — его нужно поднастроить. Запускаем mintty, тыкаем правой кнопкой на иконку в левом верхнем углу консольки и выбираем «Options. ».
Выключаем опцию Blinking, чтобы не отвлекало, выбираем привычный Block в качестве курсора.

Выбираем шрифт по вкусу, ставим сглаживание в Full, Locale — C, Character Set — UTF-8.

Очень важно поставить тип терминала в xterm-256color.

Одно несомненное преимущество данного подхода это то, что теперь можно использовать ту же самую конфигурацию Vim, что и в *nix системе. А так же мы получаем в своё распоряжение полноценную консоль и можем работать с Windows файлами с помощью утилит grep, find, ack.
Рекомендую создать приватный репозиторий со всеми конфигами совершенно бесплатно на каком-нибудь Bitbucket. Такие подборки обычно называют dotfiles.
Одним приятным открытием в плане конфигурации Vim-а для меня стал Vimified, который базируется на Vundle.
Его лучше ставить по шагам, а то мало-ли что-то пропустили во время установки Cygwin. Шаги установки подробно расписаны в описании к репозиторию.
Первый запуск Vim может пройти с ошибками из-за того, что предусмотренные конфигурацией пакеты ещё не установлены, но это не страшно.
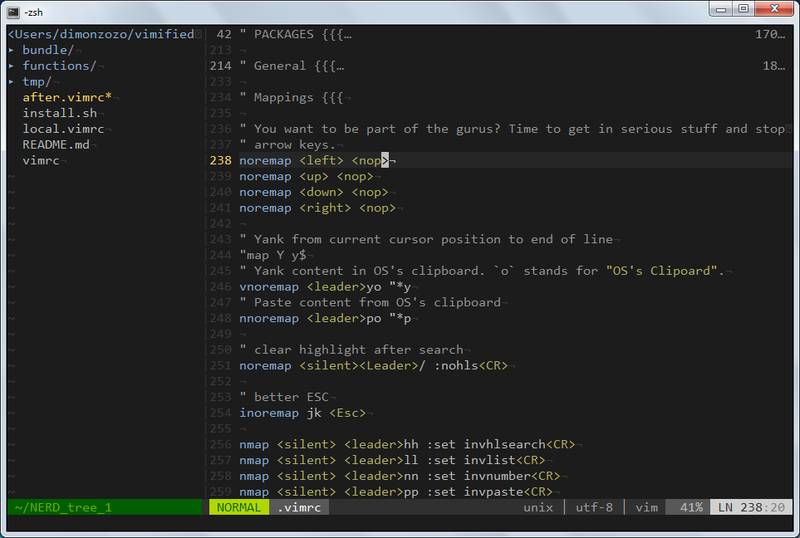
Перезапускаем Vim. И вот что у нас должно получится после небольших корректировок и правок.
Заключение
В итоге мы получили:
- Полноценный рабочий Vim
- Приятная цветовая схема и палитра, которая радует глаз
- Работает прокрутка колесом мыши (для любителей)
- Работает изменение размера панелей простым кликом и перетаскиванием
Спасибо за внимание. Надеюсь кому-нибудь пригодится.
Извещения об ошибках — хабрапочтой.
Только зарегистрированные пользователи могут участвовать в опросе. Войдите, пожалуйста.
How do I edit text files in the Windows command prompt?
On Unix I’d just use vi, but I don’t know what the command is on Windows. I am actually trying to edit files over SSH with Windows Server 2008.
10 Answers 10
I won’t vouch for its functionality and outdated GUI but it is installed by default, even on Windows 7.
Edit: Except 64 bit versions of Windows.
The simplest solution on all versions of Windows is:
And, no extra software required.
From a Windows command prompt enter copy con followed by the target file name. ( copy con c:\file.txt ).
Then enter the text you want to put in the file.
End and save the file by pressing CTRL — Z then Enter or F6 then Enter .
If you want to change text in an existing file simply display the text by using the command type followed by the file name and then just copy and paste the text in to the copy con command.
If you’re used to vi and don’t want to settle for the built-in editor you can get Vim for Windows. It’ll run from a command shell. Or try WinVi.
If you have git installed for windows then most likely nano and vim are both available at
To run from a command prompt (cmd.exe)
To run in powershell
They both work great even over ssh.

Believe it or not, EDLIN.EXE is still around at least on this Vista system.
Excuse me while I sob softly to myself.

I don’t know about SSH, or anything (else?) server-related, so forgive me if this «solution» is useless. If you want to edit files in the command prompt, you can get the Windows version of Nano.
As a side note, those little ^ signs at the bottom of the window are supposed to represent the Ctrl button. For instance, ^X Exit means that you can exit the program using Ctrl — X .
Also, Nano will sometimes add extra newlines when saving files. This seems to be some kind of bug with Nano’s word wrapping.
I’ve also seen ports of vi for Windows, although I’ve used one that just seem to make command prompt window as small as it can be, leaving only a title bar (which means the rest of the window may as well be invisible, since you can’t see what you’re doing). However, the Windows version of Vim seems to work quite nicely.
Windows console text editor
Kaa — console text editor
Kaa is a small and easy CUI text editor for console/terminal emulator environments.
Kaa is an easy yet powerful text editor for console user interface, providing numerous features like
- Macro recording.
- Undo/Redo.
- Multiple windows/frames.
- Syntax highlighting.
- Grep.
- Python console.
- Python debugger.
- Open source software(MIT).
- More to come!

Kaa is very easy to learn in spite of its rich functionality. Only thing you need to remember is «To display menu, hit F1 key or alt+’m’ key». Most of basic features could be accessed from fancy menus by hitting underlined character in the menu items. You can use kaa as easy as you are with Notepad on MS-Windows.
Kaa is written in Python. So, you can easily customize many aspects of kaa through simple Python scripts.
Kaa is a CUI editor that runs on most of modern UN*X flavor operating systems like Linux or Mac OS X. Kaa requires Unicode friendly environment both platform running kaa and terminal emulator/console to interact with kaa.
Cygwin environment on Windows platform is not supported at this time, but will be tested after they provide Python 3.3 package.
To run kaa, you need following component:
Python 3.3 or later
Development files for Python 3.3. For recent Debian/Ubuntu, you can install required libraries by
If your Python installation is not system-supplied package but built by yourself, please ensure you have installed ncurses library with wide character support before you built Python. Consult documentation of your platform for details. For recent Debian/Ubuntu, you can install required libraries by
After theses packages are installed, rebuild Python installation to take effect.
Kaa can use system clipboard. To use clipboard on Unix platform, xclip command should be installed. For Ubuntu Linux, following command installs xclip command.
Use easy_install3 or pip3 to install kaa from PyPI
Kaa uses alt key for keyboard shortcut like alt+k. On most of recent Windows or Linux terminal, alt key works out of box. But on Mac OS X, Terminal app should be configured:
- Select Preferences menu.
- Open the Settings tab.
- Open the keyboard tab.
- Check Use option as meta key.
Or, if you use iTerm2 on Mac, you should configure:
- Select Preferences menu.
- Open the Profiles tab.
- Open the Keys tab.
- Check Left option Key acts as: +Esc. and Right option Key acts as: +Esc. button.
If you use Gnome terminal and wishes to access menu by F1 key, you should configure:
- Select Edit | Keyboard shortcuts menu.
- Scroll to the Help/Contents shortcut and change key from F1 to some another key.
Kaa looks better with 256 color mode of terminal emulator. For Terminal.app on Mac OS X, you can set 256 color mode with following procedure:
- Select Preferences menu.
- Open the Settings tab.
- Select xterm-256color for «Declare terminal as» field.
For iTerm2, you can set 256 color mode with following procedure:
- Select Preferences menu.
- Open the Profiles tab.
- Open the Terminal tab.
- Select xterm-256color for «Report terminal type» field.
Otherwise, you should manually update terminal setting. e.g., If you use bash, add following line to
For detail, see http://www.pixelbeat.org/docs/terminal_colours/#256 to enable 256 color on your terminal.
| -h , —help | show this help message and exit |
| —version | show version info and exit |
| —no-init | skip loading initialization script |
| —init-script INIT_SCRIPT | |
| execute file as initialization script instead of default initialization file | |
| —palette PALETTE | |
| color palette. available values: dark, light. | |
| —term TERM , -t TERM | |
| specify terminal type | |
| —command command , -x command | |
| spefify kaa command id to execute at start-up e.g: kaa -x python.console / kaa -x tools.grep | |
Using kaa is intuitive. Typing alphabet keys will update file as you expected. Functional keys like arrow or delete keys also works.
To display menu, type F1 key or alt+m (type ‘m’ key with alt key). Each items in the menu has one underlined character. The menu item is executed by typing the underlined key with or without pressing alt key.
Typing escape key hides menu.
| New | Create new file. |
| Open | Open existing file. |
| File info | Show file information. Also update per file settings of tab or indentation. |
| View Diff | Show difference between original file and current buffer. |
| Save | Save current file. |
| Save As | Save current file as new file. |
| Close | Close current frame. |
| Save all | Save all current files. |
| Close all | Close all frames. |
| [Recently] | Show recently used files menu. |
| Quit | Terminate kaa. |
Recently used files menu
| Recently used files | Show list of recently used files. |
| Recently used dirs | Show list of recently used directories. |
| Cut | Cut selected text. |
| Copy | Copy selected text. |
| Paste | Paste from clipboard. |
| Paste History | Paste from clipboard history. |
| Undo | Undo last modification. |
| Redo | Redo last undo. |
| Search | Search text. |
| Replace | Replace text. |
| Complete | Word completion. |
| [Convert] | Show text convert menu. |
Text convert menu
| Upper | Convert selected text to upper case. |
| Lower | Convert selected text to lower case. |
| Normalization | Convert selected text to Unicode Normalization Forms(NFKC). |
| Full-width | Convert alphabet and numbers in the selected text to full-width character. |
Code menu differs among file types. Following items are typical in programming languages.
| Comment | Insert line comment character at top of lines in selected region. |
| Uncomment | Delete line comment character at top of lines in selected region. |
| Table of contents | Show table of contents to move cursor. |
| Start record | Start macro recording. |
| End record | End macro recording. |
| Run macro | Run last macro. |
| Grep | Search text from disk. |
| Paste lines | Insert lines of text without auto indentation. |
| Shell command | Execute external shell command and insert the output. |
| Make | Run make to compile source files and capture error messages. Use f9/10 key to traverse errors. |
| Spell checker | Run English spell checker. |
| Python console | Start python console. |
| Python debugger | Start Python debugger. |
| Python debugger server | Wait for external debugger connection. |
| Frame list | Show list of frame windows. Use left/right arrow key to change active frame. |
| Split vert | Split current window vertically. |
| Split horz | Split current window horizontally. |
| Move separator | Move window separator. Use left/right arrow key to move separator. |
| Next window | Activate next window. |
| Prev window | Activate previous window. |
| Join window | Join split window. |
| [Switch file] | Show switch window menu. |
Switch file menu
| Switch file | Switch content of active window. |
| New file here | Create new file to active window. |
| open file here | Open existing file to active window. |
| Recently used files | Show list of recently used files. |
| Recently used dirs | Show list of recently used directories. |
| F1, alt+m | Show menu. |
| Alt-w | Show switch file menu. |
| left, Control+b | Cursor left. |
| right, Control+f | Cursor right. |
| up | Cursor up. |
| down | Cursor down. |
| Control+p | Move cursor to previous physical line. |
| Control+n | Move cursor to next physical line. |
| Control+left, Alt+b | Move cursor to previous word boundary. |
| Control+right, Alt+f | Move cursor to next word boundary. |
| Alt+p, Page up | Previous page. |
| Alt+n, Page down | Next page. |
| Control+a, Home | Move cursor to top of line. |
| Control+^ | Move cursor to first letter of line. |
| Control+e, End | Move cursor to end of line. |
| Alt+ , Control+End | Move cursor to end of file. |
| Control+g | Go to line number. |
| Control+t | Table of contents. |
| Shift+left | Select to previous character. |
| Shift+right | Select to next character. |
| Shift+up | Select to previous line. |
| Shift+down | Select to next line. |
| Shift+Home | Select text to top of line. |
| Shift+End | Select text to end of line. |
| Control+Shift+Home | Selects text to top of file. |
| Control+Shift+End | Select text to end of file. |
| Control+Space, Control+@ | Set mark to select text region. |
| Alt+# | Set mark to select text rectangularly. |
| Alt+a | Select all text. |
| Alt+c | Select current word at first press. Subsequent press selects entire current line, and the third press selects entire text |
| Backspace, Control+h | Delete the character to the left. |
| Delete, Control+d | Delete the character at the cursor. |
| Control+backspace, Alt+h | Delete the word to the left. |
| Control+Delete, Alt+d | Delete the word to the right. |
| Control+k | Delete the line to the right. |
| Alt+k | Delete the current line. |
| Control+v | Paste from clipboard. |
| Control+x | Cut selection. |
| Control+c | Copy selection. |
| Alt+v | Paste from clipboard history. |
| Control+z | Undo last change. |
| Control+y | Redo last undo. |
| Control+s | Search text. |
| Alt+s | Replace text. |
| F2 | Search prev. |
| F3 | Search next. |
| F6 | Toggle macro recording on/off. |
| F5 | Run macro. |
| Alt+. | Run last executed edit command again. |
| Tab | Indent selected lines. |
| Shift+Tab | Dedent selected lines. |
| Control+o | Word completion. |
| Control+u Alt+! | Execute command and insert the output. |
| Alt+z | Suspend kaa and back to shell. |
When regex button is checked, Replace string is also regular expression string. In this case, special characters like \t or \n are converted to tab character and newline character. Also, back-reference character will be replaced to sub-string matched group in the search string. For example, when search string is ‘(a+)(b+)’ and replace string is ‘\2\1’, matched string ‘aabb’ will be replaced to ‘bbaa’.
Grep dialog has three input field. Search is a plain text or regular expression string to search. Directory is a directory to start searching. If Tree button was checked, files are searched recursively. Filenames is space separated list of file spec in shell-style wild-cards (e.g., *.txt *.py *.doc). Up arrow key displays history of each input field.
In the grep result window, use F9 and F10 key to traverse matches forward/backward.
You can type Python script as normal Python interpreter. To execute script, you should hit enter key at very last of the script. Otherwise, newline character is inserted as text editor. You can move cursor upper or below to edit multiline script.
To show script history window, hit alt+Enter key on the console.
To use spell checker, PyEnchant module should be installed.
On MAC OS-X install enchant with homebrew before installing PyEnchant.
[Tools]|Make executes make command to build your files. You can alter command and options to build. To retrieve previous command and options, hit up cursor key to display history window.
Output of make displayed on the window. You can traverse source files cause of the error forth and back with f9 and f10 key.
Python debugger is experimental at this point.
Kaa can be used as front-end of Python debugger module( bdb ) running in another process. Although kaa itself requires Python 3.3 or later, you can use Python 2.6 or later in the target process.
There are three ways to start debugger.
Kaadbg package executes your Python script with Python debugger connected to debugger window of kaa. Usually, kaadbg is Python package installed as a part of kaa. To use another Python interpreter than kaa installed, you can install kaadbg separately.
Currently, kaadbg supports from Python 2.6 to Python 3.x.
To activate kaa remote debugger, select [Tools]|Python debugger server and enter port number to connect debugger(default 28110).
Next, open new terminal window and run following command in the terminal window.
If you need use other port than 28110, you should provide port number with -p option.
Like Python’s standard pdb module, you can import kaadbg package and call set_trace() to start debug session.
You should start activate kaa remote debugger by menu [Tools]|Python debugger server and enter port number to connect debugger(default 28110).
To connect kaa remote debugger, open your target script and insert following lines of code.
If you need use other port than 28110, you should provide port number to set_trace() .
Now you can start your target script. Kaa remote debugger will be opened when kaadbg.debug.set_trace() is hit.
Run child process
You can run your target script as child process of kaa to debug.
To start child process, select [Tools]|Python debugger in kaa menu and specify command line as follow.
Command line should starts with Python interpreter you use and -m kaadbg.run . Name of target script and arguments follows.
Note that kaa doesn’t capture standard output and standard error of target process, so you cannot see outputs of the target script. Also, standard input of the target process is closed just after command started.
To set/unset breakpoints, select [Code]|Toggle Breakpoint in menu in editor. By default, f8 key is bounded to this menu item.
While debugger window is opened, you can suspend the debugger window by escape key. After you finish to update breakpoints in editor window, select [Tools]|Python debugger menu again to resume debugger. To view list of current breakpoints, select breakpoints button with alt+E key.
To see value of variables, select Expr on the debugger window by pressing alt+E key and enter Python expression you want to inspect like self.spam .
Python debugger is experimental at this point.
Kaa currentry supports some basic vi-like key bindings, but are disabled by default. To activate vi bindings, create
/.kaa/__kaa__.py file with following lines.
Unlike vi, kaa is in insert-mode at start up. Hit escape key to move to command mode.
| i | Insert mode. |
| R | Replace mode. |
| A | Append text after the end of line. |
| v | Characterwise visual mode. |
| V | Linewise visual mode. |
| h | Cursor right. |
| l | Cursor left. |
| k | Cursor up. |
| j | Cursor down. |
| w | Cursor word right. |
| b | Cursor word left. |
| 0 | Cursor to top of line. |
| ^ | Cursor to first character of line. |
| $ | Cursor to end of line. |
| gg | Cursor to top of file. |
| G | Cursor to end of file. |
| Control+b | Page up. |
| Control+f | Page down. |
| r | Replace a character. |
| x | Delete a character. |
| d | Delete to next move. |
| u | Undo last edit. |
| Control+r | Redo last undo. |
| y | Copy selection. |
Kaa executes a Python script file at
/.kaa/__kaa__.py on start up. You can write Python script to customize kaa as you like.
To change default color palette, you can modify kaa.app.DEFAULT_PALETTE.
Each file type has file editor mode. kaa.filetype.default import defaultmode is base class of all text file modes. You can change attributes of filetype classes.
Show line numbers
To show line number in editor screen, you can update SHOW_LINENO attribute of file mode classes.
To show line number in HTML mode, you should change attribute of htmlmode.HTMLMode class.
Each mode object calls setup function to customize. kaa.addon.setup() decorator registers setup function.
Setup function is called when mode object is created. In the setup function, you can customize various aspect of file type object.
mode.add_keybinds() method registers custom key bind.
editmode is a name of editmode which should be one of input, command, visual or visualline. keymap is a dictionary of keybind and command name.
Following example assign Control+x 2 key to split window as Emacs.
Create custom command
kaa.command.commandid() decorator declare a function as kaa’s editor command.
commandid is a unique command name in string.
Command functions can be registered to mode objects.
To register commands to mode, use add_command() method.
command is a command function.
Change color theme
Function mode.add_theme() could be used to customize color theme.
theme is a dictionary of theme name and list of styles. Currently, the only valid theme name is basic.
You can get the recent source code from github.
To run test, you need to install py.test
There is an experimental script to run freeze to build standalone kaa binary file. To freeze kaa, You must proceed with the following steps:
- In source directory of kaa, cd to kaa/freezing directory.
- Edit PYTHON variable in build.sh for your environment.
- run build.sh
- Check if freezing/dist/kaa exists.
I really appreciate for your help.
- Display git log.
- Display unmerged diffs in git status screen.
- Fix clipboard error in Linux.
- Autocomplete around puctuation now works better.
- Display result of git commit command.
- Stage/unstage in no-commit repogitory now works.
- git status doesn’t work if git has no commit.
- Stop Emacs-style set-mark command to clear ongoing-selection.
- Normalize Short-key of menu items. Now you can use double-width-F letter to open File menu.
- Add git support.
- [Markdown] Recognize nested lists.
- [CSS] Improve syntax highlight.
- Deprecate old addon functions. Use kaa.addon.setup() instead.
- Add suspend command to send kaa to the background. Bound to alt-Z key by default.
- Pasting long text to Python console was failed.
- [CSS] Highlight real number without preceding digits.
- Fix bug if diaog size is greater than screen size.
- Range of word in word completion is fixed.
- Use X11 clipboard only if environment variable DISPLAY is provided.
- Fix bug if diaog size is greater than screen size.
- Cursor word-right/left now skips white-space.
- Initial directory of file-open dialog is same directory as file now active.
- Various highlighting bugs.
- Handle terminal resize in Python 3.5.
- Reworked syntax highligh.
- [CSS mode] Highlight @media rules.
Copyright (c) 2013 — 2016 Atsuo Ishimoto
Permission is hereby granted, free of charge, to any person obtaining a copy of this software and associated documentation files (the «Software»), to deal in the Software without restriction, including without limitation the rights to use, copy, modify, merge, publish, distribute, sublicense, and/or sell copies of the Software, and to permit persons to whom the Software is furnished to do so, subject to the following conditions:
The above copyright notice and this permission notice shall be included in all copies or substantial portions of the Software.
THE SOFTWARE IS PROVIDED «AS IS», WITHOUT WARRANTY OF ANY KIND, EXPRESS OR IMPLIED, INCLUDING BUT NOT LIMITED TO THE WARRANTIES OF MERCHANTABILITY, FITNESS FOR A PARTICULAR PURPOSE AND NONINFRINGEMENT. IN NO EVENT SHALL THE AUTHORS OR COPYRIGHT HOLDERS BE LIABLE FOR ANY CLAIM, DAMAGES OR OTHER LIABILITY, WHETHER IN AN ACTION OF CONTRACT, TORT OR OTHERWISE, ARISING FROM, OUT OF OR IN CONNECTION WITH THE SOFTWARE OR THE USE OR OTHER DEALINGS IN THE SOFTWARE.


