- Automatic virtual machine activation
- Practical applications
- System requirements
- How to implement AVMA
- AVMA keys
- Reporting and tracking
- Управление виртуальными машинами с помощью центра администрирования Windows Managing Virtual Machines with Windows Admin Center
- Основные возможности Key features
- Мониторинг ресурсов и производительности узла Hyper-V Monitor Hyper-V host resources and performance
- Просмотр инвентаризации виртуальных машин View virtual machine inventory
- Создание новой виртуальной машины Create a new virtual machine
- Изменение параметров виртуальной машины Change virtual machine settings
- Динамическая миграция виртуальной машины на другой узел кластера Live migrate a virtual machine to another cluster node
- Расширенное управление и устранение неполадок для одной виртуальной машины Advanced management and troubleshooting for a single virtual machine
- Управление виртуальной машиной с помощью узла Hyper-V (VMConnect) Manage a virtual machine through the Hyper-V host (VMConnect)
- Изменение параметров узла Hyper-V Change Hyper-V host settings
- Просмотр журналов событий Hyper-V View Hyper-V event logs
- Защита виртуальных машин с помощью Azure Site Recovery Protect virtual machines with Azure Site Recovery
- Ожидается More coming
Automatic virtual machine activation
Applies to: Windows Server 2019, Windows Server Semi-Annual Channel, Windows Server 2016, Windows Server 2012 R2
Automatic Virtual Machine Activation (AVMA) acts as a proof-of-purchase mechanism, helping to ensure that Windows products are used in accordance with the Product Use Rights and Microsoft Software License Terms.
AVMA lets you install virtual machines on a properly activated Windows server without having to manage product keys for each individual virtual machine, even in disconnected environments. AVMA binds the virtual machine activation to the licensed virtualization server and activates the virtual machine when it starts up. AVMA also provides real-time reporting on usage and historical data on the license state of the virtual machine. Reporting and tracking data is available on the virtualization server.
Practical applications
On virtualization servers that are activated using Volume Licensing or OEM licensing, AVMA offers several benefits.
Server datacenter managers can use AVMA to do the following:
Activate virtual machines in remote locations
Activate virtual machines with or without an internet connection
Track virtual machine usage and licenses from the virtualization server, without requiring any access rights on the virtualized systems
There are no product keys to manage and no stickers on the servers to read. The virtual machine is activated and continues to work even when it is migrated across an array of virtualization servers.
Service Provider License Agreement (SPLA) partners and other hosting providers do not have to share product keys with tenants or access a tenant’s virtual machine to activate it. Virtual machine activation is transparent to the tenant when AVMA is used. Hosting providers can use the server logs to verify license compliance and to track client usage history.
System requirements
AVMA requires a Microsoft Virtualization Server running Windows Server 2019 Datacenter, Windows Server 2016 Datacenter, or Windows Server 2012 R2.
Here are the guests that the different version hosts can activate:
| Server host version | Windows Server 2019 | Windows Server 2016 | Windows Server 2012 R2 |
|---|---|---|---|
| Windows Server 2019 | X | X | X |
| Windows Server 2016 | X | X | |
| Windows Server 2012 R2 | X |
Note that these activate all editions (Datacenter, Standard, or Essentials).
This tool does not work with other Virtualization Server technologies.
How to implement AVMA
On a Windows Server Datacenter virtualization server, install and configure the Microsoft Hyper-V Server role. For more information, see Install Hyper-V Server.
Create a virtual machine and install a supported server operating system on it.
Install the AVMA key in the virtual machine. From an elevated command prompt, run the following command:
The virtual machine will automatically activate the license against the virtualization server.
You can also employ the AVMA keys in any Unattend.exe setup file.
AVMA keys
The following AVMA keys can be used for Windows Server 2019.
| Edition | AVMA key |
|---|---|
| Datacenter | H3RNG-8C32Q-Q8FRX-6TDXV-WMBMW |
| Standard | TNK62-RXVTB-4P47B-2D623-4GF74 |
| Essentials | 2CTP7-NHT64-BP62M-FV6GG-HFV28 |
The following AVMA keys can be used for Windows Server, versions 1909, 1903, and 1809.
| Edition | AVMA key |
|---|---|
| Datacenter | H3RNG-8C32Q-Q8FRX-6TDXV-WMBMW |
| Standard | TNK62-RXVTB-4P47B-2D623-4GF74 |
The following AVMA keys can be used for Windows Server, version 1803 and 1709.
| Edition | AVMA key |
|---|---|
| Datacenter | TMJ3Y-NTRTM-FJYXT-T22BY-CWG3J |
| Standard | C3RCX-M6NRP-6CXC9-TW2F2-4RHYD |
The following AVMA keys can be used for Windows Server 2016.
| Edition | AVMA key |
|---|---|
| Datacenter | TMJ3Y-NTRTM-FJYXT-T22BY-CWG3J |
| Standard | C3RCX-M6NRP-6CXC9-TW2F2-4RHYD |
| Essentials | B4YNW-62DX9-W8V6M-82649-MHBKQ |
The following AVMA keys can be used for Windows Server 2012 R2.
| Edition | AVMA key |
|---|---|
| Datacenter | Y4TGP-NPTV9-HTC2H-7MGQ3-DV4TW |
| Standard | DBGBW-NPF86-BJVTX-K3WKJ-MTB6V |
| Essentials | K2XGM-NMBT3-2R6Q8-WF2FK-P36R2 |
Reporting and tracking
The registry (KVP) on the virtualization server provides real-time tracking data for the guest operating systems. Because the registry key moves with the virtual machine, you can get license information as well. By default the KVP returns information about the virtual machine, including the following:
Fully qualified domain name
Operating system and service packs installed
IPv4 and IPv6 network addresses
For more information about how to get this information, see Hyper-V Script: Looking at KVP GuestIntrinsicExchangeItems.
KVP data is not secured. It can be modified and is not monitored for changes.
KVP data should be removed if the AVMA key is replaced with another product key (retail, OEM, or volume licensing key).
Historical data about AVMA requests is available in a log file on the virtualization server (EventID 12310).
Since the AVMA activation process is transparent, error messages are not displayed. However, the following events are captured in a log file on the virtual machines (EventID 12309).
Управление виртуальными машинами с помощью центра администрирования Windows Managing Virtual Machines with Windows Admin Center
Область применения. Windows Admin Center, ознакомительная версия Windows Admin Center Applies To: Windows Admin Center, Windows Admin Center Preview
Если роль Hyper-V включена на сервере или в кластере, средство «виртуальные машины» доступно в подключениях к серверу, отказоустойчивому кластеру или к кластеру с поддержкой Hyper- in. The Virtual Machines tool is available in Server, Failover Cluster or Hyper-Converged Cluster connections if the Hyper-V role is enabled on the server or cluster. С помощью средства «виртуальные машины» можно управлять узлами Hyper-V под управлением Windows Server 2012 или более поздней версии, установленными с возможностями рабочего стола или ядром сервера. You can use the Virtual Machines tool to manage Hyper-V hosts running Windows Server 2012 or later, either installed with Desktop Experience or as Server Core. Также поддерживаются Hyper-V Server 2012, 2016 и 2019. Hyper-V Server 2012, 2016 and 2019 are also supported.
Основные возможности Key features
Основные особенности средства виртуальных машин в центре администрирования Windows: Highlights of the Virtual Machines tool in Windows Admin Center include:
- Высокоуровневое отслеживание ресурсов узла Hyper-V.High-level Hyper-V host resource monitoring. Просмотр общего использования ЦП и памяти, метрики производительности операций ввода-вывода, оповещения о работоспособности виртуальной машины и события для сервера узла Hyper-V или всего кластера на одной панели мониторинга. View overall CPU and memory usage, IO performance metrics, VM health alerts and events for the Hyper-V host server or entire cluster in a single dashboard.
- Единый интерфейс, объединяющий диспетчер Hyper-V и диспетчер отказоустойчивости кластеров возможности.Unified experience bringing Hyper-V Manager and Failover Cluster Manager capabilities together. Просмотр всех виртуальных машин в кластере и подробное изучение одной виртуальной машины для расширенного управления и устранения неполадок. View all the virtual machines across a cluster and drill down into a single virtual machine for advanced management and troubleshooting.
- Упрощенные, но мощные рабочие процессы для управления виртуальными машинами.Simplified, yet powerful workflows for virtual machine management. Новые возможности пользовательского интерфейса, предназначенные для сценариев администрирования ИТ для создания, управления и репликации виртуальных машин. New UI experiences tailored to IT administration scenarios to create, manage and replicate virtual machines.
Ниже приведены некоторые задачи Hyper-V, которые можно выполнять в центре администрирования Windows. Here are some of the Hyper-V tasks you can do in Windows Admin Center:
Мониторинг ресурсов и производительности узла Hyper-V Monitor Hyper-V host resources and performance

- В левой части панели навигации щелкните средство виртуальные машины . Click the Virtual Machines tool from the left side navigation pane.
- В верхней части средства » виртуальные машины » находятся две вкладки: вкладка Сводка и Инвентаризация . Вкладка Сводка обеспечивает целостное представление ресурсов узла Hyper-V и производительность для текущего сервера или всего кластера, включая следующие: There are two tabs at the top of the Virtual Machines tool, the Summary tab and the Inventory tab. The Summary tab provides a holistic view of Hyper-V host resources and performance for the current server or entire cluster, including the following:
- Число виртуальных машин, сгруппированных по состояниям: работает, отключено, приостановлено и сохранено. The number of VMs grouped by state — running, off, paused and saved
- Недавние оповещения о работоспособности или события журнала событий Hyper-V (оповещения доступны только для кластеров с поддержкой Hyper-in под управлением Windows Server 2016 или более поздней версии). Recent health alerts or Hyper-V event log events (Alerts are only available for hyper-converged clusters running Windows Server 2016 or later)
- загрузка ЦП и использование памяти с разбивкой на узлы и гостевые системы для сравнения; CPU and memory usage with host vs guest breakdown
- Основные виртуальные машины, использующие наибольшие ресурсы ЦП и памяти Top VMs consuming the most CPU and memory resources
- Линейчатые и исторические диаграммы с данными для операций ввода-вывода и пропускной способности (графика производительности хранилища доступны только для кластеров с поддержкой Hyper-in под управлением Windows Server 2016 или более поздней версии). Live and historical data line charts for IOPS and IO throughput (Storage performance line charts are only available for hyper-converged clusters running Windows Server 2016 or later. Исторические данные доступны только для кластеров с поддержкой Hyper-in под управлением Windows Server 2019) Historical data is only available for hyper-converged clusters running Windows Server 2019)
Просмотр инвентаризации виртуальных машин View virtual machine inventory

- В левой части панели навигации щелкните средство виртуальные машины . Click the Virtual Machines tool from the left side navigation pane.
- В верхней части средства » виртуальные машины » находятся две вкладки: вкладка Сводка и Инвентаризация . На вкладке Inventory (Инвентаризация ) перечислены виртуальные машины, доступные на текущем сервере или в целом кластере, а также приведены команды для управления отдельными виртуальными машинами. There are two tabs at the top of the Virtual Machines tool, the Summary tab and the Inventory tab. The Inventory tab lists the virtual machines available on the current server or entire cluster, and provides commands to manage individual virtual machines. Вы можете: You can:
- Просмотр списка виртуальных машин, работающих на текущем сервере или в кластере. View a list of the virtual machines running on the current server or cluster.
- Просмотрите состояние виртуальной машины и сервер узла, если вы просматриваете виртуальные машины для кластера. View the virtual machine’s state and host server if you are viewing virtual machines for a cluster. Также просмотрите использование ЦП и памяти с точки зрения узла, включая нехватку памяти, потребность в памяти и выделенную память, а также время работоспособности виртуальной машины, состояние пульса и состояние защиты с помощью Azure Site Recovery. Also view CPU and memory usage from the host perspective, including memory pressure, memory demand and assigned memory, and the virtual machine’s uptime, heartbeat status and protection status using Azure Site Recovery.
- Создайте новую виртуальную машину. Create a new virtual machine.
- Удаление, запуск, отключение, завершение работы, приостановка, возобновление, сброс или переименование виртуальной машины. Delete, start, turn off, shut down, pause, resume, reset or rename a virtual machine. Также Сохраните виртуальную машину, удалите сохраненное состояние или создайте контрольную точку. Also save the virtual machine, delete a saved state, or create a checkpoint.
- Изменение параметров виртуальной машины. Change settings for a virtual machine.
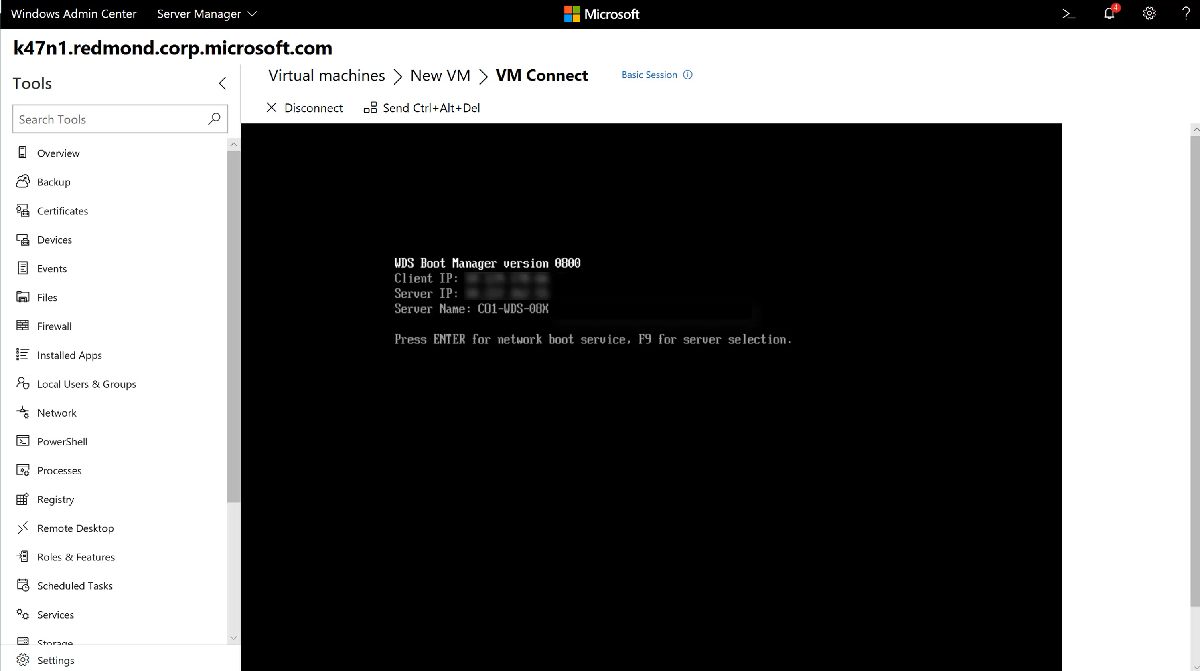
- Подключитесь к консоли виртуальной машины с помощью VMConnect через узел Hyper-V. Connect to a virtual machine console using VMConnect via the Hyper-V host.
- Репликация виртуальной машины с помощью Azure Site Recovery. Replicate a virtual machine using Azure Site Recovery.
- Для операций, которые могут выполняться на нескольких виртуальных машинах, таких как запуск, завершение работы, сохранение, приостановка, удаление, сброс, можно выбрать несколько виртуальных машин и запустить операцию одновременно. For operations that can be run on multiple VMs, such as Start, Shut down, Save, Pause, Delete, Reset, you can select multiple VMs and run the operation at once.
Примечание. Если вы подключены к кластеру, средство виртуальных машин будет отображать только кластеризованные виртуальные машины. NOTE: If you are connected to a cluster, the Virtual Machine tool will only display clustered virtual machines. В будущем мы планируем также отобразить некластеризованные виртуальные машины. We plan to also show non-clustered virtual machines in the future.
Создание новой виртуальной машины Create a new virtual machine

В левой части панели навигации щелкните средство виртуальные машины . Click the Virtual Machines tool from the left side navigation pane.
В верхней части средства «виртуальные машины» выберите вкладку » Инвентаризация «, а затем нажмите кнопку » создать «, чтобы создать виртуальную машину. At the top of the Virtual Machines tool, choose the Inventory tab, then click New to create a new virtual machine.
Введите имя виртуальной машины и выберите виртуальные машины поколения 1 и 2. Enter the virtual machine name and choose between generation 1 and 2 virtual machines.
При создании виртуальной машины в кластере можно выбрать узел для первоначального создания виртуальной машины. If you are creating a virtual machine on a cluster, you can choose which host to initially create the virtual machine on. При использовании Windows Server 2016 или более поздней версии средство предоставит рекомендации узла. If you are running Windows Server 2016 or later, the tool will provide a host recommendation for you.
Выберите путь к файлам виртуальной машины. Choose a path for the virtual machine files. Выберите том из раскрывающегося списка или нажмите кнопку Обзор , чтобы выбрать папку с помощью средства выбора папки. Choose a volume from the dropdown list or click Browse to choose a folder using the folder picker. Файлы конфигурации виртуальной машины и файл виртуального жесткого диска будут сохранены в одной папке по \Hyper-V\\[virtual machine name] пути к выбранному тому или пути. The virtual machine configuration files and virtual hard disk file will be saved in a single folder under the \Hyper-V\\[virtual machine name] path of the selected volume or path.
В средстве выбора папок можно перейти к любой доступной общей папке SMB в сети, введя путь в поле имя папки в виде \\server\share . In the folder picker, you can browse to any available SMB share on the network by entering the path in the Folder name field as \\server\share . Для использования общей сетевой папки для хранилища виртуальных машин потребуется CredSSP. Using a network share for VM storage will require CredSSP.
Выберите количество виртуальных процессоров, включить вложенную виртуализацию, настроить параметры памяти, сетевые адаптеры, виртуальные жесткие диски и выбрать, следует ли устанавливать операционную систему из файла ISO-образа или из сети. Choose the number of virtual processors, whether you want nested virtualization enabled, configure memory settings, network adapters, virtual hard disks and choose whether you want to install an operating system from an .iso image file or from the network.
Щелкните создать , чтобы создать виртуальную машину. Click Create to create the virtual machine.
После создания виртуальной машины и ее появления в списке виртуальных машин можно запустить виртуальную машину. Once the virtual machine is created and appears in the virtual machine list, you can start the virtual machine.
После запуска виртуальной машины можно подключиться к консоли виртуальной машины через VMConnect, чтобы установить операционную систему. Once the virtual machine is started, you can connect to the virtual machine’s console via VMConnect to install the operating system. Выберите виртуальную машину из списка, щелкните » Дополнительно > Подключиться «, чтобы скачать RDP-файл. Select the virtual machine from the list, click More > Connect to download the .rdp file. Откройте RDP-файл в приложении подключение к удаленному рабочему столу. Open the .rdp file in the Remote Desktop Connection app. Так как это подключение к консоли виртуальной машины, необходимо ввести учетные данные администратора узла Hyper-V. Since this is connecting to the virtual machine’s console, you will need to enter the Hyper-V host’s admin credentials.
Изменение параметров виртуальной машины Change virtual machine settings

- В левой части панели навигации щелкните средство виртуальные машины . Click the Virtual Machines tool from the left side navigation pane.
- В верхней части средства «виртуальные машины» перейдите на вкладку » Инвентаризация «. Выберите виртуальную машину из списка и нажмите кнопку » Дополнительные >Параметры«. At the top of the Virtual Machines tool, choose the Inventory tab. Choose a virtual machine from the list and click More >Settings.
- Перейдите на вкладку Общие, Безопасность, память, процессоры, диски, сети, порядок загрузки и контрольные точки , настройте необходимые параметры, а затем нажмите кнопку сохранить , чтобы сохранить текущие параметры вкладки. Switch between the General, Security, Memory, Processors, Disks, Networks, Boot order and Checkpoints tab, configure the necessary settings, then click Save to save the current tab’s settings. Доступные параметры будут зависеть от поколения виртуальной машины. The settings available will vary depending on the virtual machine’s generation. Кроме того, некоторые параметры не могут быть изменены для работающих виртуальных машин, и сначала необходимо будет приостанавливаться на виртуальной машине. Also, some settings cannot be changed for running virtual machines and you will need to stop the virtual machine first.
Динамическая миграция виртуальной машины на другой узел кластера Live migrate a virtual machine to another cluster node
Если вы подключены к кластеру, можно выполнить динамическую миграцию виртуальной машины на другой узел кластера. If you are connected to a cluster, you can live migrate a virtual machine to another cluster node.
- Из отказоустойчивого кластера или подключения к кластеру с поддержкой технологии Hyper-in щелкните средство виртуальные машины в левой части панели навигации. From a Failover Cluster or Hyper-converged cluster connection, click the Virtual Machines tool from the left side navigation pane.
- В верхней части средства «виртуальные машины» перейдите на вкладку » Инвентаризация «. Выберите виртуальную машину из списка и нажмите кнопку » больше» >Move. At the top of the Virtual Machines tool, choose the Inventory tab. Choose a virtual machine from the list and click More >Move.
- Выберите сервер из списка доступных узлов кластера и нажмите кнопку переместить. Choose a server from the list of available cluster nodes and click Move.
- Уведомления о ходе перемещения будут отображаться в правом верхнем углу центра администрирования Windows. Notifications for the move progress will be displayed in the upper right corner of Windows Admin Center. Если перемещение прошло успешно, вы увидите, что имя сервера узла изменилось в списке виртуальных машин. If the move is successful, you will see the Host server name changed in the virtual machine list.
Расширенное управление и устранение неполадок для одной виртуальной машины Advanced management and troubleshooting for a single virtual machine

Подробные сведения и диаграммы производительности для одной виртуальной машины можно просмотреть на странице «единственная виртуальная машина». You can view detailed information and performance charts for a single virtual machine from the single virtual machine page.
- В левой части панели навигации щелкните средство виртуальные машины . Click the Virtual Machines tool from the left side navigation pane.
- В верхней части средства «виртуальные машины» перейдите на вкладку » Инвентаризация «. Щелкните имя виртуальной машины в списке виртуальных машин. At the top of the Virtual Machines tool, choose the Inventory tab. Click on the name of a virtual machine from the virtual machine list.
- На странице «единственная виртуальная машина» можно: From the single virtual machine page, you can:
- Просмотр подробных сведений о виртуальной машине. View detailed information for the virtual machine.
- Просмотр динамических и исторических графиков данных для ЦП, памяти, сети, операций ввода-вывода и пропускной способности (данные журнала доступны только для кластеров с поддержкой Hyper-in под управлением Windows Server 2019) View Live and historical data line charts for CPU, memory, network, IOPS and IO throughput (Historical data is only available for hyper-converged clusters running Windows Server 2019)
- Просмотр, создание, применение, переименование и удаление контрольных точек. View, create, apply, rename and delete checkpoints.
- Просмотрите сведения о виртуальных жестких дисках (VHD-файлах) виртуальной машины, сетевых адаптерах и сервере узла. View details for the virtual machine’s virtual hard disk (.vhd) files, network adapters and host server.
- Удаление, запуск, отключение, завершение работы, приостановка, возобновление, сброс или переименование виртуальной машины. Delete, start, turn off, shut down, pause, resume, reset or rename the virtual machine. Также Сохраните виртуальную машину, удалите сохраненное состояние или создайте контрольную точку. Also save the virtual machine, delete a saved state, or create a checkpoint.
- Изменение параметров виртуальной машины. Change settings for the virtual machine.
- Подключитесь к консоли виртуальной машины с помощью VMConnect через узел Hyper-V. Connect to the virtual machine console using VMConnect via the Hyper-V host.
- Репликация виртуальной машины с помощью Azure Site Recovery. Replicate the virtual machine using Azure Site Recovery.
Управление виртуальной машиной с помощью узла Hyper-V (VMConnect) Manage a virtual machine through the Hyper-V host (VMConnect)
- В левой части панели навигации щелкните средство виртуальные машины . Click the Virtual Machines tool from the left side navigation pane.
- В верхней части средства «виртуальные машины» перейдите на вкладку » Инвентаризация «. Выберите виртуальную машину из списка и нажмите кнопку » Дополнительные >подключения » или » скачать RDP-файл«. At the top of the Virtual Machines tool, choose the Inventory tab. Choose a virtual machine from the list and click More >Connect or Download RDP file. Подключение позволит вам взаимодействовать с гостевой виртуальной машиной через веб-консоль удаленный рабочий стол, интегрированную в центр администрирования Windows. Connect will allow you to interact with the guest VM through the Remote Desktop web console, integrated in to Windows Admin Center. Скачивание RDP-файла загружает файл. RDP, который можно открыть с помощью приложения подключение к удаленному рабочему столу (mstsc.exe). Download RDP file will download an .rdp file that you can open with the Remote Desktop Connection application (mstsc.exe). Оба варианта будут использовать VMConnect для подключения к гостевой виртуальной машине через узел Hyper-V, и потребуется ввести учетные данные администратора для сервера узла Hyper-V. Both options will use VMConnect to connect to the guest VM through the Hyper-V host and will require you to enter administrator credentials for the Hyper-V host server.
Изменение параметров узла Hyper-V Change Hyper-V host settings
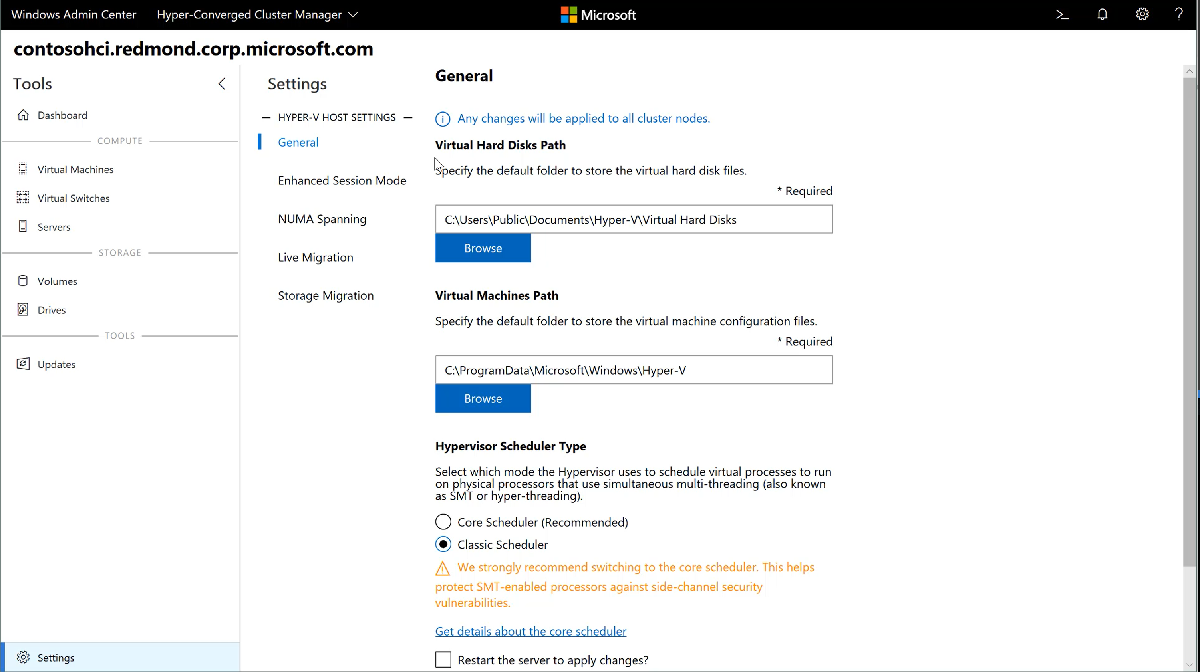
- На сервере, кластере с поддержкой кластера или отказоустойчивого кластера щелкните меню параметров в нижней части левой области навигации. On a Server, Hyper-converged Cluster or Failover Cluster connection, click the Settings menu at the bottom of the left side navigation pane.
- На сервере узла или в кластере Hyper-V вы увидите группу параметров узла Hyper-v в следующих разделах: On a Hyper-V host server or cluster, you will see a Hyper-V Host Settings group with the following sections:
- Общие: изменение виртуального жесткого диска и пути к файлу виртуальных машин и типа расписания низкоуровневой оболочки (если поддерживается) General: Change virtual hard disks and virtual machines file path, and hypervisor schedule type (if supported)
- Режим расширенного сеанса Enhanced Session Mode
- Охват NUMA NUMA Spanning
- Динамическая миграция Live Migration
- Миграция хранилища Storage Migration
- Если вы вносите изменения в параметры узла Hyper-V в кластере с поддержкой кластера или отказоустойчивого кластера, это изменение будет применено ко всем узлам кластера. If you make any Hyper-V host setting changes in a Hyper-converged Cluster or Failover Cluster connection, the change will be applied to all cluster nodes.
Просмотр журналов событий Hyper-V View Hyper-V event logs
Журналы событий Hyper-V можно просматривать непосредственно из средства «виртуальные машины». You can view Hyper-V event logs directly from the Virtual Machines tool.
- В левой части панели навигации щелкните средство виртуальные машины . Click the Virtual Machines tool from the left side navigation pane.
- В верхней части средства «виртуальные машины» перейдите на вкладку Сводка . В правом верхнем углу щелкните Просмотреть все события. At the top of the Virtual Machines tool, choose the Summary tab. In the top right Events section, click VIEW ALL EVENTS.
- На левой панели будут показаны каналы событий Hyper-V в Просмотр событийном инструменте. The Event Viewer tool will show the Hyper-V event channels in the left pane. Выберите канал, чтобы просмотреть события в правой области. Choose a channel to view the events in the right pane. Если вы управляете отказоустойчивым кластером или кластером с поддержкой Hyper-in, в журналах событий будут отображаться события для всех узлов кластера, в которых отображается сервер узла в столбце компьютер. If you are managing a failover cluster or hyper-converged cluster, the event logs will display events for all cluster nodes, displaying the host server in the Machine column.
Защита виртуальных машин с помощью Azure Site Recovery Protect virtual machines with Azure Site Recovery
Центр администрирования Windows можно использовать для настройки Azure Site Recovery и репликации локальных виртуальных машин в Azure. You can use Windows Admin Center to configure Azure Site Recovery and replicate your on-premises virtual machines to Azure. Дополнительные сведения Learn more
Ожидается More coming
Управление виртуальными машинами в центре администрирования Windows активно разрабатывается, а новые функции будут добавлены в ближайшем будущем. Virtual machine management in Windows Admin Center is actively under development and new features will be added in the near future. Вы можете просмотреть состояние и проголосовать за функции в UserVoice: You can view the status and vote for features in UserVoice:


