- Change TCP/IP settings
- To enable DHCP or change other TCP/IP settings
- To enable DHCP or change other TCP/IP settings
- Как открыть панель управления в Windows (в т.ч. в Windows 10, где убрали ссылки на нее)
- Как войти в панель управления / Control Panel
- Способ 1: универсальный (для Windows 7, 8, 10)
- Способ 2: через Power Shell / Командную строку (универсальный)
- Способ 3: с помощью созданного ярлыка на рабочем столе
- Способ 4: с помощью поиска Windows
- Способ 5: через параметры отображения значков рабочего стола (Windows 10)
- 5 Ways to Open Network Connections from CMD and Windows 10 GUI
- Open the Network Connections Applet Using Run Dialogue
- Open Network Connections from CMD
- Open Network Connections from PowerShell
- Password Recovery
Change TCP/IP settings
TCP/IP defines how your PC communicates with other PCs.
To make it easier to manage TCP/IP settings, we recommend using automated Dynamic Host Configuration Protocol (DHCP). DHCP automatically assigns Internet Protocol (IP) addresses to the computers on your network if your network supports it. If you use DHCP, then you don’t have to change your TCP/IP settings if you move your PC to another location, and DHCP doesn’t require you to manually configure TCP/IP settings, such as Domain Name System (DNS) and Windows Internet Name Service (WINS).
To enable DHCP or change other TCP/IP settings
Select Start , then select Settings > Network & Internet .
Do one of the following:
For a Wi-Fi network, select Wi-Fi > Manage known networks. Choose the network you want to change the settings for, then select Properties.
For an Ethernet network, select Ethernet , then select the Ethernet network you’re connected to.
Under IP assignment, select Edit.
Under Edit IP settings, select Automatic (DHCP) or Manual.
To specify IPv4 settings manually
Under Edit IP settings, choose Manual, then turn on IPv4.
To specify an IP address, in the IP address, Subnet prefix length, and Gateway boxes, type the IP address settings.
To specify a DNS server address, in the Preferred DNS and Alternate DNS boxes, type the addresses of the primary and secondary DNS servers.
To specify IPv6 settings manually
Under Edit IP settings, choose Manual, then turn on IPv6.
To specify an IP address, in the IP address, Subnet prefix length, and Gateway boxes, type the IP address settings.
To specify a DNS server address, in the Preferred DNS and Alternate DNS boxes, type the addresses of the primary and secondary DNS servers.
When you select Automatic (DHCP), the IP address settings and DNS server address setting are set automatically by your router or other access point (recommended).
When you select Manual, you can manually set your IP address settings and DNS server address.
When you’re done, select Save.
To enable DHCP or change other TCP/IP settings
Do one of the following:
In Windows 8.1, select the Start button, start typing View network connections, and then select View network connections in the list.
In Windows 7, open Network Connections by selecting the Start button, and then selecting Control Panel. In the search box, type adapter, and then, under Network and Sharing Center, select View network connections.
Right-click the connection that you want to change, and then select Properties. If you’re prompted for an administrator password or confirmation, type the password or provide confirmation.
Select the Networking tab. Under This connection uses the following items, select either Internet Protocol Version 4 (TCP/IPv4) or Internet Protocol Version 6 (TCP/IPv6), and then select Properties.
To specify IPv4 IP address settings, do one of the following:
To get IP settings automatically using DHCP, select Obtain an IP address automatically, and then select OK.
To specify an IP address, select Use the following IP address, and then, in the IP address, Subnet mask, and Default gateway boxes, type the IP address settings.
To specify IPv6 IP address settings, do one of the following:
To get IP settings automatically using DHCP, select Obtain an IPv6 address automatically, and then select OK.
To specify an IP address, select Use the following IPv6 address, and then, in the IPv6 address, Subnet prefix length, and Default gateway boxes, type the IP address settings.
To specify DNS server address settings, do one of the following:
To get a DNS server address automatically using DHCP, select Obtain DNS server address automatically, and then select OK.
To specify a DNS server address, select Use the following DNS server addresses, and then, in the Preferred DNS server and Alternate DNS server boxes, type the addresses of the primary and secondary DNS servers.
To change advanced DNS, WINS, and IP settings, select Advanced.
Note: To install IPv4, run Command Prompt as an administrator, type netsh interface ipv4 install, and then press Enter.
Как открыть панель управления в Windows (в т.ч. в Windows 10, где убрали ссылки на нее)

Недавно заметил, что по клику правой кнопки мышки по ПУСК, больше не появляется привычного меню: в нем нет ссылки на командную строку и на панель управления (что в первую очередь нужно!). В самом меню ПУСК — тоже нет на нее ссылки. Как ее открыть-то? Может быть я подцепил вирус?
PS Установлена Windows 10, последняя обновленная версия на сегодняшний день (то бишь на 20 мая 2018г.).
Доброго времени суток!
Да, похоже от этой классической панели разработчики Windows хотят со временем отказаться совсем.
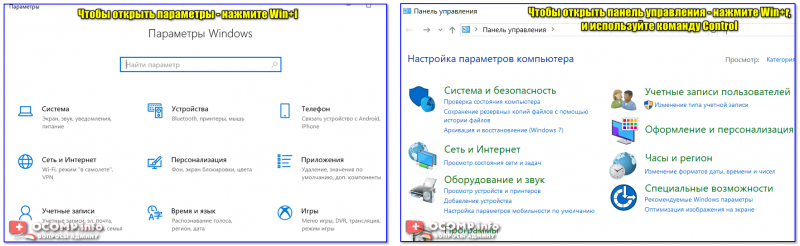
Новые параметры в Windows 10 и классическая Control Panel / Кликабельно
Но на сегодняшний день, всё же, в нее пока еще достаточно часто требуется заходить для изменения множества параметров и настроек. В этой справочной статье покажу несколько способов, как ее можно открыть (часть из способов универсальны и работают в разных ОС Windows).

Как войти в панель управления / Control Panel
Способ 1: универсальный (для Windows 7, 8, 10)
- нажмите сочетание кнопок Win+R (должно появиться окно «Выполнить» в углу экрана);
- впишите команду » Control » (без кавычек, см. на скрин ниже);
- нажмите OK или Enter. Собственно, и всё, всего 3 действия!

Win+R — открываем панель управления (команда control)
Кстати, хочу обратить внимание, что вместо команды » Control » можно использовать и » Control Panel » (полный вариант).
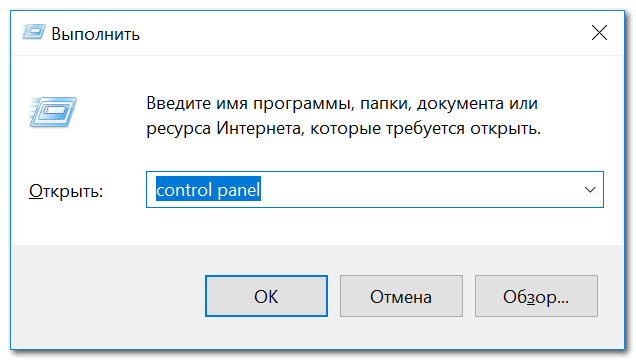
Control Panel — так тоже допускается
Также есть еще один альтернативный вариант:
- нажмите сочетание клавиш Ctrl+Shift+Esc (или Ctrl+Alt+Del ) — нам нужно открыть диспетчер задач;
- далее нажмите по меню «Файл/Новая задача»;
- в строку «Открыть» впишите команду «Control Panel» (пример см. ниже).
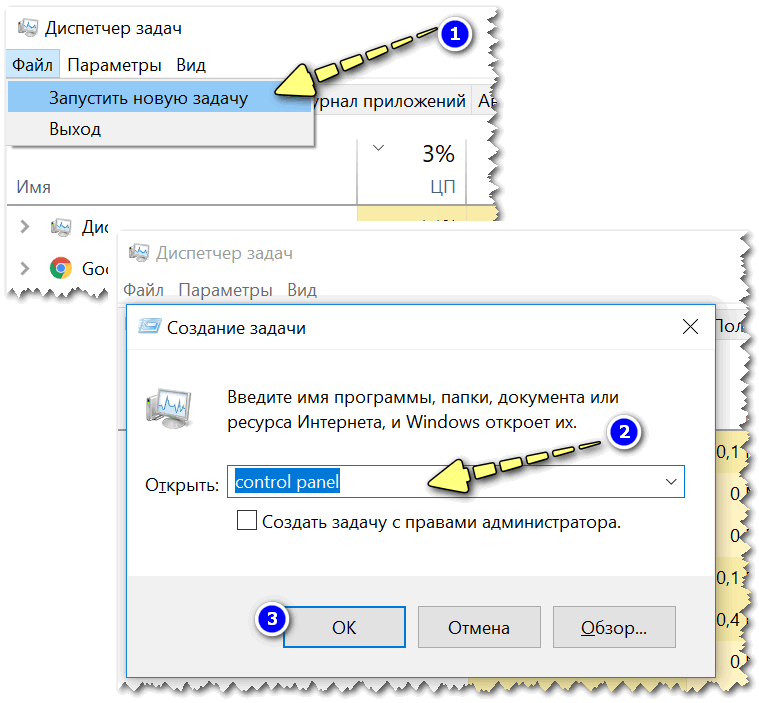
Открывает Control Panel через диспетчер задач
Способ 2: через Power Shell / Командную строку (универсальный)
Панель управления также можно открыть через командную строку. Для этого в ней нужно вписать всего одну команду » Control » и нажать на Enter.
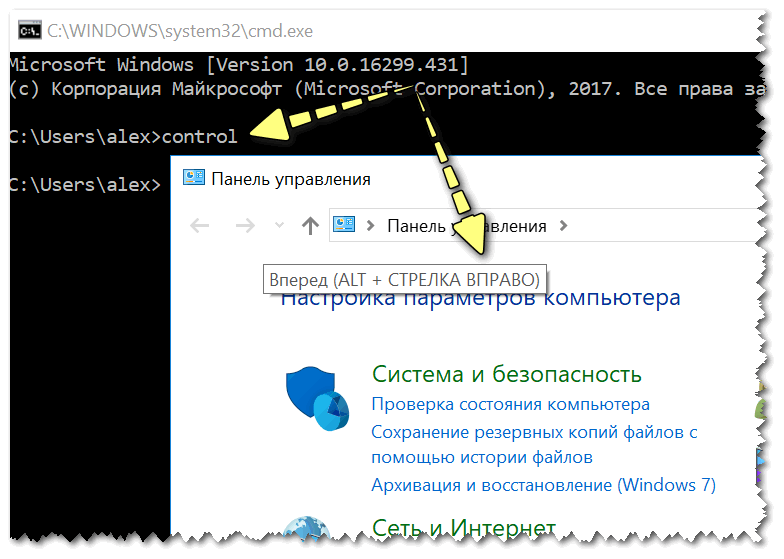
Открываем панель управления через командную строчку
Кстати, что касается Windows 10 — то в обновленных версиях при нажатии на Win+X (или правой кнопкой мышки по ПУСК) — в меню быстрого вызова нет командной строки, но есть Power Shell. Для открытия панели управления можно воспользоваться и им.
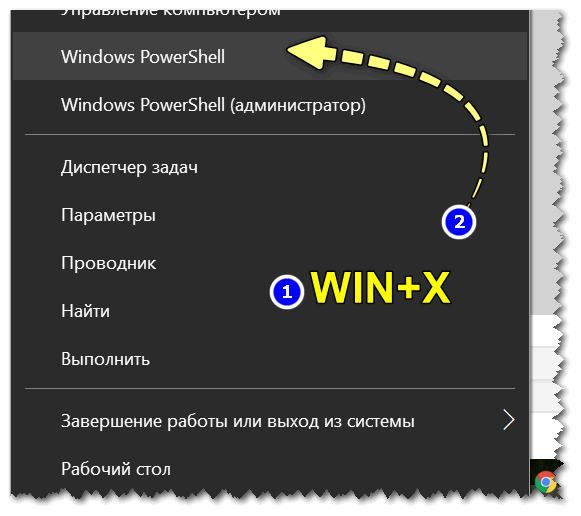
Win+X — меню быстрого вызова
В Power Shell достаточно ввести ту же команду Control и нажать на Enter. Пример продемонстрирован чуть ниже.

Power Shell — мощная замена командной строке.
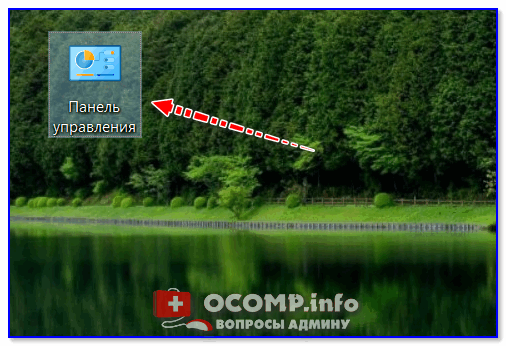
Способ 3: с помощью созданного ярлыка на рабочем столе
Еще один очень удобный способ — это создать спец. значок на рабочем столе, с помощью которого вы всегда сможете в 1 клик мышки получать доступ к панели управления.
Чтобы его сделать : кликните правой кнопкой мышки в любом месте рабочего стола, в появившемся меню выберите «Создать -> ярлык» (см. пример ниже).
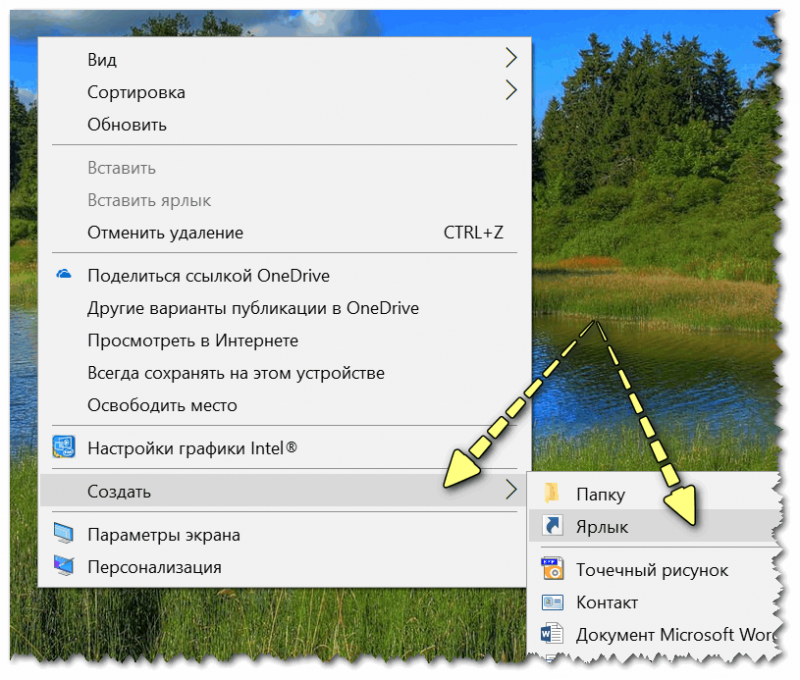
Далее в строку расположения укажите вместо пути просто команду Control Panel (как примере ниже). Кстати, имя ярлыку можете задать любое.
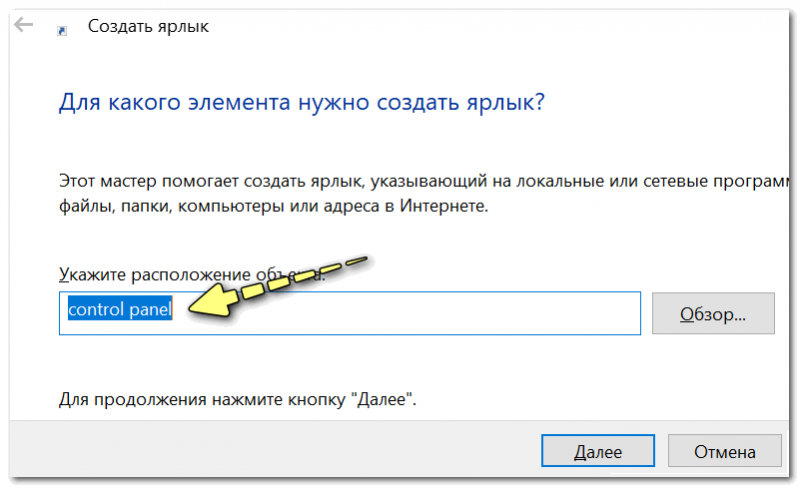
в путь ярлыка пишем команду Control
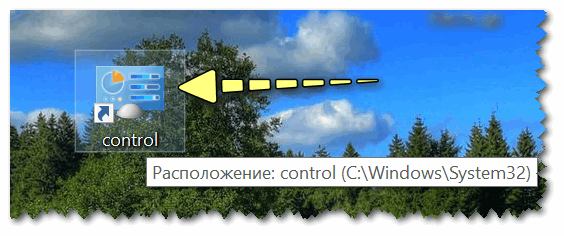
В итоге на рабочем столе появится ярлык (как на скрине ниже) для быстрого запуска панели управления.
Способ 4: с помощью поиска Windows
В Windows 10, кстати говоря, рядом с меню ПУСК есть очень «умная» поисковая строка (по крайней мере, значок с лупой там присутствует в настройках по умолчанию) .
Так вот, достаточно щелкнуть по этому значку (1), и вписать в строку поиска «панель» (2), как Windows предложит вам наиболее соответствующий вариант (3) — то бишь в данном случае «Панель управления». Как и показано на скрине ниже.
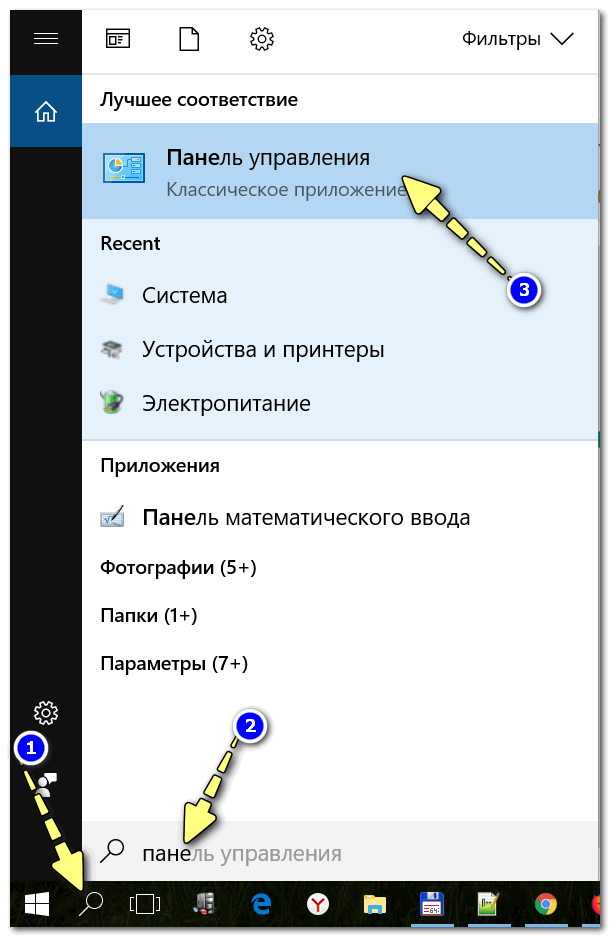
Поисковая строка в Windows 10
Кстати, чтобы каждый раз не искать панель управления , ее можно закрепить на пели задач. Для этого достаточно щелкнуть правой кнопкой мышки по значку открытой панели и выбрать функцию «Закрепить» (как показано на скрине ниже).
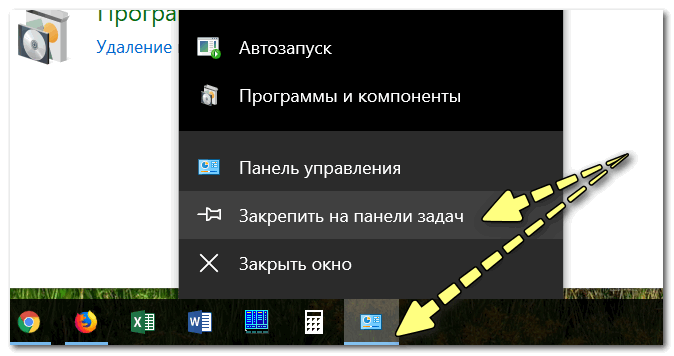
Закрепить панель на панели задач (извиняюсь за тавтологию)
Как это будет выглядеть в итоге можете увидеть из моем примера (1 клик — и вы уже в Control Panel) .

Моя панель задач: калькулятор + панель управления основные атрибуты
Способ 5: через параметры отображения значков рабочего стола (Windows 10)
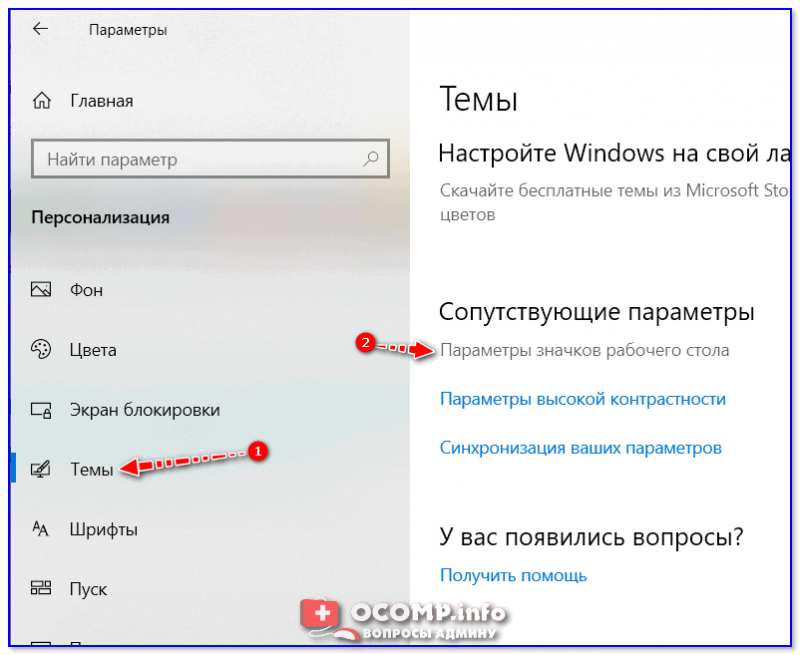
Сначала нужно открыть параметры Windows (можно через ПУСК, можно с помощью сочетания Win+i ) и перейти в раздел: «Персонализация / темы / параметры значков рабочего стола» (см. скриншот ниже).
Далее поставить галочку рядом с отображением значка «Панель управления» , и сохранить настройки.
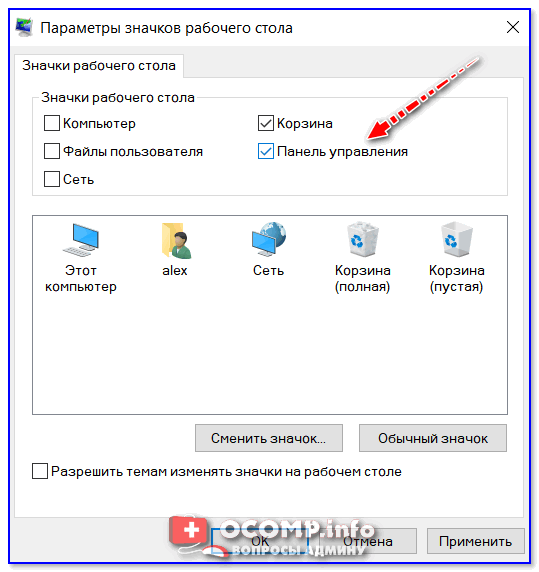
Собственно, почти сразу же у вас на рабочем столе появится панель управления — теперь можно быстро открывать ее без всяких дополнительных команд.
Думаю, что предложенных способов должно быть достаточно.
5 Ways to Open Network Connections from CMD and Windows 10 GUI
In this guide you will learn how to open Network Connections on Windows 10 from CMD (Command Line), PowerShell, Run dialogue, Settings app and Control Panel.
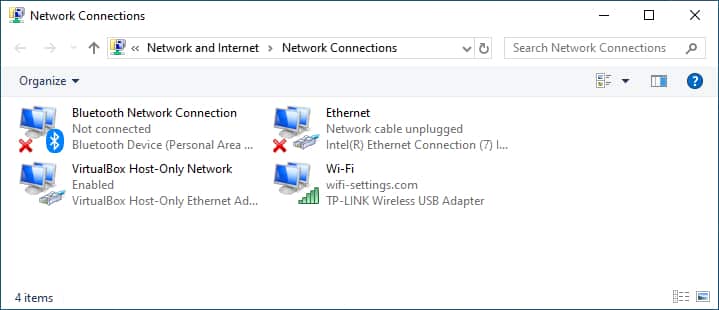
Network Connections is a Control Panel applet but it is still actively used in Windows 10 because Microsoft has not developed its substitute in modern Settings app.
Admins and experienced users often need to launch the Network Connections applet for various purposes: change the IP-address for Wi-Fi or Ethernet connection, enable / disable IPv6, assign Google DNS for the current PC, etc.
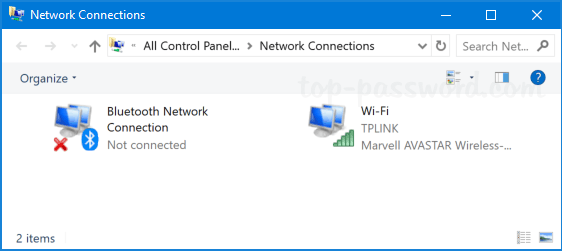
No matter which method you use, you will see the same Network Connections applet open:
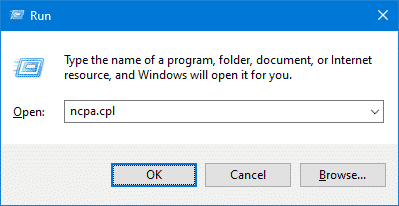
Open the Network Connections Applet Using Run Dialogue
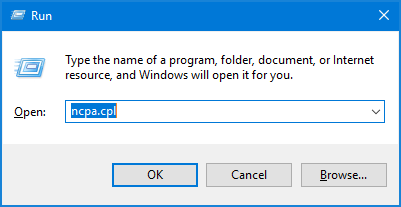
You can open the applet using the command right from the Run dialogue without actually launching command line (a.k.a. cmd):
- Press Win+R key combination
- Type ncpa.cpl (you can copy and paste the command into the “open” field).
- Hit Enter or click OK:

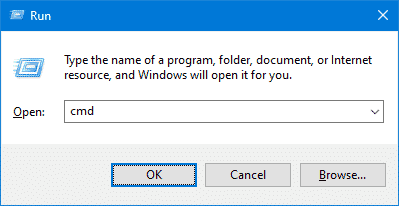
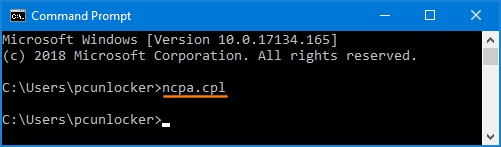
Open Network Connections from CMD
- Press Win+R.
- Type cmd
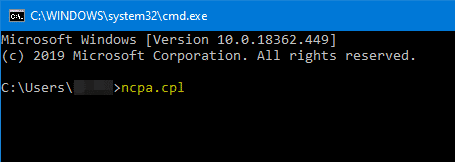
- Hit Enter or click OK to launch Command Line:
- type ncpa.cpl
- Hit Enter:
Open Network Connections from PowerShell
Almost the same steps:
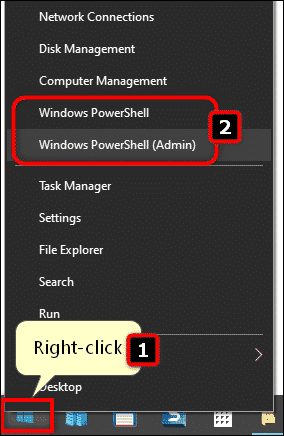
- Right-click the Windows 10 Start Button.
- Select Windows PowerShell or Windows PowerShell (Admin):
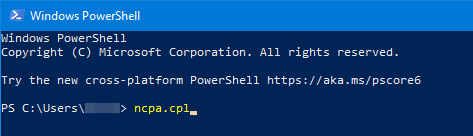
- Type ncpa.cpl
- Hit Enter:
Password Recovery
Network Connections is the most commonly used Control Panel applet for network administrators. From there you can view and manage all your wired / wireless adapters in one place. In this tutorial we’ll show you 3 quickest ways to open Network Connections in Windows 10.
Method 1: Open Network Connections via Run or Command Prompt
Press the Windows key and the R key at the same time to open the Run box. Type ncpa.cpl and hit Enter and you can access Network Connections immediately.
A similar way of opening Network Connections is to run ncpa.cpl at the Command Prompt.
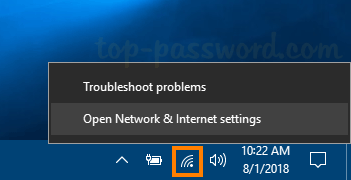
Method 2: Open Network Connections via Taskbar
Right-click the network icon which is located at the notification area of taskbar, and then select “Open Network & Internet settings” from the popup menu.
In the resulting pop-up window, click the “Change adapter options” in the right pane.
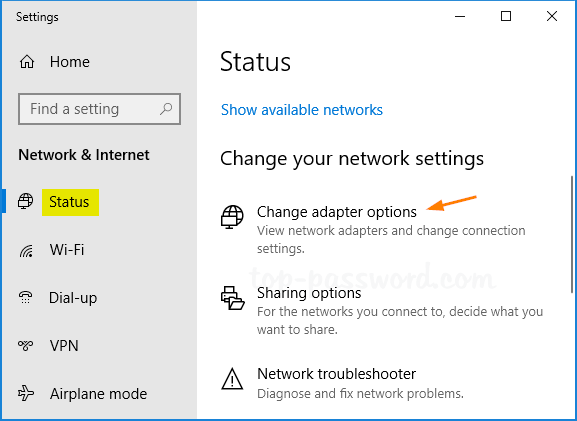
It will open Network Connections in no time.
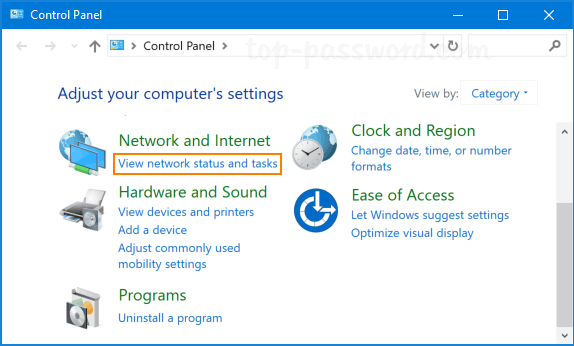
Method 3: Open Network Connections via Control Panel
Open the Control Panel in category view, click the “View network status and tasks” link beneath the “Network and Internet” heading.
In the resulting window, click “Change adapter settings” on the left-hand side.
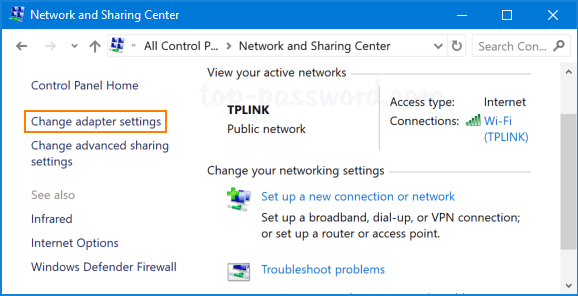
Now you can view a list of network connections on your system.


