- How to create a Windows Installer/ Setup File for Desktop Application using Visual Studio 2017.
- Procedure to create Sample WPF project :
- Procedure to create Setup file:
- Create installation media for Windows
- Windows Setup Technical Reference
- Practical applications
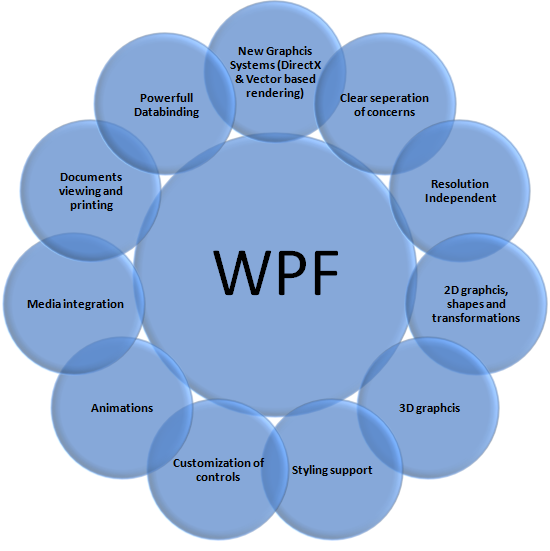
- What’s New
- See also
- Download Windows 10
- Windows 10 October 2020 Update
- Create Windows 10 installation media
How to create a Windows Installer/ Setup File for Desktop Application using Visual Studio 2017.
Jan 26, 2020 · 7 min read
Hi all, this is a brief explanation on how to create a windows installer/ setup file for a desktop application. I used to try this with WPF application, but you can try this for any kind of desktop applications.
Lets’ start with the basics.
The main idea is to give you a brief introduction on building a installer/setup file using Visual Studio. To create a installer I just want you to create a simple application.
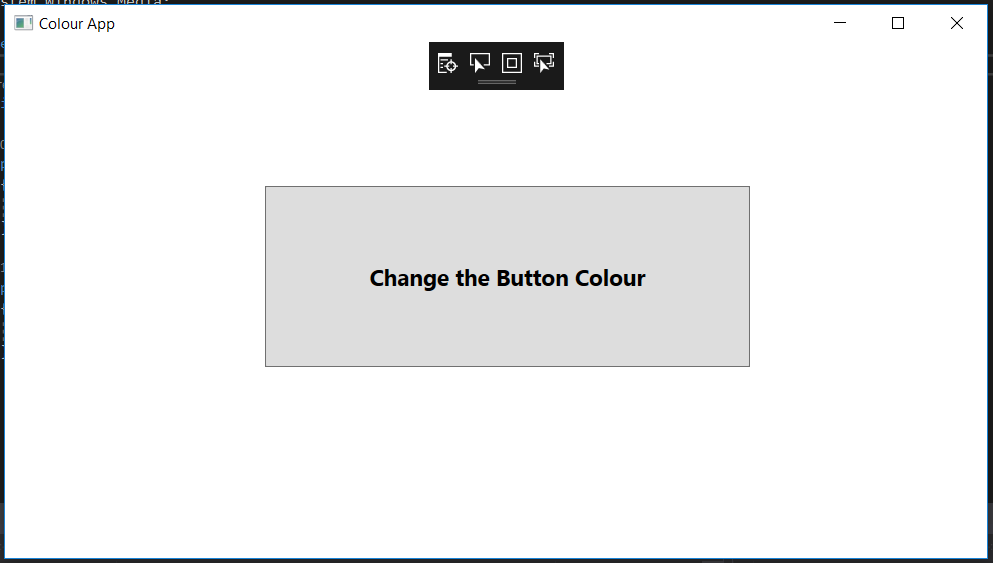
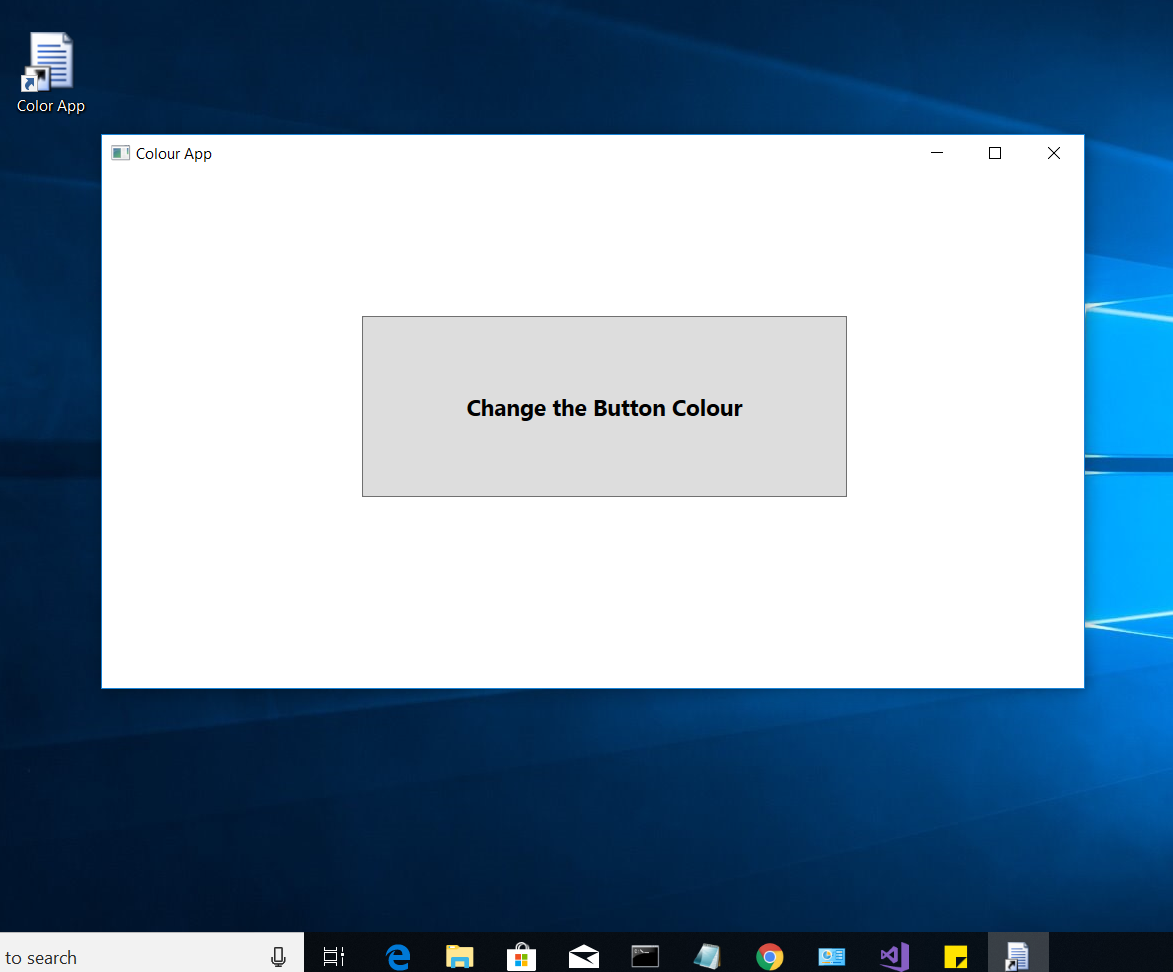
First we look how to crea t e a sample WPF application using Visual Studio. This is a small program to change the button background color when you press the button. Lets’ go forward step by step (Please consider that I just go-through the main steps to create this sample app, there are many features you can try with WPF application development).
Procedure to create Sample WPF project :
Step 01 : Open Visual Studio 2019. On the start window, choose Create new project.

Step 02 : Select a project type as your preference( I used to choose WPF App (.NET Framework), for this project), rename the project and click “OK”.

Visual Studio creates the ColourApp project and solution, and Solution Explorer shows the various files. The WPF Designer shows a design view and a XAML view of MainWindow.xaml in a split view. You can slide the splitter to show more or less of either view. You can choose to see only the visual view or only the XAML view.
Step 03 : The XAML view and the visual view of the application as follows. I just created a button to change the colour of the button. You can try with many functions and develop your own application.

Step 04 : The C# code for above XAML application as below.

Step 05 : After try above steps save the project and build/run the project using Build → Build solution. You can change the button colour to green by one button press as follows. Try to implement your own application ideas with WPF .

Congratulations on completing this steps! You can find the .exe you built under your solution and project directory (\ColourApp\ColourApp\bin\Release) or in (\ColourApp\ColourApp\bin\Debug).
Try below steps to create a Installer/Setup file for your application.
Procedure to create Setup file:
Step 01 : Right click on solution and in context menu click Add, then New Project.

Step 02 : After that you can see a new project window, in that right side you can select Other Project Types in installed Templates, then select as shown below.

Step 03 : Now you can see one project in the same solution as ColorSetup(project name). You can see the properties for this project and can change these properties as you wish like Author, Manufacture, etc. as in the following figure.
Then I am going to show you how you can import your project files to setup file, for that right click on this ColorSetup project and in context menu select Add, then click Project Output.

Step 04 : After that you can see a pop up as below, from this pop up select required items, mainly Primary output, then click OK.

After adding the items as in above figure you will get the screen as below,

Here you can see there are three folders on the left side tab called File System,
- Application Folder : This is your Destination folder where you’re going to install or copy the entire application, so here you can add all your project files.
- User’s Desktop : This folder is your desktop, here you can put shortcut of application file.
- User’s Programs Menu : This folder is your start menu context folder, here also you can put shortcut of application file, help file or any documents, etc.
Here on right side under ColorSetup project tree and in inside application folder you can see item name starts with Primary output from
, it is the output of your project i.e., it is going to be your main .exe file. And you can also see all your external .dll files required for your project to run.
Step 05 : Next we can add shortcut of application file to User’s Desktop, for this select User’s Desktop folder . On the right side you can see blank space having heading Name and Type. In that you can right click and then in context menu select Create New Shortcut as shown below.

Then you will get one pop up box like below, in that select Primary output From

Now you can see one shortcut file added on that blank space, here you can change the name of shortcut :

You also can give icon for this shortcut as in the following figure:

Step 06 : Next you can add shortcut file to the User’s Program Menu folder as I did in User’s Desktop folder and if you want you can add some document as well in this folder. This folder will come under your Start menu →All programs folder, so if you want more files to be added then first add one folder into this User’s Programs Menu folder as shown below, then add whatever files you want.

Step 07 : We can add shortcut of application file to User’s Programs Menu → Color App folder, for this select Color App folder(folder you created before) and follow the Step 05 to create the shortcut.

Now you can design your setup.exe file as in the following figure: (View →Editor →User Interface)

After adding the User Interface as in above figure you will get the screen as below.

You can give banner image and can change Copyright Warning message, welcome text, etc. by Right click on Start/Progress/End and in menu click Add Dialog.

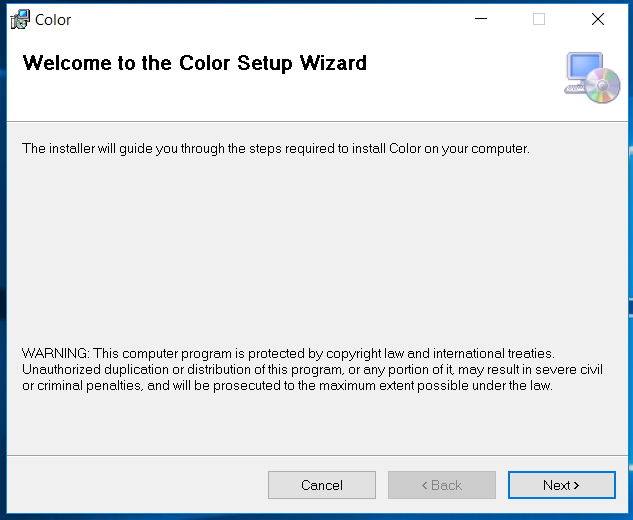
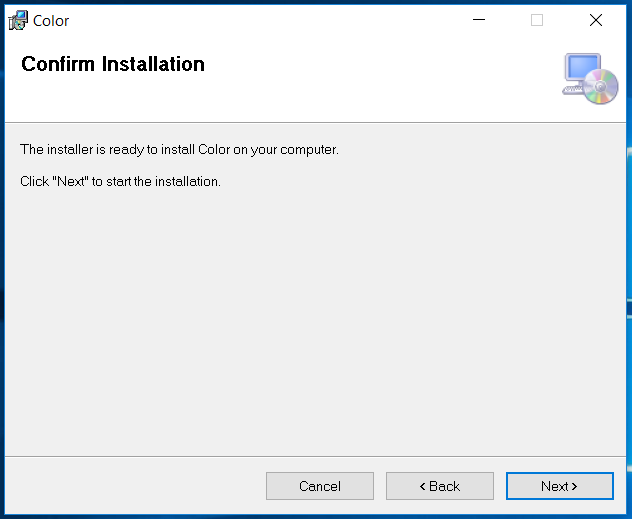
Now the time to build setup file, for this right click on ColorSetup in Solution Explorer and select Build, That’s it.

After build success you can see in your project folder one extra folder created. Inside Debug folder you can see your setup file as shown below.

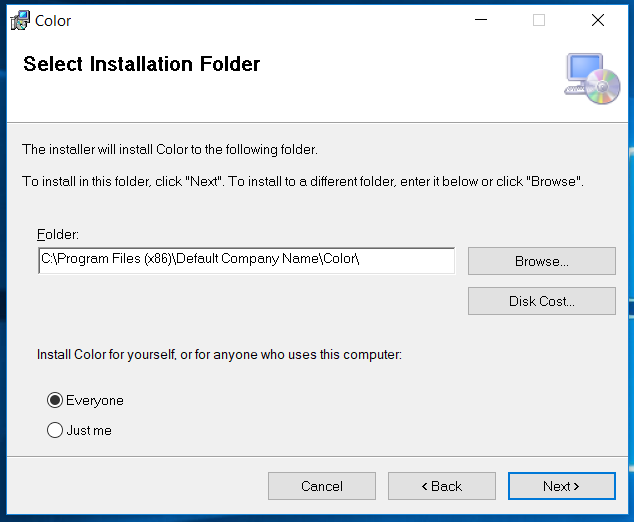
Then run the setup file to install the installer to your machine. You can see the initial steps within the installation process as shown below.
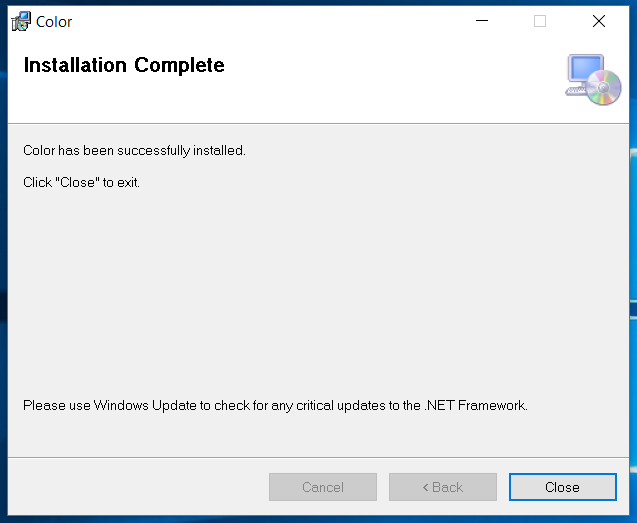
Now you can see the shortcut of the app that you already created, on your desktop.
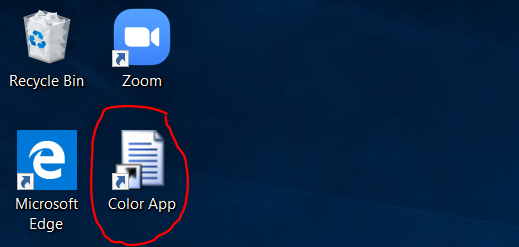
You can run the application without any IDE now.

Congratulations on completing this guide!
I assume that you’ll get a basic idea about “How to create a Windows Installer/ Setup File for Desktop Application using Visual Studio 2017”. For this blog i used WPF sample. It’s much appreciated if you can try out another sample of native application by the use of this guide.
Cool ! We almost finished with this application. If you wish to express anything about this, your valuable comments are warmly welcome.!
Create installation media for Windows
You can use installation media (a USB flash drive or DVD) to install a new copy of Windows, perform a clean installation, or reinstall Windows 10.
To create installation media, go to the software download website, where you’ll find step-by-step instructions. On that website, you can select a version of Windows and create your own installation media using either a USB flash drive or a DVD. To go directly to one of the versions, select one of these links:
Windows 10 (Then select Download tool now.)
Important: Back up your files before you install or reinstall Windows on your PC. Learn how for Windows 10 or for Windows 7 and Windows 8.1.
To create the installation media, here’s what you’ll need:
A PC with a reliable internet connection. The download time will vary, depending on your internet connection.
A USB flash drive or DVD. A blank USB flash drive with at least 8 GB of space, or a blank DVD (and DVD burner). We recommend using a blank USB or blank DVD because any content on it will be deleted. When burning a DVD from an ISO file, if you’re told the disc image file is too large, you’ll need to use dual layer (DL) DVD media.
A product key. Your 25-character product key (not required for digital licenses). For help finding it, go to Find your Windows product key.
After you’ve created the installation media, you can reset or reinstall Windows. To learn more, go to Recovery options in Windows 10.
Windows Setup Technical Reference
Windows Setup is a bootable program that installs the Windows operating system.
Practical applications
- You can install or upgrade the Windows operating system on a PC from a USB key, a mounted .ISO file, DVD, or network device.
- You can automate the Windows installation process, including the configuration of drivers, packages, files, and Windows system settings by using answer files created from Windows System Image Manager Technical Reference.
- You can use Windows Setup as an installer for your own customized Windows images.
- You can use the menus in Windows Setup to prepare the hard drives before installation.
What’s New
Windows 8.1 upgrades are different from previous Windows upgrade scenarios. For more info, see Windows 8.1 Upgrade Scenarios for OEMs.
Windows Setup cannot be used to perform automated upgrades to most editions of Windows 8.1.
For volume-licensed editions of Windows, we’ve added a new command-line option, setup /auto , to help enable upgrades. Note, we only plan to use this option for upgrades to Windows 8.1, and we may remove the option in future versions of Windows. For more info, see Windows Setup Command-Line Options.
Settings for Automating OOBE: The NetworkLocation setting is no longer needed to automate OOBE. The functionality of the ProtectYourPC setting has changed.
See also
The following table contains links to resources related to this scenario.
Download Windows 10
Before updating, please refer to the Windows release information status for known issues to confirm your device is not impacted.
Windows 10 October 2020 Update
The Update Assistant can help you update to the latest version of Windows 10. To get started, click Update now.
Create Windows 10 installation media
To get started, you will first need to have a license to install Windows 10. You can then download and run the media creation tool. For more information on how to use the tool, see the instructions below.

Here’s when to use these instructions:
- You have a license to install Windows 10 and are upgrading this PC from Windows 7 or Windows 8.1.
- You need to reinstall Windows 10 on a PC you’ve already successfully activated Windows 10.
If you are installing Windows 10 on a PC running Windows XP or Windows Vista, or if you need to create installation media to install Windows 10 on a different PC, see Using the tool to create installation media (USB flash drive, DVD, or ISO file) to install Windows 10 on a different PC section below.
Note: Before you install Windows 10, check to make sure your PC meets the system requirements for Windows 10. We also recommend going to the PC manufacturer’s website for any additional info about updated drivers and hardware compatibility.
- Select Download tool, and select Run. You need to be an administrator to run this tool.
- On the License terms page, if you accept the license terms, select Accept.
- On the What do you want to do? page, select Upgrade this PC now, and then select Next.
After downloading and installing, the tool will walk you through how to set up Windows 10 on your PC. All Windows 10 editions are available when you select Windows 10, except for Enterprise edition. For more information on Enterprise edition, go to the Volume Licensing Service Center.
- If you don’t have a license to install Windows 10 and have not yet previously upgraded to it, you can purchase a copy here: https://www.microsoft.com/en-us/windows/get-windows-10.
- If you previously upgraded to Windows 10 on this PC and you’re reinstalling it, you don’t need to enter a product key. Your copy of Windows 10 will automatically activate later using your digital license.
Follow these steps to create installation media (USB flash drive or DVD) you can use to install a new copy of Windows 10, perform a clean installation, or reinstall Windows 10.
Before you download the tool make sure you have:
- An internet connection (internet service provider fees may apply).
- Sufficient data storage available on a computer, USB or external drive for the download.
- A blank USB flash drive with at least 8GB of space or blank DVD (and DVD burner) if you want to create media. We recommend using a blank USB or blank DVD, because any content on it will be deleted.
- When burning a DVD from an ISO file, if you are told the disc image file is too large you will need to use Dual Layer (DL) DVD Media.
Check a few things on the PC where you want to install Windows 10:
- 64-bit or 32-bit processor (CPU). You’ll create either a 64-bit or 32-bit version of Windows 10. To check this on your PC, go to PC info in PC settings or System in Control Panel, and look for System type.
- System requirements. Make sure the PC meets the system requirements for Windows 10. We also recommend going to the PC manufacturer’s website for additional info about updated drivers and hardware compatibility.
- Language in Windows. You’ll need to choose the same language when you install Windows 10. To see what language you’re currently using, go to Time and language in PC settings or Region in Control Panel.
- Edition of Windows. You should also choose the same edition of Windows. To check what edition you’re currently running, go to PC info in PC settings or System in Control Panel, and look for Windows edition. Windows 10 Enterprise isn’t available in the media creation tool. For more info, go to the Volume Licensing Service Center.
- Microsoft Office products. If you just purchased a new device that includes Office 365, we recommend redeeming (installing) Office before upgrading to Windows 10. To redeem your copy of Office, please see Download and install Office 365 Home, Personal, or University on your PC. For more information, check How to upgrade to Windows 10 on new devices that include Office 365.
If you have Office 2010 or earlier and choose to perform a clean install of Windows 10, you will need to locate your Office product key. For tips on locating your product key, check Find your Office 2010 product key or Enter the product key for your Office 2007 program.
Using the tool to create installation media:
- Select Download tool now, and select Run. You need to be an administrator to run this tool.
- If you agree to the license terms, select Accept.
- On the What do you want to do? page, select Create installation media for another PC, and then select Next.
Select the language, edition, and architecture (64-bit or 32-bit) for Windows 10. This table will help you decide which edition of Windows 10 you’ll choose:
| Your current edition of Windows | Windows 10 edition |
|---|---|
| Windows 7 Starter Windows 7 Home Basic Windows 7 Home Premium Windows 7 Professional Windows 7 Ultimate Windows 8/8.1 Windows 8.1 with Bing Windows 8 Pro Windows 8.1 Pro Windows 8/8.1 Professional with Media Center Windows 8/8.1 Single Language Windows 8 Single Language with Bing Windows 10 Home Windows 10 Pro | Windows 10 |
| Windows 8/8.1 Chinese Language Edition Windows 8 Chinese Language Edition with Bing | Windows 10 Home China |
- USB flash drive. Attach a blank USB flash drive with at least 8GB of space. Any content on the flash drive will be deleted.
- ISO file. Save an ISO file to your PC, which you can use to create a DVD. After the file is downloaded, you can go to location where the file is saved, or select Open DVD burner, and follow the instructions to burn the file to a DVD. For more info about using an ISO file, see Additional methods for using the ISO file to install Windows 10 section below.
After completing the steps to install Windows 10, please check that you have all the necessary device drivers installed. To check for updates now, select the Start button, and then go to Settings > Update & Security > Windows Update, and select Check for updates. You may also wish to visit your device manufacturer’s support site for any additional drivers that may be needed.
Note: Drivers for Surface devices may be found on the Download drivers and firmware for Surface page.
Before you install Windows 10, it’s a good idea to save any work and back up your PC before you start. If you used the media creation tool to download an ISO file for Windows 10, you’ll need to burn it to a DVD before following these steps.
- Attach the USB flash drive or insert the DVD on the PC where you want to install Windows 10.
- Restart your PC.
If your PC does not automatically boot to the USB or DVD media, you might have to open a boot menu or change the boot order in your PC’s BIOS or UEFI settings. To open a boot menu or change the boot order, you’ll typically need to press a key (such as F2, F12, Delete, or Esc) immediately after you turn on your PC. For instructions on accessing the boot menu or changing the boot order for your PC, check the documentation that came with your PC or go to the manufacturer’s website. If you do not see the USB or DVD media device listed within the boot options, you may need to reach out to the PC manufacturer for instructions for temporarily disabling Secure Boot in your BIOS settings.
If changing the boot menu or order doesn’t work, and your PC immediately boots into the OS you want to replace, it is possible the PC had not fully shut down. To ensure the PC fully shuts down, select the power button on the sign-in screen or on the Start menu and select Shut down.
If you downloaded an ISO file for Windows 10, the file is saved locally at the location you selected. If you have a third-party DVD burning program installed on your computer that you prefer to use for creating the installation DVD, that program might open by going to the location where the file is saved and double-clicking the ISO file, or right-click the ISO file, select Open with and choose your preferred DVD burning software.
If you want to use the Windows Disk Image Burner to create an installation DVD, go to the location where the ISO file is saved. Right-click the ISO file and select Properties. On the General tab, click Change and select Windows Explorer for the program you would like to use to open ISO files and select Apply. Then right-click the ISO file and select Burn disc image.
If you want to install Windows 10 directly from the ISO file without using a DVD or flash drive, you can do so by mounting the ISO file. This will perform an upgrade of your current operating system to Windows 10.


