- Windows create a system image always fails, with «There was a failure in preparing the backu2p image of one of the volumes in the backup set. (0x807800C5). : Incorrect Function. (0x080070001)
- Replies (1)
- Windows 10 backup not working/ system image fails [FIXED]
- How to fix system backup problems in Windows 10
- 1. Delete the WindowsImageBackup folder
- 2. Format your external hard drive
- 3. Use a third-party backup tool
- Acronis True Image 2020
- 4. Delete EFI System Partition and Recovery Partition
- Run a System Scan to discover potential errors
- 5. Turn on System Protection
- 6. Turn off System Protection and delete restore points
- 7. Change the Disk Space Usage
- 8. Use chkdsk command
- 9. Use diskpart to remove EFI partition
- 10. Set your background to solid color
- 11. Disable any unnecessary disk tools
- 12. Use a USB 3.0 hub
Windows create a system image always fails, with «There was a failure in preparing the backu2p image of one of the volumes in the backup set. (0x807800C5). : Incorrect Function. (0x080070001)
Whenever I try to either create a system image or a backup through Backup and Restore (Windows 7), I always get the (0x80700C5) and (0x080070001) (the former only occurs with the system image, the backup and restore shows only the second one). I am backing up to a 500GB drive that is in a NAS hooked up to the PC as the Z:\ Drive.
If anyone could help me that would be amazing! I just want to be able to backup my system.
My Drive layout is :
C: — 120Gb Samsung Evo SSD (OS Only)
D: — 500gb WDC5000AAKS-41TMA0
Z: — same as above except in a Fedora server-based NAS (EXT4 file system)
My system specs are :
CPU : AMD fx-6300
RAM : 8GB dual channel G skill ares
CPU : Intel Core 2 Q8400
MOBO : Asus PQ5L Pro
RAM : 2GB dual Channel
Thanks in Advance
Replies (1)
Welcome to Microsoft Community.
I understand your concern. Let me assist you.
The issue you are facing, it could be due to the Volume shadow copy is not running on Windows background. Let’s try simple troubleshooting steps and check if this helps in resolving the issue. Follow the below methods.
Method 1.
Let’s check if Volume shadow copy is running on Windows background.
- Press Windows key + R, type services.msc and press Enter.
- Locate for Volume shadow copy, check if the services is running. If is not running, right click on it and click on Start. (If it is running stop it, and run it again).
Method 2.
If that does not helps, I suggest you to boot the system in clean boot state and try to create a system image. Clean boot process will help you determine which third party program/app that is causing this issue. It could be some other application or programs, which runs on the computer at the background, leading to this issue. Please visit the below link on how to perform Clean boot.
Disclaimer: Please go through the section: How to reset the computer to start as usual after troubleshooting with clean boot of the Kb article to boot the computer in normal startup after fixing the issue.
Windows 10 backup not working/ system image fails [FIXED]

- On rare occasions, the Windows 10 backup or system image is unusable exactly when you need it most.
- To avoid this frustrating situation, make sure to check out the prerequisites we list below, as well as the steps to troubleshoot it.
- Care to read more about using backup software? Go to our dedicated Backup Software page.
- Never miss a detail when fixing Windows errors by bookmarking our Windows 10 Troubleshooting Hub.

- Download Restoro PC Repair Tool that comes with Patented Technologies (patent available here).
- Click Start Scan to find Windows issues that could be causing PC problems.
- Click Repair All to fix issues affecting your computer’s security and performance
- Restoro has been downloaded by 0 readers this month.
Having a system backup is always useful, especially if your system gets corrupt or damaged.
Although the system Backup tool in Windows 10 is a great feature, it can sometimes fail to work on Windows 10, so let’s see how to fix it.
This issue comes along with various error codes, which are as follows:
- Windows 10 backup error 0x807800c5
- Windows 10 backup fails to complete
- Windows 10 backup did not complete successfully
- Windows 10 backup to network drive fails
How to fix system backup problems in Windows 10
Table of contents:
1. Delete the WindowsImageBackup folder

Sometimes you won’t be able to create system backup due to previous backup files, and in order to fix this problem, you need to delete those files.
To do that, locate and delete WindowsImageBackup folder. If you want to save your previous backups, you can also move them from WindowsImageBackup to a different folder.
As for the location of WindowsImageBackup folder, it should be located in the hidden folder C:/System Volume Information .
2. Format your external hard drive
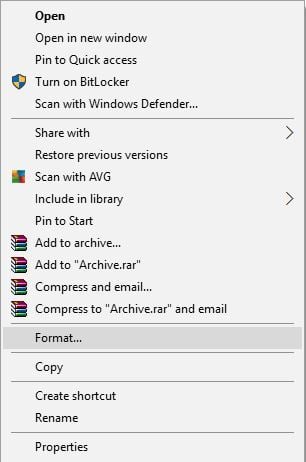
- Open This PC and locate your external hard drive. Right-click it and choose Format.
- When the Format window opens, check Quick Format option and click Start button. This process might take a minute or two, so be patient.
This is a prerequisite before creating a system backup image on an external hard drive. Also, before formatting your external hard drive make sure to move any files from it to a safe location.
After your external hard drive has been formatted, try creating the system backup on it again.
3. Use a third-party backup tool
For a hassle-free backup process (and further use of the backup image), we recommend using a third-party tool.
Acronis True Image is our suggestion as a highly-rated backup utility for Windows 10 and other platforms.
Besides local backup, the tool also provides cloud or hybrid storage to help you safe-keep your OS image.
One of the great things about the utility is that it’s so easy to set up and restore a full image backup with it. That said, with just a couple of clicks you set up the full disk image backup and only a few more clicks restore that to an alternative drive .
The tool boasts a wide range of backup and recovery options, end-to-end encryption, automatic compression, custom commands, advanced disk tools, automatic backup splitting, and disk cloning.
Acronis True Image also comes with a security dashboard to allow you to monitor potential cyberthreats and identify blocked activity.
Acronis True Image 2020
4. Delete EFI System Partition and Recovery Partition
In some cases, when you upgrade to Windows 10 or install it on a new hard drive, certain partitions from previous versions of Windows might still be present on your computer causing System Backup to fail.
In order to fix this, it’s advised that you remove EFI System Partition and Recovery Partition. To do that, follow these steps:
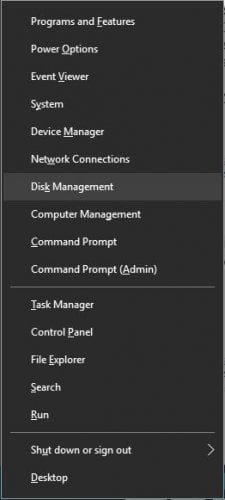
- Press Windows Key + X and select Disk Management from the menu.
- When Disk Management opens, locate the hard drive on which you wish to store your system backup.
- You should see EFI System Partition and Recovery Partition for that hard drive in Disk Manager. Delete them both.
Run a System Scan to discover potential errors


After deleting these two partitions, you should be able to successfully create system backup on that hard drive.
5. Turn on System Protection
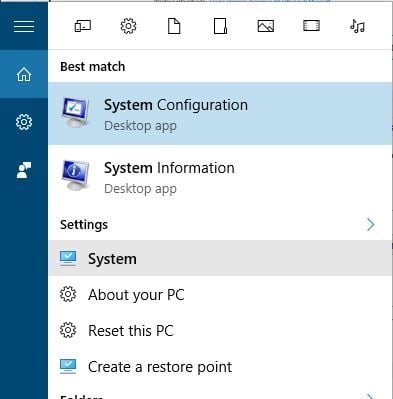
- Press Windows Key + S and type System. Choose System from the list of options.
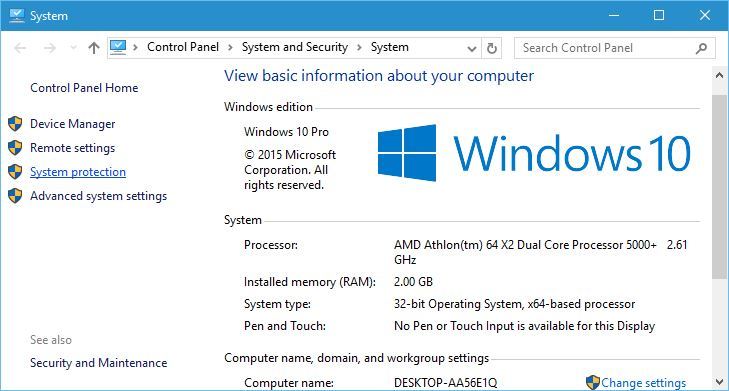
- When System window opens, click on System protection on the left.
- Locate Windows 10 System Image and click Configure.
- Select Turn on system protection and click Apply and OK to save changes.
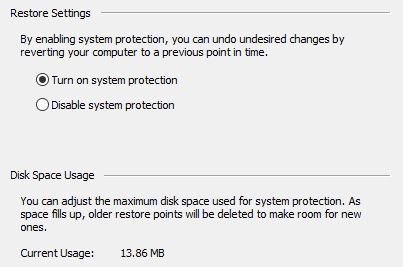
We have listed this solution because s ome users claim that in order to create System Backup, System Protection must be enabled on your PC.
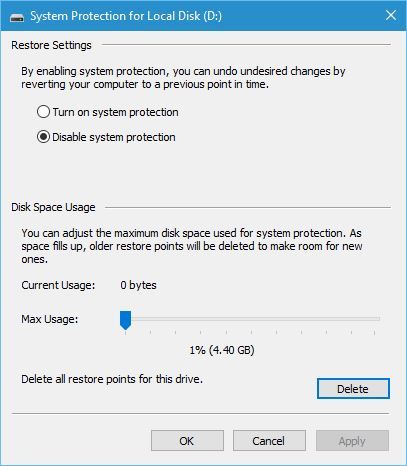
6. Turn off System Protection and delete restore points
- Open System Protection. You can do that by following the steps from the previous solution.
- Locate your hard drive and click on Configure.
- Make sure to select Disable system protection.
- Next, click on Delete button to delete previous restore points.
- Repeat these steps for all your hard drivers.
After you’ve disabled system protection and deleted previous restore points you should be able to create a system backup.
7. Change the Disk Space Usage
- Open System Protection.
- Select the volume you’re using for system image and click Configure.
- Make sure that protection is turned on.
- In the Disk Space Usage section move the Max Usage slider to the left to about 10-15%. Few users report that Max usage was set to 100% on their computer by default and that was the main culprit for system backup failure.
- After you’ve changed Max Usage value click Apply and OK to save changes.
- Restart your computer and check if the problem is resolved.
8. Use chkdsk command
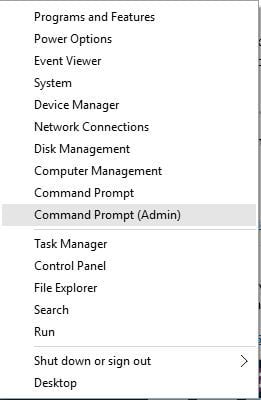
- Press Windows Key + X and choose Command Prompt (Admin) from the menu.
- When Command Prompt opens you need to type chkdsk /r X: (remember to replace X with the correct letter that represents your hard drive partition) and press Enter to run it.
- Wait for the process to complete and repeat the same process for all hard drive partitions.
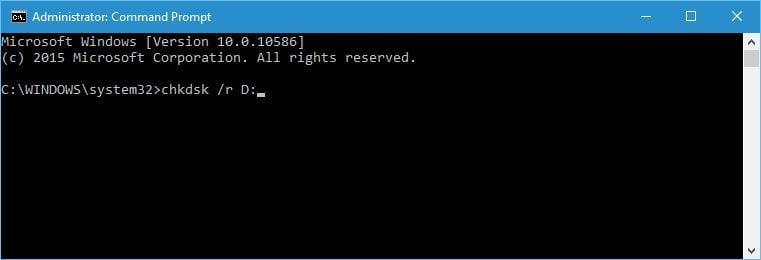
We have to mention that you might be unable to run chkdsk command on drive C, and you’ll be asked whether you want to scan drive C the next time your system restarts.
Press Y (Yes) and restart your computer in order to scan and check drive C.
If your hard drive contains corrupted files, a system backup will fail. This is why using the chkdsk command should repair them.
9. Use diskpart to remove EFI partition
If you install an additional hard drive and install new Windows on it, your previous EFI partition from the old hard disk can remain on your old hard drive and cause you problems with system restore.
We advise you to be extremely careful while using this method because you can permanently delete your important files.
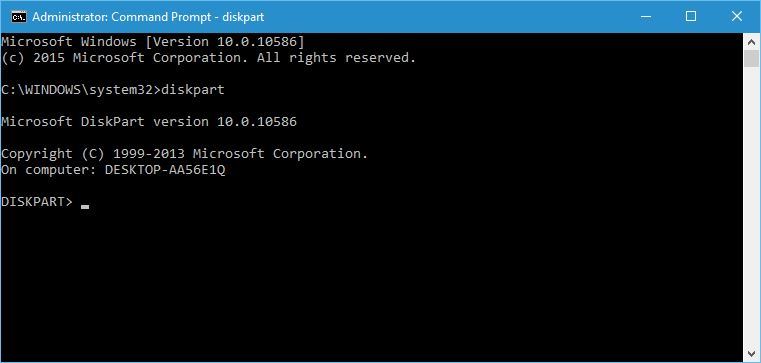
- Press Windows Key + X and choose Command Prompt (Admin).
- When Command Prompt opens, type diskpart and press Enter.
- Type list disk and press Enter. You should see several hard drives available.
- Find your old hard drive on the list and type select Disk 1 (warning: we used select Disk 1 in our example, but make sure that you use the correct number that matches your hard drive in diskpart).
- Now type list partition and press Enter.
- Locate the system partition and type select Partition 1 (again select Partition 1 is just an example, therefore, make sure that the number matches the System partition from diskpart).
- Optional: Backup all files from that partition because they will get deleted.
- Type del partition override and press Enter. This will delete the partition and all files on it.
- Optional: Add the newly created free space to any other disk partition by using the Disk Management tool.
Once again, be extremely careful while doing this because you can permanently delete your system files if you’re not careful. Use this solution at your own risk.
10. Set your background to solid color
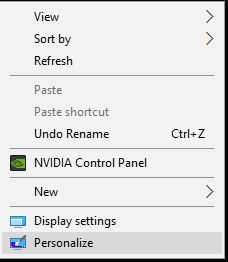
- Right-click on your desktop and choose Personalize from the menu.
- Go to Background and select Solid color from the menu.
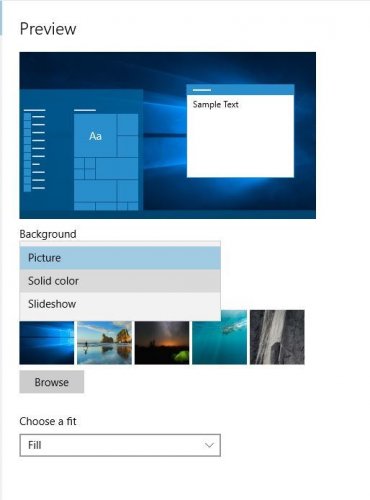
After changing the background to solid color system backup problems should be fixed.
It might seem unusual, but few users reported that system backup issues can be caused if your background is set to Slideshow.
11. Disable any unnecessary disk tools
It was reported that certain disk tools can cause problems with system backup, therefore if you’re using any disk optimizers or disk cleaning tools make sure to disable them before trying to create a system backup.
12. Use a USB 3.0 hub

Few users reported that using USB 3.0 external hard drives can cause problems due to USB 3.0 drivers. In order to avoid these issues, it’s advised to use a USB 3.0 hub in order to connect your external drive.
This is just a potential solution, but few users had success with it, so maybe you could try it out.
System backup is rather important, and if you can’t create system backup on Windows 10, make sure to try some of our solutions.
And, if you’ve already tried, do let us know which one worked for you!


