- How to Create a Bootable Windows 10 USB in Linux
- Creating a Bootable Windows 10 USB in Linux
- Prerequisite: Get Microsoft Windows 10 ISO and a USB of at least 8 GB in size
- Step 2: Properly format the USB for creating bootable Windows USB
- Step 3: Copy the content of the ISO to USB
- Alternate Method: Creating Windows 10 bootable USB in Linux using WoeUSB
- Step 1: Install WoeUSB application
- Step 2: Format USB drive
- Step 3: Using WoeUSB to create bootable Windows 10
- Step 4: Using Windows 10 bootable USB
- SDB:Create a Live USB stick using Windows
- Contents
- Using Etcher
- Using Rufus
- Using ImageUSB
- Using SUSE Studio ImageWriter
- Using GRUB4DOS
- Troubleshooting
- Verifying checksum of downloaded files
- Write access problems
- Создать bootable Windows USB stick из .iso
- How To Create a Windows 10 Installation USB Stick
- Creating The Windows Installation USB Stick
- Wipe The USB Stick
- Download The “Media Creation Tool” From Microsoft
- Choose Your Installer Format
- Now Sit Back & Wait….
- What The USB Stick Now Looks Like
How to Create a Bootable Windows 10 USB in Linux
Last updated October 29, 2020 By Abhishek Prakash 415 Comments
Brief: This tutorial shows you how to create a bootable Windows 10 USB in Linux with and without a GUI tool called WoeUSB.
I have talked a lot about creating bootable USB of Linux in Windows. How about the other way round? How about creating a bootable Windows 10 USB in Linux?
If you are uninstalling Linux from dual boot or if you want to reinstall Windows completely or you simply want to have a Windows installation disk ready, you’ll need a bootable Windows 10 USB or DVD.
In this tutorial, I am going to show you how to create a Windows 10 bootable USB in Linux. I am using Ubuntu for this tutorial but the steps should be valid for other Linux distributions as well.
If you want to use WoeUSB graphical tool for creating Windows bootable USB, you can jump to that section directly. Personally, I don’t recommend WoeUSB.
Creating a Bootable Windows 10 USB in Linux

Prerequisite: Get Microsoft Windows 10 ISO and a USB of at least 8 GB in size
You can download Windows 10 ISO from Microsoft’s website. You have to specify the Windows 10 version, language and then you should see the link to download Windows 10.
Note that the Windows 10 ISO download link is valid for 24 hours only. So use a download manager in Linux to download the
5.6 GB file and finish it within 24 hours only.
Since the ISO and its content are more than 4 GB in size, I recommend a USB of at least 8 GB in size.
I have also made a video of this tutorial so that you can see the steps in action.
Step 2: Properly format the USB for creating bootable Windows USB
Insert your USB. You have to format it so make sure that you don’t have important data on the USB key.
In Ubuntu, press Super key (Windows key) and search for ‘Disks’. You have to use this tool to format the USB key.
In the Disks tool, make sure to select your USB drive and hit format.
It will ask to choose a partitioning scheme. It could be either MBR or GPT. Select one of them and hit Format.
It will show you a warning that you data will be erased.
 Format the USB
The formatting of USB is not over yet. Now, you need to create a partition on the newly formatted USB.
Select the entire USB disk as the partition size.
Give a name to your USB and hit Create button.
Once done, your USB should be automatically mounted. It is now ready for creating bootable Windows 10 USB disk.
Files larger than 4 GB?
Newer Windows 10 ISO might have files larger than 4GB. In that case, FAT filesystem won’t work as it doesn’t allow a single file of size greater than 4 GB.
You should then format the USB in ExFAT format. This newer format allows files bigger than 4 GB.
Step 3: Copy the content of the ISO to USB
Now it’s time to copy the content of the Windows 10 ISO to the newly formatted USB.
You may ask, Abhishek, there is only one file and that is the ISO file itself. What are you talking about?
ISO is basically an archive format and you can see it’s content like any zip file in Linux. But to do that, you need to use ‘Disk Image Mounter’ tool that is installed by default in Ubuntu.
Go to your Windows 10 ISO, select it and right click on it. Now select ‘Open with other application’.
In the applications list, select Disk Image Mounter:
The ISO will be mounted. You may not see it in the left sidebar but if you click on the Other Locations, you should see it. Click on it to enter this mounted ISO folder.
You’ll see its content. All you need to do is to select all the files (Ctrl+A), copy it (Ctrl+C) and paste it in the USB drive (Ctrl+V).
Wait for the copying process to finish as it may take some time in copying 4-5 GB of data. Once it’s done, you have a bootable Windows 10 USB in your hand. Take out the USB and use it to any system you want, restart the system and change the boot settings to boot from the USB.
Alternate Method: Creating Windows 10 bootable USB in Linux using WoeUSB
You can also use a Graphical tool called WoeUSB for creating a bootable Windows USB in Linux. However, this tool might not work perfectly all the time. This is why I prefer the first method of mounting the Windows 10 ISO and copying its content to the USB.
If you are interesting in using WoeUSB, you can click on the next section to expand it and follow the steps.
You can also watch a video of creating Windows 10 bootable USB. Do subscribe to our YouTube channel for more Linux videos:
Let’s see how to create a bootable Windows 10 USB in Ubuntu and other Linux distribution.
Step 1: Install WoeUSB application
WoeUSB is a free and open source application for creating Windows 10 bootable USB. It is actually a fork of WinUSB tool that has been discontinued now.
Ubuntu and other Ubuntu-based Linux distributions such as Linux Mint, elementary OS etc have a PPA available. You can use the command below to install WoeUSB:
For other Linux distributions, you can check out the source code from the GitHub repository:
Step 2: Format USB drive
Now, plug in your USB key. You’ll have to format it first. I presume you know how to format a USB key in your Linux distribution.
Ubuntu users can simply right click on the USB and click format.

The important part here is that you should format it in NTFS:

Note: If you use Fat 32 file system for formatting, you may encounter the error below later on:

Step 3: Using WoeUSB to create bootable Windows 10
We have everything ready for us now. Start WoeUSB program.
Browse to the downloaded Windows 10 ISO file and select the USB drive on which you want to install it. Just click on Install to begin the process.

Note that it may take up to 15 minutes in creating the Windows 10 USB. Don’t get fooled by the ‘done’ on the screen.

That’s it. You should see a success message.

Step 4: Using Windows 10 bootable USB
Once the bootable USB is ready, restart your system. At boot time, press F2 or F10 or F12 repeatedly to go to the boot settings. In here, select to boot from USB.

You’ll see that Windows 10 is being booted and it gives you the option to install or repair your system. You know what to do now from here.

I hope you find this tutorial useful for creating bootable USB of Windows 10 in Linux . If you have questions or suggestions, please feel free leave a comment.
Like what you read? Please share it with others.
SDB:Create a Live USB stick using Windows
Version: 12.2+ This applies to openSUSE 12.2 and above.
Contents
Using Etcher
- Download the current ISO image of openSUSE Leap or Tumbleweed. The filename ends with «.iso».
- Download, install and start Etcher
- Select the openSUSE .iso file you just downloaded using the «Select Image» button.
- Plug a USB drive into you computer, if it’s the only drive connected to your computer, it will be automatically selected. If not, select it.
Using Rufus
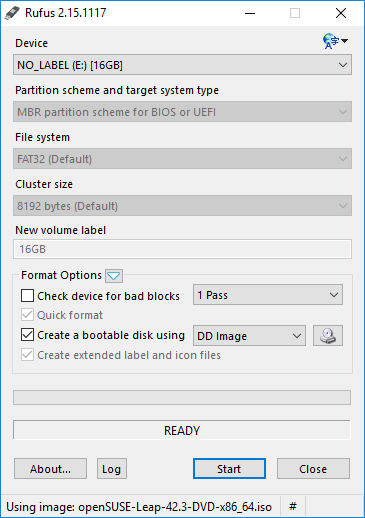
- Download the current ISO image of openSUSE Leap or Tumbleweed. The filename ends with «.iso».
- Download and start Rufus
- Plug a USB drive into you computer and select it in Rufus (see screenshot)
Using ImageUSB
Download ImageUSB and follow the instructions on their page.
Using SUSE Studio ImageWriter
We used to have SUSE Studio ImageWriter compiled for windows, but this is not maintained anymore. Feel free to fork it and build/maintain the windows version yourself.
Using GRUB4DOS
This method will keep all current data in your USB medium. Demonstration is provided in this video. Note: These instruction will not work, if your computer boots via UEFI (like most computers made after
2011-2012 and all computers with preinstalled Windows 8/8.1/10); at first you must go to BIOS, enable Legacy boot (i.e. dissable UEFI/secure boot option)!
- Copy ISO into «boot» folder of USB flash.
- Extract «initrd» and «linux» files into «boot» folder of USB medium. These files located in boot\i386\loader or boot\x86_64\loader directory of ISO image. For ISO mounting you can use, for example, Pismo File Mount Audit Package.
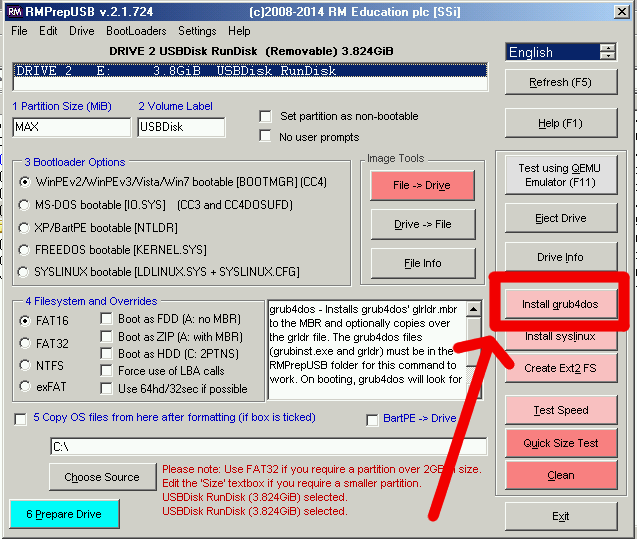
- GRUB4DOS installation into MBR of USB flash:
- download RMPrepUSB and install it;
- start RMPrepUSB;
- select your medium;
- click «Install GRUB4DOS»;
- confirm GRUB installation to MBR;
- confirm GRUB installation to selected medium;
- confirm GRLDR copying into selected medium.
- Create «menu.lst» file in root folder of USB key. Content of «menu.lst» should be (in both places – in line 2 and in line 5 – replace openSUSE.iso with real name of your ISO file):
Reboot your computer from USB stick.
Troubleshooting
Verifying checksum of downloaded files
If you need to verify that the file you’ve just downloaded is correct, you can use the CertUtil program (At least on windows10)
Write access problems
If you get write access problems with the USB drive you can try to reformat the drive in Windows prior to writing the image.
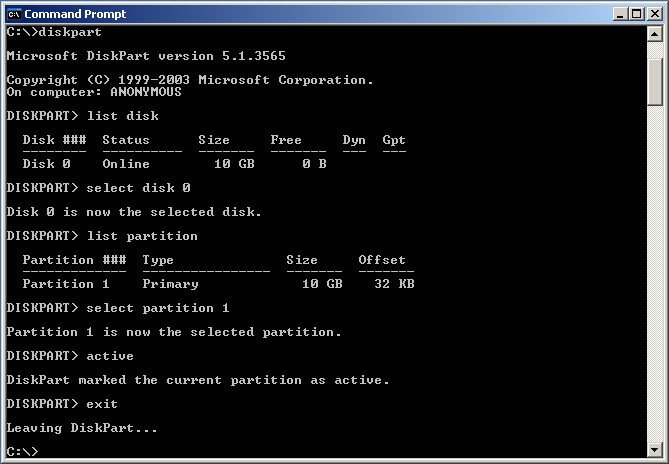
This situation would happen very rarely, but in the even that your computer doesn’t boot from the LiveUSB/DVD from the steps above, you might try the following procedure.
Unlike fdisk, diskpart will perform changes as you enter them, therefore, there is no write instruction.
Создать bootable Windows USB stick из .iso
Нужно создать Windows bootable USB stick из .iso для установки Windows
Поскольку я нуб, то и методы решения данной задачи использовал нубские: пробовал использовать UNetbootin и USB image writer, по дефолту установленную в Mint’e, но из этих жалких попыток ничего не вышло.
Насколько я могу судить проблема в том, что ни одна их этих программ по какой-то причине не добавляет «бут-сектор» на флэшку.
Укажите направление решения задачи.

dd if=*.iso of=/dev/sd*

Не всегда работает, бодяга известная.

на винфак!
а вообще:
- идёшь на sourceforge
- скачиваешь исходники ms-sys
- компиляешь
- форматируешь фрешку в ntfs
- монтируешь флешку
- монтируешь образ с -o loop
- копирушеь файлы на фрешку
- отмонтируешь флешку
- прописываешь бут-сектор (см. ms-sys —help)
- PROFIT !
Спасибо выглядит заманчиво. Сейчас опробую.
идёшь на sourceforge
скачиваешь исходники ms-sys
компиляешь
.
прописываешь бут-сектор (см. ms-sys —help)

честно, я в свое время долго пытался сделать нормальный запуск оригинального ВинХР инсталлера через граб, но в итоге получилось только в 2 этапа:
1) запуск инсталлера из WinPE, при этом распаковываются установочные данные на выбранный раздел;
2) запуск загрузчика установочных данных с диска через граб, при этом она сама себя распакует (установит) на текущий раздел и удалит установочные файлы.
В итоге после долгих раздумий я пришел к выводу, что (1) не нужно, а можно сразу перейти к (2) и не парить себе мозг. Т.е. достаточно поставить любимый загрузчик на целевой диск, создать раздел нтфс, скопировать туда установочные файлы винды и запустить инсталл с помощью chainloader (имя загрузчика там будет что-то вроде
С win7 все проще, достаточно создать раздел нтфс, замапить его как hd0 и запустить bootmgr инсталлера. НО есть один нюанс: оно умеет видеть себя только с sata и с ide, с usb разных не умеет (думаю usb эмуляция hdd в биосе или перепрошивка контроллера usb под hdd поможет).
PS: патчить виндовые образы всякими драйверами для загрузки из образа не пытаюсь, я не на столько мазохист.

Если любитель гуя — SUSE Studio ImageWriter.
How To Create a Windows 10 Installation USB Stick
Extremely helpful if you refurbish or update computers
Back in March, I wrote about making a MacOS installer on a USB stick. But you may not be aware that it is entirely possible to do the same with Windows 10 (or whatever the current version of Windows is).
Windows comes pre-installed with every PC but there are times when a USB version becomes invaluable. One is when you have trouble installing operating system updates the normal way (which happened to me last year). The second is if you make a living wiping and refurbishing used computers. Having a USB version of the latest Windows version makes reinstalling the system absurdly easy.

Obviously Windows is not free, so along with the USB installer, you will also need a valid legal license key. Obviously we can’t help you with that. But the installer? No problem. Read on.
Creating The Windows Installation USB Stick
Before we start, it is worth pointing out that whatever version of Windows you put on your USB stick will be the current version that Microsoft is offering. This means that any subsequent patches and updates will not be included as the USB stick will obviously not auto-update.
So once you have installed Windows using the USB method, you will need to check regularly to see if Windows has been updated. If so, you will have to delete the version on the stick and replace it with the new version. The whole process which I am about to describe doesn’t take very long so it’s not a big deal.
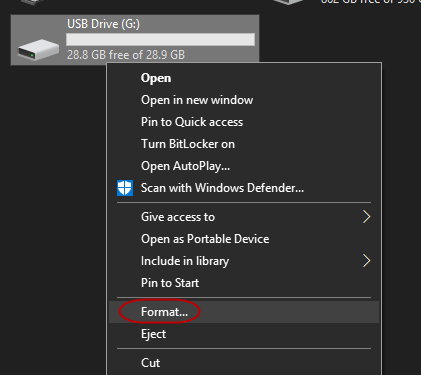
Wipe The USB Stick
The first step is to make sure the USB stick is completely blank. If you have just bought it, it will already be blank. But if it is a used stick, you need to format it. Doing so will wipe all of the contents. The stick needs at least 8GB of space for the installer to be built properly.
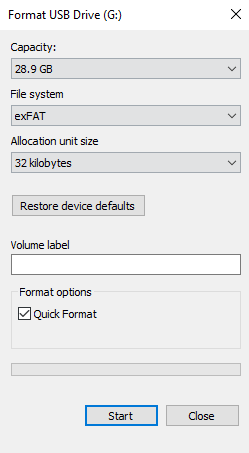
To format the stick, right-click on it in Windows Explorer and click “Format”.
In the box that comes up, click “Start” to begin the formatting process.
How long it takes depends on how used the stick is and how much data is already on it.
Download The “Media Creation Tool” From Microsoft
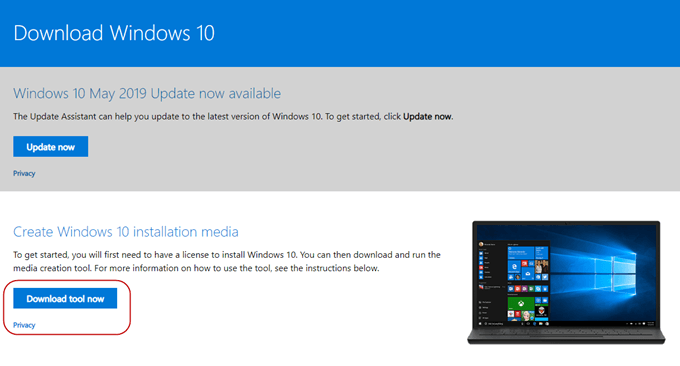
Next, head to the Microsoft website and download the “Media Creation Tool”. This is a portable app so no installation is necessary. Just download the file then double-click to get started.
Choose Your Installer Format
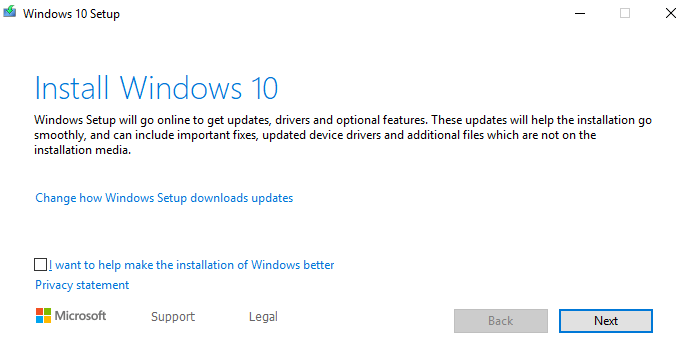
After scanning your computer to see what’s needed and asking you to pretend to have read the Terms & Conditions, the installer will now ask you what you want to do.
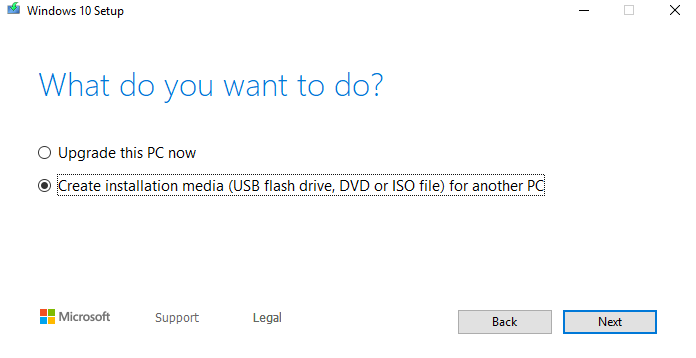
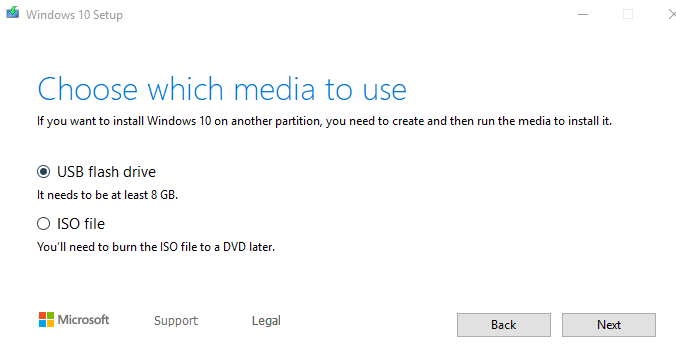
It has seen that I haven’t installed the latest patch yet so it has offered me that. But I want to make an installer USB so the second option is the one I want. You can also put Windows 10 on a DVD or ISO file, and I will be discussing ISO files in my next article. As for DVD’s, I view them as impractical and expensive for something like this.
Next it will ask you to choose the language, Windows edition and whether it’s 32 bit or 64 bit you require. It will put it to what it thinks are the “recommended options” but if you disagree with any of them, just untick the box and choose what you want.
But unless you have a very good reason and you know what you are doing, it is best to stick with the recommended options.
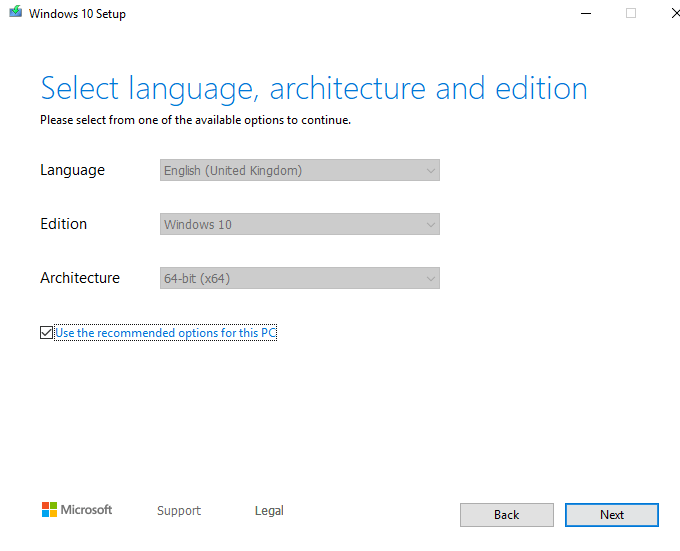
Remember, don’t choose a version of Windows that you don’t have a valid license key for!
Now confirm that you want a USB option and not an ISO file.
Click on the USB stick you want to install it on. If you don’t see it in the list, click the “refresh drive list” link.
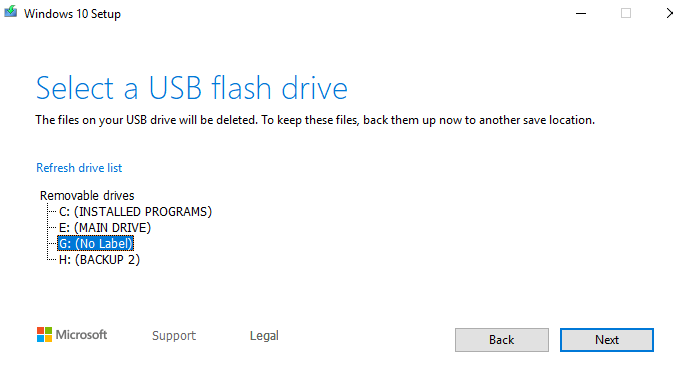
Take extreme caution that you pick the right USB device. I almost chose my backup portable hard-disk which would have been a catastrophe.
Now Sit Back & Wait….
Your installer program will now start to be transferred to the USB stick. As the progress screen will say, you can continue to use your PC while you wait. But my experience was that the PC slowed down quite a bit when making the installer.
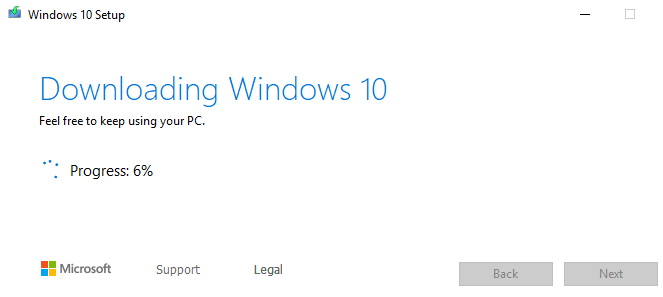
Either way, it took about 15 minutes for it to complete.
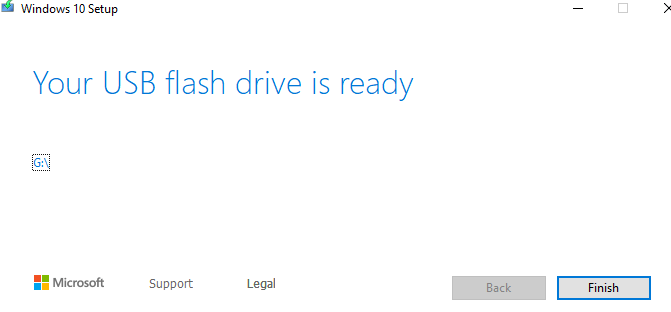
What The USB Stick Now Looks Like
Now when you click the USB stick in Windows Explorer, this is what you will see.

The only file you need to concern yourself with is the “setup.exe” file. When you click on that, it will open up a Windows installation window, after which you will be prompted for your license key.
Mark O’Neill is a British award-winning fiction author now living in Würzburg, Germany. He is the creator of the acclaimed Department 89 spy thriller series and the Scorpion novels. Read Mark’s Full Bio


