- Custom Window Frame Using DWM
- Introduction
- Extending the Client Frame
- Removing the Standard Frame
- Drawing in the Extended Frame Window
- Enabling Hit Testing for the Custom Frame
- Appendix A: Sample Window Procedure
- Appendix B: Painting the Caption Title
- Appendix C: HitTestNCA Function
- Window Frames
- Design concepts
- Glass window frames
- Hidden frames
- Custom frames
- Guidelines
- Window frames
- Full screen mode
- Glass
Custom Window Frame Using DWM
This topic demonstrates how to use the Desktop Window Manager (DWM) APIs to create custom window frames for your application.
Introduction
In WindowsВ Vista and later, the appearance of the non-client areas of application windows (the title bar, icon, window border, and caption buttons) is controlled by the DWM. Using the DWM APIs, you can change the way the DWM renders a window’s frame.
One feature of the DWM APIs is the ability to extend the application frame into the client area. This enables you to integrate a client UI element—such as a toolbar—into the frame, giving the UI controls a more prominent place in the application UI. For example, Windows Internet Explorer 7 on Windows Vista integrates the navigation bar into the window frame by extending the top of the frame as shown in the following screen shot.

The ability to extend the window frame also enables you to create custom frames while maintaining the window’s look and feel. For example, Microsoft Office Word 2007 draws the Office button and the Quick Access toolbar inside the custom frame while providing the standard Minimize, Maximize, and Close caption buttons, as shown in the following screen shot.

Extending the Client Frame
The functionality to extend the frame into the client area is exposed by the DwmExtendFrameIntoClientArea function. To extend the frame, pass the handle of the target window together with the margin inset values to DwmExtendFrameIntoClientArea. The margin inset values determine how far to extend the frame on the four sides of the window.
The following code demonstrates the use of DwmExtendFrameIntoClientArea to extend the frame.
Note that the frame extension is done within the WM_ACTIVATE message rather than the WM_CREATE message. This ensures that frame extension is handled properly when the window is at its default size and when it is maximized.
The following image shows a standard window frame (on the left) and the same window frame extended (on the right). The frame is extended using the previous code example and the default Microsoft Visual Studio WNDCLASS/WNDCLASSEX background (COLOR_WINDOW +1).

The visual difference between these two windows is very subtle. The only difference between the two is that the thin black line border of the client region in the window on the left is missing from the window on the right. The reason for this missing border is that it is incorporated into the extended frame, but the rest of the client area is not. For the extended frames to be visible, the regions underlying each of the extended frame’s sides must have pixel data with an alpha value of 0. The black border around the client region has pixel data in which all color values (red, green, blue, and alpha) are set to 0. The rest of the background does not have the alpha value set to 0, so the rest of the extended frame is not visible.
The easiest way to ensure that the extended frames are visible is to paint the entire client region black. To accomplish this, initialize the hbrBackground member of your WNDCLASS or WNDCLASSEX structure to the handle of the stock BLACK_BRUSH. The following image shows the same standard frame (left) and extended frame (right) shown previously. This time, however, hbrBackground is set to the BLACK_BRUSH handle obtained from the GetStockObject function.

Removing the Standard Frame
After you have extended the frame of your application and made it visible, you can remove the standard frame. Removing the standard frame enables you to control the width of each side of the frame rather than simply extending the standard frame.
To remove the standard window frame, you must handle the WM_NCCALCSIZE message, specifically when its wParam value is TRUE and the return value is 0. By doing so, your application uses the entire window region as the client area, removing the standard frame.
The results of handling the WM_NCCALCSIZE message are not visible until the client region needs to be resized. Until that time, the initial view of the window appears with the standard frame and extended borders. To overcome this, you must either resize your window or perform an action that initiates a WM_NCCALCSIZE message at the time of window creation. This can be accomplished by using the SetWindowPos function to move your window and resize it. The following code demonstrates a call to SetWindowPos that forces a WM_NCCALCSIZE message to be sent using the current window rectangle attributes and the SWP_FRAMECHANGED flag.
The following image shows the standard frame (left) and the newly extended frame without the standard frame (right).

Drawing in the Extended Frame Window
By removing the standard frame, you lose the automatic drawing of the application icon and title. To add these back to your application, you must draw them yourself. To do this, first look at the change that has occurred to your client area.
With the removal of the standard frame, your client area now consists of the entire window, including the extended frame. This includes the region where the caption buttons are drawn. In the following side-by-side comparison, the client area for both the standard frame and the custom extended frame is highlighted in red. The client area for the standard frame window (left) is the black region. On the extended frame window (right), the client area is the entire window.

Because the entire window is your client area, you can simply draw what you want in the extended frame. To add a title to your application, just draw text in the appropriate region. The following image shows themed text drawn on the custom caption frame. The title is drawn using the DrawThemeTextEx function. To view the code that paints the title, see Appendix B: Painting the Caption Title.

When drawing in your custom frame, be careful when placing UI controls. Because the entire window is your client region, you must adjust your UI control placement for each frame width if you do not want them to appear on or in the extended frame.
Enabling Hit Testing for the Custom Frame
A side effect of removing the standard frame is the loss of the default resizing and moving behavior. For your application to properly emulate standard window behavior, you will need to implement logic to handle caption button hit testing and frame resizing/moving.
For caption button hit testing, DWM provides the DwmDefWindowProc function. To properly hit test the caption buttons in custom frame scenarios, messages should first be passed to DwmDefWindowProc for handling. DwmDefWindowProc returns TRUE if a message is handled and FALSE if it is not. If the message is not handled by DwmDefWindowProc, your application should handle the message itself or pass the message onto DefWindowProc.
For frame resizing and moving, your application must provide the hit testing logic and handle frame hit test messages. Frame hit test messages are sent to you through the WM_NCHITTEST message, even if your application creates a custom frame without the standard frame. The following code demonstrates handling the WM_NCHITTEST message when DwmDefWindowProc does not handle it. To see the code of the called HitTestNCA function, see Appendix C: HitTestNCA Function.
Appendix A: Sample Window Procedure
The following code sample demonstrates a window procedure and its supporting worker functions used to create a custom frame application.
Appendix B: Painting the Caption Title
The following code demonstrates how to paint a caption title on the extended frame. This function must be called from within the BeginPaint and EndPaint calls.
Appendix C: HitTestNCA Function
The following code shows the HitTestNCA function used in Enabling Hit Testing for the Custom Frame. This function handles the hit testing logic for the WM_NCHITTEST when DwmDefWindowProc does not handle the message.
Window Frames
This design guide was created for Windows 7 and has not been updated for newer versions of Windows. Much of the guidance still applies in principle, but the presentation and examples do not reflect our current design guidance.
Most programs should use standard window frames. Immersive applications can have a full screen mode that hides the window frame. Consider using glass strategically for a simpler, lighter, more cohesive look.
With a window frame, users can manipulate a window and view the title and icon to identify its contents.
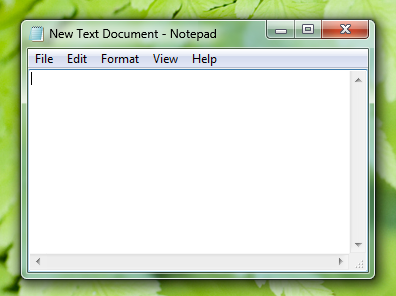
A typical window frame.
Note: Guidelines related to window management and branding are presented in separate articles.
Design concepts
Glass window frames
The glass window frames are a striking new aspect of the Microsoft Windows aesthetic, aiming to be both attractive and lightweight. These translucent frames give windows an open, less intrusive appearance, helping users focus on content and functionality rather than the interface surrounding it.
Glass window frames.
You can use glass strategically in small regions within a window that touch the window frame. Such regions appear to be part of the window frame, even though technically they are part of the window’s client area.
In this example, glass is used in the client area to make it look like part of the frame.
Hidden frames
Sometimes the best window frame is no frame at all. This is often the case for the primary window of immersive full screen applications that aren’t used in conjunction with other programs, such as media players, games, and kiosk applications.
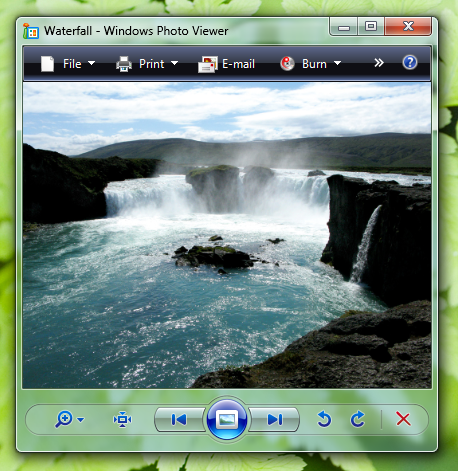
Content viewers often benefit from having the option to show content full screen. Examples include Windows Internet Explorer , Windows Live Photo Gallery, Windows Movie Maker HD, Microsoft PowerPoint , and Microsoft Word.

In this example, Windows Media Player can display its content full screen.
Custom frames
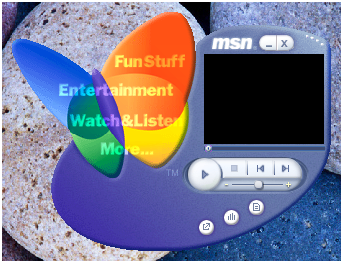
Most Windows applications should use the standard window frames. However, for immersive, full screen, stand-alone applications like games and kiosk applications, it may be appropriate to use custom frames for any windows that aren’t shown full screen. The motivation to use custom frames should be to give the overall experience a unique feel, not just for branding.
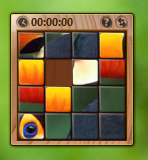
Custom frames are appropriate for immersive, full screen, stand-alone applications such as games.
Guidelines
Window frames
Use standard window frames.
- Exception: To give immersive full screen, stand-alone applications a unique feel:
- Have a modal full screen command in the menu bar or toolbar. When the user clicks the command, show the command in its cleared state.
- Use F11 for the full screen shortcut key. If not already assigned, Esc can also be used for this purpose.
Consider hiding the window frame of the primary window.
Consider using custom frames for secondary window.
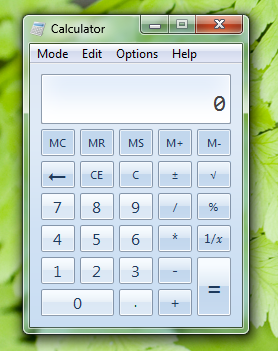
If a custom frame is appropriate, choose a design that is lightweight and doesn’t draw too much attention to itself.
Incorrect:
In this example, the custom frame draws too much attention to itself.
Don’t add controls to a window frame. Put the controls within the window instead.
Incorrect:

Correct:

In the correct example, the control is within the client area instead of the window frame.
Full screen mode
For programs that have an optional full screen mode, to enable full screen mode:
Have a modal full screen command in the menu bar or toolbar. When the user clicks the command, show the command in its selected state.
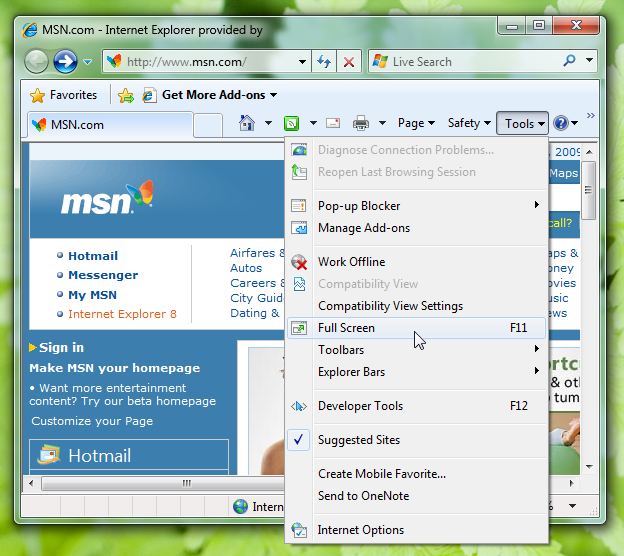
This example shows the full screen command along with its standard shortcut key.
Use F11 for the full screen shortcut key.
If there is a toolbar and full screen mode is commonly used, also have a graphic toolbar button with a Full screen tooltip.

Examples of full screen toolbar buttons.
To revert back from full screen mode:
Glass
Standard window frames use glass automatically in Windows, but you can also use glass in regions that touch the window frame.
- Consider using glass strategically in small regions touching the window frame without text. Doing so can give a program a simpler, lighter, more cohesive look by making the region appear to be part of the frame.

- In this example, glass focuses the user’s attention on the content instead of the controls.
- Don’t use glass in situations where a plain window background would be more attractive or easier to use.
Correct:
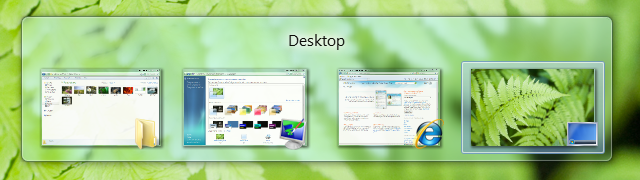
In this example, glass is used to give the Alt+Tab window a lightweight appearance. Glass works for this window because it consists of graphics and a single, strong text label.
Incorrect:
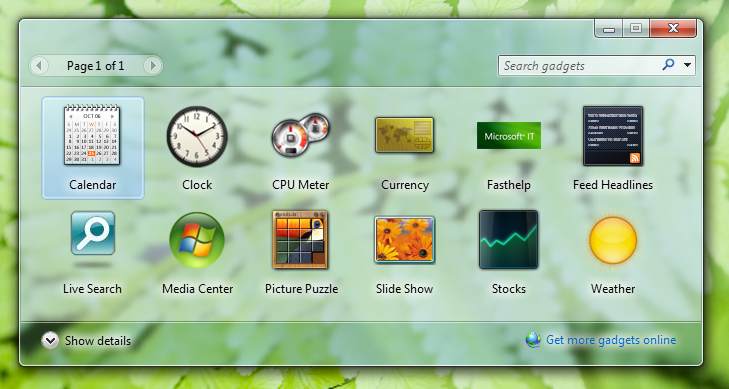
In this incorrect example, the use of glass is distracting. A plain window background would be a better choice.


