- Как открыть устройства и принтеры в Windows 10
- Инструкция по открытию системного окна «Устройства и принтеры» в Windows 10
- Видеоинструкция
- FIX: Devices and Printers won’t open in Windows 10
- Devices and Printers won’t load in Windows 10
- 1. Check the Bluetooth and Print Spooler Services are Enabled
- 2. Run a System File Scan
- 3. Register DLLs
- Device experience scenarios for document devices
- Document devices in Devices and Printers
- Device experience in Devices and Printers
- Device Stage custom experience
- Add Devices and Printers To This PC in Windows 10
- How to Add Devices and Printers to This PC in Windows 10
- Add Devices and Printers to This PC under Folders
- About Sergey Tkachenko
Как открыть устройства и принтеры в Windows 10
Приветствую!
Если в предыдущих версиях Windows добраться до системного окна «Устройства и принтеры» можно было интуитивно быстро, благо его пункт находился в меню Пуск, то в Windows 10 разработчики усложнили данную процедуру. Складывается впечатление, что разработчики поступательно усложняют доступ к некогда привычным системным элементам, в угоду их урезанным собратьям, в которых представлены далеко не все возможности, что можно посмотреть, настроить или использовать в операционной системе Windows.
Но мы оставим это на совести текущего руководства в Microsoft, что курирует разработку Windows 10. В нашу же задачу входит информирование о том, как всё-таки открыть весьма актуальное для многих пользователей окно «Устройства и принтеры», в котором не только представлены подключенные к компьютеру устройства, но и имеется возможность настройки и управления некоторыми из них.
Инструкция по открытию системного окна «Устройства и принтеры» в Windows 10
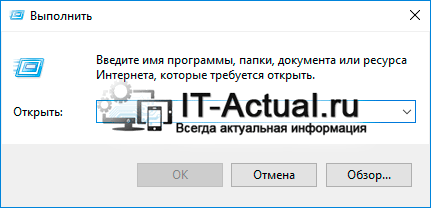
- Мы рассмотрим открытие необходимого нам окна через системную команду. Сама команда вводится в специальное окно «Выполнить», которое можно вызвать через соответствующий пункт в общем списке приложений, в папке Служебные – Windows, или же просто нажав на клавиатуре комбинацию клавиш Win + R (как её нажать).
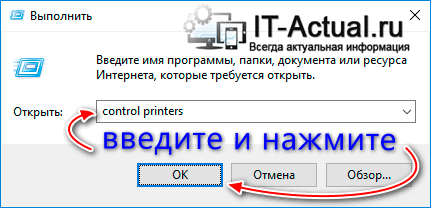
Далее следует в окне, которое было вызвано на предыдущем шаге, вписать короткую команду:
И нажать по клавише OK (или Enter на клавиатуре).
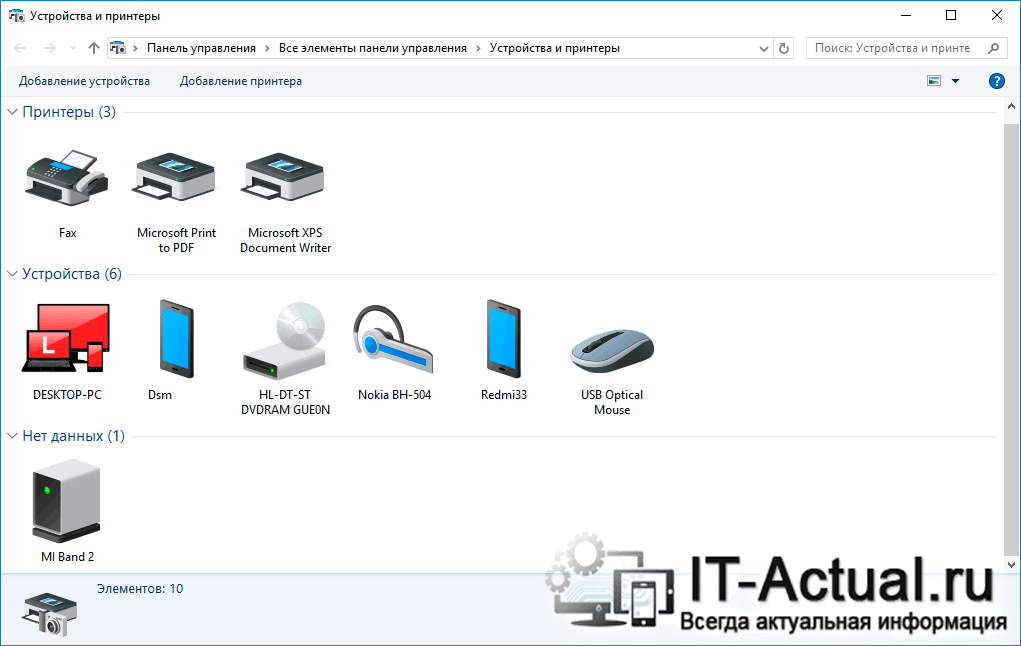
Команда будет тут же отработана, и вы увидите желанное окно «Устройства и принтеры» в Виндовс 10, в котором вы уже непосредственно сможете просмотреть подключенные к вашему компьютеру устройства и при желании произвести необходимые дополнительные манипуляции.
Видеоинструкция
Всего пару описанных шагов достаточно для того, чтобы открыть важный системный элемент, в котором отображаются как подключенные принтеры, так и любые другие устройства: телефоны, смартфоны, клавиатуры, мышки, приводы, гарнитуры и так далее.
Если же вам достаточно часто необходимо обращаться к данному окну, то имеет смысл создать на рабочем столе соответствующий ярлык, дабы максимально оперативно осуществлять его открытие. Более подробно о данной возможности вы сможете узнать из материала «Как создать ярлык с нужной командой в Windows».
В свою очередь, Вы тоже можете нам очень помочь.
Просто поделитесь статьей в социальных сетях и мессенджерах с друзьями.
Поделившись результатами труда автора, вы окажете неоценимую помощь как ему самому, так и сайту в целом. Спасибо!
FIX: Devices and Printers won’t open in Windows 10

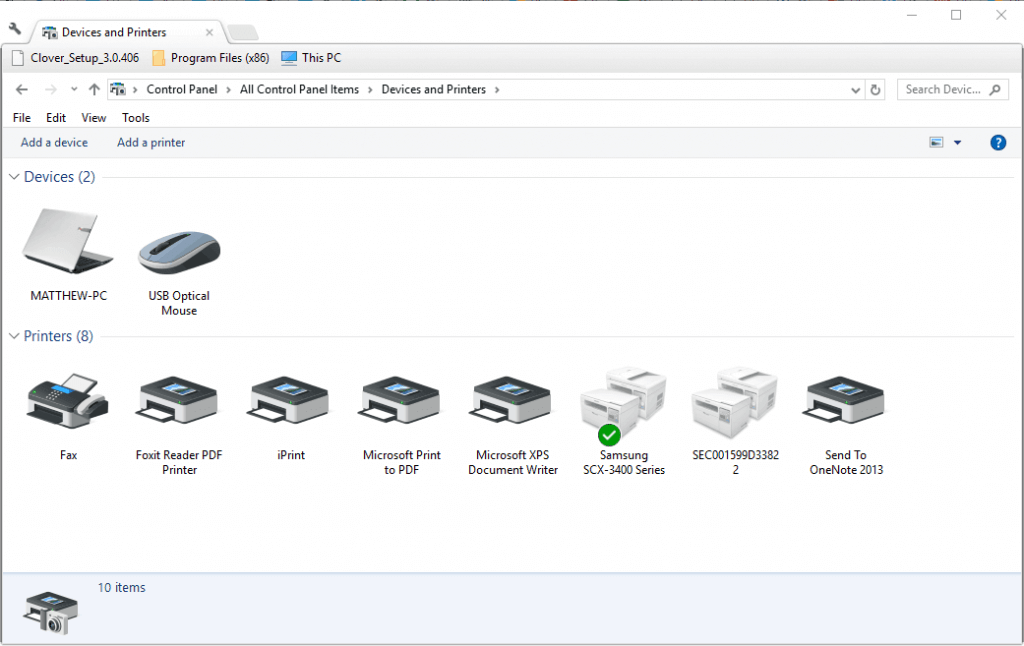
Devices and Printers usually displays printers and other devices within the Control Panel as shown directly below. However, some users have stated that the Devices and Printers applet is blank and doesn’t display any devices when they open the Control Panel. Is Devices and Printers also blank when you open it in Windows? If so, here are a few resolutions that might fix the Devices and Printers Control Panel applet.
Devices and Printers won’t load in Windows 10
1. Check the Bluetooth and Print Spooler Services are Enabled
Many users have confirmed that enabling Bluetooth fixes blank Devices and Printers applets. So check Bluetooth services are enabled. This is how you can switch the Bluetooth services on in Windows 10.
- Open the Run accessory by pressing the Windows key + R keyboard shortcut.
- Enter ‘services.msc’ in the Open text box, and press the OK button.

- Double-click Bluetooth Support Service to open its properties window shown below.

- Select Automatic on the Startup type drop-down menu.
- Press the Start button if the service is stopped.
- Click Apply and OK to confirm settings and close the window.
- Repeat the steps above for all other Bluetooth services on the Services window, such as Bluetooth User Support, Bluetooth Audio Gateway, etc.
- In addition, check the Print Spooler is on by double-clicking Printer Spooler on the Services window.
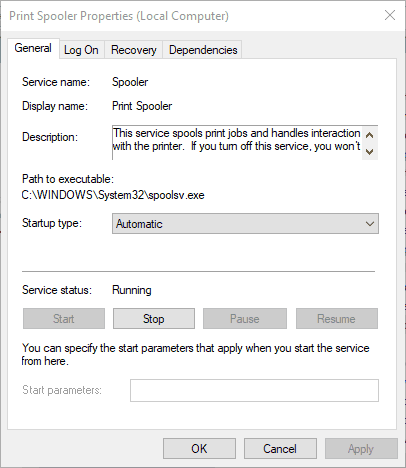
- Click the Startup type drop-down menu and select Automatic.
- Press the Start button to turn on the Printer Spooler.
- Press the Apply and OK buttons.
2. Run a System File Scan
The Devices and Printers applet might not open if there are corrupted or interrupted files. You can repair corrupted files with the System File Checker utility in Windows. This is how you can scan with the SFC in Windows 10.
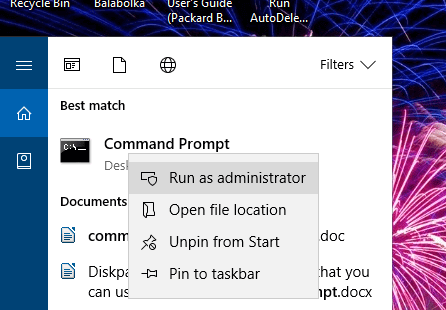
- Open Cortana’s search box by pressing its Type here to search button.
- Enter ‘Command Prompt’ in the search box. Then right-click Command Prompt and select Run as administrator to open its window.
- Firstly, enter ‘DISM.exe /Online /Cleanup-image /Restorehealth’ in the Prompt and press Return.
- Then enter ‘sfc /scannow’ in the Command Prompt and press Return to run a system file scan that will take up to half an hour.
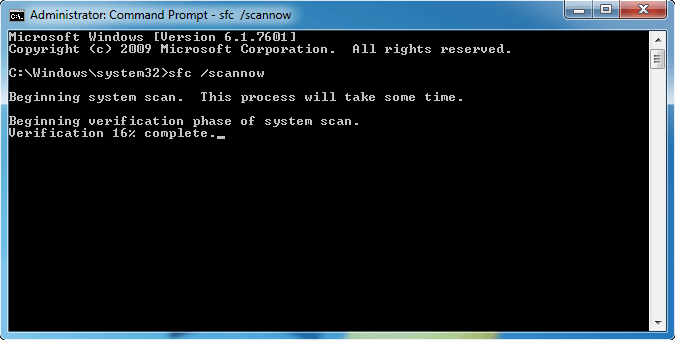
- After the SFC scan, the Command Prompt window might state, “Windows Resource Protection found corrupt files and successfully repaired them.” If so, restart your desktop or laptop.
3. Register DLLs
A blank Devices and Printers applet might be due to missing DLLs. Registering DLLs is a resolution that some users have confirmed can fix Devices and Printers. This is how you can register DLLs with the Command Prompt.
- Press the Windows key + X to open the menu below.
Device experience scenarios for document devices
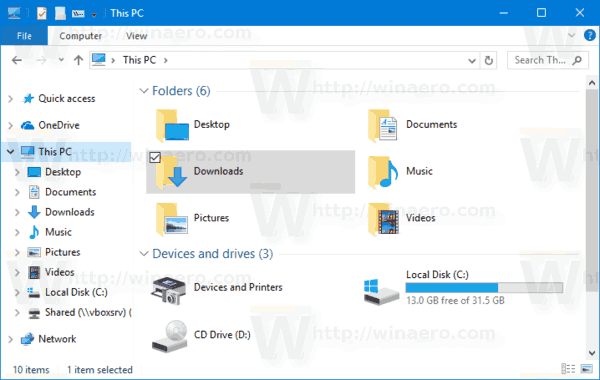
The Devices and Printers folder shows devices that are connected to a computer, including the document devices.
The following screenshot shows a typical Devices and Printers folder.

When you select a device in Devices and Printers, Device Stage shows the details for that device. The following screenshot shows Device Stage.

Document devices in Devices and Printers
The Devices and Printers folder includes the following items:
- Locally connected printers
- Networked printers connected through TCP/IP
- Point and Print connections
- HTTP-connected printers
- Printer connections redirected through the Remote Desktop Connection tool
- Virtual printers (including Microsoft Shared Fax and Microsoft XPS Document Writer)
All scanners installed with a Windows Image Acquisition (WIA) driver appear in the Devices and Printers view. Only scanners that are connected by Plug and Play or PnP-X appear in this view.
Multifunction printers (MFPs) that connect to the computer by Plug and Play or PnP-X will appear in the Devices and Printers view as a single, composite device instead of as separate printer and scanner devices. Network MFPs that connect to a computer by using TCP/IP only are recognized as separate print and scan devices. The manufacturer can still provide a custom device experience that includes custom icons and a Device Stage page, but the Devices and Printers view displays the printer and scanner functions in the MFP as separate devices.
An MFP appears in the Devices and Printers view only if both the printer and scanner functions in the MFP are installed. If only the printer function is installed, this function appears in the view as a standalone printer. If only the scanner function is installed, this function appears as a standalone scanner.
The Devices and Printers user interface treats the fax queues that the Microsoft Shared Fax driver creates as print queues. All shortcut menus and command bar menus that are available for print queues are available for these queues.
If partner fax drivers appear as printers in the spooler, the Devices and Printers user interface treats them as print queues. The interface provides printer shortcut menus, command bar menus, and generic printer icons for them.
If an MFP has a fax queue that enumerates as a print queue, it will appear as part of the MFP.
If an MFP has a fax function that does not enumerate as a print queue, the Devices and Printers user interface can identify the fax function as part of the MFP only if a device container ID for the fax functional device instance can be found. Manufacturers must provide custom metadata to specify the tasks for such fax devices. For more information about container IDs, see Identifying device functions in MFPs.
Device manufacturers can author Device Stage for printers, scanners, and MFPs. Both locally attached printers (such as a printer that has a USB connection) and network-connected printers can have customized device experiences.
Device experience in Devices and Printers
If a manufacturer does not supply a custom Device Stage metadata package for a printer, scanner, or MFP device, all printers and scanners will still appear in the Devices and Printers view. The Devices and Printers user interface provides a default device experience for the device. The default device experience does not include a Device Stage page for the device.
As shown in the following figure, the device icon and the shortcut menu that appears when the user right-clicks a device in the Devices and Printers view are different for devices that have customized device experiences versus devices that have default device experiences. In this example, the device is a locally connected MFP.

For the default experience, shown on the left side of the figure, the device is represented by a generic printer icon. For the customized experience, shown on the right side of the figure, the device is represented by a custom icon that the manufacturer supplies.
For the customized experience, the default action in the shortcut menu is Open. Selecting Open opens the Device Stage page. Open in new window opens Device Stage in a new window.
For the default experience, the device has no associated Device Stage page, and the shortcut menu does not contain an Open option. Selecting the See what’s printing option opens the print queue.
Device Stage custom experience
With Device Stage, manufacturers can easily extend their product and corporate brands to the desktop. The following screenshot shows a typical branded Device Stage custom experience.

Manufacturers customize the device experience. They can include their own tasks (start applications, download software, access product manuals, update firmware, buy accessories), include a wide range of device statuses, and update the experience at any time to reflect their most current offerings.
Device Stage experiences can be created for specific models of a device. Depending on your product strategy, you can opt to create a general device experience for a whole line of devices or modify each experience down to the color of each device model.
Device Stage experiences are distributed through Microsoft servers to Windows clients in device metadata packages. Any updates to the custom device experience will be available on Microsoft servers, downloaded to Windows if found, and installed automatically. If the user is using Device Stage at the time, the interface will offer an option to upgrade immediately. Otherwise, the update will be applied the next time Device Stage is used.
Device Stage experiences can also be distributed with a manufacturer’s setup applications.
Add Devices and Printers To This PC in Windows 10
Devices and Printers is a special system folder which shows the important devices connected to your computer with fancy icons. This folder was first introduced in Windows 7. Windows 10 comes with this folder in the classic Control Panel.
For fast access to this useful folder, you might want to add it to This PC. It will appear under Drives and devices or under Folders, depending on what you need. You need to sign in as Administrator before proceeding.
How to Add Devices and Printers to This PC in Windows 10
Firstly, let’s see how to make the folder appear under Drives and devices.
To add Devices and printers to This PC in Windows 10, do the following.
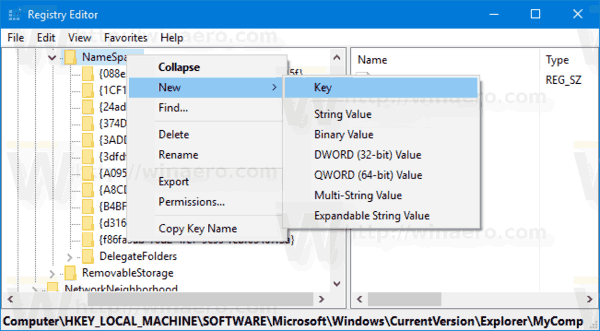
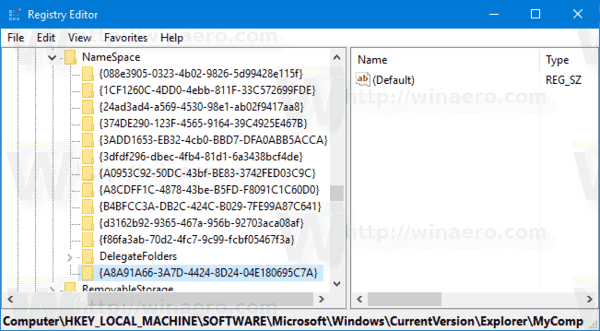
- Open the Registry Editor app.
- Go to the following Registry key.
See how to go to a Registry key with one click.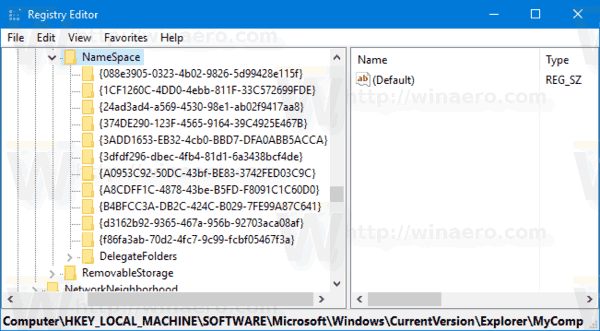
Before: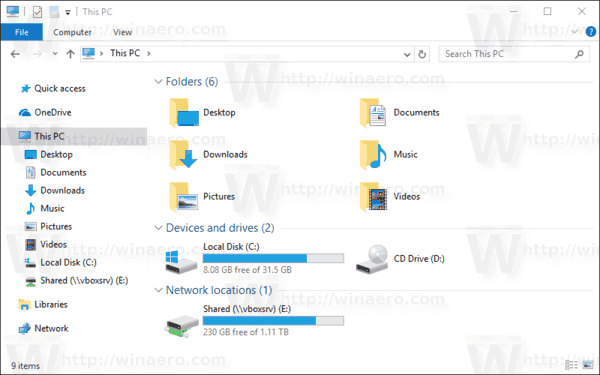
After:
To save your time, you can use the following ready-to-use Registry files:
The undo tweak is included.
Add Devices and Printers to This PC under Folders
To add Devices and printers to This PC in Windows 10 under Folders, do the following.
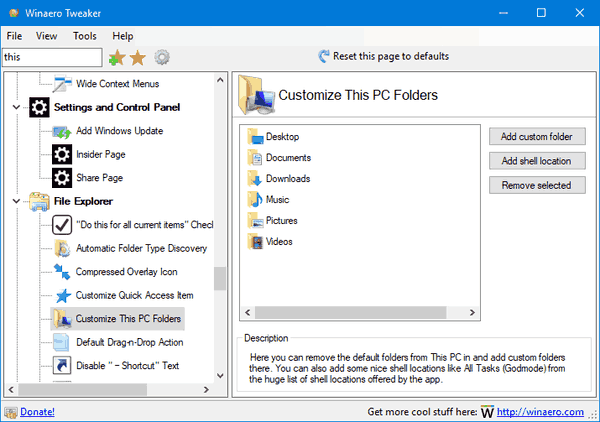
- Download Winaero Tweaker.
- Run the app and go to File Explorer — Customize This PC Folders. It looks as follows.

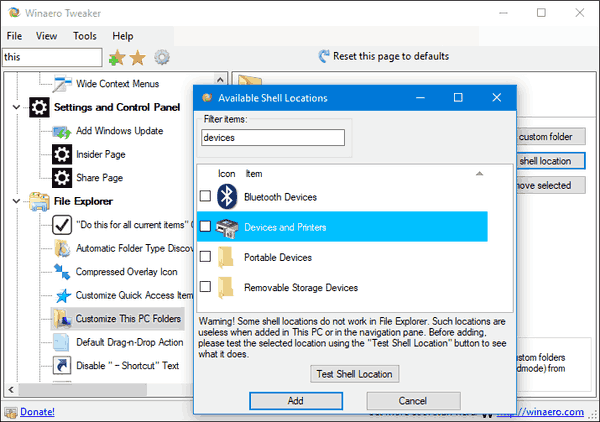
- Click the button Add Shell Location.
- In the next dialog, look for the item Devices and Printers in the list. Select it and click the Add button.
The result will be as follows: 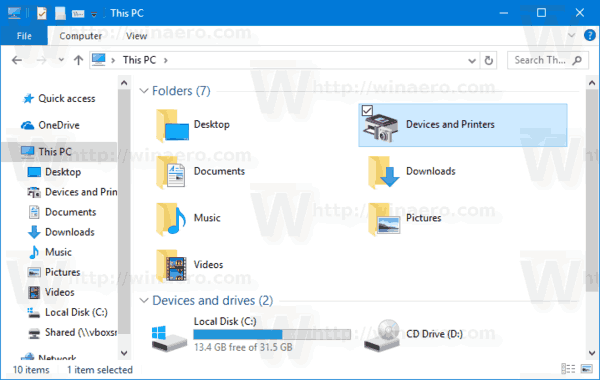
Winaero greatly relies on your support. You can help the site keep bringing you interesting and useful content and software by using these options:
Share this post
About Sergey Tkachenko
Sergey Tkachenko is a software developer from Russia who started Winaero back in 2011. On this blog, Sergey is writing about everything connected to Microsoft, Windows and popular software. Follow him on Telegram, Twitter, and YouTube.


