- What to do if Adaptive Brightness won’t turn off in Windows 10
- How to turn off Adaptive brightness in Windows 10?
- 1. Check the Power settings
- 2. Disable related options in GPU settings
- 3. Use a command prompt
- 4. Update GPU drivers
- 5. Disable Adaptive brightness in the Registry
- 6. Run Power troubleshooter
- 7. Reset your PC to factory settings
- How to disable adaptive brightness by default
- Replies (10)
- How to Disable Adaptive Brightness in Windows 10
- How do I turn off «adaptive brightness?»
- Replies (10)
What to do if Adaptive Brightness won’t turn off in Windows 10


Adaptive brightness is a power-saving feature available on some machines and it either uses the ambient sensor or the background content to dim or increase the display brightness. However, many users don’t want this option changing erratically the brightness level.
Of course, in theory, you can disable it with no more than a few clicks. However, in practice, numerous users weren’t able to turn off Adaptive brightness on Windows 10.
Because of the problem’s gravity, we enlisted some advanced solutions for the problem below. If you’re unable to turn off adaptive brightness on your Windows 10 PC or laptop, make sure to check them out.
How to turn off Adaptive brightness in Windows 10?
- Check the Power settings
- Disable related options in GPU settings
- Use a command prompt
- Update GPU drivers
- Disable Adaptive brightness in the Registry
- Run Power troubleshooter
- Reset your PC to factory settings
1. Check the Power settings
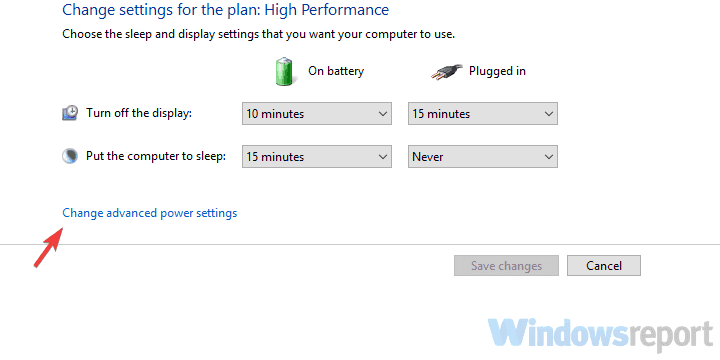
If you’re having this issue for some time, you’ve probably tried disabling Adaptive brightness in Advanced power settings. However, just for the sake of troubleshooting, let’s check this section again. An update might have changed your settings to default values. If you’re sure that it’s disabled, move to additional steps.
On the other hand, if you’re unsure, here’s how to confirm the Adaptive brightness feature is disabled:
- Right-click on the Battery icon in the notification area and open Power Options.
- Under your current plan, click Change plan settings.

- Expand the Display.
- Expand Enable adaptive brightness.
- Turn the setting off.
- READ ALSO: Add a Switch Power Plan Option to Desktop in Windows 10
2. Disable related options in GPU settings
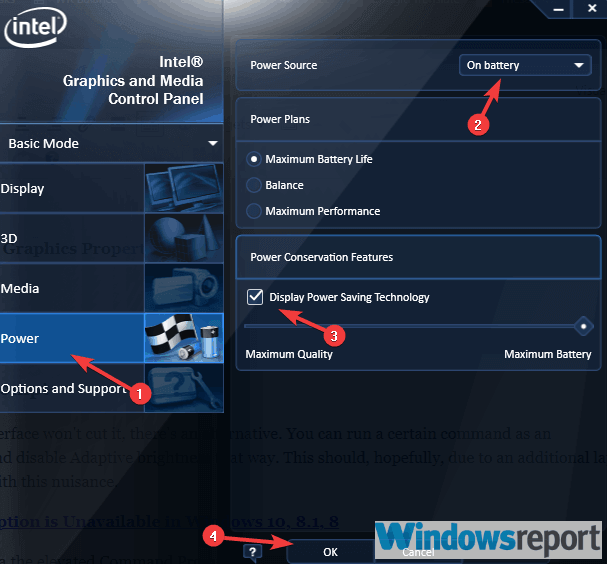
If native options won’t allow you to turn off the Adaptive brightness feature, there are some options you can turn off in GPU settings. This applies to all GPUs, especially Intel’s Display Power Saving Technology and AMD’s Vari-Bright. Both features seemingly enforce the Adaptive brightness based on the background in order to preserve the battery power.
Here’s where to look and what to disable:
AMD
- Right-click on the desktop and open AMD Radeon settings.
- Open Preferences.
- Choose Radeon Additional settings.
- Expand the Power section.
- Select Power Play.
- Uncheck the “Enable Vari-Bright” box.
Intel
- Right-click on the desktop and open Graphics Properties.
- Select the Basic mode.
- Choose Power.
- Select “On battery“.
- Uncheck the “Display Power Saving Technology” box and confirm changes.
3. Use a command prompt
If the standard way through the Users Interface won’t cut it, there’s an alternative. You can run a certain command as an administrator in the Command Prompt and disable Adaptive brightness that way. This should, hopefully, due to an additional layer of administrative access, allow you to deal with this nuisance.
Here’s how to turn Adaptive Brightness via the elevated Command Prompt:
-
- Right-click on Start and open Command Prompt (Admin).
- In the command line, copy and paste the following line and press enter:
- powercfg -restoredefaultschemes
- Close Command Prompt and follow the instructions from the first step to disable Adaptive brightness.
- READ ALSO: Fix: Brightness Option is Unavailable in Windows 10, 8.1, 8
4. Update GPU drivers
Some users have found the resolution in updating GPU drivers. Outdated or generic drivers provided by Windows Update are prone to invoking all kinds of issues. The best solution for this is to download drivers from an official source. You need to look up for your model on the official OEM’s website and get them from there. Once you’ve installed them, the issue with the Adaptive brightness should be dealt with for good.
Here’s where to find up-to-date drivers for your GPU:
In addition, consider updating your BIOS as well. Lot’s of older machines are manufactured and optimized to work with Window 7, so some features won’t work as intended on Windows 10. For that reason, make sure to flash your BIOS/UEFI and update it with the most recent update. We explained the whole procedure, here.
5. Disable Adaptive brightness in the Registry
Tweaking the Registry can be dangerous but the benefits of a knowledgeable approach are great. Whenever a certain system function won’t comply in a standard manner, disabling it in the Registry should do the job. This should be a permanent solution for your issue and a definite way to disable Adaptive brightness.
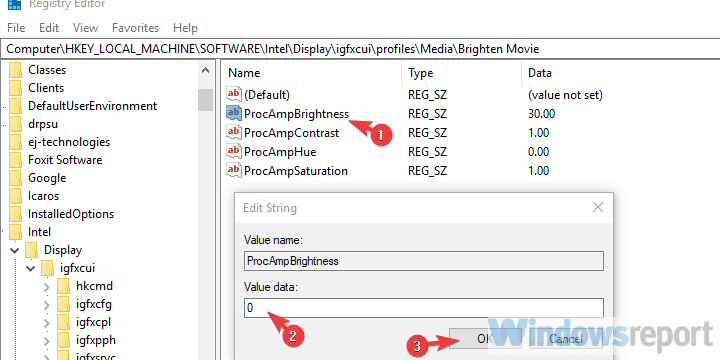
Follow these instructions to disable Adaptive brightness in Registry:
- Press Windows key + R to open the Run command line.
- Type regedit and press Enter.
- Go to HKEY_LOCAL_MACHINE\Software\Intel\Display\igfxcui\profiles\media\Brighten Movie.
- Right-click on the ProcAmpBrightness input and choose Modify.
- Change the value to 0 (zero) and confirm changes.
- Now, navigate to HKEY_LOCAL_MACHINE\Software\Intel\Display\igfxcui\profiles\media\Darken Movie and do the same for ProcAmpBrightness there (set its value to zero).
- Exit the Registry Editor and restart your PC.
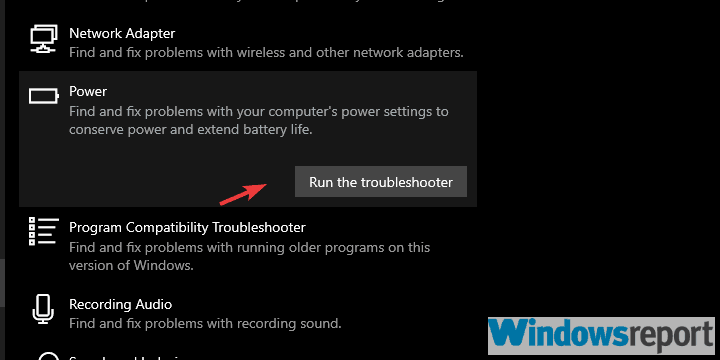
6. Run Power troubleshooter
This solution is a long shot, but while we’re at it, let’s give it a try. Windows 10 introduced a dedicated troubleshooting menu, covering all kinds of possible system issues. In there, you can find the Power troubleshooter which, as the name itself says, deals with all kinds of power-related issues, including the power-modes like Adaptive brightness.
Here’s how to run the Power troubleshooter:
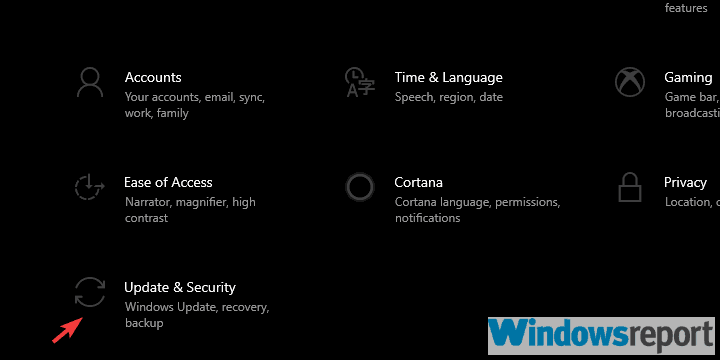
- Right-click Start and open Settings.
- Choose Update & Security.
- Select Troubleshoot from the left pane.
- Expand the Power troubleshooter and click Run the troubleshooter.
- READ ALSO: FIX: Windows 10 power plans are missing
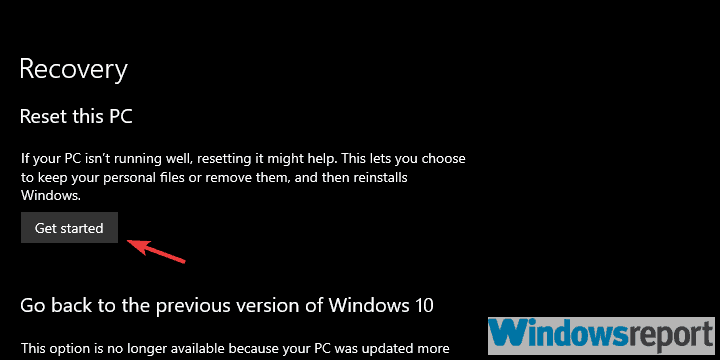
7. Reset your PC to factory settings
Finally, if the aforementioned steps haven’t helped you turn off Adaptive brightness, we suggest resetting your PC to factory settings. This is a recovery option available in Windows 10, and it allows users to keep their data while restoring the system state to default values. If that doesn’t help, we can only suggest clean reinstallation. Of which you can learn in detail, here.
This is how to reset your PC to factory settings:
- Press Windows key + I to open the Settings app.
- Choose Update & Security section.
- Select the Recovery from the left pane.
- Under the “Reset this PC” option, click Get started.
That’s it. Don’t forget to share your thought and post questions in the comments section below. We look forward to hearing from you.
RELATED STORIES YOU SHOULD CHECK OUT:
How to disable adaptive brightness by default
Replies (10)
If you’re unsuccessful on disabling the adaptive brightness on Settings, we advise disabling it manually using the Registry Editor. Before proceeding with the procedure, be sure to back up the registry for restoration in case problem occurs because serious issues might occur if we modify the registry incorrectly.
- Select the Start button.
- Type Regedit and then press Enter.
- Navigate to the paths below and then double-click ProcAmpBrightness.
- HKEY_LOCAL_MACHINE\Software\Intel\Display\igfxcui\profiles\media\Brighten Movie
- HKEY_LOCAL_MACHINE\Software\Intel\Display\igfxcui\profiles\media\Darken Movie
- Change the value to 0.
- Close Regedit and then restart your PC.
Please respond back with the results.
12 people found this reply helpful
Was this reply helpful?
Sorry this didn’t help.
Great! Thanks for your feedback.
How satisfied are you with this reply?
Thanks for your feedback, it helps us improve the site.
How satisfied are you with this reply?
Thanks for your feedback.
Was this reply helpful?
Sorry this didn’t help.
Great! Thanks for your feedback.
How satisfied are you with this reply?
Thanks for your feedback, it helps us improve the site.
How satisfied are you with this reply?
Thanks for your feedback.
Was this reply helpful?
Sorry this didn’t help.
Great! Thanks for your feedback.
How satisfied are you with this reply?
Thanks for your feedback, it helps us improve the site.
How satisfied are you with this reply?
Thanks for your feedback.
Since the Power Options wasn’t able to retain the settings you set, we suggest resetting it through Command Prompt.
- Select the Start button.
- Type CommandPrompt.
- Right-click CommandPrompt and then select Run as administrator.
- If prompted, select Yes or enter the administrator password.
- In the CommandPrompt window, type the command below and then press Enter.
- powercfg -restoredefaultschemes
- Close CommandPrompt.
- Restart your PC.
- Select the Start button.
- Type PowerOptions and then press Enter.
- Click Change plan settings >Change advanced power settings.
- Navigate to Display >Enable adaptive brightness.
- Set adaptive brightness to Off.
- Click OK to complete.
We’ll be waiting for your response.
2 people found this reply helpful
Was this reply helpful?
Sorry this didn’t help.
Great! Thanks for your feedback.
How satisfied are you with this reply?
Thanks for your feedback, it helps us improve the site.
How to Disable Adaptive Brightness in Windows 10
There many articles on «How to Disable Adaptive Brightness in Windows 10»
Control Panel -> Power Options -> Change plan settings -> Change advanced power settings -> Display -> Enable adaptive brightness.
But my Windows 10 doesn’t have an option «Enable adaptive brightness«.
Hi Wise
Greetings! I am Vijay, an Independent Advisor. I am here to work with you on this problem.
Yes, this has been taken off from Power Options in 1809. But there are other methods to enable / disable this.
How to Enable or Disable Adaptive Brightness in Windows 10 — https://www.tenforums.com/tutorials/70157-enabl.
Do let me know if you have any more question or require further help.
Disclaimer — This is a non-Microsoft website. The page appears to be providing accurate, safe information. Watch out for ads on the site that may advertise products frequently classified as a PUP (Potentially Unwanted Products). Thoroughly research any product advertised on the site before you decide to download and install it.
Best regards
Vijay A. Verma @ http://www.eforexcel.com/
Timezone: UTC+05:30, PST+12:30
Availability Hours (UTC) : 05:00 AM — 05:00 PM
10 people found this reply helpful
Was this reply helpful?
Sorry this didn’t help.
Great! Thanks for your feedback.
How satisfied are you with this reply?
Thanks for your feedback, it helps us improve the site.
How do I turn off «adaptive brightness?»
I recently installed Windows 7 Ultimate and now when I try to watch movies the screen dims. It doesn’t go dark, but within a minute after the movie begins, the screen dims, making it impossible to watch. This is the only time it happens. I went into the «power options» as suggested on MS website, but when I expand «Display,» there is no option to enable or disable «adaptive brightness.» It is obvious this function is working, but how can I disable it if I can’t locate it?
Thank you for any help you can offer,
Stephanie
Replies (10)
1 person found this reply helpful
Was this reply helpful?
Sorry this didn’t help.
Great! Thanks for your feedback.
How satisfied are you with this reply?
Thanks for your feedback, it helps us improve the site.
How satisfied are you with this reply?
Thanks for your feedback.
I looked through my monitor’s onscreen settings and couldn’t locate anything related to «adaptive brightness.» I owned the monitor prior to upgrading to W7, and when I purchased it I was running Vista Home Premium — for which it was certified compatible. I will call the manufacturer next week to see if they have any suggestions, but since this is a W7 feature, I suspect that it needs to be disabled in the OS. I would gladly go into the BIOS if necessary to disable this feature because it is not working as it was designed.
Thank you for the suggestion,
Stephanie
Was this reply helpful?
Sorry this didn’t help.
Great! Thanks for your feedback.
How satisfied are you with this reply?
Thanks for your feedback, it helps us improve the site.
How satisfied are you with this reply?
Thanks for your feedback.
3 people found this reply helpful
Was this reply helpful?
Sorry this didn’t help.
Great! Thanks for your feedback.
How satisfied are you with this reply?
Thanks for your feedback, it helps us improve the site.
How satisfied are you with this reply?
Thanks for your feedback.
There is no option that says «Dim the display.» In fact, I have W7 on my netbook and also did not find this option anywhere under the power settings. How bizarre is that? BTW, I’m fairly tech savvy so this has been very frustrating for me (can you tell?).
However, I believe I may have solved the problem this way (fingers crossed): I went in to the advanced settings and noticed that there were 3 power options: «Balanced» (the default setting), «High Performance,» and «Power saver.» Under each of these, the «Multimedia settings» has 3 choices: Optimize video quality, Balanced, and Optimize power savings — the last one was the default setting. I changed the last option to «Optimize video quality,» watched a few minutes of «The Fall» (awesome film), and the display did not dim. Hopefully, if anyone else has this problem they may find this tidbit of info useful.
Thank you all for your efforts in helping me to find a solution.
Kindest regards,
Stephanie
1 person found this reply helpful
Was this reply helpful?
Sorry this didn’t help.
Great! Thanks for your feedback.
How satisfied are you with this reply?
Thanks for your feedback, it helps us improve the site.
How satisfied are you with this reply?
Thanks for your feedback.
It is possible to disable the service if you are still interested in this. Additionally, you can also change a few settings in the power management to make it stop dimming. For the first, typeservices.msc into the search box then hit enter (or hit Windowskey + r and typeservices.msc if the first way doesn’t work). Then, you should see as one of the first options in the list that pops up the Adaptive Brightness service. Clicking on it gives you the option to start and stop it. Right clicking, then clicking properties will show you a «startup type» option where you can disable it from the dropdown list.
Alternatively, you can click the battery meter, choose «more power options» and find the plan you wish to use (If I understand you correctly, you are using the high performance mode). Click on ‘change plan settings» and click «change advanced power settings,» then scroll down to «display.» You can change the «dim display after» setting to be whatever you want.
Just a quick note, unless your computer has a light sensor, you can’t actually use the Adaptive Brightness service.
I think your solution may work, as I have changed my settings so that is the default when I am plugged in only and I don’t experience the problem. I’d would recommend that if you stick to your solution, you change it (similar to my second solution) when using only battery power or you can watch your battery life drop fairly noticeably.
6 people found this reply helpful
Was this reply helpful?
Sorry this didn’t help.
Great! Thanks for your feedback.
How satisfied are you with this reply?
Thanks for your feedback, it helps us improve the site.
How satisfied are you with this reply?
Thanks for your feedback.
![]()
It is possible to disable the service if you are still interested in this. Additionally, you can also change a few settings in the power management to make it stop dimming. For the first, typeservices.msc into the search box then hit enter (or hit Windowskey + r and typeservices.msc if the first way doesn’t work). Then, you should see as one of the first options in the list that pops up the Adaptive Brightness service. Clicking on it gives you the option to start and stop it. Right clicking, then clicking properties will show you a «startup type» option where you can disable it from the dropdown list.
Alternatively, you can click the battery meter, choose «more power options» and find the plan you wish to use (If I understand you correctly, you are using the high performance mode). Click on ‘change plan settings» and click «change advanced power settings,» then scroll down to «display.» You can change the «dim display after» setting to be whatever you want.
Just a quick note, unless your computer has a light sensor, you can’t actually use the Adaptive Brightness service.
I think your solution may work, as I have changed my settings so that is the default when I am plugged in only and I don’t experience the problem. I’d would recommend that if you stick to your solution, you change it (similar to my second solution) when using only battery power or you can watch your battery life drop fairly noticeably.


