- Отключение CHKDSK при старте компьютера на Windows 7
- Выключаем CHKDSK в Windows 7
- Способ 1: «Командная строка»
- Способ 2: Правка системного реестра
- Способ 3: Удаление обновления KB2823324 (пользователи Kaspersky AntiVirus)
- Решение некоторых проблем
- Заключение
- How to disable the CHKDSK — Check Disk, on start up for Windows 7
- ‘Disk check has been cancelled’ automatically
- Replies (17)
- Disk checking cancelled automatically
- How to cancel ChkDsk in Windows 10
- Cancel ChkDsk in Windows 10
- 1] Using Registry Editor
- 2] Using Command Prompt
- 3] Using Taskkill
Отключение CHKDSK при старте компьютера на Windows 7
Выключаем CHKDSK в Windows 7
В большинстве случаев появление средства проверки винчестера означает наличие проблем с накопителем, поэтому прежде чем отключать CHKDSK, стоит из-под системы или Live-образа проверить его.
Если проверка показала, что с носителем всё нормально, или же основным является SSD, CHKDSK можно смело отключать. Делается это посредством нескольких методов.
Способ 1: «Командная строка»
Первый доступный вариант – отключение утилиты через «Командную строку».
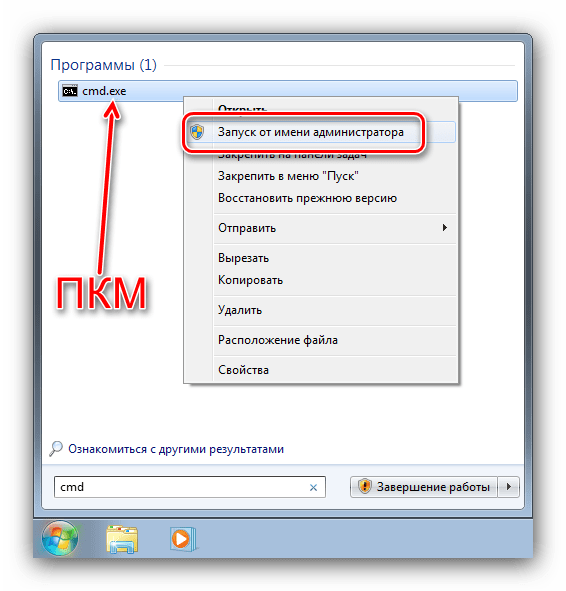
- Найдите инструмент в средстве поиска: откройте «Пуск» и напечатайте в нём cmd . Далее выделите результат, кликните по нему правой кнопкой мыши и выберите «Запуск от имени администратора».
Читайте также: Запуск «Командной строки» в Windows 7
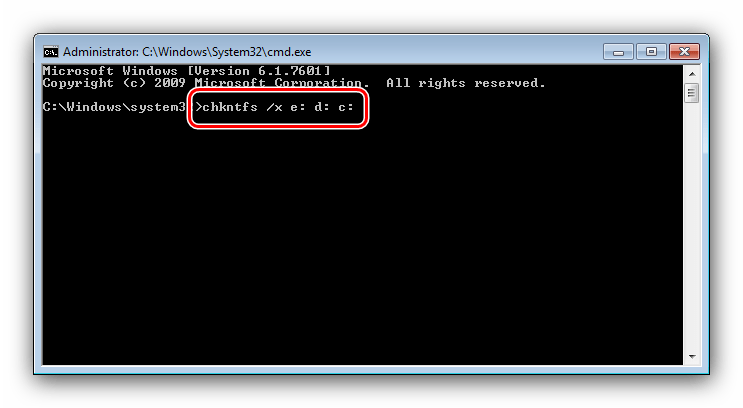
Запустится интерфейс ввода. В нём нужно напечатать следующую команду:
chkntfs /x e: d: c:
Вместо e:, d: и c: могут быть буквы других дисков, ориентируйтесь на указанные в системе наименования. Подтвердите ввод команды нажатием на Enter.
Перезагрузите компьютер и проверьте результат.
Метод отключения проверки дисков через «Командную строку» наиболее безопасен, поэтому рекомендуем использовать именно его и переходить к остальным только тогда, когда он оказался неэффективен.
Способ 2: Правка системного реестра
Иногда система отказывается отключать утилиту CHKDSK, и в таком случае потребуется правка реестра. Алгоритм действий следующий:
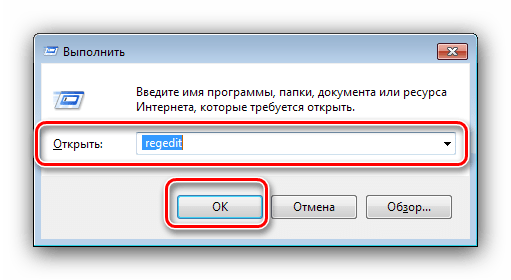
- Откройте средство «Выполнить» (клавиши Win+R или средство поиска), после чего введите в него код regedit и нажмите Enter.
После запуска «Редактора реестра» перейдите по следующему адресу:
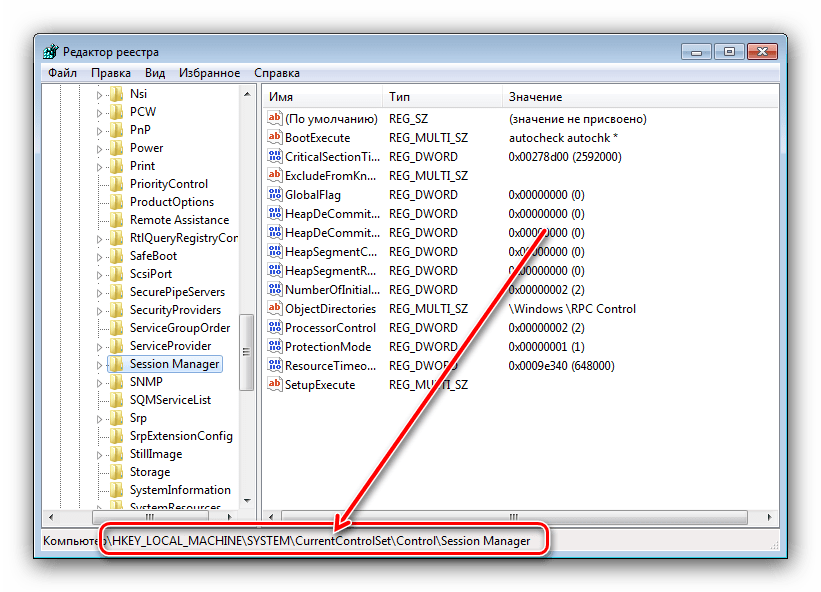

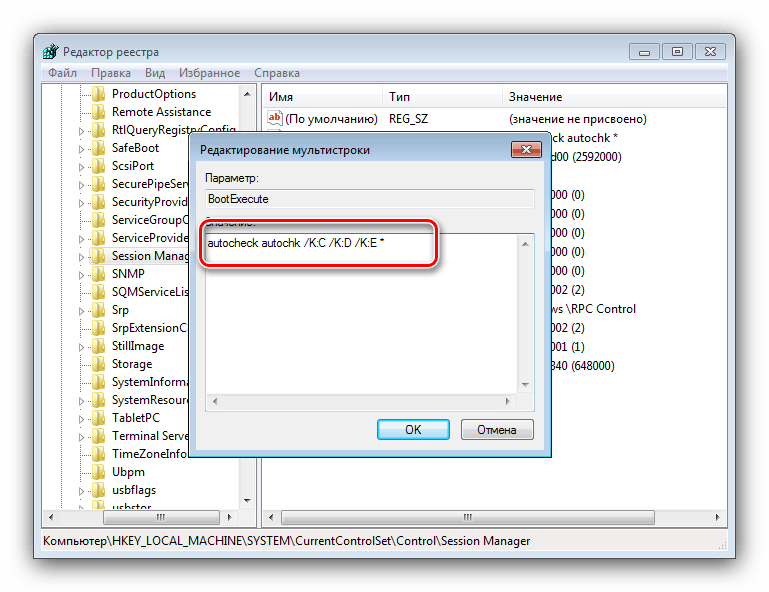
Появится окно редактирования. По умолчанию в нём присутствует запись «BootExecute». Для исключения диска или раздела из проверки при старте введите перед «звёздочкой» следующее:
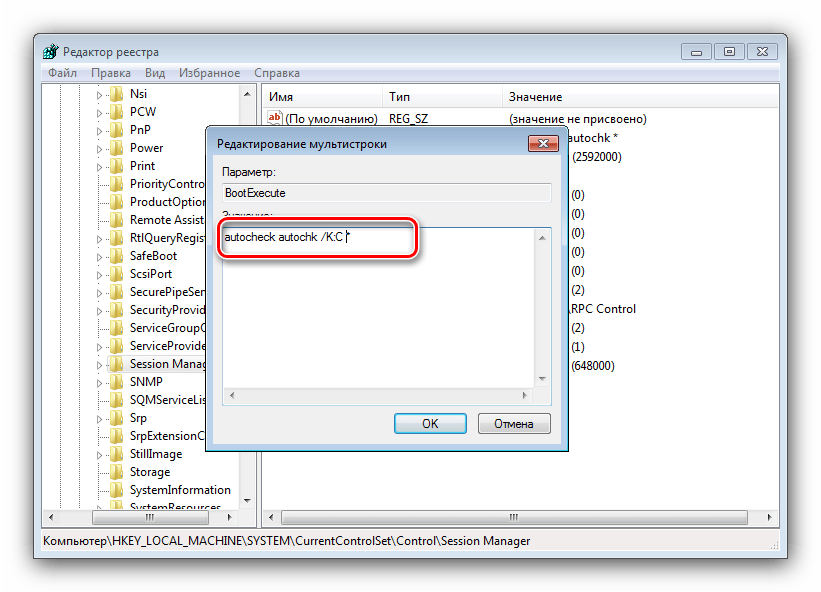
Внимание! Перед командой и после нее (перед символом *) обязательно должны быть пробелы!
Для применения изменений нажимайте «ОК», затем закрывайте «Редактор реестра» и перезагружайте компьютер.
Вариант с правкой реестра самый радикальный, так что применяйте его с осторожностью.
Способ 3: Удаление обновления KB2823324 (пользователи Kaspersky AntiVirus)
Сугубо специфический случай проблемы заключается в конфликте между патчем безопасности для Виндовс 7 под номером KB2823324 и новыми версиями Антивируса Касперского. Если вы используете этот программный продукт и наблюдаете ничем не обоснованное появление CHKDSK при старте системы, скорее всего, проблема именно в этом. Следовательно, устранить её можно удалением либо антивируса, либо проблемного обновления.
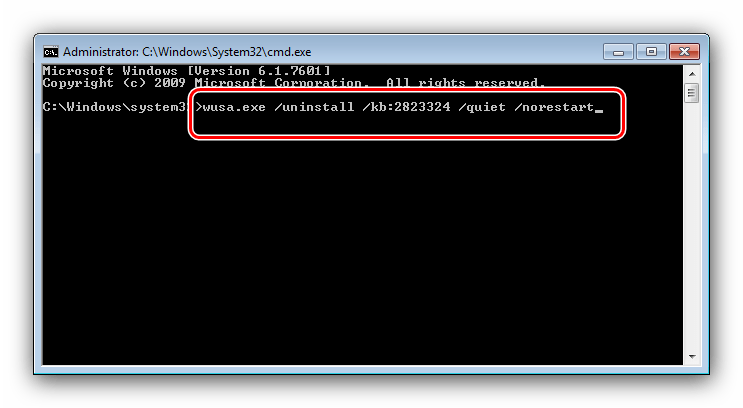
- Если вы выбрали деинсталляцию обновления, откройте «Командную строку» от имени администратора (о том, как это сделать, рассказано в первом шаге Способа 1). Далее введите в интерфейс команду:
wusa.exe /uninstall /kb:2823324 /quiet /norestart
Подтвердите ввод нажатием на Enter, затем перезагрузите компьютер.
Если решили избавиться от Kaspersky Antivirus, воспользуйтесь инструкциями, представленными по ссылкам далее.
Удаление либо одной, либо другой стороны конфликта позволит избавиться от ошибки.
Решение некоторых проблем
Нередко отключение CHKDSK тем или иным способом может привести к появлению разнообразных проблем и сбоев. Рассмотрим решения самых распространённых из них, а также ситуации, когда задействовать тот или иной метод не получается.
После отключения CHKDSK компьютер перестал загружаться
Если наблюдается проблема с запуском компьютера после выключения проверки дисков при старте, это верный признак того, что с накопителем что-то не в порядке. Проверьте его ещё раз, желательно на другом компьютере, и замените, если состояние оставляет желать лучшего.
Также не исключено, что к спонтанному появлению CHKDSK приводят ошибки системы – на это прямо указывает техническая исправность HDD, если просканировать его на заведомо рабочем компьютере. В таком случае хорошим решением будет сброс настроек системы до заводских или же полная переустановка, желательно без сохранения пользовательских данных.
«Командная строка» не реагирует на ввод команды
Если интерфейс ввода команд не отвечает на попытки ввести тот или иной оператор, это либо признак проблем с системными файлами, либо на компьютере неправильно настроены переменные среды. В первом случае проверьте системные компоненты и восстановите их, если требуется.
Во втором же потребуется правильно настроить переменные среды по следующему образцу:
- Откройте «Свойства системы» и перейдите к пункту «Дополнительные параметры системы».
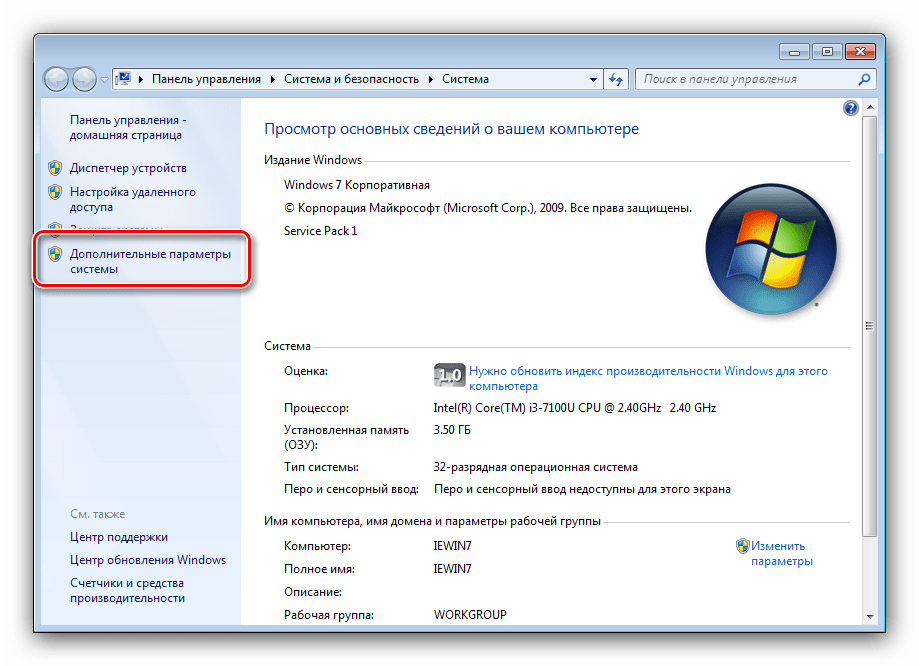
Читайте также: «Свойства системы» в Windows 7
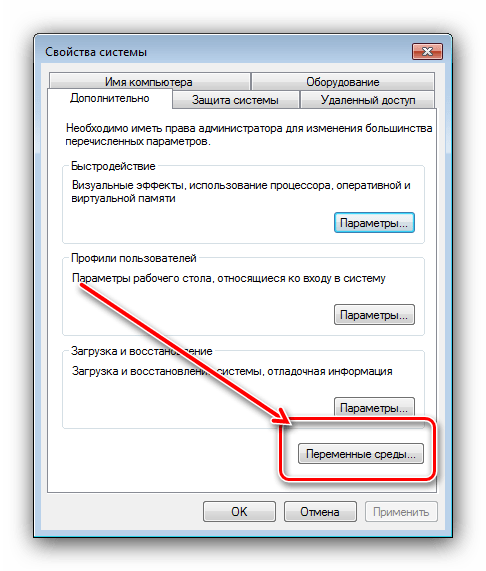
Далее кликните по кнопке «Переменные среды».
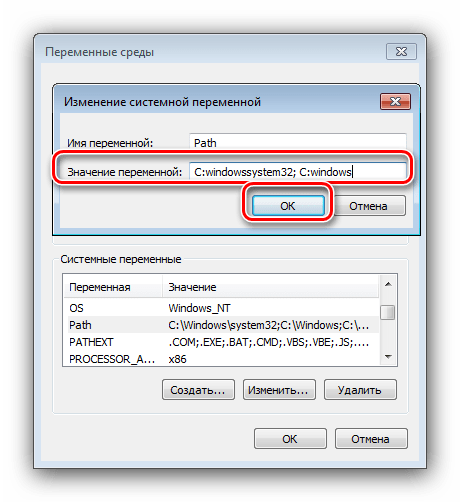
Откроется средство редактирования указанного элемента. Выделите запись «Path» в блоке «Системные переменные» и нажмите «Изменить».
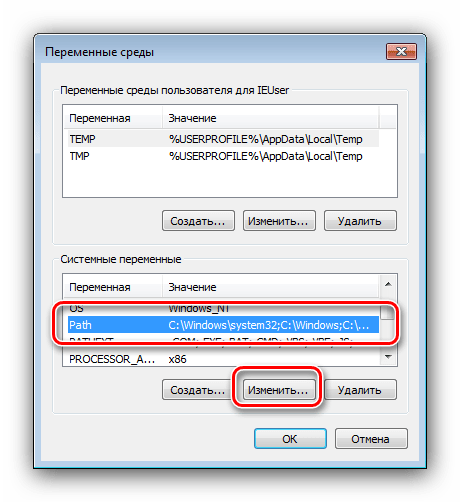
Введите следующее значение:
Далее примените изменения и закрывайте средство.
Заключение
Итак, мы изучили способы отключения CHKDSK при старте компьютера на Виндовс 7. Как видим, причин у проявления этой проблемы существует немало, а метод её устранения зависит от источника.
How to disable the CHKDSK — Check Disk, on start up for Windows 7
I been experiencing some problems, when i start my laptop i am prompted with a black screen saying

I haven’t found any solutions on how to disable this on my computer, but i want to because after the seconds say 1, its stays on for a while . and after i have left it on for a while, the screen sleeps, yet when i turn it on. The page is black.. Can someone help me disable the schedule checking for windows 7? Thank you very much! 😀
Welcome to Microsoft Answers!
To disable automatic disk checking at Windows startup through registry, go to the following registry key:
Important: This section, method, or task contains steps that tell you how to modify the registry. However, serious problems might occur if you modify the registry incorrectly. Therefore, make sure that you follow these steps carefully. For added protection, back up the registry before you modify it. Then, you can restore the registry if a problem occurs. For more information about how to back up and restore the registry, click the following article number to view the article in the Microsoft Knowledge Base:
322756 How to back up and restore the registry in Windows: http://support.microsoft.com/kb/322756
HKEY_LOCAL_MACHINE\SYSTEM\CurrentControlSet\Control\Session Manager
In the right hand pane, double click BootExecute.
The default value of the key is autocheck autochk *
* means every drive is checked for consistency. Just add /K:C at the end before *. /K switch will disable autocheck on C: drive at Windows startup. So the final value should look like this:
autocheck autochk /k:C *
If you want to add more drives, the key should look like this: (disabling C and D drives)
autocheck autochk /k:C /k:D *
If you want to restore everything to default, just replace the key with the default one i.e.
autocheck autochk *
You may also follow the link given below and check if it is of any help.
Hope this information is helpful.
Microsoft Answers Support Engineer
Visit our Microsoft Answers Feedback Forum and let us know what you think.
217 people found this reply helpful
Was this reply helpful?
Sorry this didn’t help.
Great! Thanks for your feedback.
How satisfied are you with this reply?
Thanks for your feedback, it helps us improve the site.
‘Disk check has been cancelled’ automatically
Replies (17)
* Please try a lower page number.
* Please enter only numbers.
* Please try a lower page number.
* Please enter only numbers.
Let’s try the following:
Start > Search > cmd (right click run as admin)
Type the following and press enter:
fsutil dirty query c:
This tells you if the disk is dirty or not. If it is dirty, type the following:
chkntfs /x c:
hit enter
chkdsk c: /r
Then ‘Y’ when it asks to reboot.
32 people found this reply helpful
Was this reply helpful?
Sorry this didn’t help.
Great! Thanks for your feedback.
How satisfied are you with this reply?
Thanks for your feedback, it helps us improve the site.
How satisfied are you with this reply?
Thanks for your feedback.
Was this reply helpful?
Sorry this didn’t help.
Great! Thanks for your feedback.
How satisfied are you with this reply?
Thanks for your feedback, it helps us improve the site.
How satisfied are you with this reply?
Thanks for your feedback.
It’s possible that your autochk.exe (program in charge of chkdsk) is corrupt.
What does running SFC /SCANNOW do?
The sfc /scannow command (System File Checker) scans the integrity of all protected Windows 7 system files and replaces incorrect corrupted, changed/modified, or damaged versions with the correct versions if possible.
To run the SFC /SCANNOW command in Windows 7:
— Open an elevated command promt (run cmd as administrator).
— In elevated command prompt, type «sfc /scannow» without the quotes, and press enter. Do note this can take some time to finish.
To see and read only the «SFC» scan results from the CBS.log:
— Open an elevated command promt (run cmd as administrator).
— Copy and paste the following and then press enter:
Disk checking cancelled automatically
When the computer is booting up, a disk checking comes up. But it cancels automatically before the time is up. Everytime! This has been happening for about 3 months now. I think my laptop was shut down bad once and ever since then, the disk checking thing appears.
Note: I assume you only have one hard drive, “C:\”, if you have more, look at the check disk screen when it is running at startup and take note of the drive letter is being scanned (C:, D:, etc.) and change where appropriate.
Go to Start, type “cmd.exe” in the search box and in the results, right click cmd.exe and choose Run as Administrator.
In the Command Prompt box, type, or copy/paste the following commands and press enter:
fsutil dirty query c:
This should tell you if the drive is Dirty or NOT Dirty. If it is Dirty, do the following:
chkntfs /x c:
chkdsk c: /r
Type Y when asked if you want to do this on next boot.
Reboot the computer and let this check disk run completely, do not cancel or skip it. Note that this will take some time depending on the size of your hard drive and speed of your computer.
After the full scan is complete and you login to Windows, open the command prompt as instructed above and run the fsutil dirty query c: command once more and check if it is still listed as Dirty or not.
David
Microsoft Answers Support Engineer
Visit our Microsoft Answers Feedback Forum and let us know what you think.
How to cancel ChkDsk in Windows 10
In this post, we will see how to cancel ChkDsk in Windows 10/8 at startup or reboot, after it has been scheduled in Windows. Disk Error Checking in Windows 10/8 is a bit different from the earlier versions of Windows. In Windows 10, Microsoft has redesigned the chkdsk utility – the tool for detecting and fixing disk corruption.
Microsoft introduced a file system called ReFS, which does not require an offline chkdsk to repair corruption – as it follows a different model for resiliency and hence does not need to run the traditional chkdsk utility. The disk is periodically checked for file system errors, bad sectors, lost clusters, etc., during Automatic Maintenance and you now no longer need to re and run it.
But there may be times when you may want to run the command-line version of ChkDsk . In this case, you may bring up CMD, enter the following command to identify bad sectors, attempt recovery of information and fix errors detected, and schedule a ChkDsk to run at boot time:
Cancel ChkDsk in Windows 10
During Windows startup, you will be given a couple of seconds, during which you can press any key to abort the scheduled Disk checking. If this does not help, cancel CHKDSK by pressing Ctrl+C and see if that works for you.
If while it is running, you need to cancel it, then, the only want to do it, is to power down the computer. But then, again on the next restart, the scheduled chkdsk utility will run.
If you want to cancel chkdsk in Windows 10/8 after you have scheduled it, here is how you can do it.
1] Using Registry Editor
Run regedit to open the Registry Editor and navigate to the following key:
Change the BootExecute entry from:
Close the Registry Editor and restart your Windows PC. ChkDsk will not run.
2] Using Command Prompt
To cancel a scheduled check disk, open an elevated CMD window, type the following and hit Enter:
Here c is the drive letter. This should cancel the scheduled chkdsk run.
3] Using Taskkill
First, obtain the PID for the Chkdsk task. Open the Task Manager and look at CHKDSK, Right-click > Details. You will find it here.
Now in an elevated command prompt execute the following:
Here XYZ is the Process ID for the running CHKDSK.
You should know that it is not a good idea to forcibly stop a manually scheduled chkdsk process that has been executed with parameters like /f and /r.


