- 9 Fixes to Display Driver Stopped Responding and Has Recovered [Clone Disk]
- Summary :
- Quick Navigation :
- When Would «Display Driver Stopped Responding and Has Recovered» Error Occur
- Solution 1. Close Unnecessary Programs and Applications
- Solution 2. Adjust Visual Effects for Better Performance
- Solution 3. Uninstall and Reinstall Graphics Drivers
- Solution 4. Increase GPU Processing Time
- Solution 5. Update Your Graphics Drivers
- Solution 6. Check if GPU Is Overheating
- Solution 7. Set Hardware to Default Settings
- Solution 8. Reinstall Windows Operating System
- Solution 9. Replace your Graphics Card with a New One
- Conclusion
- «Display driver stopped responding and has recovered» error in Windows 7 or Windows Vista
- Summary
- Resolution
- Method 1: Update to the latest display driver for your graphics hardware
- Method 2: Adjust visual effects for better performance
- Method 3: Modify registry entry to increase GPU processing time
- More Information
9 Fixes to Display Driver Stopped Responding and Has Recovered [Clone Disk]
By Irene | Follow | Last Updated March 25, 2021
Summary :
Many Windows users got error code «Display driver stopped responding and has recovered» when playing games or running some applications. If you are one of them, don’t worry. This article introduces 9 ways to help resolve error «Display driver stopped responding and has recovered» with detailed steps and screenshots.
Quick Navigation :
Some of you may have encountered this situation: when you are playing computer games or running an application on your computer, it freezes up a few seconds or exit it to the desktop. Sometimes the computer is stuck in a blue screen of death or goes black. After a few seconds, a notification as below will show up at the right corner of the computer screen.
It is really annoying if you are doing something urgent at that time. You may wonder: how did this happen? How can I fix it? Well, the following contents will tell you when this phenomenon would occur and the specific steps to fix it.
When Would «Display Driver Stopped Responding and Has Recovered» Error Occur
The reasons for error «Display Driver Stopped Responding and Has Recovered» are various and complicated. Here I summarize some occasions that display driver stopped responding error would occur at its great possibility.
- There are a lot of programs and applications running on your computer.
- The display drive is outdated, corrupted or missing.
- The GPU in your computer is overheating.
- GPU takes more time than permitted to display graphics to your monitor.
- The graphic card in your computer is very old or defective.
- Windows operating system has corrupt system or registry files.
Solution 1. Close Unnecessary Programs and Applications
When there are more applications and programs than the GPU can handle running, performance issues like «Display Driver Stopped Responding and Has Recovered» error could be triggered.
In this case, you can close some unnecessary applications and programs running on your computer, which should fix display driver has stopped responding issue.
Solution 2. Adjust Visual Effects for Better Performance
Adjusting visual effect can also help to improve computer performance and fix display driver stopped responding and has recovered Windows 10 error. You can adjust your computer for better performance by disabling some of the visual effects. Here are detailed steps and pictures to show you how to adjust visual effects in Windows 10.
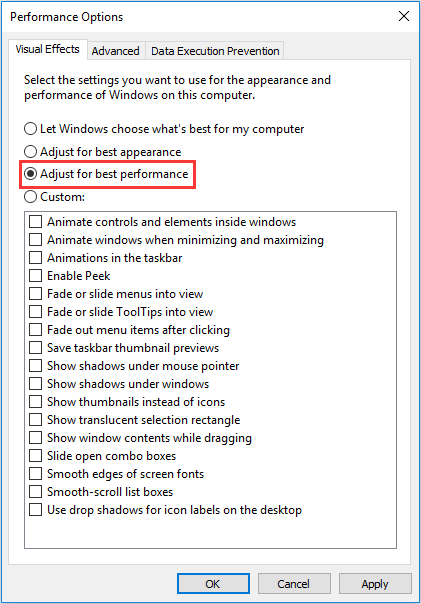
Step 1. Input Adjust the appearance and performance of Windows in the Windows Cortana search box and choose the best match to open the Performance options.
Step 2. In this Visual Effect section, select Adjust for best performance and click OK.
Step 3. Close the windows and check if display driver has stopped responding issue has been fixed.
If this method did not resolve the Windows 10 display driver stopped responding and has recovered issue, you may try the next method.
Solution 3. Uninstall and Reinstall Graphics Drivers
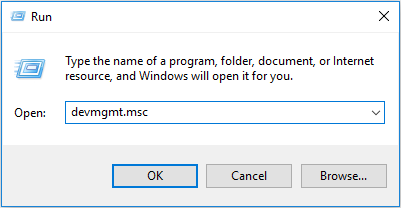
Step 1. Right-click Windows Start menu and choose Run.
Step 2. Input devmgmt.msc into the Run dialog and press Enter to launch the Device Manager.
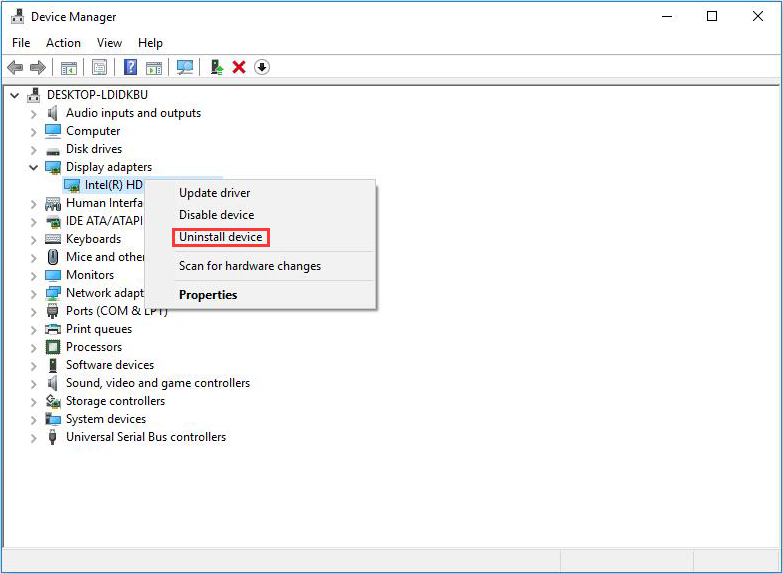
Step 3. Find Display adapters in the Device Manager and expand it.
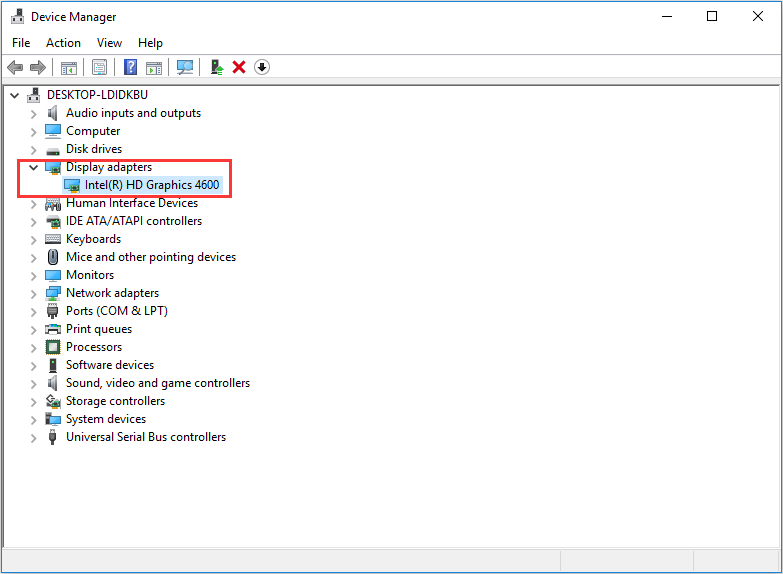
Step 4. Right-click on your graphics drivers, click on Uninstall to uninstall the drivers. If you have more than one graphics driver, them uninstall them one by one.
Step 5. Restart your computer. When your computer starts up successfully, Windows will automatically reinstall the same version of the graphics drivers.
Solution 4. Increase GPU Processing Time
You can resolve the «Display drive stopped responding and has recovered» issue by simply increasing the TDR (Timeout Detection & Recovery) timeout for your GPU, and this can be done by editing your computer’s registry. Now, follow the detailed steps.
Step 1. Exit all Windows based programs.
Step 2. Input regedit in the Windows 10 Cortana search box.
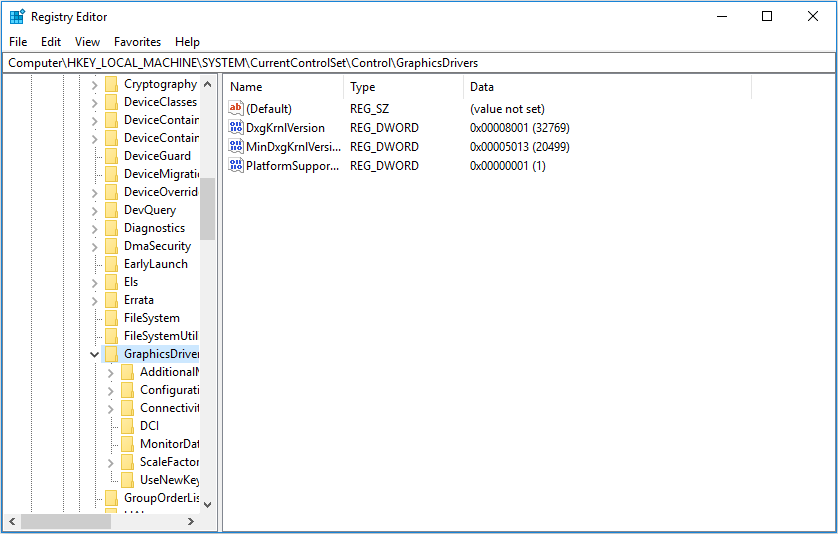
Step 3. Go to the following directory.
HKEY_LOCAL_MACHINE > SYSTEM > CurrentControlSet > Control > GraphicsDrivers
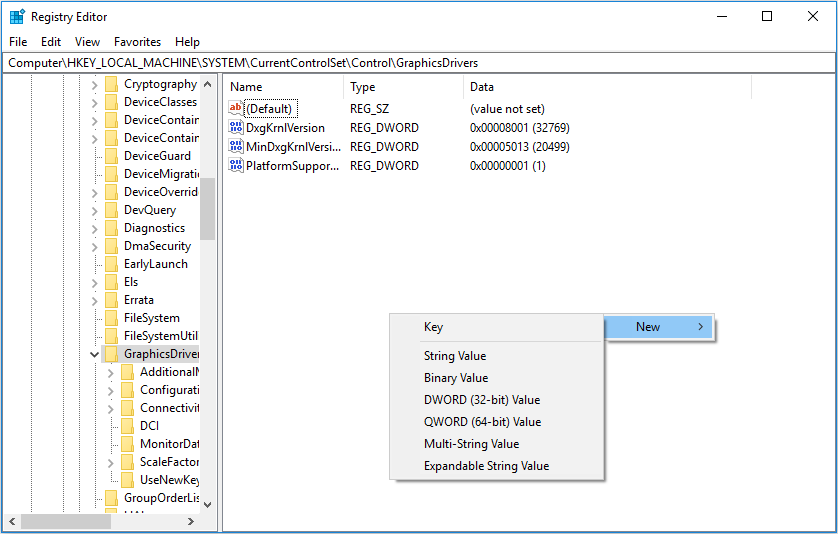
Step 4. In the right pane, right-click on an empty space and click New to expand the context menu. If you are using a 32-bit operating system, choose DWORD (32-bit) Value in the context menu. If you are using a 64-bit operating system, click on QWORD (64-bit) Value in the context menu.
Step 5. Name the new registry value TdrDelay and press Enter.
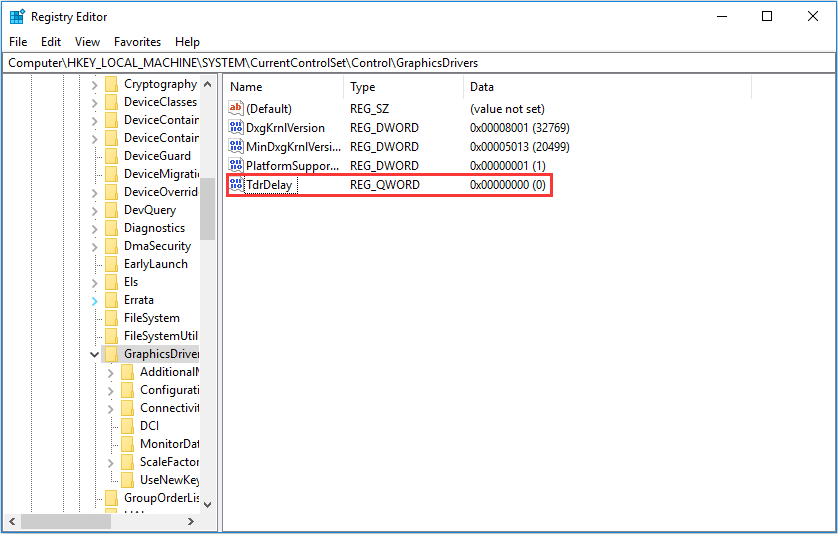
Step 6. Double-click on the TdrDelay registry value to modify it. Then input 8 into its Value data box and click on OK.
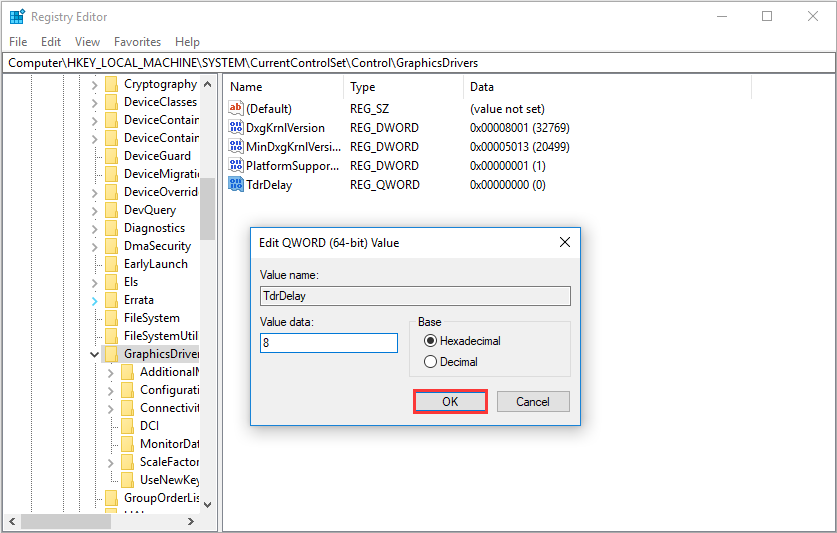
Step 7. Close the Registry Editor and restart your computer to see if display driver stopped responding and has recovered windows 10 error is fixed.
Tips: If you modify the registry incorrectly, it could cause serious problem on your computer. If there is something wrong with your computer, you can delete the added TdrDelay and restart your computer.
Solution 5. Update Your Graphics Drivers
If a newer version of the graphics drivers on your computer is available for your computer, you can download and install them, which may be able to fix «Display driver stopped responding and has recovered» error.
To check to see if a newer version of your computer’s graphics drivers is available, you can follow the steps as below.
Step 1. Go to the official website of your GPU’s manufacturer. If you don’t know the type of your GPU, you can follow the steps in Solution 3 to find it out.
Step 2. Search if a newer version of your computer’s graphics drivers is available.
Step 3. If there is a version available, download and install it on your computer. And this should solve your problem.
If you find that this is a little complicated for you or you don’t have the time, patience to update the driver by yourself, you can also resort to a third-party driver update software to update your drivers automatically, which is very convenient. Be sure to choose a reliable one.
Solution 6. Check if GPU Is Overheating
Overheating GPU may cause the Windows 10 display driver stopped responding and has recovered issue. The temperature of your graphic card should not go beyond its maximum operating temperature.
Generally speaking, if the temperature of the GPU is around or above 80° C, it may cause driver crash and then give you the notification «Display driver stopped responding and has recovered». In this case, you can use a temperature monitor program to check your GPU temperature and make sure the temperature is not too high.
Besides, the GPU is easy to get overheating if the radiator is dusted. So you can shut down your computer, take it out, clean some impurities and dust on the GPU radiator and see if the display driver has stopped responding and has recovered problem resolves.
Solution 7. Set Hardware to Default Settings
If you get the display driver stop responding issue after overclocking CPU, Memory or GPU, you can try to run all hardware components at their default settings to see if that helps.
Solution 8. Reinstall Windows Operating System
If your Windows operating system has corrupt system files or registry files, it may cause the «Display driver stopped responding and has recovered» issue. Some users also said that display driver has stopped responding and has recovered Windows 10 error has only happened to them after upgrading Windows 10.
In this case, you can do a clean install of Windows 10 to solve this issue. Before your start reinstallation, remember to backup the disk, as reinstallation will delete your data.
The fastest way to backup all important files is to backup the whole disk with a disk cloning software. But if you don’t have that much space to store all the data on your disk, you can also bakcup the partition that you have stored important files.
To backup partition or disk, it is recommended to use MiniTool Partition Wizard Pro Ultimate Edition as it is a professional partition manager as well as disk cloning software trusted by tens of millions of people. Using MiniTool Partition Wizard can not only help you backup partition and disk but also help you format partition, resize partition, check file system, convert MBR disk to GPT. Now let’s see detailed steps to backup disk and reinstall Windows 10.
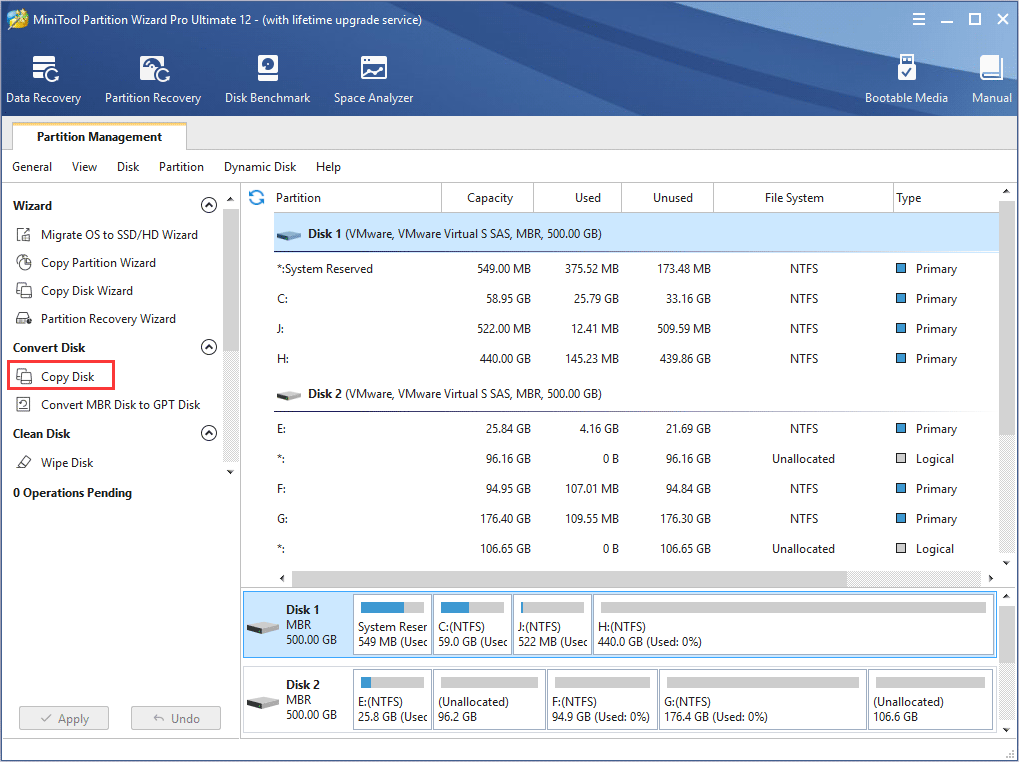
Step 1. Get MiniTool Partition Wizard Pro Ultimate Edition by clicking the following button. Install it on your computer and launch it to get the main interface.
Step 2. Then choose Copy Disk from the left action panel.
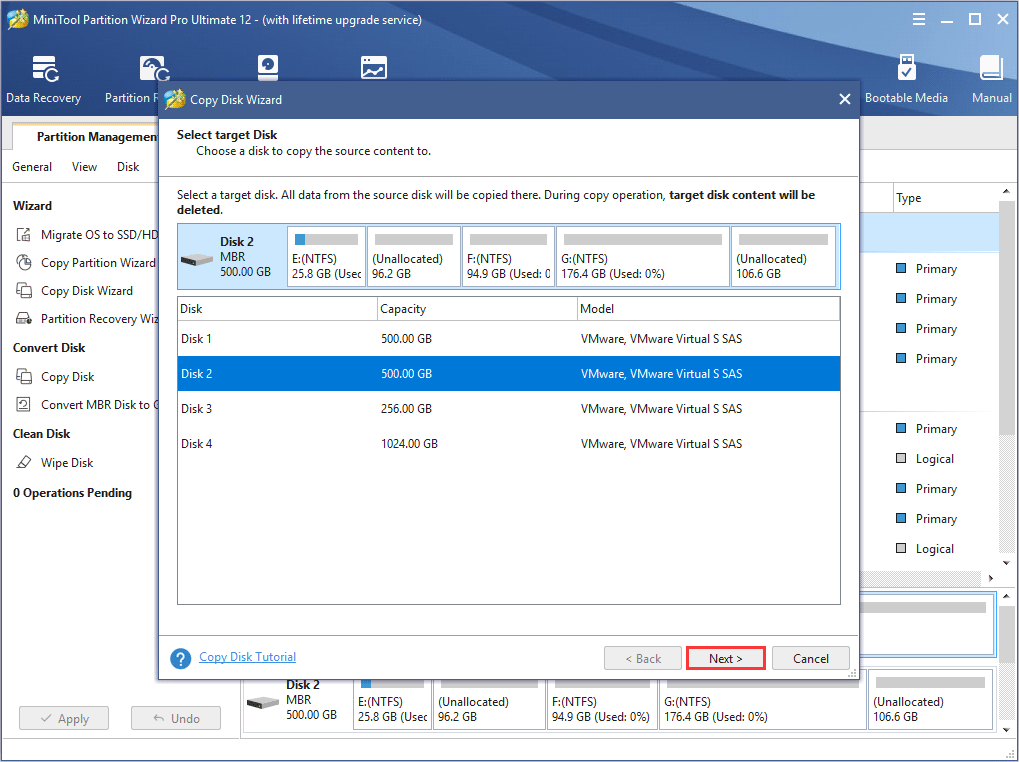
Step 3. Choose a disk to copy the source content to and click Next. And click Yes on the pop-up window to continue. All the data on the target disk will be destroyed, so make sure there is no important file on the disk or you have made backups in advance.
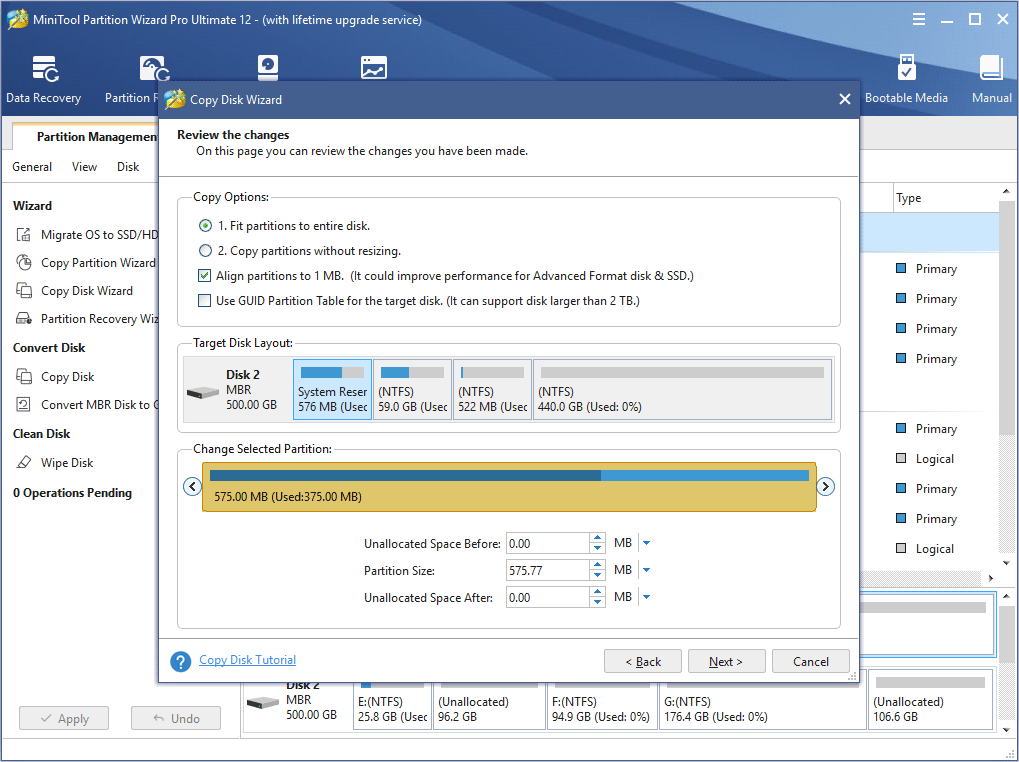
Step 4. Here you can change the copy options by yourself if necessary. And you can also change the partition size by dragging the handle bar. Then click Next to continue.
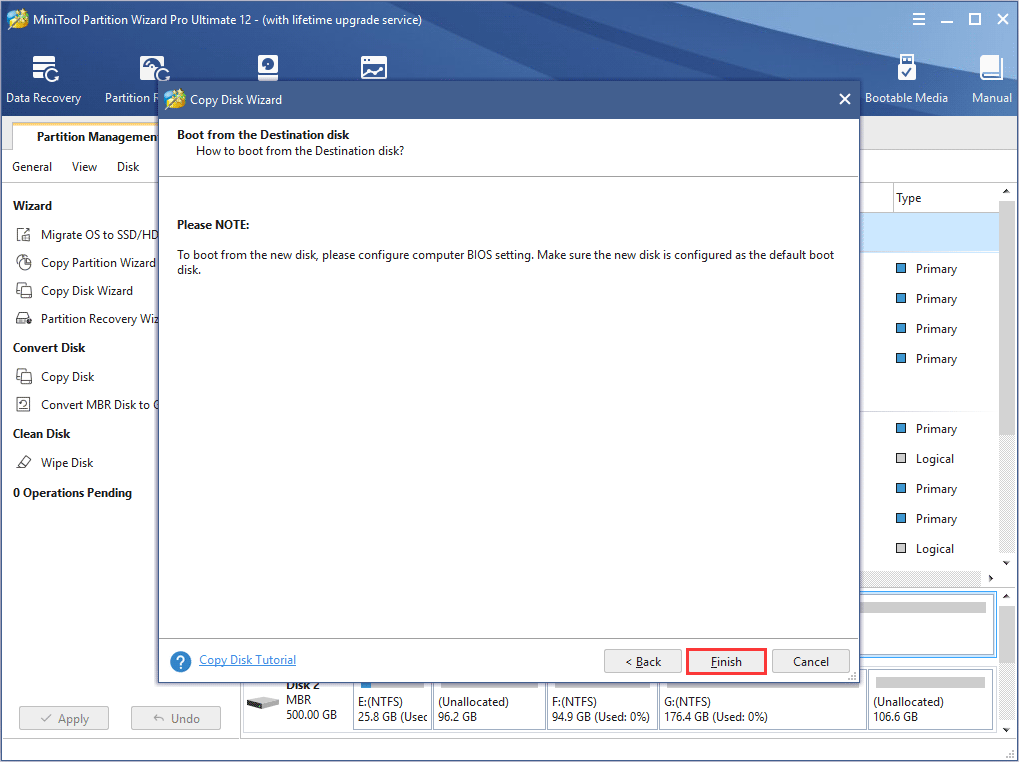
Step 5. Read the note about how to boot from the destination hard drives if you are cloning a system disk. Then click Finish.
Step 6. In this page, you can preview the changes. At last, you need to click Apply to allow the pending operations.

Now, follow the steps as below to perform a clean install of Windows 10.
Step 1. Create a Windows 10 installation media via Microsoft’s Media Creation Tool.
Step 2. Change BIOS boot sequence to give the bootable USB drive or DVD/CD disc boot priority.
Step 3. Insert the Windows10 installation media USB drive or DVD/CD disc to your computer and boot from it.
Step 4. Select your language preferences, and click on Next button to continue.
Step 5. Click on Install now.
Step 6. Follow the instruction and let it install automatically. The installation process will start and your PC will reboot. When it’s finished, you just need to log in with your account.
Solution 9. Replace your Graphics Card with a New One
If all of the above methods don’t work for your computer, the issue «Display drive has stopped responding and has recovered» is possibly caused by a defective graphics card. In this case, you have no choice but to buy a new one.
Conclusion
After showing you the 9 methods to fix «Display drive has stopped responding and has recovered» error, you can try these methods one by one or choose the most suitable one according to your situation.
If you have any question about how to fix display drive stopped responding and has recovered Windows 10 issue with the 9 solutions or if you have other better solutions, you can leave a message in the following comment zone and we will reply as soon as possible. If you need any help when using MiniTool software, you may contact us via [email protected] .
«Display driver stopped responding and has recovered» error in Windows 7 or Windows Vista
Summary
This article introduces three methods that you can use to troubleshoot the «display driver stopped responding» issue. For more information about the cause of the issue, move to the More Information section.
Resolution
To resolve this issue, follow the steps in the methods starting with method 1 and then proceeding with method 2 and method 3 if the solutions do not resolve the issue.
Method 1: Update to the latest display driver for your graphics hardware
To update to the latest display driver for your graphics hardware by using Windows Update, click the link specific to your version of Windows and follow the steps in that article:
If installing the latest updates does not resolve the issue, continue to method 2.
Method 2: Adjust visual effects for better performance
Having multiple programs, browser windows, or email messages open at the same time can use up memory, and cause performance issues. Try to close any programs and windows that you are not using.
You can also adjust your computer for better performance by disabling some of the visual effects. Here’s how to adjust all visual effects for best performance:
Open Performance Information and Tools by selecting Start > Control Panel. In the search box, type Performance Information and Tools, and then, in the list of results, click Performance Information and Tools.
Select Adjust visual effects, if you are prompted for an administrator password or confirmation, type the password or provide confirmation.
Select Visual Effects > Adjust for best performance > OK.
Note For a less drastic option, select Let Windows choose what’s best for my computer.
If this method did not resolve the issue, continue to method 3.
Method 3: Modify registry entry to increase GPU processing time
Timeout Detection and Recovery is a Windows feature that can detect when the video adapter hardware or a driver on your computer has taken longer than expected to complete an operation. When this occurs, Windows attempts to recover and reset the graphics hardware. If the GPU is unable to recover and reset the graphics hardware in the time permitted (two seconds), your system may become unresponsive, and display the error message “Display driver stopped responding and has recovered.”
Giving the Timeout Detection and Recovery feature more time to complete this operation by adjusting the registry value, may resolve this issue.
To do this, follow these steps:
Exit all Windows based programs.
Select Start, type regedit in the Search box, and then double-click regedit.exe from the results above. If you are prompted for an administrator password or confirmation, type the password or provide confirmation.
Locate to the following registry subkey:
HKEY_LOCAL_MACHINE\SYSTEM\CurrentControlSet\Control\GraphicsDrivers
On the Edit menu, select New, and then select the following registry value from the drop-down menu specific to your version of Windows (32 bit, or 64 bit):
Close Registry Editor and then restart your computer for the changes to take effect.
Important This section, method, or task contains steps that tell you how to modify the registry. However, serious problems might occur if you modify the registry incorrectly. Therefore, make sure that you follow these steps carefully. For added protection, back up the registry before you modify it. Then, you can restore the registry if a problem occurs. For more information about how to back up the registry in Windows 7, see Back up the registry.
Select DWORD (32-bit) value.
Type TdrDelay as the Name and then select Enter.
Double-click TdrDelay and add 8 for the Value data and then select OK.
Select QWORD (64-bit) value.
Type TdrDelay as the Name and then select Enter.
Double-click TdrDelay and add 8 for the Value data and then select OK.
More Information
This behavior can occur for one or more of the following reasons:
You may have to install the latest updates for your display driver.
Visual effects, or too many programs running in the background may be slowing your computer down.
The GPU is taking more time than permitted to display graphics to your monitor.
Note If you are using an older video card, there may not be a video driver that is fully compatible with your version of Windows. For more information about Timeout Detection and Recovery, see Timeout Detection and Recovery of GPUs through WDDM.


