This section tells you how to write the setup information file (INF) sections that specifically apply to a graphics-adapter installation. For more general information about INF files, see INF File Sections and Directives.
DDInstall.SoftwareSettings Section
A DDInstall.SoftwareSettings section contains an AddReg directive and/or a DelReg directive. Each directive points to a separate, writer-defined INF section that contains registry entries for the installer to add or delete.
For example, the following code shows an AddReg directive that points to a writer-defined add-registry section named ACME-1234_SoftwareDeviceSettings. The DelReg directive points to a delete-registry section named ACME-1234_DeleteSWSettings.
The add-registry section adds four entries to the registry and sets their values, as shown in the following code.
The preceding code first sets the value of the InstalledDisplayDrivers entry to the name of the display driver. The code then sets the value of the OverRideMonitorPower entry to 0 (in other words, FALSE). This entry, which should be used only by OEM system vendors, controls the power behavior of the monitor device (for example, the LCD, CRT, or TV). When set to 1, OverRideMonitorPower limits the possible power states of the monitor device to D0 and D3.
Third, the code sets the value of the MultiFunctionSupported entry to 1 (in other words, TRUE), which is the required value for an adapter that supports multiple PCI functions. Last, the code sets the value of the VideoDebugLevel entry, which controls the global debug level that checked builds use for debug messages. This value ranges from 0 (no debug messages) to 3 (the most verbose messages). For more information about global debug levels, see VideoDebugPrint.
Most video miniport drivers are not VGA-compatible and require no VgaCompatible entry in the registry. If your video miniport driver is VGA-compatible, add the VgaCompatible entry to the registry and set its value to 1 (TRUE) in the add registry section, as shown here:
For more information about VGA-compatible video miniport drivers, see VGA-Compatible Video Miniport Drivers (Windows 2000 Model).
The following delete-registry section deletes three registry entries: GraphicsClocking, MemClocking, and CapabilityOverride.
The CapabilityOverride entry specifies the capabilities that the system turns off for the display driver. For example, even if the display driver implements a DrvEscape function, that capability cannot be used if the 0x10 flag is set in the CapabilityOverride entry.
The value of the CapabilityOverride registry entry is a bitwise OR of one or more of the flags that are listed in the following table.
Flag
Meaning
Disables all hardware acceleration. Equivalent to moving the hardware-acceleration slide bar (in the Display item of Control Panel) to the minimum setting.
Disables all support for Microsoft DirectDraw and Microsoft Direct3D hardware acceleration.
Disables all support for Direct3D hardware acceleration. Prevents calls to DdGetDriverInfo](/windows/win32/api/ddrawint/nc-ddrawint-pdd_getdriverinfo)» data-linktype=»absolute-path»>DdGetDriverInfo, which request Direct3D capability and callback information, from reaching the driver.
For display drivers that are shipped with Windows, CapabilityOverride is typically set to 0x8, which disables OpenGL. Note that it is not necessary to set the 0x10 flag to disable OpenGL, and you should not set the 0x10 flag unless you intend to disable all escapes.
Microsoft Windows XP and earlier operating systems do not delete the CapabilityOverride registry entry when a display driver is updated—for example, from a driver that is shipped with Windows to a more recent driver provided by an independent hardware vendor (IHV). The persistent CapabilityOverride entry disables the same capabilities in the updated driver that it disabled in the old driver. Therefore, for Windows XP and earlier, include a DelReg directive in your INF file that explicitly deletes the existing CapabilityOverride entry. Windows XP SP1 and later operating systems automatically delete the CapabilityOverride entry when a driver is updated so, for those systems, it is not necessary to delete the CapabilityOverride entry.
Disabling AGP Transfer Rates and Sideband Addressing
If necessary, you can modify the INF file for your display adapter to disable certain AGP transfer rates or sideband addressing. Note that a miniport driver can change AGP transfer rates when it calls AgpSetRate, but such calls are not allowed to change transfer rates that are disabled in an INF file.
The regstr.h header file, which is shipped with the Windows Driver Kit (WDK), defines the following set of flags.
Flag
Value
Meaning
Disables the single-speed (66 MHz) transfer rate.
Disables two times the single-speed transfer rate.
Disables four times the single-speed transfer rate.
Disables eight times the single-speed transfer rate.
Disables sideband addressing (SBA).
Two types of settings exist: global and platform-specific. The registry contains the global entries at the following location:
You can find the platform-specific entries under «Parameters» in the filter-driver service key. For example, these entries exist for the hypothetical AcmeAGP adapter in the following location in the registry:
To disable sideband addressing for a device that has a DeviceID of 0x012A (Nuclear3D) and a VendorID of 0x1AD0 on VIA Technologies platforms, add a Nuclear3D_Install.HW section to your INF file. (For more information about this type of INF Install section, see INF DDInstall.HW Section.) In this section, include an AddReg directive similar to the following:
Next, create the following section, which the AddReg directive points to:
The preceding entry indicates that the subkey identified by the string following HKLM is to be added to the registry, under the HKEY_LOCAL_MACHINE root. The «1AD0012A» string is the entry name, from which the first four characters compose the DeviceID, and the last four compose the VendorID for this part. The hexadecimal number following the entry name comprises a set of flags, which indicate the data type for the entry. The last part is the entry value, which disables sideband addressing.
ImportantВ В The bytes in the value entry are in the opposite order from those of the AGP_FLAG_NO_SBA_ENABLE flag’s definition in the preceding table.
Suppose you determine that AGP 4X is broken on every chipset for this same device. To indicate this fact, add a second entry to the Nuclear3D_Reg section:
The second entry in the preceding code indicates that the subkey identified by the string following HKLM is to be added to the registry, under the HKEY_LOCAL_MACHINE root. As in the previous entry, the value name associated with this subkey is a string that is composed of the device’s DeviceID and VendorID. The flag value is also the same. The value entry is AGP_FLAG_NO_4X_RATE, which disables the AGP 4X transfer rate. Notice that, as before, the bytes in this value entry are in the opposite order as those of the flag’s value in the preceding table.
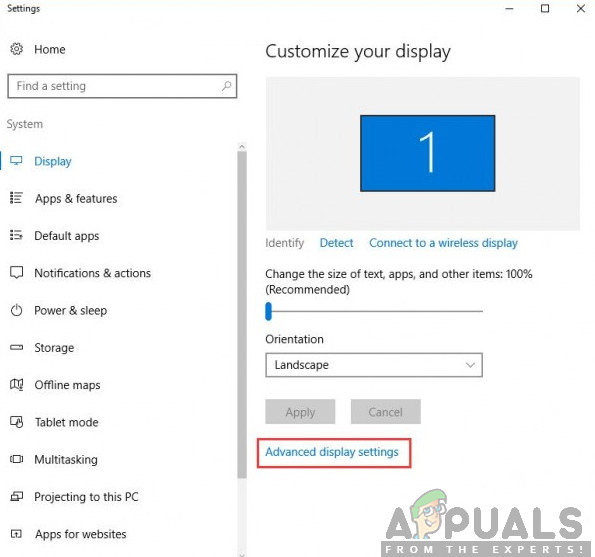
How to Fix Advanced Display Settings Missing in Windows 10?
We came across numerous complaints from users where they complained that they were unable to locate the Advanced Display Settings on their computers after a potential Windows 10 update. This issue was reported globally and occurred to almost everyone who updated to 1703 or Fall Creators update.
Advanced Display Settings Missing in Windows 10
The most common feature which the users used was the ‘Text Size Setting’. Using the Advanced Display Settings, users were able to easily change their text sizes without going through much hassle. However, this was changed with the updated Windows. In this article, we will go through all the reasons as to why this issue might occur on your computer and what the workarounds are to solve the issue.
What causes ‘Advanced display Settings’ to Disappear?
After analyzing all the user reports, statements from Microsoft and our research, we concluded that the issue occurred due to several different reasons. Some of the reasons why you might find the ‘Advanced Display Settings’ missing are but not limited to:
Feature Removed in Update: Reportedly, Microsoft officially removed the option available on Windows. This was met with a lot of backlash from the community. At the time of writing this article, Microsoft is still considering to bring it back.
Bad Graphics Drivers: Another surprising issue which we came across was where bad graphics drivers installed caused the display settings to vanish. Updating or Rolling back the drivers usually solve the problem.
Clash with on-board graphics: There are also instances where the onboard graphics might conflict with the third-party graphics drivers. Disabling the onboard graphics might help in this.
Windows corrupt installation files: There might also be instances where the installation files of Windows might be corrupt. Here, restoring a previous version or doing a clean installation might help.
Before starting the solution, make sure that you are logged in as an administrator on your computer. Furthermore, save all your work as we might be restarting your computer again and again.
Solution 1: Using Alternate Options
If your computer was indeed updated and you found the option missing, it is probably because it was removed by Microsoft. They replaced the options present inside the Advanced Display settings to another location in Windows. We will navigate there and access the text formatting/size settings from there.
Press Windows + I to launch your Settings. Now, click on the sub-category of System. System – Windows settings
Once in the System tab, click on Display from the left-hand side of the screen.
Now on the right-hand side, scroll down until you find the option of Display adapter properties. Click it. Here, you can also change other settings of your display such as Scale and layout and Multiple displaysDisplay adapter properties
Now, navigate to Intel HD Graphics Control Panel and then click on Properties
Now, click on Graphics properties and then go to the Display setting to make changes as required.
Also, if you don’t find your required setting here, you can always navigate to the color management.
Press Windows + S, type “color management” in the dialogue box and open the application.
Once in color management, click on Advanced
Now if you wish to calibrate the display, click on Calibrate Display. Calibrate Display
After calibrating your display, click Finish and go to the ClearType Text Tuner. ClearType Text Tuner
From here, you will be able to change the text type without any issues.
Solution 2: Using Third-party Software
If the above method doesn’t work for you and you still having difficulty in changing your settings, we will try downloading a third-party software and see if we can get it to work. This is a workaround given if your computer was indeed updated. If it wasn’t and you see the option missing, proceed to the other solutions listed down below.
System Font Size Changer
Download System Font Size Changer from WinTools page and install it on your computer. When you launch the application, you will see various options the ability to change their settings. You can also create a shortcut and access the tool whenever required.
Solution 3: Running Hardware and Device Troubleshooter
Every Windows OS has a hardware troubleshooter which helps users in detecting issues with your current operating system and resolve them after a series of steps. This solution applies if you haven’t updated Windows and the display settings option automatically vanished from your screen.
Right-click on the Windows icon present at the bottom left side of the screen or press Windows + X button and select Control panel. If this doesn’t work, press Windows + S and in the dialogue box, type “control panel” and hit enter.
Now on the top right side of the screen, click on View By and select Large Icons from the list of options available.
Now select the option of Troubleshooting from the control panel.
Troubleshooting – Control panel
Now on the left side of the window, select “View all” option to list all the troubleshooting packs available on your computer.
Now select “Hardware and Devices” or Display from the list of options available and click it.
Hardware and Devices Troubleshooting
Now select Next in the new window that pops up in front of you.
Now Windows will start searching for hardware problems and fix them if it finds any. This process can take some time as all of your hardware is being checked. Be patient and let the process complete successfully.
Windows might prompt you to restart your PC to fix problems. Don’t delay the request, save your work and press “Apply this Fix”.
Another issue which we noticed that plagued users was where dedicated graphics on your computer were causing several issues with the OS. This is very unlikely but usually occurs if there is a conflict of the drivers with the system. In this solution, we will disable the onboard graphics. This will help us determine and troubleshoot whether they are clashing with your dedicated graphics and causing the problem.
Press Windows + R, type “devmgmt.msc” in the dialogue box and press Enter.
Once in the Device Manager, navigate to the entry “Display adapters”, right-click on the on-board graphics and select Disable device. Disabling onboard graphics
Restart your computer. Now, only your dedicated graphics will be active. Check if the issue is resolved.
Solution 5: Changing Registry Entries
If you indeed want to change the text size of your computer (or some parts of it), you can perform the actions using registry files. Registries are instructions and a type of manual for your computer which informs it what it needs to do when certain actions occur. Here, we will make changes to your Registry by downloading an external one and installing it. When we install it, the computer automatically merges the new and the existing one.
Note: Making changes to the Registry is a risky job so make sure that you proceed at your request and don’t make any changes to any other entries.
Download the required Registry file from the links down below:
After downloading the registry file, right-click on it and select Run as administrator.
If you are prompted with User Access Control, press Yes.
Now, restart your computer completely. After restarting, check if the issue is resolved indeed. You can always run the opposite registry entry for reverting the entry.
Solution 6: Updating Graphics Drivers
Graphics drivers are the main components in play when you are playing games on your computer. They have the job of relaying the information from the motherboard to your graphics hardware. If the graphics drivers themselves are having issues, it is recommended that you update them as soon as possible and see where things go.
In this solution, we will first try installing default drivers and see if this fixes the problem.
Download and install DDU (Display driver uninstaller) from its official website.
After installing Display Driver Uninstaller (DDU), launch your computer in safe mode. You can check our article on how to boot your computer into safe mode.
After launching the DDU, select the first option “Clean and restart”. This will uninstall the current drivers completely from your computer.
DDU Clean and Restart
Now after the uninstallation, boot your computer normally without safe mode. Press Windows + R, type “devmgmt.msc” in the dialogue box and press Enter. Right-click on any space and select “Search for hardware changes”. The default drivers will be installed. Try launching the game and check if this solves the problem.
In the majority of the cases, the default drivers will not work for you so you can either install the latest drivers through Windows update or navigate to your manufacturer’s website and download the latest ones.
Search for hardware changes
After you have installed the drivers, restart your computer and check if the problem is solved.
Solution 7: Performing a System Restore
If all the above methods are not working and you still cannot get any response out of Ctrl + Alt + Del, you can perform a system restore after backing up your data.
System restore rollbacks your Windows to the last time it was working correctly. The restore mechanism automatically creates backups either periodically or in-time whenever you install a new update.
Press Windows + S to launch the start menu’s search bar. Type “restore” in the dialogue box and select the first program which comes in the result.
One in the restore settings, press System Restore present at the beginning of the window under the tab of System Protection. System Restore – Windows
Now a wizard will open navigating you through all the steps to restore your system. You can either select the recommended restore point or choose a different restore point. Press Next and proceed with all the further instructions.
Now select the restore point from the list of options available. If you have more than one system restore points, they will be listed here. Selecting the restore point
Now windows will confirm your actions for the last time before it starts the system restore process. Save all your work and backup important files just in case and proceed with the process.
Note: You can also get your hard drive checked if the problem is persisting.
Solution 8: Clean installing Windows
If all the above methods don’t work out and you are still unable to the problem at hand, we can try installer a fresh version of Windows on your computer. This fixes any issues with the installation files (if any) and solves the problem instantly. Make sure that backup all of your data before proceeding as all your information as well as installed applications will be removed.
Clean installing Windows
You check out our article on how to install Windows 10 on your computer. You can easily make a Windows bootable by either Rufus or by Windows media creation tool. Do note that you would have to manually install the update by updating the version of Windows installed (or if you clean install Windows directly into update 1903, the problem will go away automatically).
 Advanced Display Settings Missing in Windows 10
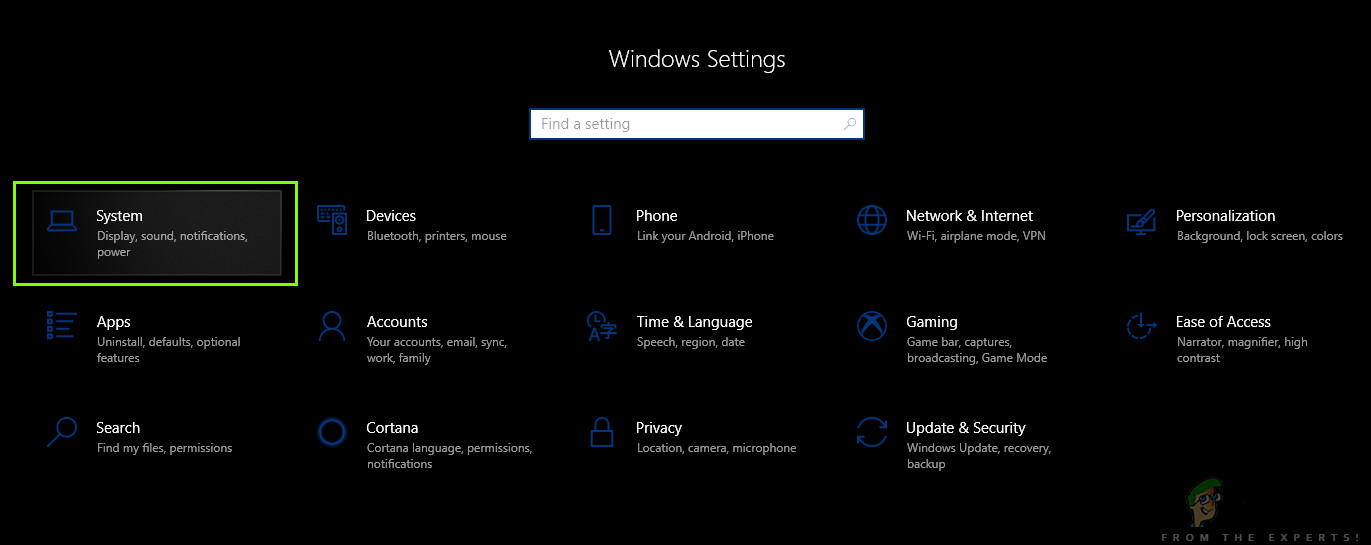 System – Windows settings
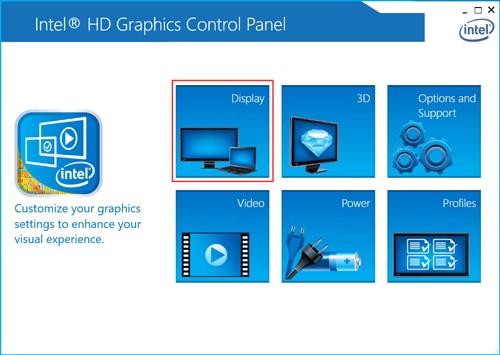 Display adapter properties
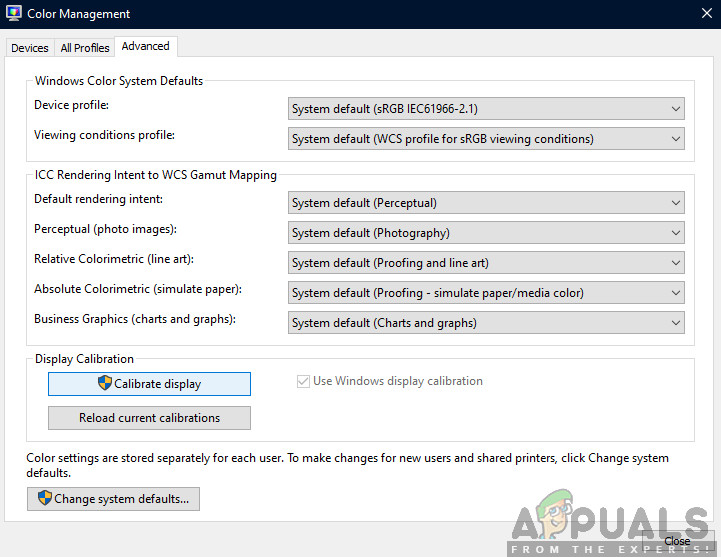 Calibrate Display
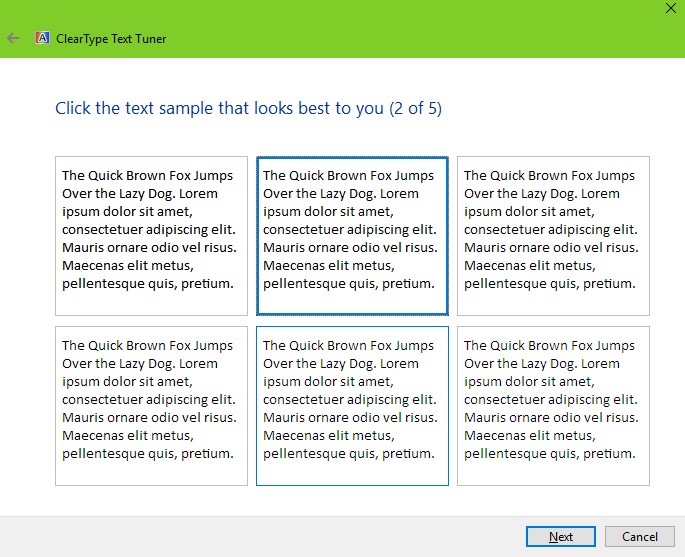 ClearType Text Tuner
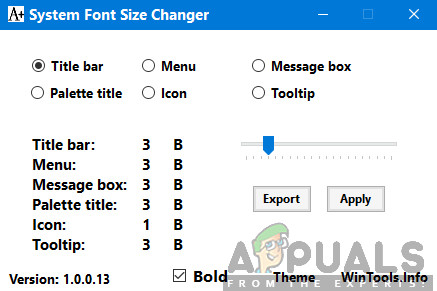 System Font Size Changer
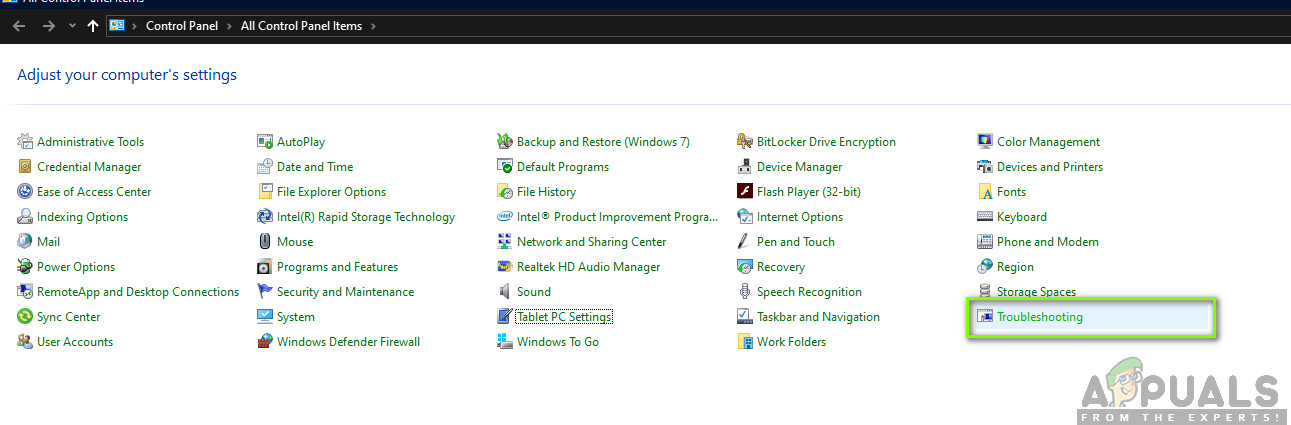 Troubleshooting – Control panel
 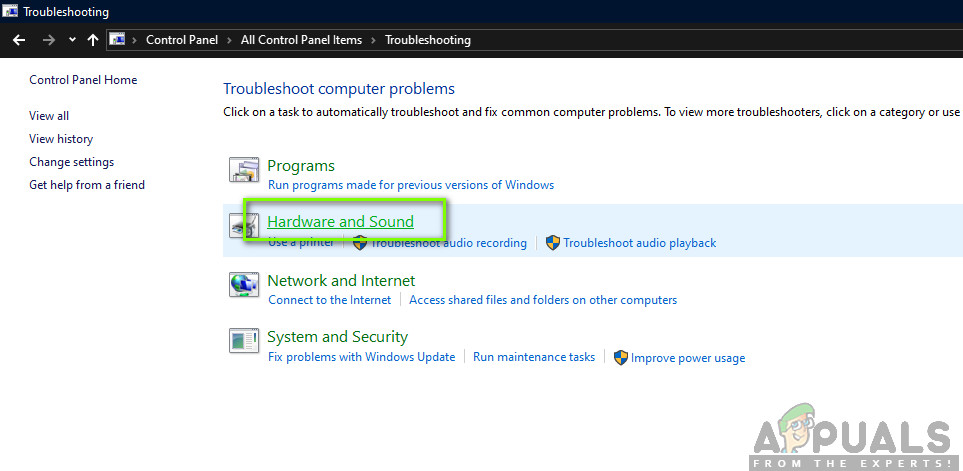 Hardware and Devices Troubleshooting
 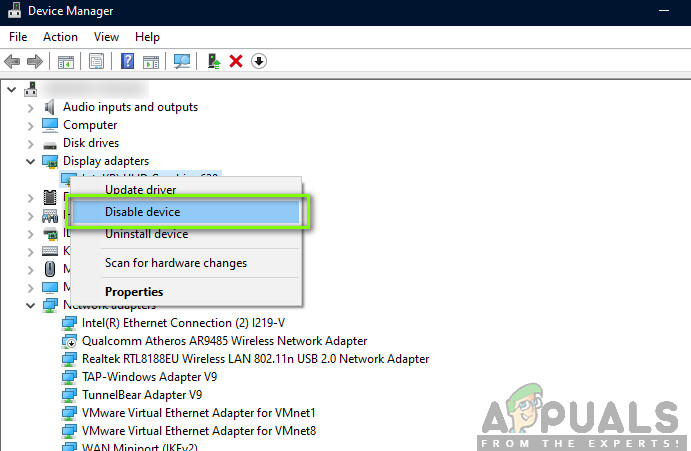 Disabling onboard graphics
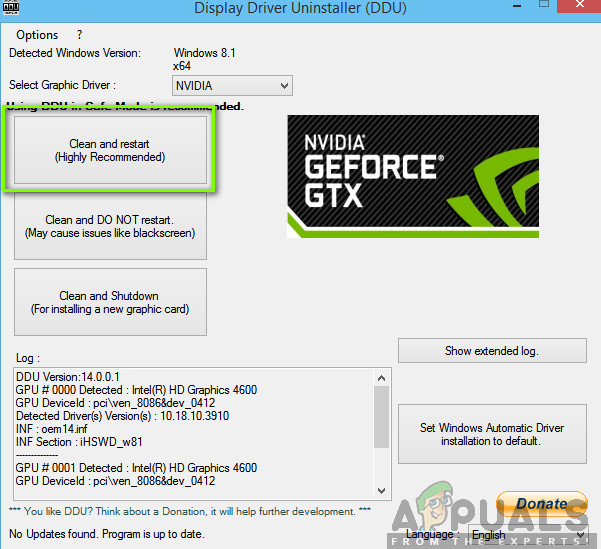 DDU Clean and Restart
 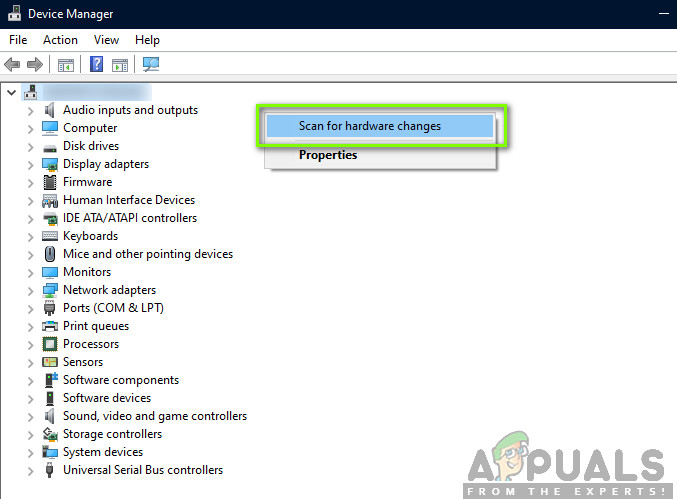 Search for hardware changes
 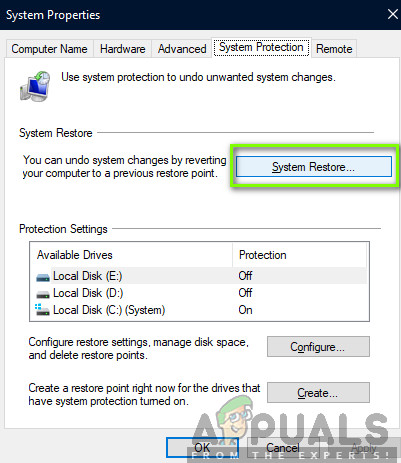 System Restore – Windows
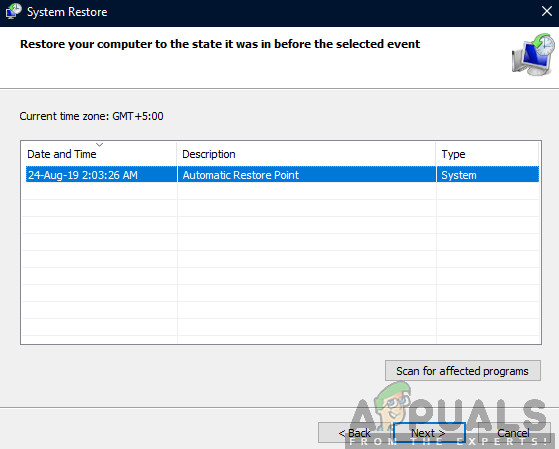 Selecting the restore point
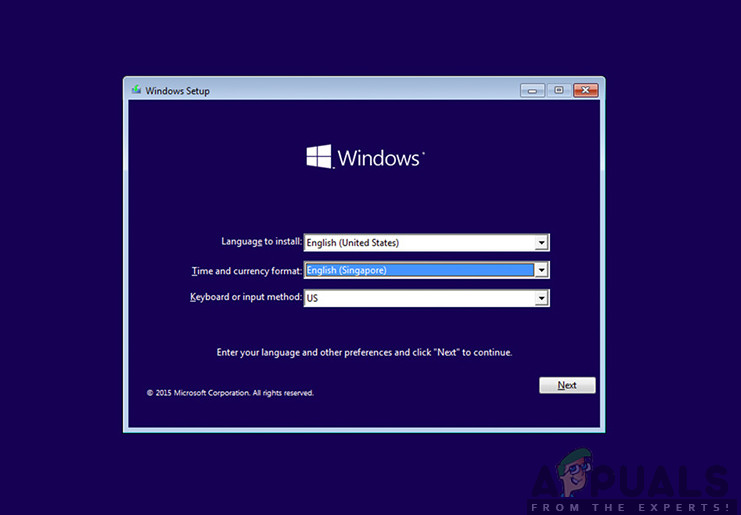 Clean installing Windows


