- How do I password protect my files and folders in Windows?
- Microsoft Windows Vista, 7, 8, and 10 users
- Microsoft Windows XP Professional users
- Encrypt contents to secure data is grayed out
- Show «Encrypt» on the context menu
- Microsoft Windows XP Home users
- Make this folder private is grayed out
- Other security solutions for protecting your files and folders in Windows
- File and folders frequently used or accessed
- How to encrypt files and folders in Windows 10 [EASY GUIDE]
- How can I encrypt files or folders in Windows 10?
- 1. Use a dedicated encryption tool (recommended)
- WinZip
- 2. Use the built-in Encrypted File System
- Private Internet Access
- How to back up your encryption key
- 3. Use Microsoft Office
- Шифрование файлов и папок в Windows: BitLocker и EFS
- Содержание:
- Стандартные средства шифрования Windows и их различия
- Шифрование при помощи EFS
- Как использовать ключи шифровальщика?
- Шифрование диска при помощи BitLocker
- Ошибка BitLocker
- Как разблокировать зашифрованный диск?
- Как защитить паролем отдельные папки и файлы?
- Часто задаваемые вопросы
How do I password protect my files and folders in Windows?
Because most versions of Windows do not include a method of password protecting your files and folders, this page provides steps for encrypting files and folders instead. To password protect your files and folders in Windows, you need to use a third-party program.
Before password protecting any document, you may want to create a backup of the non-password protected files and folder in case you forget the password in the future.
Microsoft Windows Vista, 7, 8, and 10 users
Unfortunately, Windows Vista, Windows 7, Windows 8, and Windows 10 do not provide any features for password protecting files or folders. You need to use a third-party software program to accomplish this.
If you want to encrypt a file or folder, this can be done by following these steps:
- Select the file or folder you want to encrypt.
- Right-click the file or folder and select Properties.
- On the General tab, click the Advanced button.
- Check the box for the «Encrypt contents to secure data» option, then click OK on both windows.

If the «Encrypt contents to secure data» option is not selectable or available, you likely have a Home edition of Windows, which does not support this feature. It is also possible that the hard drive where the files are located is not formatted as NTFS, which is required.
Microsoft Windows XP Professional users
The steps below for encrypting the files on Windows XP Professional apply to users who are using a computer with two or more accounts. If you are using a single account, see the other security solutions section.
- Select the file or folder you want to encrypt.
- Right-click the file or folder, and click Properties.
- On the General tab, click the Advanced button.
- Check the box for the Encrypt contents to secure data option.
- Click Apply and then OK.
You won’t be prompted to enter a password when encrypting a folder in Windows XP Professional. However, other user accounts on your computer won’t have access to files contained in the encrypted folder.
Encrypt contents to secure data is grayed out
If you are using the Home edition of Microsoft Windows XP, see the Windows XP Home steps.
Show «Encrypt» on the context menu
The newest version of TweakUI also enables you to show the Encrypt option in the context menu. To do this, follow the steps below.
- Open TweakUI.
- In the TweakUI window, select Explorer.
- In the right side of the window under Settings, locate Show ‘Encrypt’ on the context menu and check the box. This option should be below Prefix ‘shortcut to’ on new shortcuts and above Show ‘View workgroup computers’ in NetPlaces.
- I’m missing Show Encrypt on the context menu in TweakUI.
Microsoft Windows XP Home users
- Select the file or folder you want to encrypt.
- Right-click the file or folder and click Properties.
- Click the Sharing tab.
- Check the box Make this folder private.
- Click Apply and then OK.
Make this folder private is grayed out
For this option to work on Microsoft Windows XP Home edition, you must meet the below requirements.
- The hard drive must be formatted in NTFS and not FAT32 file system.
- The folder you are attempting to encrypt is your folder. For example, if your name is Bob, you must encrypt the following folder, or a folder within it:
C:\Documents and Settings\Bob\
You cannot encrypt any folders outside of this folder. If you want to encrypt folders outside of this folder, see the other security solutions section below.
Other security solutions for protecting your files and folders in Windows
File and folders not frequently used — An easy way to password protect files is to create an archive of the files using a compression tool. When the archive is created, you can encrypt the contents by specifying a password.
Windows ME and Windows XP users — Windows ME and Windows XP comes with a compression utility. This utility can also be used to compress and password protect files.
Windows Vista and Windows 7 users — Windows Vista and Windows 7 also include a compression utility. However, password protection for the compressed files is not possible without the use of a third-party software program.
Users can still view a list of the files within a compressed file. If you want both your file names and contents to be hidden, move all the files into a single folder and password protect that folder.
File and folders frequently used or accessed
If you need to password protect or encrypt data you frequently use, you need to install a third-party program that allows you to protect your files and folders. Below are some free and commercial solutions.
- 7-Zip — A free file and folder zipping utility, that also includes the ability to password protect zipped files and folders.
- AxCrypt — An excellent free encryption utility that enables users to encrypt all files within a folder and not allow those files to be viewed unless a passphrase (password) is known.
- Folder Guard — A commercial version of a password protection software that enables you to password protect files, folders, and other Windows resources.
- Protected Folder — For a small fee, it’s an excellent software program that enables you to password protect folders.
How to encrypt files and folders in Windows 10 [EASY GUIDE]

- Encrypting your most important files is not only extremely useful but also easier than you’d think.
- You have several methods to password-protect your documents, including an inbuilt Windows tool.
- For more guides on the same topic, see our dedicated File Encryption section on the website.
- Looking for a particular step-by-step guide? We’ve probably got it covered, so do a quick search in our How-To Hub.

- Unzip all major file formats: ZIP, RAR, 7Z, TGZ, TAR, etc.
- Encrypts the files you zip for maximum protection
- Manage your files easily (PC, Cloud, network)
Open archived files
with ease on your PC
Encrypting a certain file or folder is probably the best way to keep it safe, so only you can access that file or folder.
Microsoft’s developers decided to keep the built-in encryption method in Windows 10 similar to the previous method.
Still, it’s good from time to time to go through the file encryption methods available in Windows, but not exclusively.
How can I encrypt files or folders in Windows 10?
1. Use a dedicated encryption tool (recommended)
If you think that Windows’ own encryption tool isn’t good enough for your files, you can try with some third-party encryption software.
Actually, a right third-party tool is an even better choice than EFS, because it offers more options, so you’ll be able to keep your files as safe as possible.
There are a lot of free encrypting tools out there, but the best way is to get a premium software. It has many more features and it is a priority when it needs support from developers.
A first recommendation would be WinZip. You’ve probably heard of it since it’s currently the most popular file encryption and compression tool.
As a matter of fact, the program offers more file management options, including sharing, compressing, and backing up files.
The encryption option allows you to zip your files with certified 128 or 256-bit AES encryption, keeping your files safe from unwanted eyes.
Plus, with WinZip, you can create read-only PDFs and add watermarks to deter copying.
Other notable features of WinZip include finding, opening, editing, moving, and sharing the files stored on PCs, networks, or cloud services.
The tool can be fully integrated with Dropbox, G-Suite, or OneDrive.
WinZip
2. Use the built-in Encrypted File System

- Right-click on the file/folder you want to encrypt and go to Properties.
- On the General tab, click Advanced.
- Under the Compress and encrypt attributes section, click on Encrypt content to secure data.
- Click OK and close Properties.
- Choose Apply changes to the folder, subfolders, and files.
That’s that, your folder is now encrypted and its text is shown in green color.
All subfolders and files of the encrypted folder are encrypted as well, but if you want to change that, repeat the process above, and choose to Apply changes to this folder only instead of Apply changes to this folder, subfolders, and files.
The EFS (Encrypted File System) is probably the fastest way to encrypt your files and folders in Windows 10 (and any other version of Windows since XP).
This is a very simple encryption tool, and you’ll make your files protected in a couple of minutes, with just a couple of clicks.
But before we show you how to encrypt your files with EFS, we have to warn you that you’ll be able to access the encrypted file only with the login of the account you encrypted the file with.
Other user accounts (if with administrative permissions) won’t be able to access it. Thus, make sure to remember or write down the password somewhere, or your file will stay locked forever.
You may also choose to protect your files before they can be accessed with a good VPN tool. We strongly recommend Private Internet Access VPN to secure your data.
It protects your PC from attacks while browsing, masks your IP address, and blocks all unwanted access to your computer.
Private Internet Access
How to back up your encryption key
- Click on Back up your encryption key popup.
- Choose Back up now.

- Follow the instructions from the wizard.
- Enter and re-enter your password.
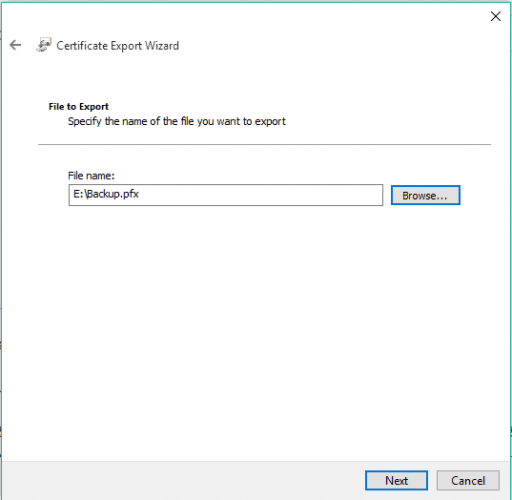
- Choose a place to which you’ll save your certificate and give a name to your encryption backup file.
- Click Next, and Finish.

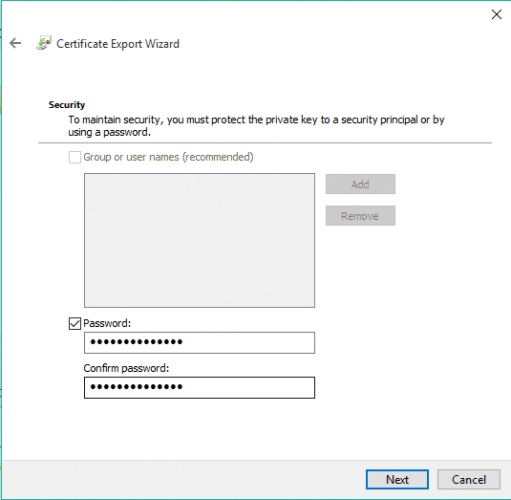
Usually, Windows will offer you an option to back up your encryption key right after you create it.
If you’re looking to encrypt a USB flash, we’ve got a list of the 12 best software solutions that will help you secure your files in no time.
3. Use Microsoft Office
- Open the Office file you want to encrypt, and go to File.
- Under Info, click on Protect document.
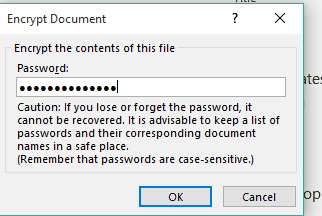
- Choose Encrypt with password.
- Enter your password and press Enter.
- Re-enter your password, and click OK.
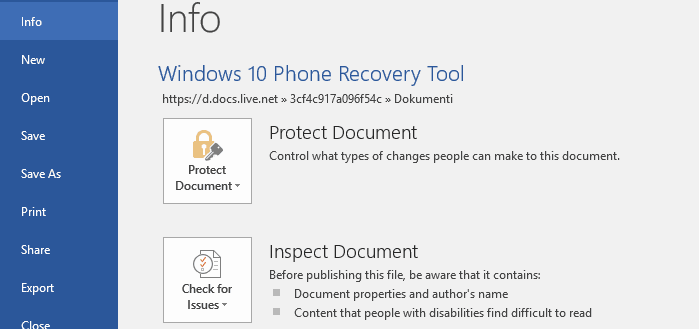
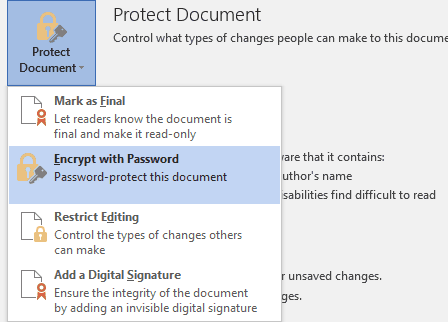
Your Office document is now encrypted, and you’ll have to enter a password you set before to access it.
As you can see, there are a couple of methods to keep your files safe, so it’s completely up to you which one you’ll use. If you have some questions or comments, just reach for the comments section below.
Шифрование файлов и папок в Windows: BitLocker и EFS
В этой статье мы расскажем о том, как зашифровать файлы и папки стандартными методами Windows 10, а также рассмотрим две утилиты для шифрования: BitLocker и EFS.
Содержание:
Операционная система Windows имеет встроенные утилиты, предназначенные для шифрования данных. С их помощью можно защитить данные от третьих лиц и скрыть содержимое от тех, кто не знает пароль.
Стоит отметить, что встроенные шифровальщики Windows имеют достаточно простые алгоритмы работы, поэтому при умении и наличии хакерского ПО такое шифрование можно обойти, но для обычных пользователей данные все равно останутся недоступными, что можно применять, к примеру, для компьютеров, которыми пользуется сразу несколько различных пользователей.
Стандартные средства шифрования Windows и их различия
Windows снабжен встроенными средствами для шифрования данных: BitLocker и EFS.
Данные утилиты позволяют быстро провести шифрование данных и устанавливать собственные пароли на файлы.
Шифровальщик BitLocker является узкоспециализированной программой, предназначенной для шифрования дисков. С её помощью можно защитить данные на всем жестком диске или его разделе, без возможности шифрования отдельных каталогов и файлов.
Утилита EFS – заполняет пробел BitLocker и шифрует как отдельные папки, так и всевозможные файлы. Функционал EFS позволяет простым и быстрым способом сделать данные недоступными для других пользователей.
Шифрование при помощи EFS
Сразу стоит отметить, что домашняя версия ОС Windows не подходит для шифрования данных встроенными средствами, поскольку алгоритмы работы утилиты являются неэффективными при данной версии системы. Помимо этого, пользователю следует обзавестись съемным носителем, где можно хранить специальный ключ, способный расшифровать информацию в случае утери доступа к профилю ОС.
Для начала работы с утилитой EFS следует выбрать необходимые для шифрования данные и поместить их в одну папку.
Теперь необходимо выделить папку и нажать по выделенной области правой кнопкой мыши, где следует выбрать пункт «Свойства» и в открывшемся окне перейти во вкладку «Общие». На вкладке общее кликаем по кнопке «Другие», как показано на скриншоте.
В открывшемся окне выбираем самый нижний пункт «Шифровать содержимое для защиты данных» и нажимаем «Ок».
После нажатия кнопки «Применить» пользователю будет предложено два варианта шифрования. Выбираем один из них, нажимаем «Ок».
Теперь папка станет недоступной для других пользователей, использующих иную учетную запись. Стоит отметить, что текущий пользователь сможет открыть данные в любой момент, поэтому для своего профиля Windows следует придумать надежный пароль.
Как использовать ключи шифровальщика?
После проведенного шифрования система автоматически предупредит о создании специального ключа, при помощи которого можно расшифровать указанную папку в экстренной ситуации.
Как правило, оповещение будет показано в правом нижнем углу, где зачастую находятся настройки громкости.

Нажимаем по оповещению и видим окно с возможными действиями с ключом. Если необходимо создать резервную копию ключа, нажимаем по пункту «Архивировать сейчас».
После этого откроется окно мастера экспорта сертификатов. Нажимаем «Далее» и переходим к окну с установками. Указываем необходимые или оставляем текущие параметры и нажимаем «Далее».

В открывшемся окне указываем метод создания с паролем и устанавливаем собственный пароль.
Следующим шагом будет сохранение ключа на любой внешний накопитель. При создании ключа появляется гарантия того, что необходимую папку можно будет открыть и просмотреть даже в случае утери доступа к своей учетной записи.
Шифрование диска при помощи BitLocker
При необходимости шифрования дисков или съемных накопителей следует воспользоваться встроенной утилитой BitLocker, которая позволит провести шифрование большого объема данных. Чтобы начать работу с BitLocker, необходима максимальная, профессиональная или корпоративная версия Windows.
Для доступа к BitLocker следует нажать ПКМ по кнопке «Пуск», выбрать пункт «Панель управления» и зайти в первый раздел «Система и безопасность».
В открывшемся окне переходим к пункту «Шифрование диска Bitlocker».
Теперь необходимо активировать утилиту напротив системного диска или необходимого тома.

Программа автоматически проведет анализ диска и предложит выбрать способ разблокировки.

Если материнская плата обладает модулем TPM, можно выбрать дополнительные способы разблокировки. Также в утилите доступна возможность защитить диск паролем или создать специальную флешку с ключом, который сможет разблокировать диск при подключении.
Независимо от выбора способа разблокировки, программа BitLocker предоставит специальный ключ для разблокировки диска. Им можно воспользоваться при утере флешки или пароля.
Данный ключ можно распечатать, сохранить в виде документа на съемный носитель или сохранить на сервере Microsoft. Стоит отметить, что этот этап является очень важным, поскольку без экстренного ключа и при утере других средств разблокировки диск останется заблокированным.
После выполнения всех действий утилита предложит выбрать метод шифрования, из которых следует выбрать предпочтительный.
После этого компьютер будет перезагружен, а при новой загрузке в системе будет присутствовать указатель процесса шифрования.
Ошибка BitLocker
В некоторых случаях вместо выбора способа разблокировки может появиться сообщение об ошибке. Это означает, что данный компьютер не оборудован TPM модулем, расположенным на материнской плате. Модуль TPM является специальным микрочипом, в котором могут храниться зашифрованные ключи, используемые при разблокировке дисков.

Если модуль не подключен, существует способ обхода данной ошибки. Для этого следует выполнить следующие шаги:
Шаг 1. Нажимаем ПКМ по кнопке «Пуск», выбираем команду «Выполнить» и в открывшемся окне вводим команду «gpedit.msc».
Шаг 2. В редакторе групповой политики следует перейти по следующему пути: «Локальный компьютер», «Конфигурация компьютера», «Административные шаблоны», «Компоненты Windows», «Шифрование диска BitLocker», «Диски операционной системы».
Зайдя в последний раздел, в окне справа можно увидеть отображение множества пунктов. Среди них необходимо выбрать «Этот параметр политики позволяет настроить требование дополнительной проверки подлинности при запуске».
Шаг 3. В левой части появившегося окна следует выбрать пункт «Включено», а также проверить наличие галочки возле параметра «Разрешить использование BitLocker…». Выполненные действия следует подтвердить кнопкой «Применить».
Как разблокировать зашифрованный диск?
Разблокировка зашифрованного диска происходит соответственно с выбранным методом разблокировки. Это может быть специальный пин-код, который необходимо ввести в начале работы, либо подключение флешки-ключа. После разблокировки пользователь может настроить работу BitLocker, изменить пароль или убрать шифрование.
Стоит отметить, что BitLocker – достаточно требовательная утилита, которая тратит ресурсы компьютера во время работы. При включенном шифровальщике дисков производительность системы может падать вплоть до десяти процентов.
Как защитить паролем отдельные папки и файлы?
Функционал шифровальщика данных EFS может показаться слега ограниченным и не очень удобным при использовании в сети, поэтому многие пользователи прибегают к шифрованию данных при помощи встроенного архиватора данных WinRAR. Запаковав файлы в архив, можно добавить к нему пароль, защищающий файлы от просмотра третьими лицами.
Чтобы зашифровать папку или файл, следуйте шагам:
Шаг 1. Выбираем нужную папку или файл и нажимаем по нему правой кнопкой мыши. В открывшемся списке следует выбрать «Добавить в архив».
Шаг 2. В открывшемся окне выбираем пункт «Установить пароль». В следующем окне следует дважды ввести свой пароль и нажать «Ок».
Шаг 3. Финальным этапом будет выбор метода сжатия, имени и других параметров будущего архива с паролем. Данные параметры можно выбирать по своему усмотрению.
Теперь при открытии архива понадобиться вводить пароль.
Часто задаваемые вопросы
Это сильно зависит от емкости вашего жесткого диска и производительности вашего компьютера. В основном, большинство операций восстановления жесткого диска можно выполнить примерно за 3-12 часов для жесткого диска объемом 1 ТБ в обычных условиях.
Если файл не открывается, это означает, что файл был поврежден или испорчен до восстановления.
Используйте функцию «Предварительного просмотра» для оценки качества восстанавливаемого файла.
Когда вы пытаетесь получить доступ к диску, то получаете сообщение диск «X: \ не доступен». или «Вам нужно отформатировать раздел на диске X:», структура каталога вашего диска может быть повреждена. В большинстве случаев данные, вероятно, все еще остаются доступными. Просто запустите программу для восстановления данных и отсканируйте нужный раздел, чтобы вернуть их.
Пожалуйста, используйте бесплатные версии программ, с которыми вы можете проанализировать носитель и просмотреть файлы, доступные для восстановления.
Сохранить их можно после регистрации программы – повторное сканирование для этого не потребуется.


