- FIX: The operation completed successfully: (ERROR_SUCCESS)
- How do I fix the ERROR_SUCCESS issue?
- 1. Run a full system scan
- 2. Repair your registry
- 3. Update your OS
- 4. Update your PC drivers
- 5. Perform a clean boot
- 6. Uninstall and reinstall the apps and programs affected by error_success
- 7. Disable the proxy server
- Error 0x80080204: The operation did not complete successfully on Store Windows 10
- Error 0x80080204: The operation did not complete successfully on Store Windows 10 Solutions
- Change Time Zone
- Restore Microsoft Store using Command Prompt
- Run Windows Store Apps Troubleshooter
- Reset Microsoft Store Cache
- Change Developers Settings in Update & security
- Turn Off Third-party Antivirus
- Perform SFC Scan
- System Restore
- Conclusion
FIX: The operation completed successfully: (ERROR_SUCCESS)

- Keeping your Windows 10 updated will generally fix any issue, so use the built-in Windows Update feature as often as you can.
- Updating your drivers also helps, so make sure you follow all known methods to do it properly.
- Thankfully enough this type of error does not hinder functionality too much, nor does it lead to more severe issues, such as BSoDs.
- The Successful Error message is just one of many error messages you will encounter in Windows 10. Thankfully enough, we’ve covered most of them.
One of the oddest errors that you may encounter when using Windows 10 is an error message stating that the operation you were undergoing was completed successfully.
Error _success usually occurs in the following situations:
- When upgrading your PC to Windows 10
- While installing the latest Windows updates
- When downloading apps from the Windows Store
- During Windows startup and shutdown
- When performing various tasks, such as printing, etc.
Error _success variations
At the same time, this error may also occur under the following forms:
- Error Code 0x00000000 : The operation completed successfully
- Error Success: The operation completed successfully
- Error success 0 (0x0)
- The operation completed successfully win32exception
If you’re getting the error success 0 (0x0) or Error success: the operation completed error codes, follow the troubleshooting steps listed in this article to fix them.
How do I fix the ERROR_SUCCESS issue?
1. Run a full system scan
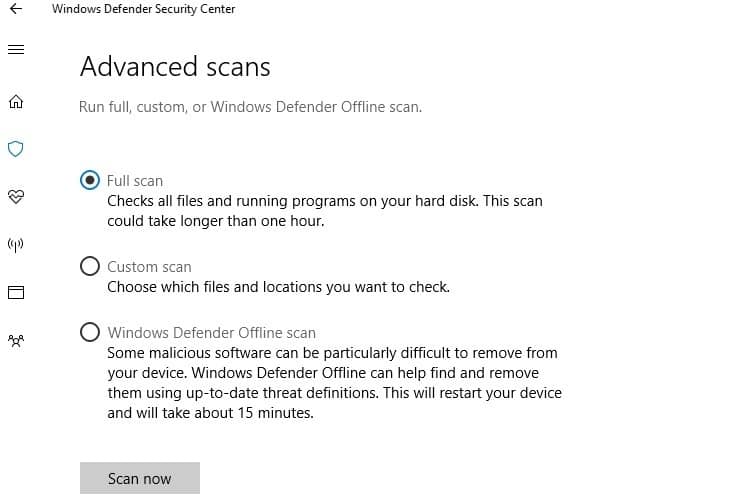
Malware may cause various issues on your computer, including errors. Perform a full system scan in order to detect any malware running on your computer. You can use Windows’ built-in antivirus, Windows Defender, or third-party antivirus solutions.
2. Repair your registry
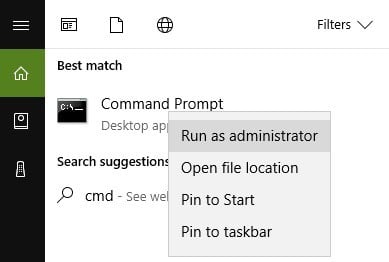
1. Go to Start > type cmd > right-click Command Prompt > select Run as Administrator
2. Now type the sfc /scannow command
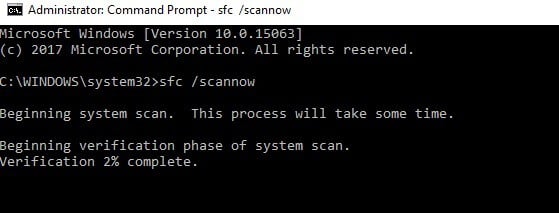
3. Wait for the scanning process to complete and then restart your computer. All corrupted files will be replaced on reboot.
The simplest way to repair your registry is to use a dedicated tool, such as CCleaner. Don’t forget to first backup your registry in case anything goes wrong. If you haven’t installed any registry cleaner on your computer, check out our article on the best registry cleaners to use on Windows 10 PCs.
If that doesn’t work, simply use Microsoft’s System File Checker to check for system file corruption by using the methods listed above.
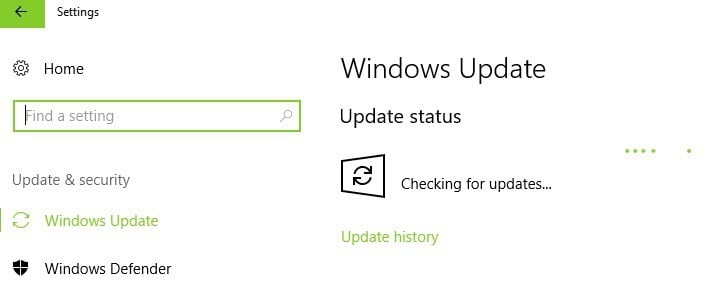
3. Update your OS
Make sure that you’re running the latest Windows OS updates on your machine. As a quick reminder, Microsoft constantly rolls out Windows updates in order to improve the system’s stability and fix various issues.
Go to Windows Update , check for updates and install the available updates. To access the Windows Update section, you can simply type update in the search box. This method works on all Windows versions.
If you’re looking for a particular update, go to Microsoft’s Update Catalog website. Simply type the KB number of the respective update, hit Enter and then click on the download button.

Windows updates are meant to improve the operating system ‘s stability and reliability, but sometimes they bring issues of their own. For this reason, it’s possible that some updates cause various error_success errors.
4. Update your PC drivers
Outdated drivers may also trigger error_success errors. As a result, install the latest driver updates on your PC and see if this action solves the problem. Here’s how to update computer drivers for various Windows versions.
4.1 How to update drivers on Windows 10
You can fix the most common driver issues by installing the latest Windows updates . Simply type “update” in the Search box, and click Check for Updates to download and install the latest updates.
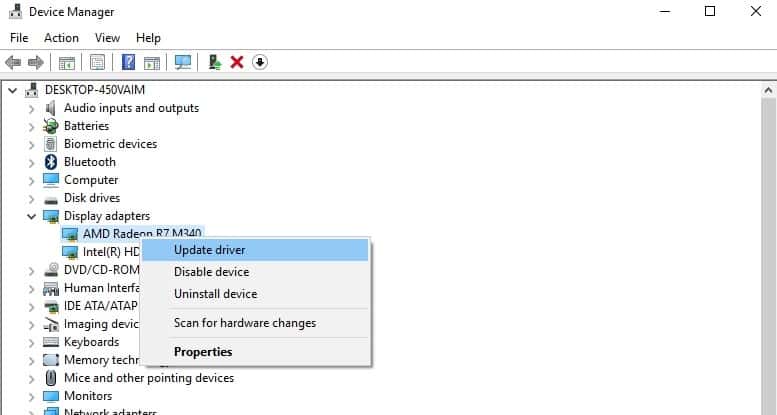
If you want to install particular drivers, launch Device Manager. Expand the available categories and select the device that you wish to update the driver for. To install the latest driver updates for that device, right-click on it and select Update Driver.
A third option is to download the available driver updates directly from the manufacturer’s website.
4.2 How to update drivers on Windows 7
You can set Windows 7 to automatically install the latest driver updates on your computer.
- Go to Start > click Devices and Printers.
- Right-click the name of your computer > select Device installation settings.
- Click Yes, do this automatically (recommended), and then click Save changes.
- If you’re prompted for an administrator password or confirmation, type the password or provide confirmation.
You can also use Windows Update to install the latest driver updates on your machine. If Windows can’t find a driver for your device, you can download the available driver updates directly from the manufacturer’s website.
5. Perform a clean boot
A clean boot starts Windows using a minimal set of drivers and startup programs. This action eliminates software conflicts and helps you determine what conflict is causing the annoying error_success errors.
5.1 How to perform a clean boot on Windows 10:
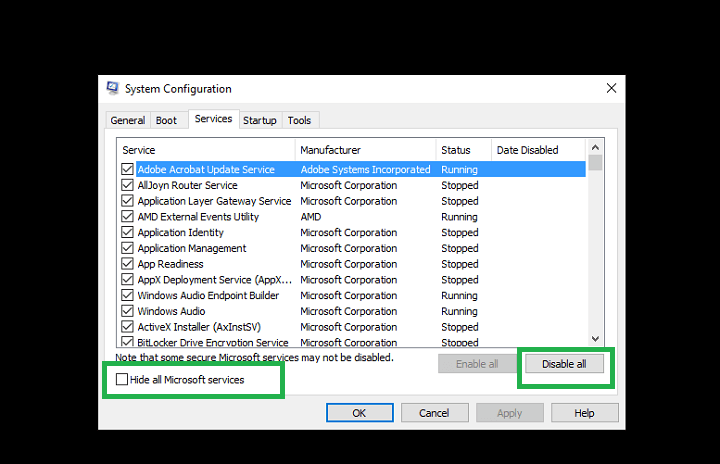
- Type System Configuration in the search box > hit Enter
- On the Services tab > select the Hide all Microsoft services check box > click Disable all .
3. On the Startup tab > click on Open Task Manager .
4. On the Startup tab in Task Manager > select all items > click Disable .
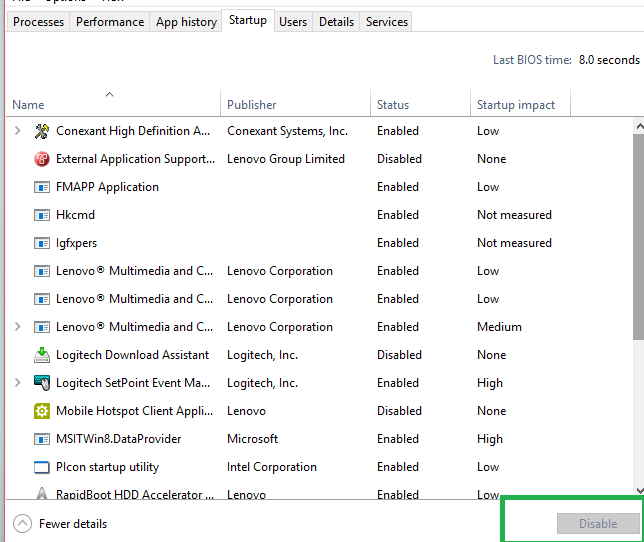
5. Close the Task Manager.
6. On the Startup tab of the System Configuration dialog box >click OK > restart your computer.
5.2 How to perform a clean boot on Windows 7
1. Go to Start > type msconfig.exe > select the System Configuration utility.
2. On the General tab, click the Selective startup option > uncheck the Load startup items check box.
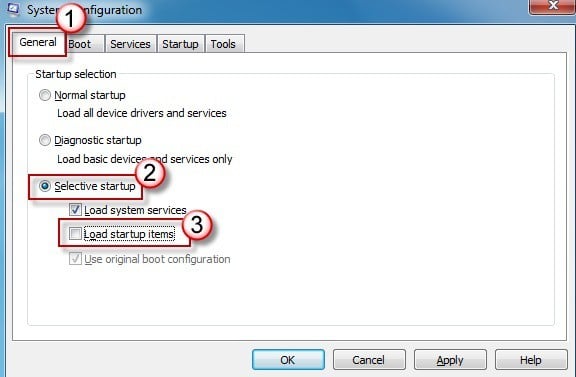
3. On the Services tab, check the Hide all Microsoft services check box > click Disable all > click OK > Restart.
For more information on how to perform a clean boot on other Windows versions, check out Microsoft’s support page.
6. Uninstall and reinstall the apps and programs affected by error_success
If the error_success error occurs when using a particular app or program, try uninstalling and reinstalling the respective programs. Also, if this error occurs shortly after installing a new app or program, try uninstalling the respective app or program.
7. Disable the proxy server
This workaround is particular useful if you encounter error_success when downloading app from the Windows Store or when updating them.
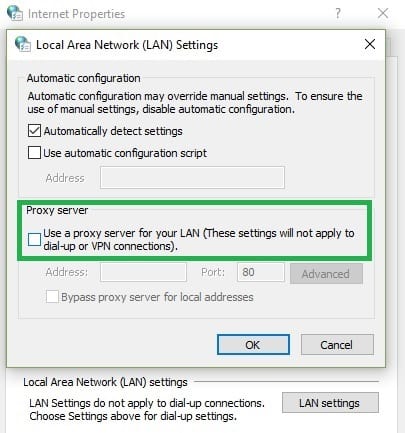
1. Go to Search > type Internet Options > go to Connections tab > go to LAN Settings
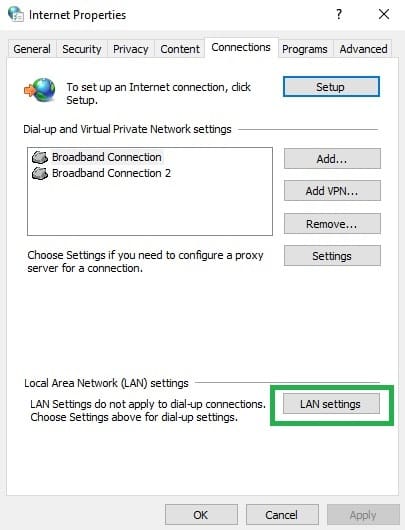
2. Uncheck the option Use a proxy server for your LAN > click Apply.
By following our listed steps you should no longer see any successful errors when using your Windows 10 PC.
The good news is that The operation completed successfully error occurs quite rarely. If you’ve come across other workarounds to fix error_success, feel free to list the troubleshooting steps in the comment section below.
Error 0x80080204: The operation did not complete successfully on Store Windows 10
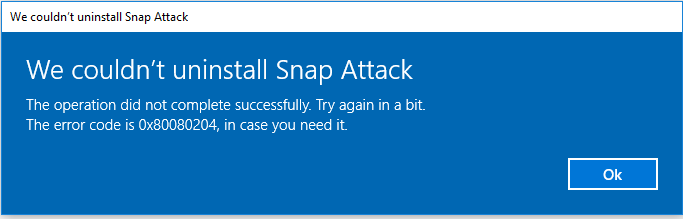
Do you encounter Error 0x80080204 on Windows 10 Device when download or update or uninstall an app from Microsoft Store? The stop code appears with a message – The operation did not complete successfully – after the application stays in the queue. You can’t update the built-in or 3rd part app from Store because of this issue.
For some users, the Error 0x80080204: The operation did not complete successfully on Store Windows 10 shows up for certain applications only. This generally happens due to the presence of bugs and problems in the build you are running. Also, the misconfigured system files on the OS may also be the possible reason that stops applications from updating, installing or uninstalling. So, in this article, we will discuss a decent range of workarounds that will help you in bypassing Error 0x80080204 in Windows 10 Microsoft Store.
Error 0x80080204: The operation did not complete successfully on Store Windows 10 Solutions
Here is How to Fix Error 0x80080204: The operation did not complete successfully on Store Windows 10 –
Change Time Zone
You need to check the system’s date and time are correctly configured or not. In case, the time zone is not set properly, you are likely to receive Error 0x80080204. So, go through these steps to modify the date and time of Windows 10 PC.
Step-1: To start with, hit Windows logo + I shortcut keys in order to open Windows Settings.
Step-2: From the main interface of the Settings application, click Time & Language category.
Step-3: On the following page, go to the Time zone drop-down menu. Click on it and choose the correct zone of your location.
Step-4: Now, ensure to toggle On the option Set time automatically so that Windows configures the time all by itself when you set your current time zone.

Restore Microsoft Store using Command Prompt
If the above method fails to solve Error 0x80080204, you can simply use Command Prompt to restore the operation of Store in Windows 10. Experts recommend running a command will eventually help in restoring the functionality of Store. So, give an attempt to this solution.
Click on the Start Menu and type cmd. Moving ahead, execute a right-click on the result and select Run as administrator from the context menu.
Upon the prompt of UAC, hit Yes to proceed further.
Now in the elevated Command Prompt, type or copy/paste the below-given command line and hit Enter to run.
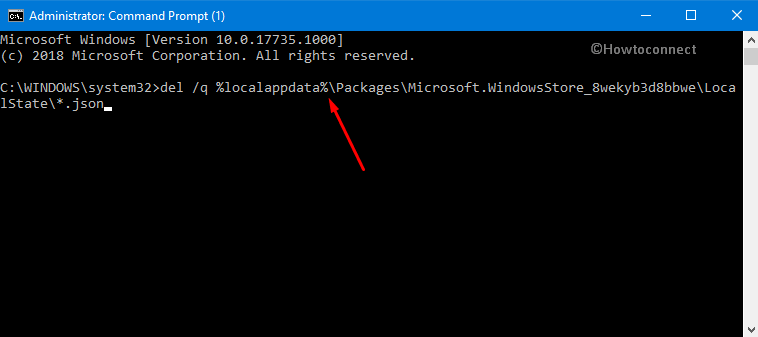
Now, give an attempt to the application that you were trying to install and update. Hopefully, you will be able to carry out the task without receiving Error 0x80080204: The operation did not complete successfully on Store Windows 10.
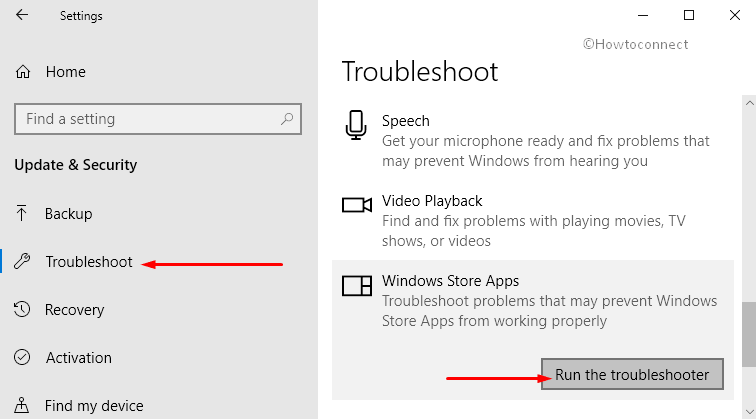
Run Windows Store Apps Troubleshooter
Go to Start Menu and click the cog icon to launch Settings application. Click Update & security category on the next page of the application.
Select Troubleshoot on the left pane and switch to the corresponding right side.
Here, locate and select Windows Store Apps. Once it gets expanded, click Run the troubleshooter button. Now, wait for the scan to detect the issues and fix it automatically.
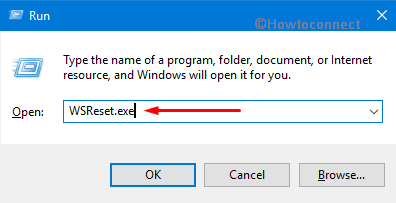
Reset Microsoft Store Cache
This is one of the common workarounds that most users undertake to resolve the issues that Store apps come across.
So, open Run dialog box by hitting Windows logo + R shortcut keys altogether.
Type in or copy/paste WSReset.exe in the text field of Run and click OK. This will immediately launch Command Prompt on the screen displaying the reset process. Once the resetting procedure gets over, the Command Prompt window will be closed automatically.
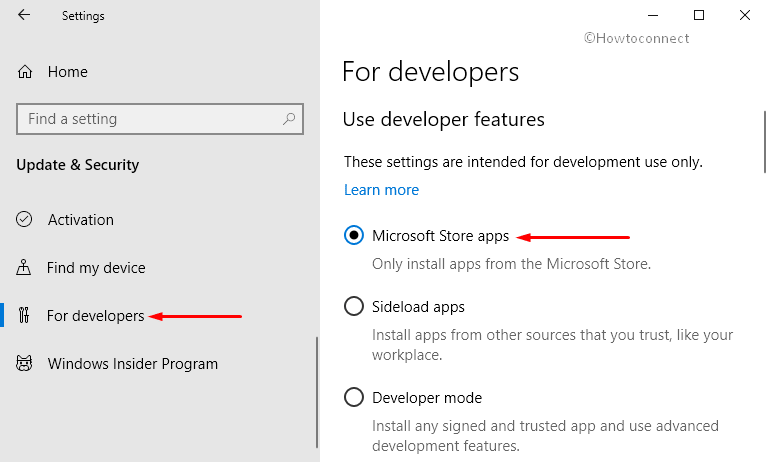
Change Developers Settings in Update & security
Another possible reason for the occurrence of Error 0x80080204 in Microsoft Store is the Sideload apps. So, you need to change the developer settings in order to get rid of this issue.
Access Settings, the built-in application of Windows 10. To quickly launch it, hit Win + I hotkeys simultaneously.
Select Update & security from the homepage of Settings program.
Go to For developers section on the left sidebar. Switch to its right pane and select the Microsoft Store apps option as shown in the below snapshot.
Turn Off Third-party Antivirus
The presence of third-party antivirus may also lead to the Error 0x80080204: The operation did not complete successfully on Store Windows 10. This generally affects the system when you try to update the already installed Store apps. So, turn off your antivirus program and then give a shot to install or update the Store applications.
Perform SFC Scan
As mentioned earlier also the faulty system files may not prevent the applications from uninstalling, updating or installing from Store. So, conducting a full system scan will help in detecting as well as resolving those files.
Access Run dialog and type “cmd” in the blank space. Now, jointly press Ctrl + Shift + Enter keys altogether to launch Command Prompt with admin authorities.
Hit Yes button when “UAC” warning pops-up on the PC screen.
In the black window that appears, insert the given command and press Enter.
Wait for the scan to finish and let it repair the corrupted files.
System Restore
If the Error 0x80080204: The operation did not complete successfully on Store Windows 10 still persists, you can follow these steps to Restore your computer to an earlier point.
Note: This method is only applicable if you have created a Restore point on your PC.
Press Win+S hotkeys together and type System Restore.
From the result, make a click on “Create a restore point“. It will pop up a new window.
Click System Restore button (see snapshot).
Now, go through the guidelines of the restore and finally, restart Windows 10 to get rid of Error 0x80080204.
Conclusion
The faulty system file entries can do real harm to the operating system. Because of these files, you may experience incomplete installation, or uninstallation or problem while updating the Store apps. Moreover, the corrupted system files also result in improper info which eventually hampers the smooth functioning of the OS.
However, the workarounds mentioned above are pretty easy to carry out which will bypass Error 0x80080204: The operation did not complete successfully on Store Windows 10. If you have more tips to deal with this specific Microsoft Store issue, do drop them in the comments form below.


