- How to Change File Explorer Default Start Folder in Windows 10
- Open File Explorer to This PC or Quick access
- Open File Explorer to the Downloads folder by default
- Open File Explorer to Any folder of your choice
- One small request: If you liked this post, please share this?
- About the author
- 3 thoughts on “How to Change File Explorer Default Start Folder in Windows 10”
- How to Change Windows Explorer’s Default Folder
- How to set a default Folder View for all folders in Windows 10
- What are Folder Templates
- Set a default Folder View for all folders
- How to Change The Windows 7 Explorer Default Folder
- How To Change Your Explorer’s Default Folder on Windows 7
- Step 1
- Step 2
- Set Default Folder When Opening Explorer in Windows 10
- Set Default Folder to This PC
- Set Any Folder as Default for Explorer
- Pin Folders to Quick Access
How to Change File Explorer Default Start Folder in Windows 10
The Windows 10 File Explorer opens to Quick access by default. Quick access is a section where you can place shortcuts to your favorite folders. It also displays recently viewed files and frequently used folders. If you’re not a fan of the Quick access feature and want File Explorer to default to “This PC”, Downloads or any other custom folder by default, this post tells you how to do it.
Open File Explorer to This PC or Quick access
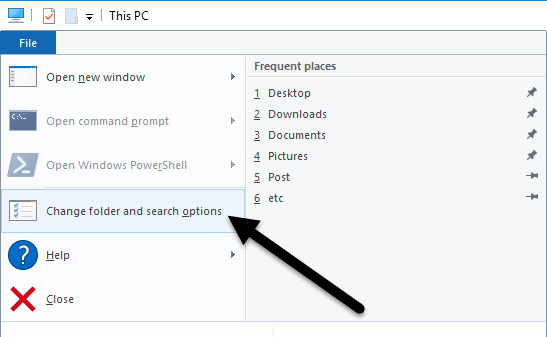
- Start File Explorer, and click the File menu.
- Click Folder and search options
- In the Folder Options dialog that opens, select This PC from the drop-down box, and click OK.


There is also another choice (“Downloads”) you can make which Microsoft doesn’t tell you. But it requires editing the registry.
Open File Explorer to the Downloads folder by default
Here is how to set File Explorer to open the “Downloads” folder every time you press WinKey + E or click the File Explorer Taskbar shortcut.
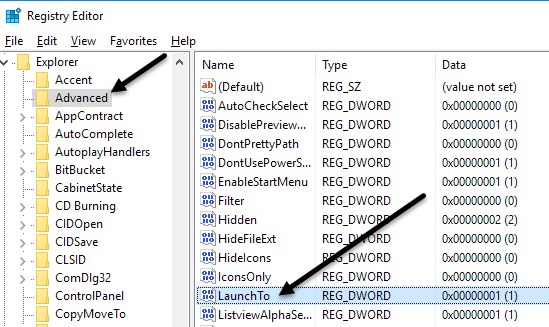
The Folder Options setting “Open File Explorer to:” is saved in the following registry key:
Value name: LaunchTo
Data: 1, 2 or 3
- 1 – File Explorer opens to “This PC”
- 2 – File Explorer opens to Quick access
- 3 – This is undocumented. If the value data is set to 3 (not configurable via Folder Options dialog), File Explorer opens to the Downloads folder.
Launch the Registry Editor ( regedit.exe ) and go to the above key:
Set the LaunchTo value data to 3 and exit the Registry Editor.
Note that after setting the value data to 3 , the drop-down box in the Folder Options dialog would appear like this.
One of the Windows 10 Anniversary Update insider preview builds included “Downloads” in the drop-down list, and Microsoft removed the option in the subsequent releases. However, the registry edit still works in version 1903 through 20H2.
Open File Explorer to Any folder of your choice
To make File Explorer start to a custom folder location other than the three options, use the registry edit and script method described in the article How to Change WinKey + E and File Explorer Shortcut Target in Windows 10
One small request: If you liked this post, please share this?
About the author
Ramesh Srinivasan founded Winhelponline.com back in 2005. He is passionate about Microsoft technologies and he has been a Microsoft Most Valuable Professional (MVP) for 10 consecutive years from 2003 to 2012.
Microsoft → Windows → Windows 10 → How to Change File Explorer Default Start Folder in Windows 10
3 thoughts on “How to Change File Explorer Default Start Folder in Windows 10”
Is there a tweak to have Explorer open with the highlighted folder at the top of the left panel list instead of near the bottom.
Latest Windows 10 registry does not have Launchto.
Tried this today, works as of 2020-10-09. Thanks!
How to Change Windows Explorer’s Default Folder
By Melanie Pinola 22 April 2016
When you open Windows Explorer in Windows 10, the default folder that opens is either Quick Access or This PC, depending on your settings. But what if you want Explorer to open a different folder? Here’s a way to open your preferred folder every time.

1. Right-click on the desktop and choose New > Shortcut.
2. In the location field, enter C:\Windows\explorer.exe
3. Click Next.
4. Name the shortcut or leave it as explorer.exe
5. Click Finish.
6. Right-click on the shortcut and choose Properties.
7. Change the target to C:\Windows\explorer.exe /n, /e, [location of your folder]. For example, to make Explorer open the C:\ drive folder, it would look like this:
You can use a subfolder too, such as C:\Users
8. Click OK.
Now, whenever you click that shortcut, your desired folder will open instead of the default. You can do this with as many folders as you wish.
How to set a default Folder View for all folders in Windows 10
In Windows File Explorer, you might have noticed the different folder layout settings for different folders. Some of the folders have smaller icons while some puts on a large icons view layout. There are several folder layouts available in Windows 10/8/7 which you can choose from, for any folder. While Windows has set these defaults based on the nature of the files in the folder, if you wish, you can set a default Folder View for all folders. In this post, we will how to set & apply the same view settings of the current folder, as the default, for all other folders on your PC.
What are Folder Templates
Before rolling on to change the folder’s view settings, let’s take a look at how folder templates work. You might have noticed that folders that contain pictures have a different view layout than that which contains videos or documents. This is the folder optimization technique in play which chooses one of the five templates for any folder based on the content that is stored in it. These templates are:
- General Items – Applies to any folder that contains a mixed combination of files and other sub-folders.
- Documents – Applies to the folders that contain documents (Word files, text files, etc.)
- Pictures – Applies to the folders that contain image files (.jpg, .png files, etc.)
- Music – Applies to all such folders which contain music files (.mp3, .wav, etc.)
- Videos – Applies to any folder that contains just video items (.mp4, .avi, etc.)
Whenever you create a new folder and put some files in it, Windows does its best to decide the folder template based on the content. If you’re storing mixed type of files in any folder, Windows automatically assigns General Items as the folder template. If you want to view any folder’s template, right-click the folder icon and open its Properties window. In here, navigate to the Customize tab where you can see the correct template optimized for the folder in question.
Set a default Folder View for all folders
Now that we are clear on basics, let’s roll over to the task at hand. You can apply a folder’s view settings to only those folders which are optimized for the same folder template type. Once the view layout is generalized for a folder template type (say, Music), every time you change the layout of file icons (from tile icons to large icons), the same will be reflected in other folders as well that are optimized for Music template. Now, you can follow the below steps to apply the folder view settings across a folder template type:
1. Open File Explorer by using key combination Windows Key + E and navigate to the folder you want to use as a source for view layout settings.
2. Navigate to the View tab in ribbon bar on the top and change the settings per your wish. You can change the layout and choose the folder details to display, add extra panes, adjust column width, etc.
3. Once done with the changes, click Options to open Folder Options window.
4. Navigate to View tab in Folder Options window.
5. Click/Tap on Apply to Folders button.
6. Click/Tap Yes on the confirmation window that pops up.
7. Click/Tap OK on the Folder Options window to save the settings.
That is it. You have just generalized the view settings for a particular folder template type across the OS. Hope this works for you.
How to Change The Windows 7 Explorer Default Folder

In Windows 7, the UI including the taskbar, jump lists, etc. was a huge upgrade. But what about the folder shortcut on your taskbar? I find it helpful being that I can just click it and I’m instantly in Windows Explorer sitting in my Libraries folders. But like any groovy geek, I like to choose my own destiny, so let’s change where it points me!
How To Change Your Explorer’s Default Folder on Windows 7
Step 1
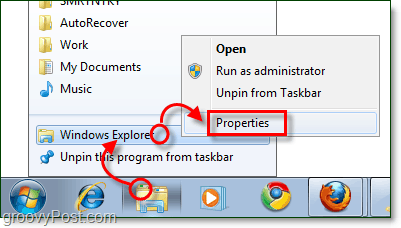
Right-click your Explorer taskbar icon and select Properties.
Note that you may have to Right-Click it and then right-click it again within the jump list that appears to get to the context menu where you can select Properties.
Step 2
The shortcut tab should open by default, but if it doesn’t just click the Shortcut tab.
The only area of interest on this tab is the Target box. By default the target will point to:
This location is exactly where we want it to point, to so don’t modify that at all. What we’re going to do is add some text after it.
Type a single space after the %windir%explorer.exe part, and then Type your folder path right after it. For example, I want it to point to my Downloads folder so mine becomes:
Or I could have just put %userprofile%\downloads\ since that will automatically point to the C:\Users\grooveDexter\ folder for me. Notice I didn’t change the first part, I just added the folder location right after explorer.exe. This procedure might sound a little confusing, so refer to the screenshot below as it explains it a bit more clearly. Don’t forget to Click OK to save changes!

From now on when you click the Windows Explorer shortcut on your taskbar, then it will open up to the folder you specified in Step 2! Groovy eh? 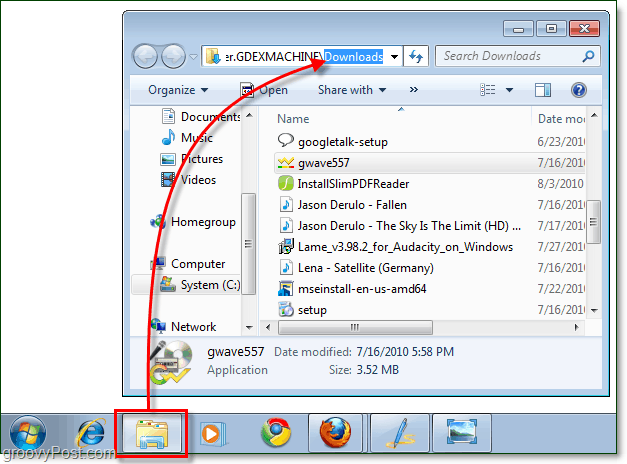
Set Default Folder When Opening Explorer in Windows 10
How to change from Quick Access to This PC
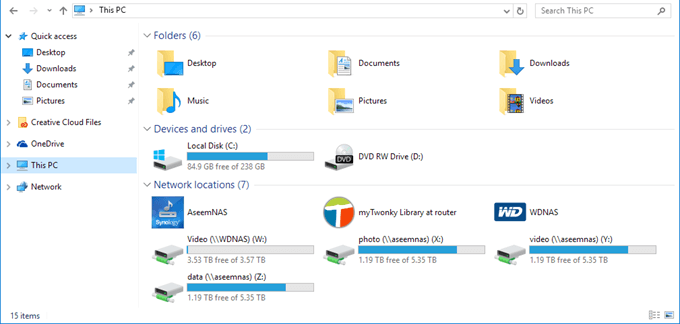
After upgrading to Windows 10 recently, I noticed that whenever I opened Explorer, it would always show me Quick Access. I like the new Quick Access feature, but I preferred to have Explorer open to This PC instead.
For me, being able to access the different drives on the computer and my network devices was far more important than accessing frequently used folders or recently opened files. It’s a useful feature, but I don’t mind having to click once to access it.
In this post, I’ll show you how to change the default folder from Quick Access to This PC when opening Explorer. In addition, I’ll also show you a trick whereby you can set any folder to be the default folder when opening Explorer in Windows 10.
Set Default Folder to This PC
To change the setting, open Explorer, click on File and then click on Change folder and search options.
In the dialog that pops up, you should already be on the General tab. At the very top, you’ll see Open File Explorer to where you can select from This PC and Quick Access.
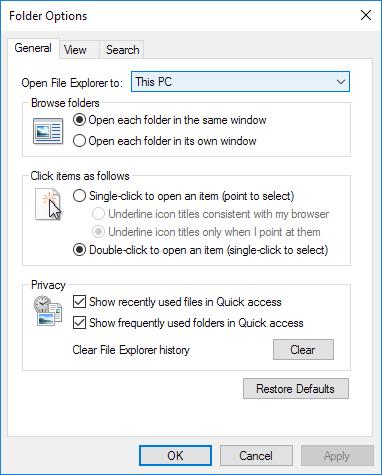
Just pick whichever folder you prefer and you’re good to go! Now when you open Explorer, you should see it open to This PC selected instead of Quick Access.
If you need to do this on many machines in a corporate environment, you’ll be happy to know that there is a registry entry that controls this setting also. Just navigate to the following key:
On the right hand side, look for a DWORD key named Launch To. 1 means This PC and 2 means Quick Access.
Finally, let’s talk about how we can configure Explorer to open up to any folder as the default folder.
Set Any Folder as Default for Explorer
Since there really isn’t any official way to do this, we have to kind of hack Windows to get it to do what we want. I’ve tested it out and the process seems to work just fine. To get started, find your folder and create a shortcut to the folder on your desktop.

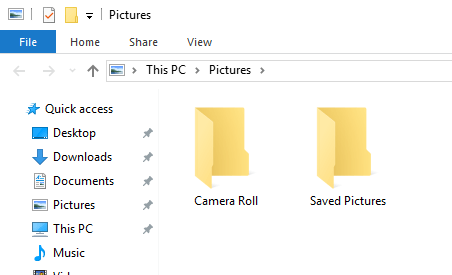
For example, if I wanted to use the Pictures folder as my default folder, I would right-click on it, choose Send to and then click on Desktop (create shortcut). Next, we need to copy that shortcut into a special location in Windows. First, let’s open Explorer and go to that special location. Just copy and paste the following path into the address bar in another Explorer window:
Make sure to press Enter after you paste the path into Explorer. Depending on what else is pinned to your taskbar, you might see shortcuts to several programs here, but you should always see a File Explorer shortcut.
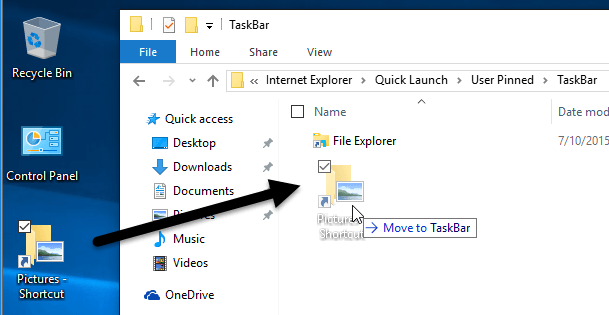
Now go ahead and drag the shortcut that we just created from your desktop into the special folder you have open in Explorer. Now we have to do one last thing. Go ahead and delete the File Explorer shortcut and rename the Pictures Shortcut to File Explorer. If you chose a different folder than Pictures, then change whatever the name of that shortcut is to File Explorer.
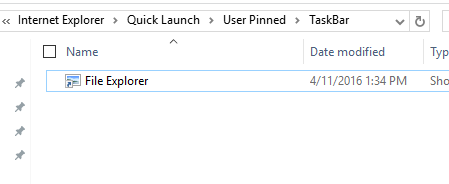
That’s about it! Now open File explorer from your taskbar and you should be viewing the contents of whichever folder you chose to be the default folder.
It’s worth noting that this little trick will only work when you click on the Explorer icon on your taskbar. If you open Explorer by double-clicking on This PC on the desktop or by clicking on Start and then File Explorer, you’ll either see This PC or Quick Access, depending on which option is chosen in the settings.
If you want to undo what we just did above, all you have to do is right-click on Explorer in the taskbar and choose Unpin from taskbar. After that, just drag the This PC icon from your desktop and drop it onto the taskbar again. This will create a new Explorer shortcut and it’ll work normally.
Pin Folders to Quick Access
If you don’t like any of the two options above, you do have one other choice in Windows 10. You could use the new pinned folders feature that is associated with Quick Access. When you open Explorer, you’ll see a pin icon next to several folders under Quick Access.
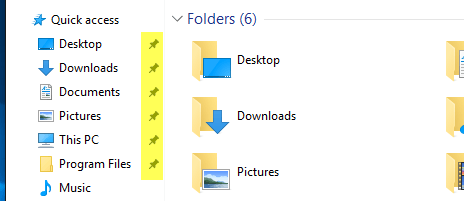
The Desktop, Downloads, Documents, Pictures, This PC and Music folders are pinned by default in Windows 10. If you want to remove any of them, just right-click and choose Unpin from Quick Access.
However, if you want one click access to any folder on your computer, navigate to that folder, then right-click on Quick Access and choose Pin current folder to Quick Access.
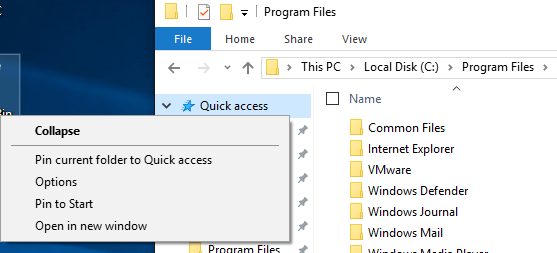
As you can see, this is how I pinned the Program Files folder to my Quick Access section. Using this method, you don’t have to resort to any hacks and you can also quickly access any folder on your system with two clicks.
Lastly, you can also get to that pinned folder quickly by simply right-clicking on the File Explorer icon in your taskbar and choosing your pinned folder, which will show up in the jumplist.

So in summary, if you want to change the default folder system-wide, you can only pick between This PC and Quick Access. If you use the second method involving the shortcut hack, then you have to use the shortcut from the taskbar.
Lastly, if you just need quick access to a folder, try using the pin to Quick Access option as that will also be system-wide and will remain in the left-hand side even as you browse through other folders. If you have any questions, post a comment. Enjoy!
Founder of Online Tech Tips and managing editor. He began blogging in 2007 and quit his job in 2010 to blog full-time. He has over 15 years of industry experience in IT and holds several technical certifications. Read Aseem’s Full Bio


