- How to Fix Advanced Display Settings Missing in Windows 10?
- What causes ‘Advanced display Settings’ to Disappear?
- Solution 1: Using Alternate Options
- Solution 2: Using Third-party Software
- Solution 3: Running Hardware and Device Troubleshooter
- Solution 4: Disabling onboard graphics (if dedicated graphics installed)
- Solution 5: Changing Registry Entries
- Solution 6: Updating Graphics Drivers
- Solution 7: Performing a System Restore
- Solution 8: Clean installing Windows
- Windows System Files: Where They Are Stored, How to Display or Restore Them
- What files are system files?
- Where are system files stored?
- How to display hidden system files in Windows?
- What happens if system files are damaged?
How to Fix Advanced Display Settings Missing in Windows 10?
We came across numerous complaints from users where they complained that they were unable to locate the Advanced Display Settings on their computers after a potential Windows 10 update. This issue was reported globally and occurred to almost everyone who updated to 1703 or Fall Creators update.
 Advanced Display Settings Missing in Windows 10
The most common feature which the users used was the ‘Text Size Setting’. Using the Advanced Display Settings, users were able to easily change their text sizes without going through much hassle. However, this was changed with the updated Windows. In this article, we will go through all the reasons as to why this issue might occur on your computer and what the workarounds are to solve the issue.
What causes ‘Advanced display Settings’ to Disappear?
After analyzing all the user reports, statements from Microsoft and our research, we concluded that the issue occurred due to several different reasons. Some of the reasons why you might find the ‘Advanced Display Settings’ missing are but not limited to:
- Feature Removed in Update: Reportedly, Microsoft officially removed the option available on Windows. This was met with a lot of backlash from the community. At the time of writing this article, Microsoft is still considering to bring it back.
- Bad Graphics Drivers: Another surprising issue which we came across was where bad graphics drivers installed caused the display settings to vanish. Updating or Rolling back the drivers usually solve the problem.
- Clash with on-board graphics: There are also instances where the onboard graphics might conflict with the third-party graphics drivers. Disabling the onboard graphics might help in this.
- Windows corrupt installation files: There might also be instances where the installation files of Windows might be corrupt. Here, restoring a previous version or doing a clean installation might help.
Before starting the solution, make sure that you are logged in as an administrator on your computer. Furthermore, save all your work as we might be restarting your computer again and again.
Solution 1: Using Alternate Options
If your computer was indeed updated and you found the option missing, it is probably because it was removed by Microsoft. They replaced the options present inside the Advanced Display settings to another location in Windows. We will navigate there and access the text formatting/size settings from there.
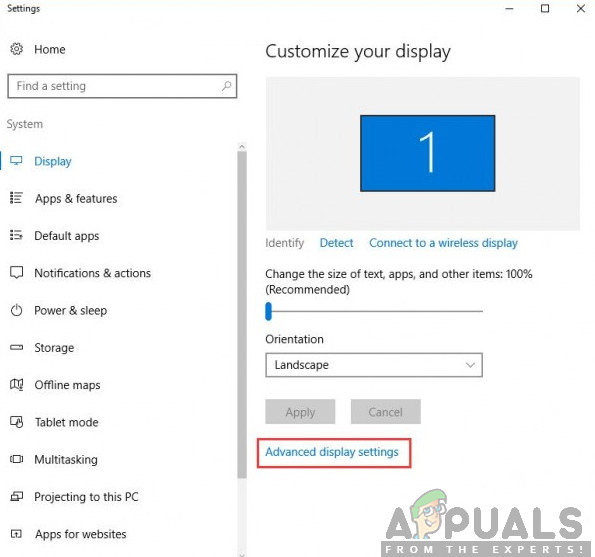
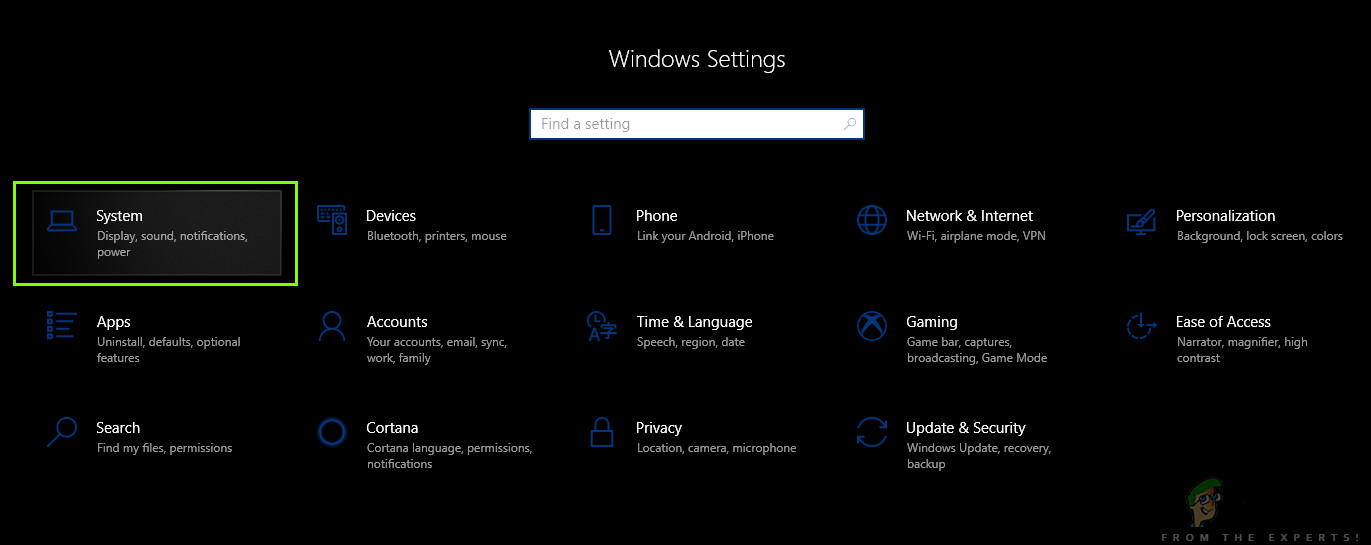
- Press Windows + I to launch your Settings. Now, click on the sub-category of System.
 System – Windows settings
 - Once in the System tab, click on Display from the left-hand side of the screen.
- Now on the right-hand side, scroll down until you find the option of Display adapter properties. Click it. Here, you can also change other settings of your display such as Scale and layout and Multiple displaysDisplay adapter properties
- Now, navigate to Intel HD Graphics Control Panel and then click on Properties
- Now, click on Graphics properties and then go to the Display setting to make changes as required.
 System – Windows settings
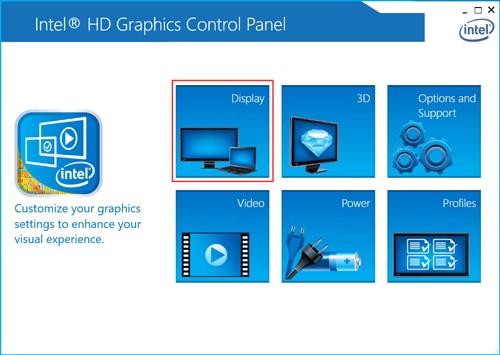 Display adapter properties
Also, if you don’t find your required setting here, you can always navigate to the color management.
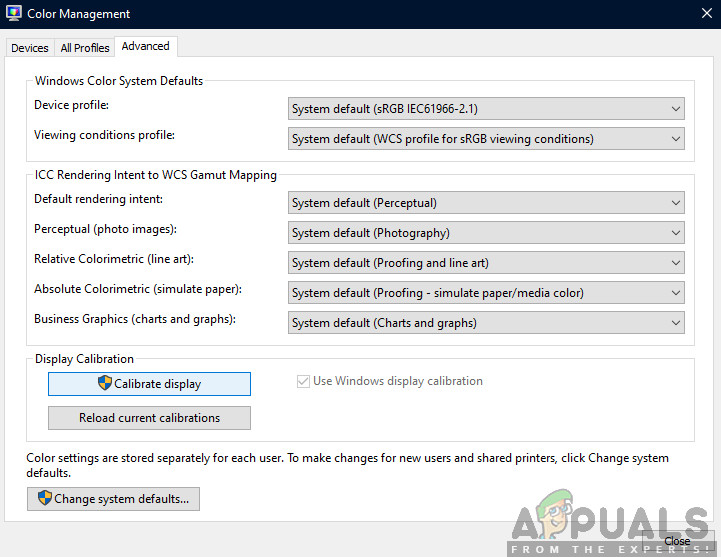
- Press Windows + S, type “color management” in the dialogue box and open the application.
- Once in color management, click on Advanced
- Now if you wish to calibrate the display, click on Calibrate Display. Calibrate Display
- After calibrating your display, click Finish and go to the ClearType Text Tuner. ClearType Text Tuner
- From here, you will be able to change the text type without any issues.
 Calibrate Display
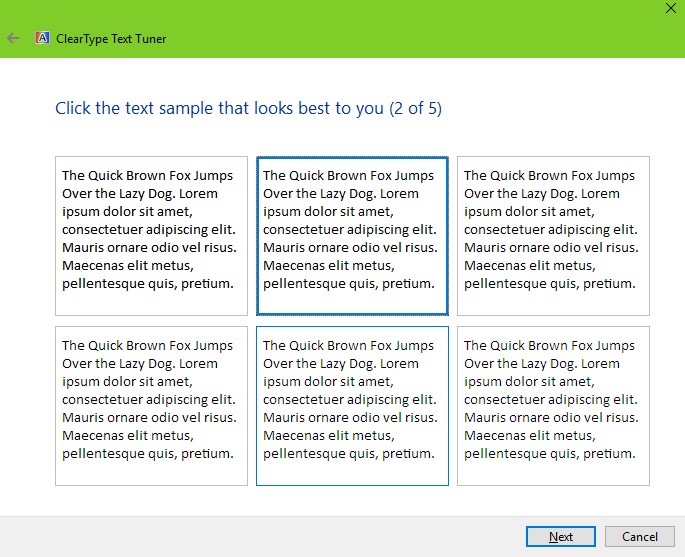 ClearType Text Tuner
Solution 2: Using Third-party Software
If the above method doesn’t work for you and you still having difficulty in changing your settings, we will try downloading a third-party software and see if we can get it to work. This is a workaround given if your computer was indeed updated. If it wasn’t and you see the option missing, proceed to the other solutions listed down below.
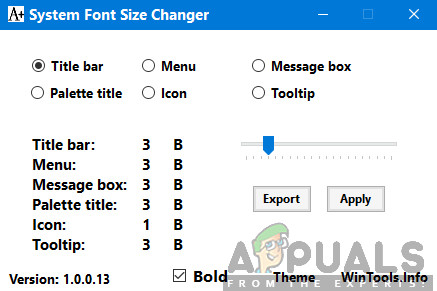 System Font Size Changer
Download System Font Size Changer from WinTools page and install it on your computer. When you launch the application, you will see various options the ability to change their settings. You can also create a shortcut and access the tool whenever required.
Solution 3: Running Hardware and Device Troubleshooter
Every Windows OS has a hardware troubleshooter which helps users in detecting issues with your current operating system and resolve them after a series of steps. This solution applies if you haven’t updated Windows and the display settings option automatically vanished from your screen.
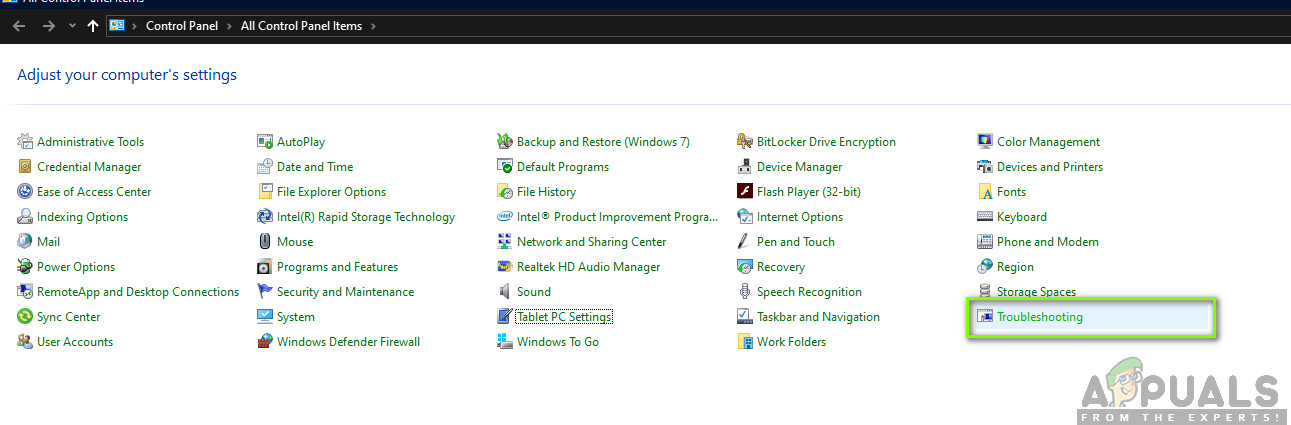
- Right-click on the Windows icon present at the bottom left side of the screen or press Windows + X button and select Control panel. If this doesn’t work, press Windows + S and in the dialogue box, type “control panel” and hit enter.
- Now on the top right side of the screen, click on View By and select Large Icons from the list of options available.
- Now select the option of Troubleshooting from the control panel.
 Troubleshooting – Control panel
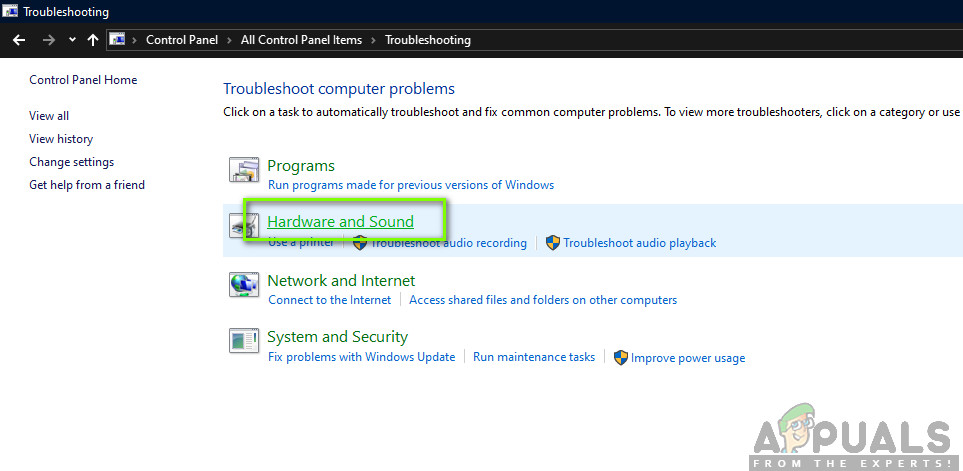
- Now on the left side of the window, select “View all” option to list all the troubleshooting packs available on your computer.
- Now select “Hardware and Devices” or Display from the list of options available and click it.
 Hardware and Devices Troubleshooting
- Now select Next in the new window that pops up in front of you.
- Now Windows will start searching for hardware problems and fix them if it finds any. This process can take some time as all of your hardware is being checked. Be patient and let the process complete successfully.
- Windows might prompt you to restart your PC to fix problems. Don’t delay the request, save your work and press “Apply this Fix”.
Solution 4: Disabling onboard graphics (if dedicated graphics installed)
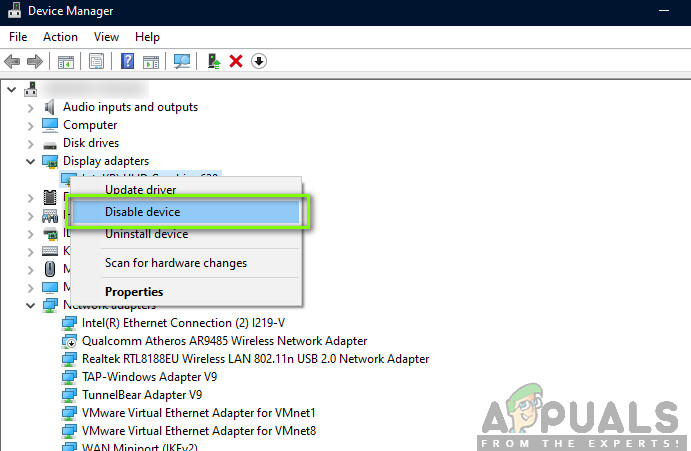
Another issue which we noticed that plagued users was where dedicated graphics on your computer were causing several issues with the OS. This is very unlikely but usually occurs if there is a conflict of the drivers with the system. In this solution, we will disable the onboard graphics. This will help us determine and troubleshoot whether they are clashing with your dedicated graphics and causing the problem.
- Press Windows + R, type “devmgmt.msc” in the dialogue box and press Enter.
- Once in the Device Manager, navigate to the entry “Display adapters”, right-click on the on-board graphics and select Disable device. Disabling onboard graphics
- Restart your computer. Now, only your dedicated graphics will be active. Check if the issue is resolved.
 Disabling onboard graphics
Solution 5: Changing Registry Entries
If you indeed want to change the text size of your computer (or some parts of it), you can perform the actions using registry files. Registries are instructions and a type of manual for your computer which informs it what it needs to do when certain actions occur. Here, we will make changes to your Registry by downloading an external one and installing it. When we install it, the computer automatically merges the new and the existing one.
Note: Making changes to the Registry is a risky job so make sure that you proceed at your request and don’t make any changes to any other entries.
- Download the required Registry file from the links down below:
- After downloading the registry file, right-click on it and select Run as administrator.
- If you are prompted with User Access Control, press Yes.
- Now, restart your computer completely. After restarting, check if the issue is resolved indeed. You can always run the opposite registry entry for reverting the entry.
Solution 6: Updating Graphics Drivers
Graphics drivers are the main components in play when you are playing games on your computer. They have the job of relaying the information from the motherboard to your graphics hardware. If the graphics drivers themselves are having issues, it is recommended that you update them as soon as possible and see where things go.
In this solution, we will first try installing default drivers and see if this fixes the problem.
- Download and install DDU (Display driver uninstaller) from its official website.
- After installing Display Driver Uninstaller (DDU), launch your computer in safe mode. You can check our article on how to boot your computer into safe mode.
- After launching the DDU, select the first option “Clean and restart”. This will uninstall the current drivers completely from your computer.
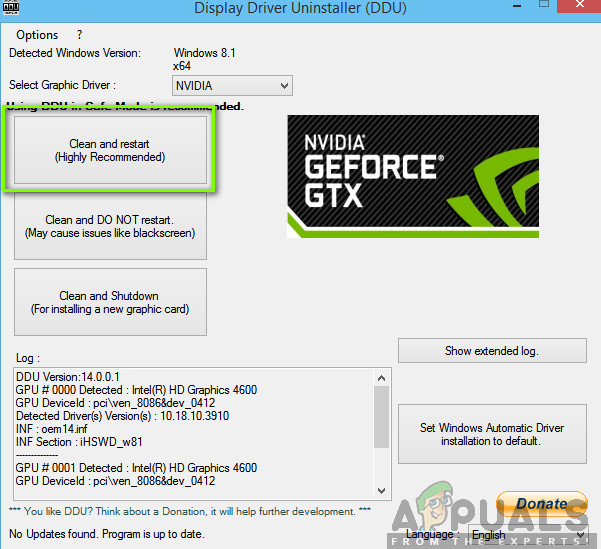 DDU Clean and Restart
- Now after the uninstallation, boot your computer normally without safe mode. Press Windows + R, type “devmgmt.msc” in the dialogue box and press Enter. Right-click on any space and select “Search for hardware changes”. The default drivers will be installed. Try launching the game and check if this solves the problem.
- In the majority of the cases, the default drivers will not work for you so you can either install the latest drivers through Windows update or navigate to your manufacturer’s website and download the latest ones.
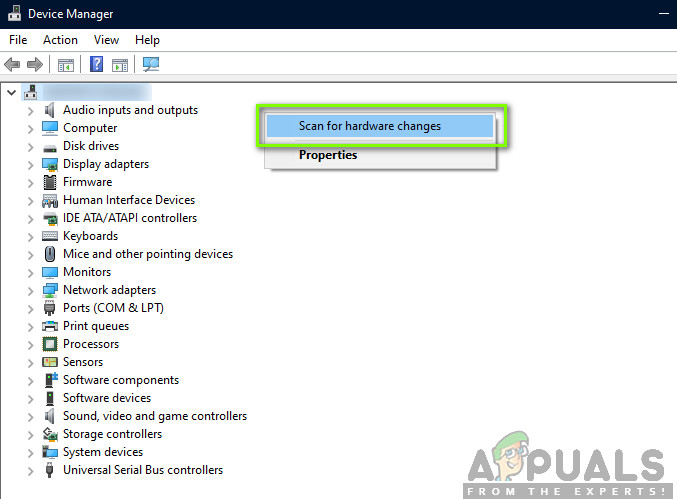 Search for hardware changes
- After you have installed the drivers, restart your computer and check if the problem is solved.
Solution 7: Performing a System Restore
If all the above methods are not working and you still cannot get any response out of Ctrl + Alt + Del, you can perform a system restore after backing up your data.
System restore rollbacks your Windows to the last time it was working correctly. The restore mechanism automatically creates backups either periodically or in-time whenever you install a new update.
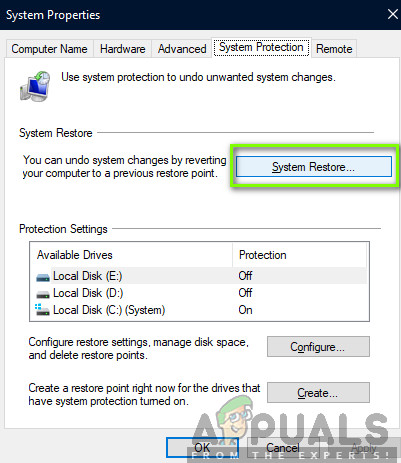
- Press Windows + S to launch the start menu’s search bar. Type “restore” in the dialogue box and select the first program which comes in the result.
- One in the restore settings, press System Restore present at the beginning of the window under the tab of System Protection. System Restore – Windows
- Now a wizard will open navigating you through all the steps to restore your system. You can either select the recommended restore point or choose a different restore point. Press Next and proceed with all the further instructions.
- Now select the restore point from the list of options available. If you have more than one system restore points, they will be listed here. Selecting the restore point
- Now windows will confirm your actions for the last time before it starts the system restore process. Save all your work and backup important files just in case and proceed with the process.
 System Restore – Windows
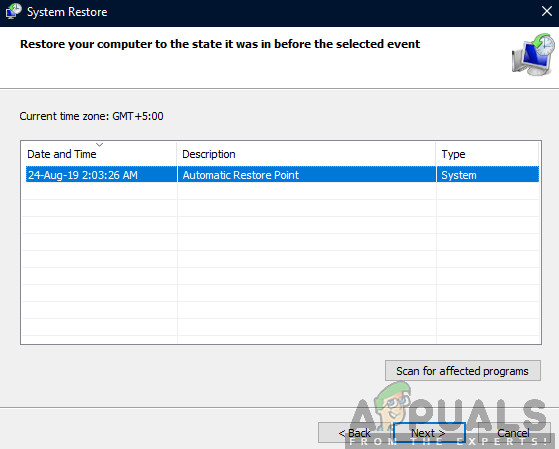 Selecting the restore point
Note: You can also get your hard drive checked if the problem is persisting.
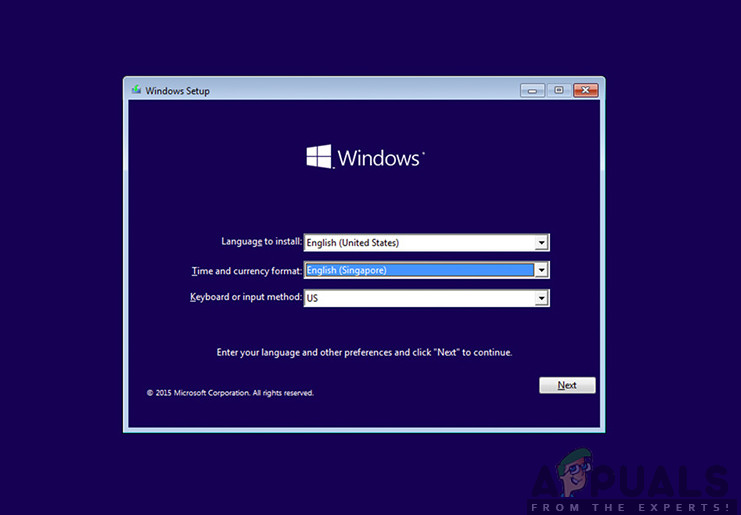
Solution 8: Clean installing Windows
If all the above methods don’t work out and you are still unable to the problem at hand, we can try installer a fresh version of Windows on your computer. This fixes any issues with the installation files (if any) and solves the problem instantly. Make sure that backup all of your data before proceeding as all your information as well as installed applications will be removed.
 Clean installing Windows
You check out our article on how to install Windows 10 on your computer. You can easily make a Windows bootable by either Rufus or by Windows media creation tool. Do note that you would have to manually install the update by updating the version of Windows installed (or if you clean install Windows directly into update 1903, the problem will go away automatically).
Windows System Files: Where They Are Stored, How to Display or Restore Them
Read about what files are called system files, their names and extensions, and where you can find them. We’ll find out what to do if system files get damaged and how they can be restored with the SFC checking tool.
A personal computer, smartphone, tablet PC, laptop – everyone knows these words, and we see and use these devices every day. All these things help their users solve various tasks while saving time and money.
What files are system files?
Modern computers and other gadgets are pretty small and compact while offering high performance and effective data processing capacity. It takes advanced software – an operating system – to use all the wide functionality of computer devices. The operating system should let the user adjust the interface to suit individual needs, manage all processes without errors and failures, be extremely effective, convenient to use and never bottleneck the hardware components of a device.
Windows, the Microsoft operating system, meets the above requirements in every way. It’s got a user-friendly customizable interface so that every user can configure the operating system to satisfy their needs. The high performance of this operating system is perfectly combined with intuitive computer control and management tools so the ease of use comes along with high efficiency.

In fact, the Windows operating system is a program shell which lets the user install applications and other software required to perform certain tasks.
To ensure correct work of the entire operating system, its full-fledged operation and opportunities to use additional software, Windows uses special system files.
Technically, Windows system files are any files with the “hidden” system attribute enabled. These include hardware drivers, configuration files, DLL (dynamic link library) files and various sets of files that make up the Windows registry.
Such files are often modified automatically when the operating system is updated or applications are installed, but the usual rule is you shouldn’t try to modify system files on your own. Deleting, moving, renaming or changing these files in any way can result in certain apps refusing to start, some system elements crashing, or even the entire system failing to work. That is why system files are often hidden and accessible to users as read-only files. However, there’s a lot of advice and recommendations (you can find some of the stuff described in our website) on modifying system files.
If you are an advanced PC user, acting carefully and confident of what you’re doing, or you follow a certain guide you trust absolutely, then you may gain a kind of advantage from using such advice.
Where are system files stored?
Usually system files are found in certain folders which are identified as system folders. In Windows operating systems, these files are hidden by default to prevent them from being deleted accidentally. Also, they are not shown in search results to save the system from undesirable consequences.
Actually, system files can be found in many locations on your PC. For example, the root folder of your system disk (C:\) contains system files such as the paging file (pagefile.sys) and the hibernation file (hiberfil.sys).
Most system files of a Windows operating system are stored in the folder C:\Windows, especially in such subfolders as /System32 and /SysWOW64. You will also find system files in a user’s folder (for example, AppData) and application folders (for example, Program Data or Program Files).
How to display hidden system files in Windows?
Though system files are hidden by default in a Windows operating system, you can easily change the settings to make them visible.
Just remember that deleting, moving, editing or renaming these files can cause all kinds of issues affecting reliability and correct work of your operating system. The right decision, after all, is to leave the system files hidden as they were. But if you work with system files deliberately and follow certain advice or recommendations, then make them visible, do your job, and then make them hidden again.
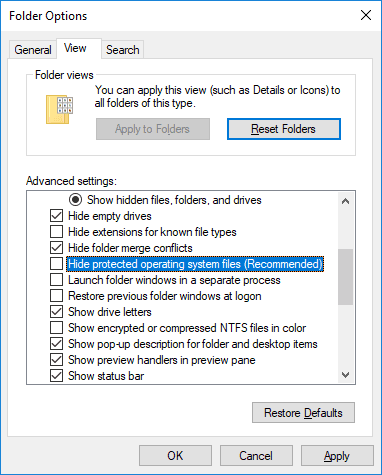
To enable displaying system files in a Windows operating system, you’ll have to open This PC in the File Explorer. In the window that opens, go to the tab View. In this tab find Options which contains settings for opening elements, presentation of files and folders, and open the nested menu. In the pop-up menu, select Change folder and search options.
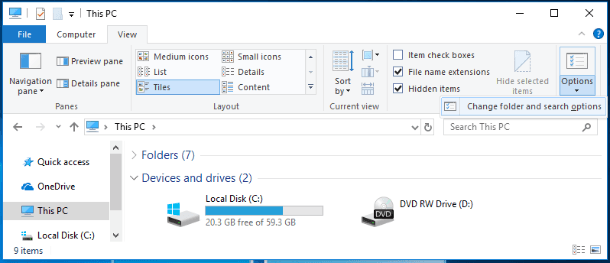
In the Folder Options window go to the View tab and in the section Advanced settings drag the slider down until you can uncheck the box Hide protected operating system files (Recommended). The Windows operating system will show you a warning to make sure that you realize what you’re going to do. Confirm your choice by clicking on the Yes button. Then click Apply and OK to save the changes you have made to file and folder view settings.
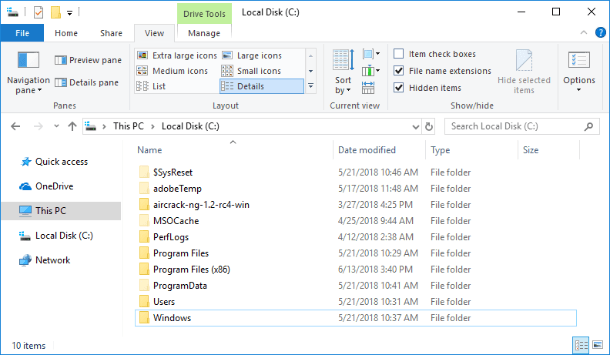
Now you’ll be able to see hidden system files in the Windows File Explorer. Note that the icons for system files look dimmer than the non-system files icons. This is a special feature to mark them as more important.
What happens if system files are damaged?
The answer really depends on what system files are damaged, that’s why the final symptoms may range from some applications failing to start or working incorrectly to BSOD errors or even the Windows operating system crashing completely – which makes the OS absolutely no good to use.
If you suspect that some system files are damaged or missing, there are several built-in tools inside the operating system to help you out of trouble. The System File Check (SFC) tool scans Windows system files and can replace any missing or damaged files detected during the test. The Windows Deployment Image Servicing and Management (DISM) can be used to eliminate the problems that prevent the SFC tool from performing its functions properly. Using the two apps together you’ll be able to restore successfully any missing or damaged system files.
SFC scans your computer to detect possible damage or any other changes in Windows system files. If the SFC checking tool finds a system file that has been changed, the file will be replaced automatically with its correct version.
To launch the SFC tool you will have to use the Command Prompt utility started with Administrator rights. There are many ways to open this app. We’ll describe several of them so you can use the one you like best.
Method one: Open This PC in the File Explorer and then go to the system folder C:/. Open the Windows folder and go to the subfolder System32. Drag the slider box down and find the file cmd.exe. Right-click on it and open a pop-up menu. From the list of possible actions, select Run as administrator.

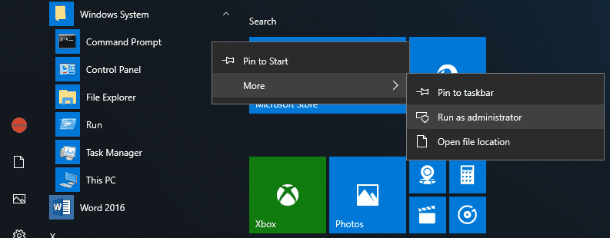
Method two: Click on the Start button in the lower left corner of your desktop, on the Taskbar, and open the main Windows menu. In the list of all installed applications, drag the slider down and find the section Windows System. In the drop-down menu, find the line Command Prompt and right-click on it. From the list of possible actions in the More section, select Run as administrator.
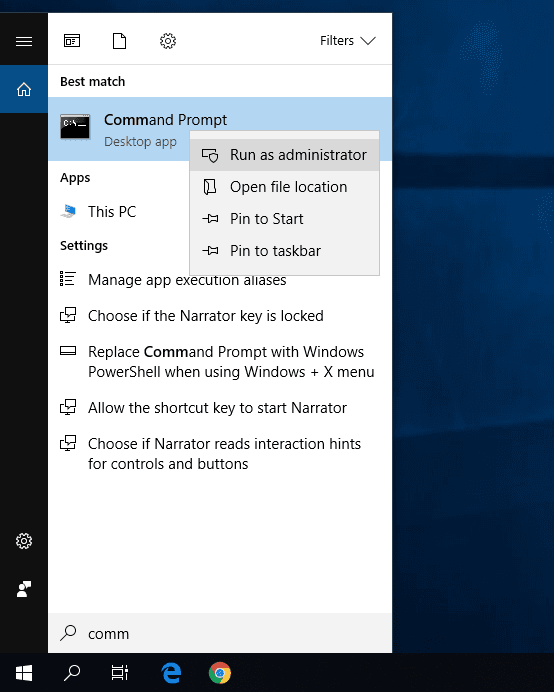
Method three: Click the Search button on the Taskbar (you can find it next to the Start button) and open the search panel. Enter command or cmd into the search field. The Best match section will show you the result you were looking for – Command Prompt. Right-click on it and select Run as administrator in the menu.
When the pop-up notification from Windows User Account Control asks “Do you want to allow this app to make changes to your device?” click Yes and the command prompt with administrator rights will open.
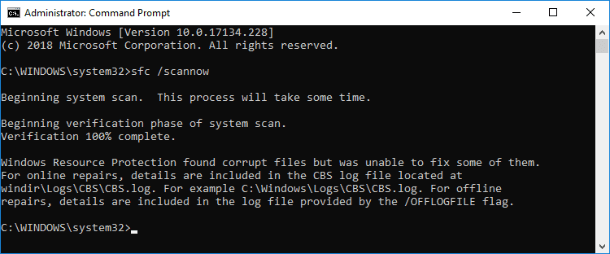
Enter the command sfc /scannow into the Command Prompt window to launch the Windows system file checking utility.
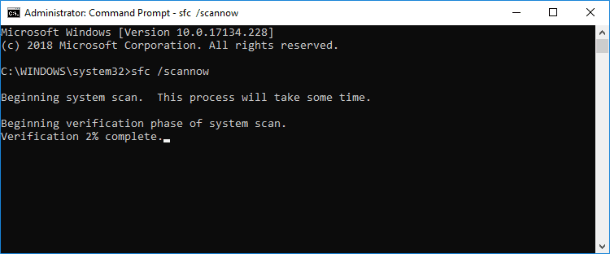
Results of the system scan with description of all actions will be shown in the application window.
If all the actions described above didn’t work and you failed to fix the damaged system files, you can always update or reset your computer’s operating system settings. However, this solution should only be used as the last resort. All your personal files will be preserved, but any applications will be removed after you reset the operating system.
If all the actions described above didn’t work and you failed to fix the damaged system files, you can always update or reset your computer’s operating system settings. However, this solution should only be used as the last resort. All your personal files will be preserved, but any applications will be removed after you reset the operating system.

Author: Vladimir Artiukh, Technical Writer
Vladimir Artiukh is a technical writer for Hetman Software, as well as the voice and face of their English-speaking YouTube channel, Hetman Software: Data Recovery for Windows. He handles tutorials, how-tos, and detailed reviews on how the company’s tools work with all kinds of data storage devices. Read more


