- Sysinternals File and Disk Utilities
- Windows USB/DVD Download Tool
- Overview
- Installation
- Using the Windows USB/DVD Download Tool
- Frequently Asked Questions
- Troubleshooting
- 3 Genius Ways to Delete a File in Use in Windows
- Force Deleting a File in Use in Windows
- More Related Articles:
- From Command Prompt
- Using a Third-Party Tool – Unlocker
- How to Restore a File If It Has Been Deleted Accidentally
- Your Safe & Reliable Data Recovery Software
- Video Tutorial on How to Recover Deleted Files on Windows 10/8/7 Easily?
Sysinternals File and Disk Utilities
AccessChk
This tool shows you the accesses the user or group you specify has to files, Registry keys or Windows services.
AccessEnum
This simple yet powerful security tool shows you who has what access to directories, files and Registry keys on your systems. Use it to find holes in your permissions.
CacheSet
CacheSet is a program that allows you to control the Cache Manager’s working set size using functions provided by NT. It’s compatible with all versions of NT.
Contig
Wish you could quickly defragment your frequently used files? Use Contig to optimize individual files, or to create new files that are contiguous.
Disk2vhd
Disk2vhd simplifies the migration of physical systems into virtual machines (p2v).
DiskExt
Display volume disk-mappings.
DiskMon
This utility captures all hard disk activity or acts like a software disk activity light in your system tray.
DiskView
Graphical disk sector utility.
Disk Usage (DU)
View disk usage by directory.
EFSDump
View information for encrypted files.
FindLinks
FindLinks reports the file index and any hard links (alternate file paths on the same volume) that exist for the specified file.В A file’s data remains allocated so long as at it has at least one file name referencing it.
Junction
Create Win2K NTFS symbolic links.
LDMDump
Dump the contents of the Logical Disk Manager»s on-disk database, which describes the partitioning of Windows 2000 Dynamic disks.
MoveFile
Schedule file rename and delete commands for the next reboot. This can be useful for cleaning stubborn or in-use malware files.
NTFSInfo
Use NTFSInfo to see detailed information about NTFS volumes, including the size and location of the Master File Table (MFT) and MFT-zone, as well as the sizes of the NTFS meta-data files.
PageDefrag
Defragment the Windows paging file and Registry hives.
PendMoves
See what files are scheduled for delete or rename the next time the system boots.
Process Monitor
Monitor file system, Registry, process, thread and DLL activity in real-time.
PsFile
See what files are opened remotely.
PsTools
The PsTools suite includes command-line utilities for listing the processes running on local or remote computers, running processes remotely, rebooting computers, dumping event logs, and more.
SDelete
Securely overwrite your sensitive files and cleanse your free space of previously deleted files using this DoD-compliant secure delete program.
ShareEnum
Scan file shares on your network and view their security settings to close security holes.
Sigcheck
Dump file version information and verify that images on your system are digitally signed.
Streams
Reveal NTFS alternate streams.
Sync
Flush cached data to disk.
VolumeID
Set Volume ID of FAT or NTFS drives.
Windows USB/DVD Download Tool
Overview
When you download Windows from Microsoft Store, you have two options: You can download a collection of compressed files, or you can download an ISO file. An ISO file combines all the Windows installation files into a single uncompressed file.
If you choose to download an ISO file so you can create a bootable file from a DVD or USB drive, copy the Windows ISO file onto your drive and then run the Windows USB/DVD Download Tool. Then simply install Windows onto your computer directly from your USB or DVD drive.
When you download the ISO file, you must copy it onto a USB or DVD. When you’re ready to install Windows, insert the USB drive or DVD with the ISO file on it and then run Setup.exe from the root folder on the drive.
This allows you to install Windows onto your machine without having to first run an existing operating system. If you change the boot order of drives in your computer’s BIOS, you can run the Windows installation directly from your USB drive or DVD when you first turn on your computer. Please see the documentation for your computer for information about how to change the BIOS boot order of drives.
Making copies
To install the software, you can make one copy of the ISO file on a disc, USB flash drive, or other media.
After you’ve installed the software and accepted the license terms that accompany the software, those license terms apply to your use of the software. The license terms for Windows permit you to make one copy of the software as a back-up copy for re-installation on the licensed computer. If you do not delete your copy of the ISO file after installing the Windows software, the copy of the ISO file counts as your one back-up copy.
If you need to download the software again, you can go to your Download Purchase History in your Microsoft Store account and access the download there.
Installation
To install the Windows USB/DVD Download Tool:
2. Click Download then Run.
3. Follow the steps in the setup dialogs. You’ll have the option to specify where to install the Windows USB/DVD Download Tool.
You must be an administrator on the computer on which you are installing the Windows USB/DVD Download tool. It requires the Microsoft .NET Framework version 2.0 or higher.
System requirements
Windows XP SP2, Windows Vista, or Windows 7 (32-bit or 64-bit)
Pentium 233-megahertz (MHz) processor or faster (300MHz is recommended)
50MB of free space on your hard drive
DVD-R drive or 4GB removable USB drive
For Windows XP users
The following applications must be installed prior to installing the tool:
Microsoft .NET Framework 2.0 must be installed. It can be downloaded here.
Microsoft Image Mastering API v2 must be installed. It can be downloaded here.
Using the Windows USB/DVD Download Tool
Before you run the Download Tool, make sure you have purchased the Windows ISO download from Microsoft Store and downloaded the Windows ISO file to your drive. If you have purchased Windows but have not yet downloaded the ISO file, you can download the ISO file from your Microsoft Store Account.
To make a copy of your Windows ISO file:
1. Click the Windows START button, and click WINDOWS USB/DVD DOWNLOAD TOOL in the ALL PROGRAMS list to open the Windows USB/DVD Download Tool.
2. In the SOURCE FILE box, type the name and path of your Windows ISO file, or click BROWSE and select the file from the OPEN dialog box. Click NEXT.
3. Select USB DEVICE to create a copy on a USB flash drive or select DVD disk to create a copy on a DVD disk.
4. If you are copying the file to a USB flash drive, select your USB device in the drop-down list and click BEGIN COPYING. If you are copying the file up to a DVD, click BEGIN BURNING.
When your Windows ISO file is copied to your drive, install Windows by moving to the root folder of your DVD or USB drive, and then double-click Setup.exe.
Frequently Asked Questions
Where can I download .NET framework 2.0?
The .NET framework can be downloaded here.
Where can I download Image Mastering API 2.0?
The Image Mastering API can be downloaded here.
What size USB drive is required?
You need a USB drive with a minimum of 4GB of free space.
Can I use my newly created USB drive to install Windows on someone else’s computer?
No. The Windows ISO file on the USB drive is only intended to be used to install Windows on the licensed user’s own computer.
Can I back up to a CD-ROM?
No. The Windows ISO file is too large to fit on a CD.
Can I back up to a Blu-ray Disc?
Yes, as long as your DVD drive can write to a Blu-ray Disc.
IfI have other files on the USB drive will the Windows USB/DVD download tool delete them?
This tool requires the USB drive to be completely blank before the Windows files are copied. This helps ensure that the device is bootable after the copying has completed.
Can I backup to an external hard drive or other device with enough free disk space?
Yes, but this is not recommended. The device must be formatted in order for the device to be bootable. A dedicated USB flash drive would be a better option.
Can I use the Windows USB/DVD Download Tool to back up other files?
No. This tool is only for use with the Windows ISO file purchased from Microsoft Store.
Does the tool support dual-layer DVD discs for burning?
No. Currently, the tool does not support dual-layer DVD discs.
Troubleshooting
The tool is asking me to install the .NET framework and Image Mastering API before I install the tool
If you’re running Windows XP, you must install the .NET Framework 2.0 and the Image Mastering API 2.0 before installing the tool. You can download .NET framework here and you can download the Image Mastering API here.
A restart may be required after installing the .NET framework and the Image Mastering API.
When creating a bootable USB device, I am getting an error about bootsect
To make the USB drive bootable, you need to run a tool named bootsect.exe. In some cases, this tool needs to be downloaded from your Microsoft Store account. This may happen if you’re trying to create a 64-bit bootable USB device from a 32-bit version of Windows. To download bootsect:
1. Login to your Microsoft Store account to view your purchase history.
2. Look for your Windows purchase.
3. Next to Windows, there is an Additional download options drop-down menu.
4. In the drop-down menu, select 32-bit ISO.
5. Right-click the link, and then save the bootsect.exe file to the location where you installed the Windows USB/DVD Download Tool (e.g. C:\Users\username\AppData\Local\Apps\Windows USB DVD Download Tool).
6. Once the file has been saved, go back to the Windows USB/DVD Download Tool to create your bootable USB device.
My USB drive is not in the list of available devices
If you don’t see your USB drive in the list of available devices, please make sure the drive is inserted in the USB port, and then click the Refresh button beside the list of available drives.
I inserted a blank DVD in my DVD-ROM drive, but the Windows USB/DVD Download Tool doesn’t recognize it
If there are multiple drives on the system, the tool will select the first one that is capable of burning DVDs. If you have multiple DVD-R drives, try inserting the blank DVD into another DVD-R drive. If that doesn’t help, please make sure that your disc isn’t damaged and that your DVD-R drive is operational. Contact Product Support if issues continue to arise.
I inserted a blank DVD in my DVD-ROM drive, but the tool won’t let me burn it
Make sure the disc isn’t a dual-layer DVD disc. Currently, dual-layer discs are not supported within the tool.
3 Genius Ways to Delete a File in Use in Windows

Amy Dennis
Dec 21, 2020 • Filed to: Recover & Repair Files • Proven solutions
When working on Microsoft Windows, how many times have you seen a message telling that the particular file you are attempting to delete is already in use and that the program using the file must be stopped before Windows allows you to remove the file from the PC?
Annoying!! Isn’t it?
Well, not anymore.
Here are the three genius ways that you can use to force delete a file that is in use and Windows doesn’t allow you to remove it normally.
Force Deleting a File in Use in Windows
This method works most of the time. All you need to do is to force terminate the program that is using the file. Assuming that you already know which program is using the file that you want to remove, this is how you delete the file:
Note:В Windows 7 is used here as a reference PC.
Force terminating a process shuts down the entire program and you may lose any unsaved data that any other file that relies on the program may have. It is advisable to save all your work progress before proceeding.
1. On your desktop screen, right-click the taskbar.
2. From the context menu that appears, clickВ Start Task Manager.

3. In the Task Manager box, if not already there, go to theВ ProcessesВ tab.
4. From the displayed list of running processes, right-click the one that you know is using the file that you want to delete.
5. From the context menu, clickВ End ProcessВ orВ End Process Tree. (End process treeВ is clicked here.)

6. On the confirmation box that pops up, click theВ End process treeВ button from the bottom.

7. Once the process has been forcefully terminated, you can easily remove the file as it is no longer used until the process starts running again.
Note:В In some cases, you need to be quick in deleting the file after force terminating the process. This is because some processes are stubborn and even if you terminate them forcefully, they restart automatically after a few seconds.
More Related Articles:
From Command Prompt
This method requires you to open Command Prompt on your Windows PC. For the files used by some local processes (the processes that can be started and closed by a standard – non-administrator user account), opening Command Prompt on a standard user account would suffice. However, if the file is used by any system process, the elevated Command Prompt must be initialized. An elevated Command Prompt is the command window that has all the administrator rights and all the administrative tasks can be performed via commands in its interface.
This is what you need to do:
Note:В A Windows 7 PC is used in this example.
1. On your Windows PC, locate the folder that contains the file in use that you want to delete. (Do not enter into the folder.)
2.В Shift + right-clickВ the folder.
3. From the advanced context menu that appears, clickВ the Open command window hereВ or press theВ WВ key on the keyboard.

Note:В This method does not allow you to open an elevated command window.
Note: To start elevated Command Prompt, click the Start button, type CMD in the search box at the bottom of the Start menu, right-click CMD from the suggested programs’ list, click Run as administrator from the context menu, and on the User Account Control confirmation box, type the password for the admin account (or click Yes if Windows doesn’t ask you for the password) to provide your consent to continue. After the elevated command window opens up, you must use the DOS commands like CD and DIR to locate the directory where the file you want to delete is placed and to check the presence of the file respectively.
4. In the command window, type theВ DEL /F file nameВ command and pressВ EnterВ to force delete the file that is in use.
Note:В In the above command,В the file nameВ must be replaced by the name of the file along with its extension that you want to delete. For exampleВ del /f TestFile.txt.
WARNING!! – A file deleted using the DEL command does not move it to the Recycle Bin but deletes it permanently. Use the DEL command with caution.

5. Once the file is deleted, you can close Command Prompt by clicking theВ CloseВ button from the top-right corner of the window or by typingВ EXITВ in the command window and pressingВ Enter.
Using a Third-Party Tool – Unlocker
Even though you can use any of the two methods described above to remove a file that is in use, a third-party tool such as Unlocker makes your task extremely simple. The best part is that Unlocker is a freeware and is free to download and use. This is how Unlocker works:
Note:В A Windows 7 computer is used for reference.
1. Log on to your Windows PC.
2. Ensure that it is connected to the Internet.
3. Open any web browser of your choice and open your preferred search engine. (Google, Yahoo!, Bing, etc.)
4. Using the search engine, search for Unlocker.
5. Once found, download Unlocker’s installable file and install the program using the normal installation method, or get its portable version.
Note:В Unlocker is installed on this referenceВ PC.
6. After this, locate the file that you want to delete but is in use.
7. Right-click the file.
8. From the context menu that is displayed, clickВ Unlocker.

9. On theВ User Account ControlВ confirmation box, clickВ YesВ to provide your consent to continue launching the program.
10. On the displayed interface, from the available list of files in use, click to select the one that you want to unlock.
11. From the bottom of the interface, clickВ UnlockВ to unlock the file while leaving the corresponding application open. Alternatively, you can also click theВ Kill ProcessВ button to force terminate the running process that is responsible for engaging the file.

12. Once the file is unlocked, you can right-click the file and clickВ DeleteВ from the context menu.
13. ClickВ YesВ on theВ Delete FileВ confirmation box when/if displayed.
How to Restore a File If It Has Been Deleted Accidentally
Even if the file has been forcefully unlocked using any of the methods, it is moved to the Recycle Bin when deleted (except for when deleted using the command line). That being said, restoring the file from the Recycle Bin is simple. This is what you need to do.
1. On your Windows desktop screen, double-click the Recycle Bin’s icon.
2. Once inside theВ Recycle Bin, right-click the file that you want to restore.
3. From the context menu, clickВ Restore.

Note:В If a file has been deleted permanently (e.g. when removed with the DEL command), you need an efficient file recovery software such as RecoveritВ Data RecoveryВ to recover the file back.
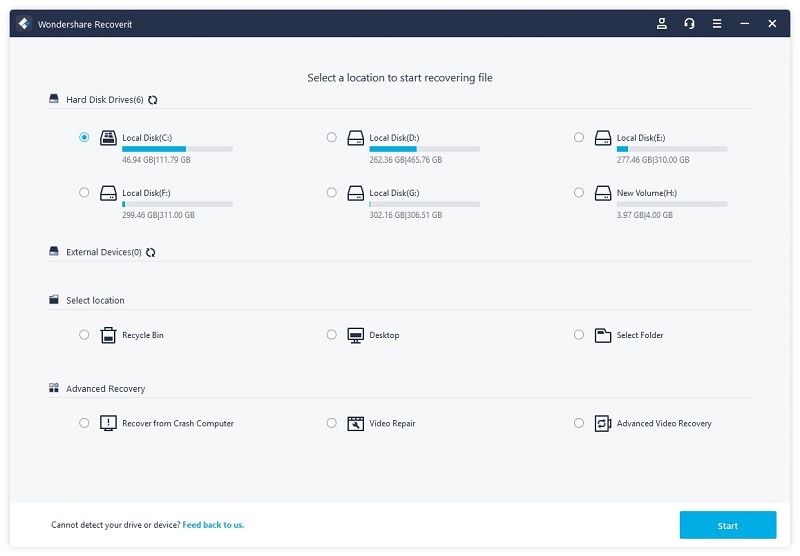
Your Safe & Reliable Data Recovery Software
- Recover lost or deleted files, photos, audio, music, emails from any storage device effectively, safely and completely.
- Supports data recovery from recycle bin, hard drive, memory card, flash drive, digital camera, and camcorders.
- Supports to recover data for sudden deletion, formatting, hard drive corruption, virus attack, system crash under different situations.
Although the above-mentioned tricks work almost every time, you must take the utmost care while deleting any file that is in use. Deleting a wrong file may cause consequences like permanent or temporary system failure or data loss. To avoid this, before force deleting your files, make sure you have thoroughly verified the following:
- The file in use does not contain any important data.
- Force terminating the process to unlock the file doesn’t cause any permanent damage to its corresponding program.
- You have backed up the file before deleting it.
- You have tried (and failed) other ways to do what you want to do, and that force deleting the file is the only option left.
Video Tutorial on How to Recover Deleted Files on Windows 10/8/7 Easily?
Recent Videos from Recoverit


