- File Permissions for WSL
- WSL metadata on Windows files
- File Access Scenarios
- Accessing Files in the Windows drive file system (DrvFS) from Linux
- Reading file permissions from an existing Windows file
- Changing file permissions on an existing Windows file using chmod
- Creating a file in DriveFS
- Which Linux user and Linux group owns the file?
- Accessing Linux files from Windows using \wsl$
- Creating a new file
- Accessing files in the Linux root file system from Linux
- Configuring file permissions
- How to Fix ‘Incorrect permissions on Windows Search directories’ Issue
- What is causing the ‘Incorrect permissions on Windows Search directories’ error?
- Method 1: Taking ownership of the Data folder
- Method 2: Running SFC and DISM scans
- Method 3: Creating a New User Profile
- Method 4: Reset Cortana via PowerShell
- Method 5: Performing a repair install
File Permissions for WSL
This page details how Linux file permissions are interpreted across the Windows Subsystem for Linux, especially when accessing resources inside of Windows on the NT file system. This documentation assumes a basic understanding of the Linux file system permissions structure and the umask command.
When accessing Windows files from WSL the file permissions are either calculated from Windows permissions, or are read from metadata that has been added to the file by WSL. This metadata is not enabled by default.
WSL metadata on Windows files
When metadata is enabled as a mount option in WSL, extended attributes on Windows NT files can be added and interpreted to supply Linux file system permissions.
WSL can add four NTFS extended attributes:
| Attribute Name | Description |
|---|---|
| $LXUID | User Owner ID |
| $LXGID | Group Owner ID |
| $LXMOD | File mode (File systems permission octals and type, e.g: 0777) |
| $LXDEV | Device, if it is a device file |
Additionally, any file that is not a regular file or directory (e.g: symlinks, FIFOs, block devices, unix sockets, and character devices) also have an NTFS reparse point. This makes it much faster to determine the kind of file in a given directory without having to query its extended attributes.
File Access Scenarios
Below is a description of how permissions are determined when accessing files in different ways using the Windows Subsystem for Linux.
Accessing Files in the Windows drive file system (DrvFS) from Linux
These scenarios occur when you are accessing your Windows files from WSL, most likely via /mnt/c .
Reading file permissions from an existing Windows file
The result depends on if the file already has existing metadata.
DrvFS file does not have metadata (default)
If the file has no metadata associated with it then we translate the effective permissions of the Windows user to read/write/execute bits and set them to the this as the same value for user, group, and other. For example, if your Windows user account has read and execute access but not write access to the file then this will be shown as r-x for user, group and other. If the file has the ‘Read Only’ attribute set in Windows then we do not grant write access in Linux.
The file has metadata
If the file has metadata present, we simply use those metadata values instead of translating effective permissions of the Windows user.
Changing file permissions on an existing Windows file using chmod
The result depends on if the file already has existing metadata.
chmod file does not have metadata (default)
Chmod will only have one effect, if you remove all the write attributes of a file then the ‘read only’ attribute on the Windows file will be set, since this is the same behaviour as CIFS (Common Internet File System) which is the SMB (Server Message Block) client in Linux.
chmod file has metadata
Chmod will change or add metadata depending on the file’s already existing metadata.
Please keep in mind that you cannot give yourself more access than what you have on Windows, even if the metadata says that is the case. For example, you could set the metadata to display that you have write permissions to a file using chmod 777 , but if you tried to access that file you would still not be able to write to it. This is thanks to interopability, as any read or write commands to Windows files are routed through your Windows user permissions.
Creating a file in DriveFS
The result depends on if metadata is enabled.
Metadata is not enabled (default)
The Windows permissions of the newly created file will be the same as if you created the file in Windows without a specific security descriptor, it will inherit the parent’s permissions.
Metadata is enabled
The file’s permission bits are set to follow the Linux umask, and the file will be saved with metadata.
Which Linux user and Linux group owns the file?
The result depends on if the file already has existing metadata.
User file does not have metadata (default)
In the default scenario, when automounting Windows drives, we specify that the user ID (UID) for any file is set to the user ID of your WSL user and the group ID (GID) is set to the principal group ID of your WSL user.
User file has metadata
The UID and GID specified in the metadata is applied as the user owner and group owner of the file.
Accessing Linux files from Windows using \\wsl$
Accessing Linux files via \\wsl$ will use the default user of your WSL distribution. Therefore any Windows app accessing Linux files will have the same permissions as the default user.
Creating a new file
The default umask is applied when creating a new file inside of a WSL distribution from Windows. The default umask is 022 , or in other words it allows all permissions except write permissions to groups and others.
Accessing files in the Linux root file system from Linux
Any files created, modified, or accessed in the Linux root file system follow standard Linux conventions, such as applying the umask to a newly created file.
Configuring file permissions
You can configure your file permissions inside of your Windows drives using the mount options in wsl.conf. The mount options allow you to set umask , dmask and fmask permissions masks. The umask is applied to all files, the dmask is applied just to directories and the fmask is applied just to files. These permission masks are then put through a logical OR operation when being applied to files, e.g: If you have a umask value of 023 and an fmask value of 022 then the resulting permissions mask for files will be 023 .
Please see the Configure per distro launch settings with wslconf article for instructions on how to do this.
How to Fix ‘Incorrect permissions on Windows Search directories’ Issue
Several WIndows users have been reaching us with questions after running the Search and Indexing troubleshooter and discovering that there’s an issue with Windows Search permissions. The issue that gets found is “Incorrect permissions on Windows Seach directories“. Most users have decided to runt his troubleshooter after noticing some inconsistencies with how Windows Search returns results. The issue is not exclusive to a certain Windows version since it’s confirmed to occur on Windows 7, Windows 8.1 and Windows 10.
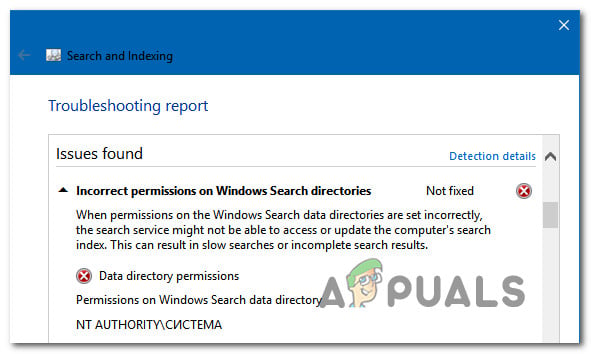 Incorrect permissions on Windows Search directories
What is causing the ‘Incorrect permissions on Windows Search directories’ error?
We investigated this particular issue by looking at various user reports and the repair strategies that are most commonly used to resolve this problem. As it turns out, several different scenarios might end up facilitating the apparition of this issue. Here’s a list of potential culprits:
- The data folder is not owned by the active account – In most cases where this problem is occurring, it’s because the folder used during the search query (Data) is not owned by the account that is currently active. Several users that were also encountering the issue have managed to fix it by taking ownership of the Data folder.
- System file corruption – System file corruption can also be responsible for the apparition of this issue. If this scenario is applicable, you should be able to restore the normal functionality of your search function by fixing corruption with utilities like SFC and DISM. In more severe cases, you’ll need to go for a repair install to get rid of the corrupted files.
- Corrupted user profile – Another reason why you might encounter this problem is due to a corrupted user profile. In this case, you should be able to resolve any corruption conflicts that are causing the issue by creating a new user profile and using that one instead of the current one.
- Glitched Cortana module – Based on various user reports, you might also encounter this error in instances where the search function is affected by Cortana or one of its dependencies. In this case, you should be able to resolve the issue by resetting Cortana and all associated components to its factory state.
Method 1: Taking ownership of the Data folder
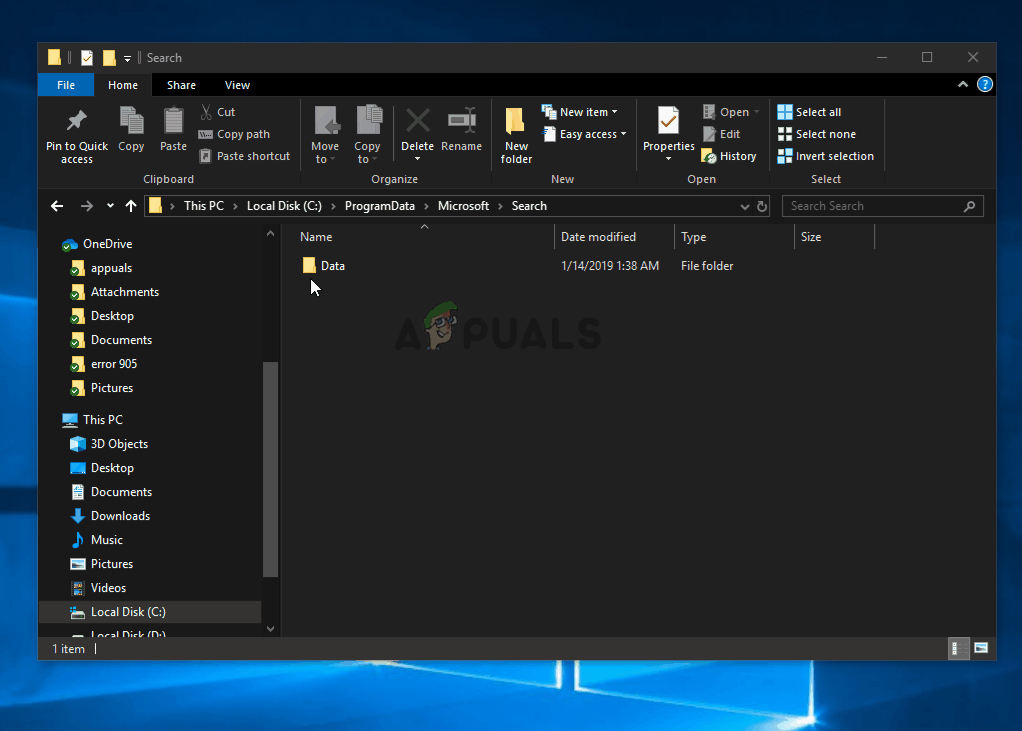
A large portion of affected users has managed to resolve the issue by taking complete ownership of the following path: C:/Program Data/ Microsoft/Search/Data. Affected users have reported that after doing so and restarting their computer, the Seach and Indexing troubleshooter was no longer encountering this particular issue.
Here’s a quick guide on taking complete ownership on C:/Program Data/ Microsoft/Search/Data:
Note: You should be able to follow the instructions below on all recent Windows versions (Windows 7, Windows 8.1 and Windows 10).
- Open File Explorer and navigate to the following location:
- Once you get there, right-click on the Data folder and choose Properties from the newly appeared context menu.
- Inside the Properties menu, use the horizontal bar at the top to access the Security tab, then click on Advanced to access the Advanced Security Settings for Data.
- Once you’re inside the Advanced Security Settings for data, click on the Change hyperlink associated with Owner.
- Now that you’re inside the Select User or Group window, start by typing your username inside the text box. Once you’ve done that, click on Check names to ensure that the name you entered is correct.
Note: If the name is correct, you should see your full name and email address added to the text box automatically. If the username is not correct, you’ll see an error message. - When you get returned to the Advanced Security Settings for Data, select your username from the list of Permission entries and click the Edit button below.
- Next, you should be taken inside the Permission Entry for Data window. From there, go to Basic permissions categories and ensure that the box associated with Full control is checked. Then click Ok to save the changes.
- Once you’re back to the Advanced Security Settingsfor Data, click on Apply to save the changes, then restart your computer.
- After the next startup is complete, run the Search and Indexing troubleshooter again and see if the issue is still occurring.
 Setting the correct permissions
If you still see the “Incorrect permissions on Windows Seach directories” error, move down to the next method below.
Method 2: Running SFC and DISM scans
If the method above didn’t allow you to resolve the issue, chances are the issue is being caused by some corrupted system files. As several affected users have reported, you should be able to resolve this particular issue by using a couple of built-in utilities capable of fixing system file corruption. Both DISM (Deployment Image Servicing and Management) and SFC (System File Checker) are perfectly capable of resolving cases of system file corruption, but they work around the issue differently.
While DISM uses Windows Update to replace corrupted files with healthy copies, SFC relies on a local cache archive to fetch healthy copies when it needs to. But since both inconsistencies are known to have some blank spots when it comes to identifying corrupted files, we highly recommend that you run both utilities in the same order.
Here’s a quick guide on performing DISM & SFC scans:
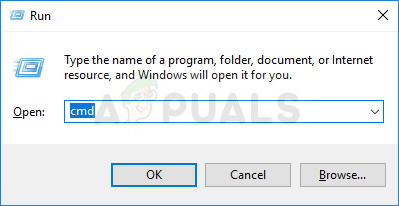
- Open up a Run dialog box by pressing Windows key + R. Inside the Run window, type “cmd” inside the text box and press Ctrl + Shift + Enter to open up an elevated Command Prompt. If you’re prompted by the UAC (User Account Control), click Yes to grant administrative privileges to the CMD window.
 Running Command Prompt
 - Once you’re inside the elevated Command Prompt, type the following command and press Enter to start an SFC scan:
 Running Command Prompt
Note: Once you start this process, do not close the CMD window or shut down your machine under any circumstances. Doing this might expose your system to further system corruption. And keep in mind that even if the final report doesn’t contain any fixed corruption files, that doesn’t mean that nothing was repaired. SFC is notoriously known for failing to report corrupted instances that have been resolved.
Note: Since DISM uses WU, it needs a reliable internet connection to download healthy copies of the files that are determined to be corrupted. Because of this, you need to make sure that your internet connection is stable before starting this procedure.
If you’re still encountering the same problem, move down to the next method below.
Method 3: Creating a New User Profile
Some affected users have reported that they manage to fix the issue by creating a new Windows user profile and deleting the older one. For most users, this trick has allowed them to restore the search function completely. Upon running the Search & indexing troubleshooter, the”Incorrect permissions on Windows Seach directories” issue was no longer reported.
Here’s a quick guide on creating a new user profile on Windows 10:
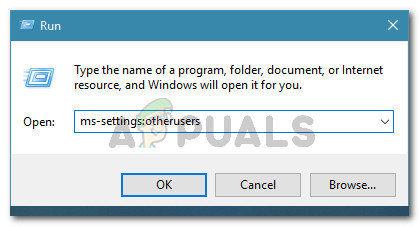
- Press Windows key + R to open up a Run dialog box. Next, type “ms-settings:other users” inside the text box and press Enter to open up the Family & other people tab of the Settings app. Running dialog: ms-settings:otherusers
- After you manage to get inside the Family & other users tab, move down to the right-hand pane and go to the Other users tab. Once you’re there, click on Add someone else to this PC.
- Next, proceed by adding your email and phone associated with your Microsoft account. If you want to establish a local account, click on “I don’t have this person’s sign-in information‘
- Once you get to the next screen, type the credentials of your Microsoft account or click on Add a user without a Microsoft account (if you want to create a local account).
Note: Know that if you create a local account, some online features present on Windows 10 will not be available. - Establish a User name and a password for your new account. Next, you’ll be prompted to assign a security question. We encourage you to do it to secure your account and set up a password recovery method.
- When the new account has been created, restart your computer and log in with the newly created account at the next startup.
- Once the startup sequence is complete, see if the search function is working normally now. If it is, you can safely delete the old user profile since you won’t use it anymore.
 Running dialog: ms-settings:otherusers
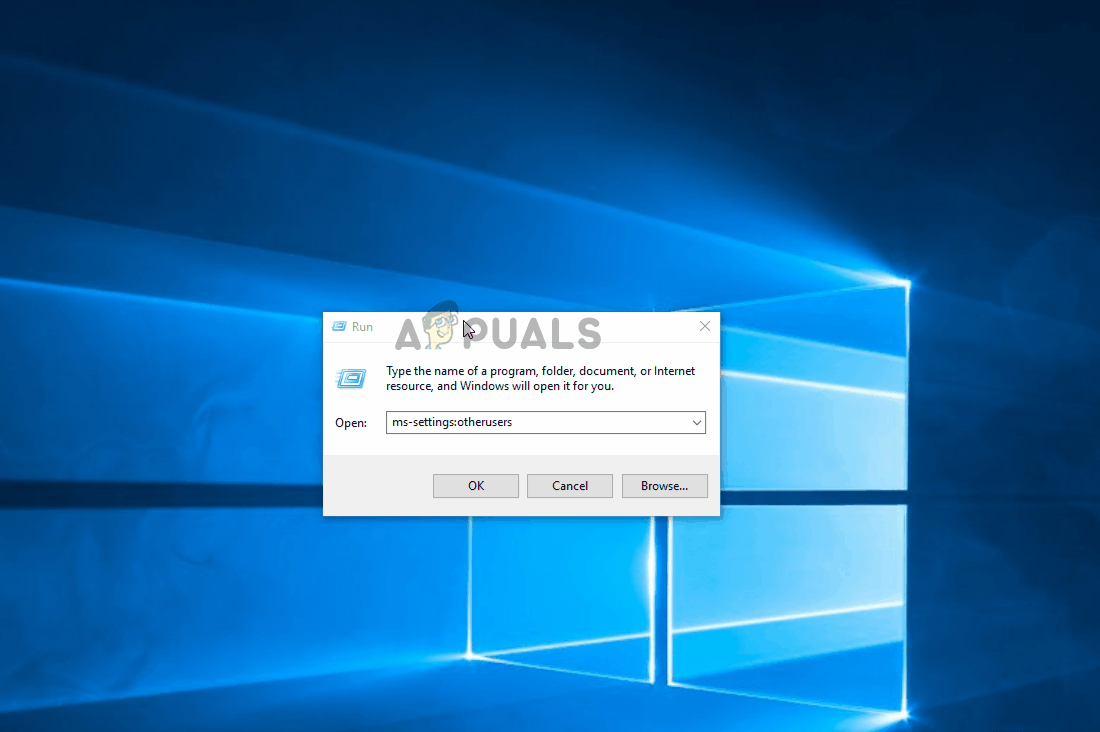 Creating a new Windows account to bypass system file corruption
If you’re still having issues with your Windows search function, move down to the next method below.
Method 4: Reset Cortana via PowerShell
As it turns out, this particular issue can also occur in instances where files or dependencies of Cortana are corrupted and are preventing the search queries from completing successfully. Several users that we’re also struggling to resolve the same issue have reported that they were finally able to resolve it by resetting Cortana via an elevated PowerShell window.
Here’s a quick guide on doing this:
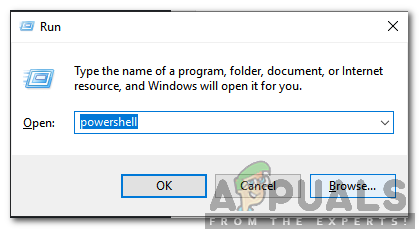
- Press Windows key + R to open up a Run dialog box. Next, type “powershell” inside the text box and press Ctrl + Shift + Enter to open up an elevated Powershell prompt. At the UAC (User Account Control) prompt, click Yes to grant admin access to the Powershell window. Typing in “Powershell” and pressing “Shift” + “Alt” + “Enter”
- Once you’re inside the elevated Powershell window, type or paste the following command and press Enter to reset Cortana and all its associated components:
- After the procedure is complete, close the elevated Powershell window and restart your machine.
- At the next startup, see if the issue is resolved.
 Typing in “Powershell” and pressing “Shift” + “Alt” + “Enter”
If you’re still encountering the “Incorrect permissions on Windows Seach directories” error while running the Indexing and Search troubleshooter, move down to the next method below.
Method 5: Performing a repair install
If none of the methods above have allowed you to resolve the permission issues with Windows search, chances are you’re dealing with some underlying system corruption issues that can’t be resolved conventionally. In this case, the most effective way of resolving the problem is to reset al Windows components.
To do this, you can always go for a clean install, but this procedure means that you’ll also lose any personal data including applications, user preferences, and media.
A better procedure would be to reset all Windows components by using a repair install. This procedure will also reset all WIndows components, but the key difference is a repair install will allow you to keep all personal data (including games, applications, images, videos, photos, etc.).
If you decide to perform a repair install, you can follow this article (here) for step-by-step instructions on how to do so by yourself.


