- Stay protected with Windows Security
- Important security info
- Understand and customize Windows Security features
- Status icons indicate your level of safety:
- Run a malware scan manually
- Run a quick scan in Windows Security
- Run an advanced scan in Windows Security
- Schedule your own scan
- Schedule a scan
- Turn Microsoft Defender Antivirus real-time protection on or off
- Turn real-time protection off temporarily
- Enable controlled folder access
- Windows Security app
- Intune
- Mobile Device Management (MDM)
- Microsoft Endpoint Configuration Manager
- Group Policy
- PowerShell
- Restore files and directories — security policy setting
- Reference
- Possible values
- Best practices
- Location
- Default values
- Policy management
- Group Policy
- Security considerations
- Vulnerability
- Countermeasure
- Potential impact
Stay protected with Windows Security
Windows 10 includes Windows Security, which provides the latest antivirus protection. Your device will be actively protected from the moment you start Windows 10. Windows Security continually scans for malware (malicious software), viruses, and security threats. In addition to this real-time protection, updates are downloaded automatically to help keep your device safe and protect it from threats.
Windows 10 in S mode
Some features will be a little different if you’re running Windows 10 in S mode. Because this mode is streamlined for tighter security, the Virus & threat protection area has fewer options. But don’t worry—the built-in security of this mode automatically prevents viruses and other threats from running on your device, and you’ll receive security updates automatically. For more info, see Windows 10 in S mode FAQ.
Important security info
Windows Security is built-in to Windows 10 and includes an antirvirus program called Microsoft Defender Antivirus. (In previous versions of Windows 10, Windows Security is called Windows Defender Security Center).
If you have another antivirus app installed and turned on, Microsoft Defender Antivirus will turn off automatically. If you uninstall the other app, Microsoft Defender Antivirus will turn back on automatically.
If you’re having problems receiving Windows Security updates, see Fix Windows Update errors and the Windows Update FAQ.
For info on how to uninstall an app, see Repair or remove an app in Windows 10.
To change your user account to an admin account, see Create a local user or administrator account in Windows 10.
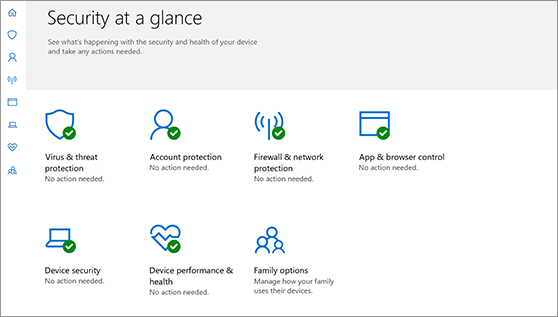
Understand and customize Windows Security features
Windows Security is your home to manage the tools that protect your device and your data:
Virus & threat protection. Monitor threats to your device, run scans, and get updates to help detect the latest threats. (Some of these options are unavailable if you’re running Windows 10 in S mode.)
Account protection. Access sign-in options and account settings, including Windows Hello and dynamic lock.
Firewall & network protection. Manage firewall settings and monitor what’s happening with your networks and internet connections.
App & browser control. Update settings for Microsoft Defender SmartScreen to help protect your device against potentially dangerous apps, files, sites, and downloads. You’ll have exploit protection and you can customize protection settings for your devices.
Device security. Review built-in security options to help protect your device from attacks by malicious software.
Device performance & health. View status info about your device’s performance health, and keep your device clean and up to date with the latest version of Windows 10.
Family options. Keep track of your kids’ online activity and the devices in your household.
You can customize how your device is protected with these Windows Security features. To access them, select Start > Settings > Update & Security > Windows Security . Then select the feature you want to explore.
Open Windows Security settings
Status icons indicate your level of safety:
Green means your device is sufficiently protected and there aren’t any recommended actions.
Yellow means there is a safety recommendation for you.
Red is a warning that something needs your immediate attention.
Run a malware scan manually
When you’re concerned about risks to a specific file or folder, you can right-click the file or folder in File Explorer, then select Scan with Microsoft Defender.
If you suspect there’s malware or a virus on your device, you should immediately run a quick scan. This is much faster than running a full scan on all your files and folders.
Run a quick scan in Windows Security
Select Start > Settings > Update & Security > Windows Security and then Virus & threat protection.
Open Windows Security settings
Under Current threats, select Quick scan (or in previous versions of Windows 10, under Threat history, select Scan now).
If the scan doesn’t find any issues, but you’re still concerned, you may want to check your device more thoroughly.
Run an advanced scan in Windows Security
Select Start > Settings > Update & Security > Windows Security and then Virus & threat protection.
Under Current threats, select Scan options (or in previous versions of Windows 10, under Threat history, select Run a new advanced scan).
Select one of the scan options:
Full scan (check files and programs currently running on your device)
Custom scan (scan specific files or folders)
Microsoft Defender Offline scan (run this scan if your device has been, or could potentially be, infected by a virus or malware). Learn more about Microsoft Defender Offline
Select Scan now.
Note: Because of streamlined security, this process isn’t available if you’re running Windows 10 in S mode.
Schedule your own scan
Even though Windows Security is regularly scanning your device to keep it safe, you can also set when and how often the scans occur.
Schedule a scan
Select the Start button, type schedule tasks in the Search box, and in the list of results, select Task Scheduler.
In the left pane, select the arrow (>) next to Task Scheduler Library to expand it, do the same with Microsoft > Windows, and then scroll down and select the Windows Defender folder.
In the top-center pane, select Windows Defender Scheduled Scan. (Point to the choices to see the full names.)
In the Actions pane on the right, scroll down and then select Properties.
In the window that opens, select the Triggers tab, and then select New.
Set your preferred time and frequency, and then select OK.
Review the schedule and select OK.
Note: Because of streamlined security, this process isn’t available if you’re running Windows 10 in S mode.
Turn Microsoft Defender Antivirus real-time protection on or off
Sometimes you may need to briefly stop running real-time protection. While real-time protection is off, files you open or download won’t be scanned for threats. However, real-time protection will soon turn on automatically again to protect your device.
Turn real-time protection off temporarily
Select Start > Settings > Update & Security > Windows Security and then Virus & threat protection > Manage settings. (In previous versions of Windows 10, select Virus & threat protection > Virus & threat protection settings.)
Open Windows Security settings
Switch the Real-time protection setting to Off and choose Yes to verify.
Note: Because of streamlined security, this process isn’t available if you’re running Windows 10 in S mode.
Enable controlled folder access
Applies to:
Controlled folder access helps you protect valuable data from malicious apps and threats, such as ransomware. Controlled folder access is included with Windows 10 and Windows Server 2019.
You can enable controlled folder access by using any of these methods:
Audit mode allows you to test how the feature would work (and review events) without impacting the normal use of the device.
Group Policy settings that disable local administrator list merging will override controlled folder access settings. They also override protected folders and allowed apps set by the local administrator through controlled folder access. These policies include:
- Microsoft Defender Antivirus Configure local administrator merge behavior for lists
- System Center Endpoint Protection Allow users to add exclusions and overrides
Windows Security app
Open the Windows Security app by selecting the shield icon in the task bar. You can also search the start menu for Defender.
Select the Virus & threat protection tile (or the shield icon on the left menu bar) and then select Ransomware protection.
Set the switch for Controlled folder access to On.
If controlled folder access is configured with Group Policy, PowerShell, or MDM CSPs, the state will change in the Windows Security app after a restart of the device. If the feature is set to Audit mode with any of those tools, the Windows Security app will show the state as Off. If you are protecting user profile data, we recommend that the user profile should be on the default Windows installation drive.
Intune
Sign in to the Azure portal and open Intune.
Go to Device configuration > Profiles > Create profile.
Name the profile, choose Windows 10 and later and Endpoint protection.
Go to Configure > Windows Defender Exploit Guard > Controlled folder access > Enable.
Type the path to each application that has access to protected folders and the path to any additional folder that needs protection. Select Add.
Wilcard is supported for applications, but not for folders. Subfolders are not protected. Allowed apps will continue to trigger events until they are restarted.
Select OK to save each open blade and Create.
Select the profile Assignments, assign to All Users & All Devices, and Save.
Mobile Device Management (MDM)
Use the ./Vendor/MSFT/Policy/Config/ControlledFolderAccessProtectedFolders configuration service provider (CSP) to allow apps to make changes to protected folders.
Microsoft Endpoint Configuration Manager
In Microsoft Endpoint Configuration Manager, go to Assets and Compliance > Endpoint Protection > Windows Defender Exploit Guard.
Select Home > Create Exploit Guard Policy.
Enter a name and a description, select Controlled folder access, and select Next.
Choose whether block or audit changes, allow other apps, or add other folders, and select Next.
Wilcard is supported for applications, but not for folders. Subfolders are not protected. Allowed apps will continue to trigger events until they are restarted.
Review the settings and select Next to create the policy.
After the policy is created, Close.
Group Policy
On your Group Policy management device, open the Group Policy Management Console, right-click the Group Policy Object you want to configure and select Edit.
In the Group Policy Management Editor, go to Computer configuration and select Administrative templates.
Expand the tree to Windows components > Microsoft Defender Antivirus > Windows Defender Exploit Guard > Controlled folder access.
Double-click the Configure Controlled folder access setting and set the option to Enabled. In the options section you must specify one of the following options:
Enable — Malicious and suspicious apps won’t be allowed to make changes to files in protected folders. A notification will be provided in the Windows event log.
Disable (Default) — The Controlled folder access feature won’t work. All apps can make changes to files in protected folders.
Audit Mode — Changes will be allowed if a malicious or suspicious app attempts to make a change to a file in a protected folder. However, it will be recorded in the Windows event log where you can assess the impact on your organization.
Block disk modification only — Attempts by untrusted apps to write to disk sectors will be logged in Windows Event log. These logs can be found in Applications and Services Logs > Microsoft > Windows > Windows Defender > Operational > ID 1123.
Audit disk modification only — Only attempts to write to protected disk sectors will be recorded in the Windows event log (under Applications and Services Logs > Microsoft > Windows > Windows Defender > Operational > ID 1124). Attempts to modify or delete files in protected folders won’t be recorded.
To fully enable controlled folder access, you must set the Group Policy option to Enabled and select Block in the options drop-down menu.
PowerShell
Type powershell in the Start menu, right-click Windows PowerShell and select Run as administrator.
Enter the following cmdlet:
You can enable the feature in audit mode by specifying AuditMode instead of Enabled .
Restore files and directories — security policy setting
Applies to
Describes the best practices, location, values, policy management, and security considerations for the Restore files and directories security policy setting.
Reference
This security setting determines which users can bypass file, directory, registry, and other persistent object permissions when they restore backed up files and directories, and it determines which users can set valid security principals as the owner of an object.
Granting this user right to an account is similar to granting the account the following permissions to all files and folders on the system:
- Traverse folder / execute file
- Write
Possible values
- User-defined list of accounts
- Defaults
- Not Defined
Best practices
- Users with this user right can overwrite registry settings, hide data, and gain ownership of system objects, so only assign this user right to trusted users.
Location
Computer Configuration\Windows Settings\Security Settings\Local Policies\User Rights Assignment
Default values
By default, this right is granted to the Administrators, Backup Operators, and Server Operators groups on domain controllers, and to the Administrators and Backup Operators groups on stand-alone servers.
The following table lists the actual and effective default policy values. Default values are also listed on the policy’s property page.
| Server type or Group Policy Object (GPO) | Default value |
|---|---|
| Default Domain Policy | |
| Default Domain Controller Policy | Administrators Backup Operators Server Operators |
| Stand-Alone Server Default Settings | Administrators Backup Operators |
| Domain Controller Effective Default Settings | Administrators Backup Operators Server Operators |
| Member Server Effective Default Settings | Administrators Backup Operators |
| Client Computer Effective Default Settings | Administrators Backup Operators |
Policy management
This section describes features, tools, and guidance to help you manage this policy.
A restart of the computer is not required for this policy setting to be effective.
Any change to the user rights assignment for an account becomes effective the next time the owner of the account logs on.
Group Policy
Settings are applied in the following order through a Group Policy Object, which will overwrite settings on the local computer at the next Group Policy update:
- Local policy settings
- Site policy settings
- Domain policy settings
- OU policy settings
When a local setting is greyed out, it indicates that a GPO currently controls that setting.
Security considerations
This section describes how an attacker might exploit a feature or its configuration, how to implement the countermeasure, and the possible negative consequences of countermeasure implementation.
Vulnerability
An attacker with the Restore files and directories user right could restore sensitive data to a computer and overwrite data that is more recent, which could lead to loss of important data, data corruption, or a denial-of-service condition. Attackers could overwrite executable files that are used by legitimate administrators or system services with versions that include malicious software to grant themselves elevated privileges, compromise data, or install programs that provide continued access to the device
Note:В В Even if the following countermeasure is configured, an attacker could restore data to a computer in a domain that is controlled by the attacker. Therefore, it is critical that organizations carefully protect the media that are used to back up data.
Countermeasure
Ensure that only the local Administrators group is assigned the Restore files and directories user right unless your organization has clearly defined roles for backup and for restore personnel.
Potential impact
If you remove the Restore files and directories user right from the Backup Operators group and other accounts, users who aren’t members of the local Administrators group can’t load data backups. If restoring backups is delegated to a subset of IT staff in your organization, you should verify that this change does not negatively affect the ability of your organization’s personnel to do their jobs.


