- Как сбросить кэш шрифтов в Windows 10
- Ways to Clear Font Cache on Windows
- Font cache is stored in specific files, check out this post and learn how to clear font cache on Windows.
- Part 1: How to Clear Font Cache on Windows
- Method 1 (Administrator privilege required)
- Method 2 Clear Font Cache on Windows with Stellar BitRaser for file
- Part 2: How to Clear Font Cache on Mac
- How To Rebuild Font Cache in Windows 10
- About Sergey Tkachenko
Как сбросить кэш шрифтов в Windows 10

При загрузке иконок рабочего стола и файлов их значки берутся из кэша Windows. Аналогичным образом в интерфейсе приложений, документов и самой системы загружаются шрифты. Если такой кэш повреждается, шрифты либо начинают отображаться неправильно, либо попросту пропадают из списка. Если вам пришлось столкнуться с этой неполадкой, вот способ её исправить.
Кэш шрифтов Windows представляет собой набор файлов DAT , расположенных в системной папке FontCache. Нужно удалить эти файлы, а затем перезагрузить компьютер, чтобы Windows смогла их пересоздать. Папка FontCache является защищённой, чтобы иметь возможность с нею работать, сначала необходимо отключить службу кэша шрифтов Windows.
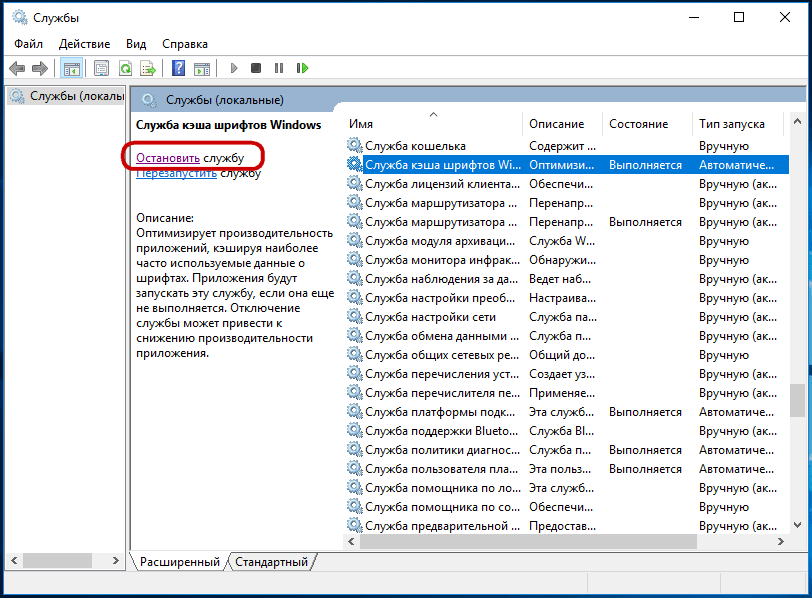
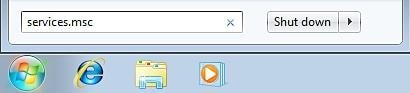
Командой services.msc в окошке «Выполнить» откройте оснастку управления службами и найдите элемент «Служба кэша шрифтов Windows».
А затем перейдите в Проводнике по адресу:
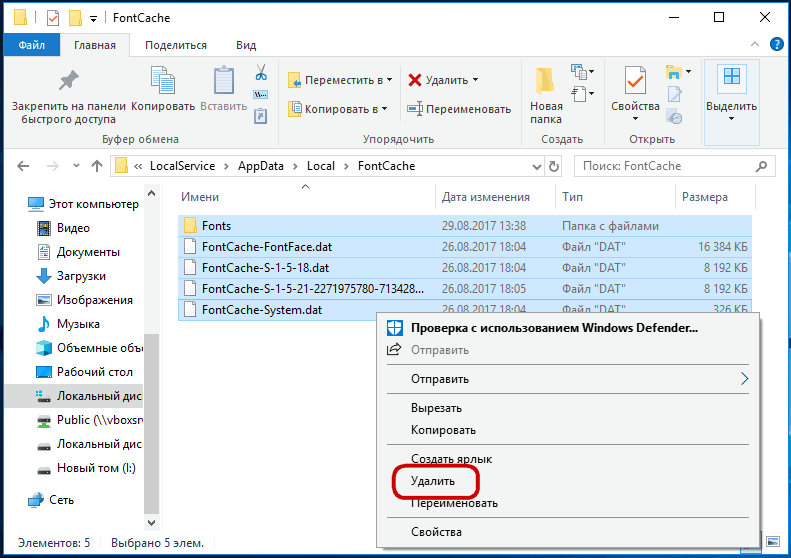
C:\Windows\ServiceProfiles\LocalService\AppData\Local\FontCache
Переходить лучше вручную, так как если просто вставить путь в адресную строку Проводника и нажать ввод , Windows скорее всего сообщит о некорректности пути.
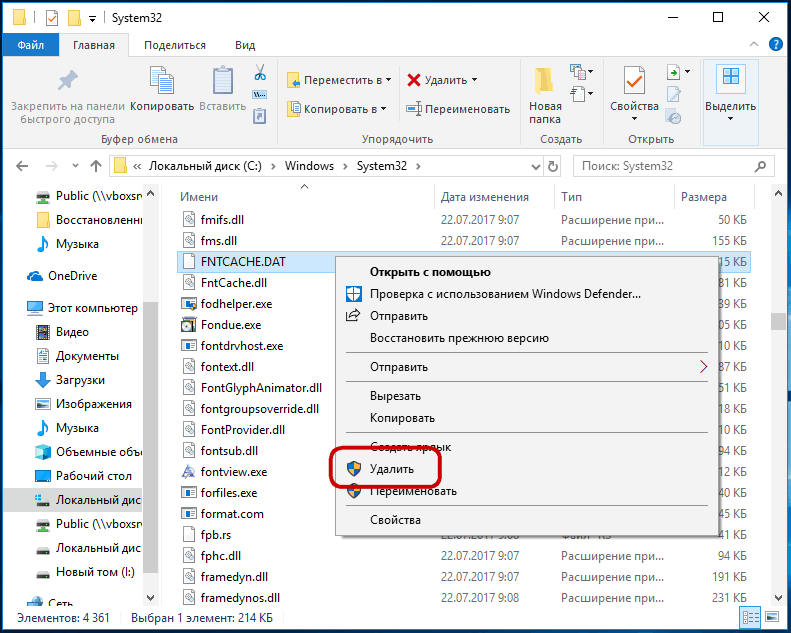
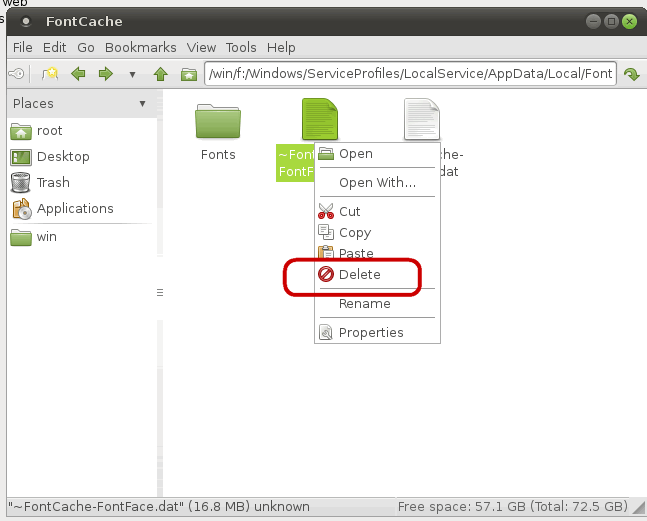
В папке вы увидите каталог Fonts и несколько файлов в формате DAT . Удалите все эти объекты, а затем также удалите файл FNTCACHE.DAT в папке C:\Windows\System32 и перезагрузите компьютер.
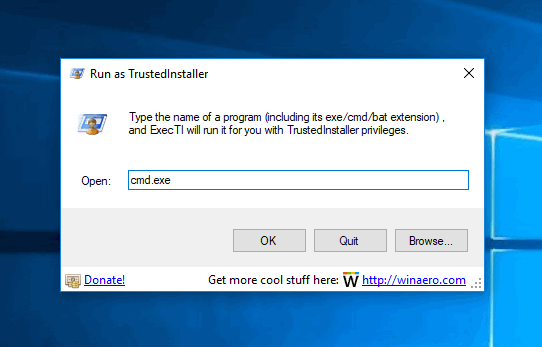
Если после отключения службы кэша шрифтов файлы в папке FontCache удалить не удастся, скачайте по ссылке winaero.com/download.php?view.1991 утилиту ExecTI, запустите с её помощью командную строку с правами TrustedInstaller .
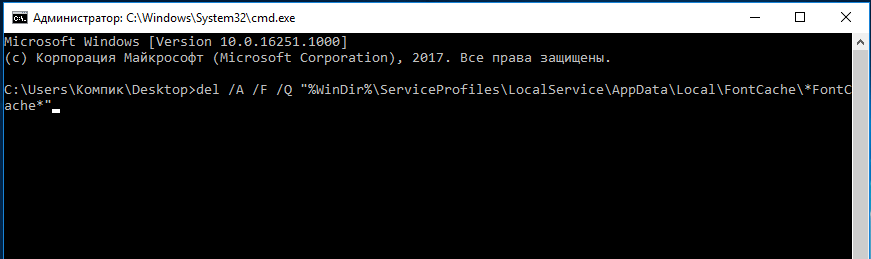
И выполните такую команду:
Если и при этом вы получите отказ в доступе, загрузите вашу систему с любого живого диска со встроенным файловым менеджером и удалите DAT -файлы вручную.
После этого загрузитесь в обычном режиме и включите службу кэша шрифтов . Это должно решить проблемы с отображением шрифтов в Windows 10.
Описанный выше способ применим и для Windows 7 и 8.1, только файлы кэша в этих версиях располагаются по пути %Windir%\ServiceProfiles\LocalService\AppData\Local . Отдельная папка FontCache в Windows 7 и 8.1 отсутствует, поэтому будьте осторожны, удаляя файлы DAT . Удалять можно только файлы, в названии которых есть «FontCache», а вот папки Microsoft , PnrpSqm и Temp в каталоге Local трогать нельзя.
Ways to Clear Font Cache on Windows
Font cache is stored in specific files, check out this post and learn how to clear font cache on Windows.

Amy Dennis
Dec 21, 2020 • Filed to: Recover & Repair Files • Proven solutions
A cache is a file made by the operating system to make certain aspects quickly accessible and reduce fetch times and also the burden on your storage device. If you are having trouble displaying or using fonts such as fonts appearing garbled, fonts refusing to switch when you want them to or giving errors or crashing the program while switching fonts, then it may indicate that your font cache is corrupted.
To rebuild it, you need toВ clear font cache on WindowsВ or Mac. You can safely delete these files since these are just caches and not the actual fonts stored on your computer. Once you clear the font cache on Windows or Mac, the next time your system starts, the operating system will check for the font cache, and once it is found to be missing, the cache will be reconstructed from the original files, thus fixing any issues that may be caused by corrupt font cache.
Part 1: How to Clear Font Cache on Windows
There are two ways to clear font cache on Windows. One is to stop caching service and manually remove all the files. However, you must have a reasonable level of comfort and confidence tinkering with your system. For example, if you delete the wrong system files, you may cause severe damage to your system. Another way is to use a simple font cache cleaner likeВ Stellar BitRaser for the file.
Method 1 (Administrator privilege required)
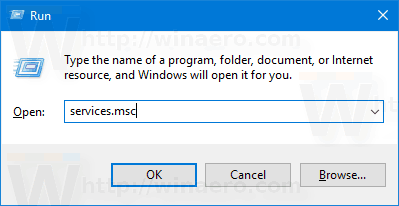
- Open the «Run» dialogue box from the Start menu (open Start menu and type «Run») or by pressing Windows Key + R. Enter «services.msc» in the Run dialogue box and hit Enter key
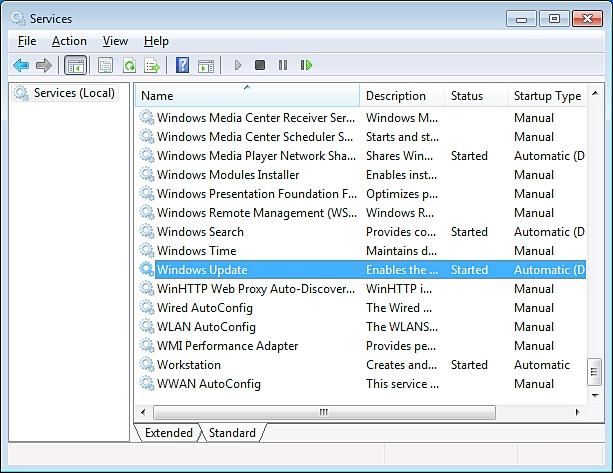
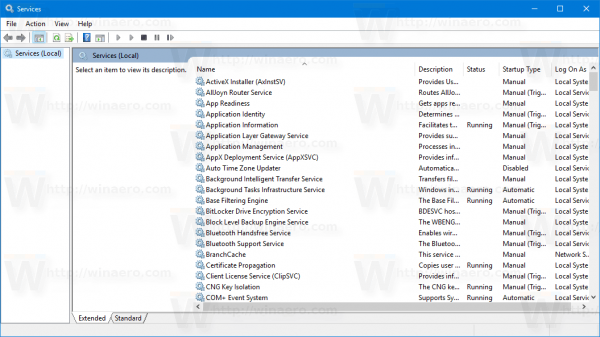
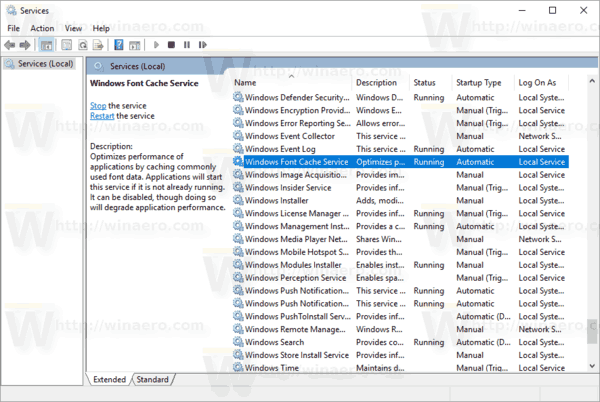
- Find the «Windows Font Cache Service» in the long list. Stop it by selecting the service and pressing the Stop option in the sidebar or by right-clicking it and selecting the Stop option.
- Open «This PC» or Windows Explorer (hit Windows Key + E) and navigate to the path below. Directly pasting the path in Windows Explorer will not work, you will need to specially allow permission to access certain folders. So start from C:\ and navigate to the path.
C:\Windows\ServiceProfiles\LocalService\AppData\Local\FontCache - Select all files in this folder (Ctrl + A) and delete them.
- Open the Run dialogue again, enter «%WinDir%\System32\» and press Enter key.
- Find the file named «FNTCACHE.DAT» and delete it. Warning — Be careful not to modify or delete any other file.
- Restart your computer. The font cache will be rebuilt during the restart.
Method 2 Clear Font Cache on Windows with Stellar BitRaser for file
Stellar BitRaser for file, besides acting as a font cache cleaner, can also help you in the cleanup of other junk files in your system. This program is specially made to erase unnecessary and unwanted junk. It can automatically find and clean traces of Internet activity and also traces of activities of other software. It has options that you can choose to delete any private emails, chat messages, or temporary files. It can also employ secure erasure techniques to erase private files such that they cannot be recovered or reconstructed. The secure erase technique can use one of 17 different standard or advanced erasing standards.
- Download Stellar BitRaser for the file on your Windows computer, and launch it.
- Click the «System Trace» section to start clear font cache on Windows
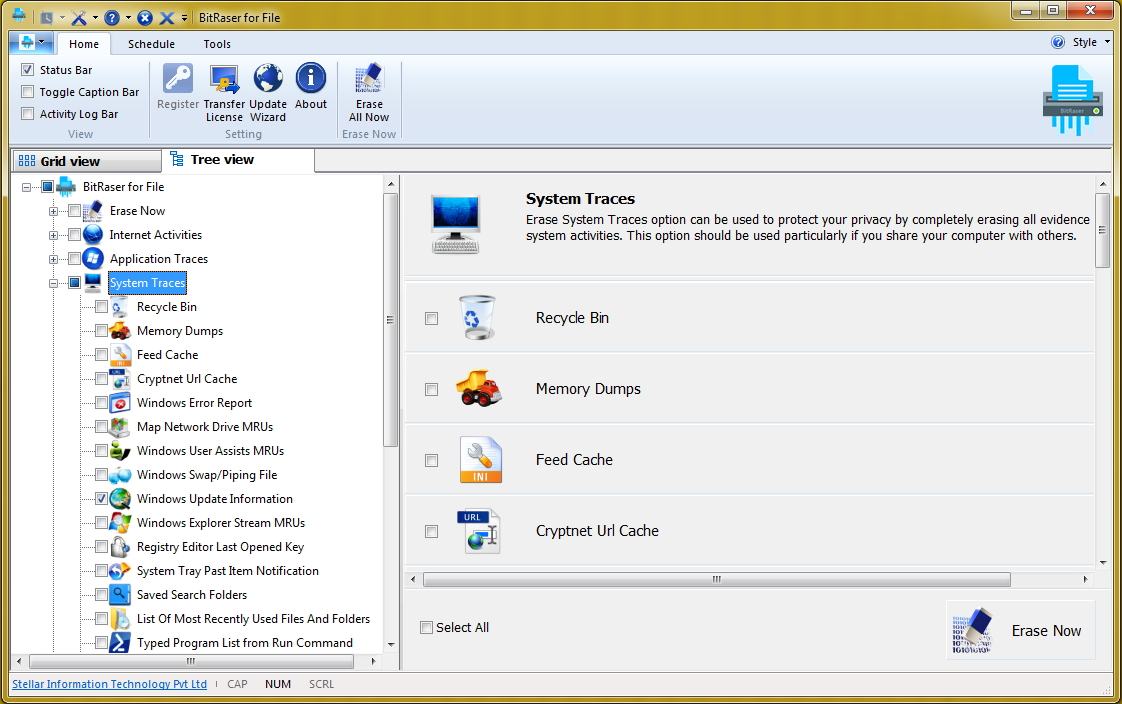
- Select «Cache Fonts» and click the «Erase Now» button to process.
- After completing the erasure, you can reboot your system.
Tip:В If you need to ensure that the data is permanently removed beyond the point where it can be recovered, you can repeat the process one more time. The data will be overwritten once more, and two passes would be enough to ensure that it cannot be recovered.
Part 2: How to Clear Font Cache on Mac
For Mac, you can either start your computer in the safe boot mode or use Terminal commands to rebuild font cache.
Method 1
- Shut down your computer.
- Press the Power button to start up your computer. As you hear the power-up tone, immediately press and hold down the Shift key. You can release the Shift key after the Apple logo appears.
- Let the computer start-up in Safe Boot. This mode can be used to automatically clear font cache on Mac.
- Restart your computer normally.
Method 2
- Close any running applications and run the Terminal. You can open Terminal from Applications > Utilities > Terminal
- For only your user account, type «atsutil databases –removeUser» and hit the Return key. For clearing font cache for all users, type «atsutil databases –remove» and hit the Return key. This clears the font cache on Mac.
- Now you need to stop and restart the ATS server. For doing so, first, enter «atsutil server –shutdown» in the Terminal and hit Return. Then enter atsutil server –ping’ and hit Return.
Malfunctioning fonts can be a major annoyance or even prevent you from doing your work altogether. It can be fixed by clearing the font cache using the simple steps mentioned in this article. However, the task can be made a lot easier by using a font cache cleaner likeВ Stellar BitRaser for file, so that you can get back to work quickly.
How To Rebuild Font Cache in Windows 10
Similarly to the icon cache, Windows creates a cache for fonts to load them faster and display the user interface of apps, documents and other controls faster. When it is corrupted, fonts may not appear properly, or some fonts might be missing in the font list available for certain apps. In this article, we will see how to rebuild the font cache.
Before proceeding, ensure that your user account has administrative privileges. Now, follow the instructions below.
To rebuild the font cache in Windows 10, do the following.
- Press Win + R shortcut keys on the keyboard to open the Run dialog. Type services.msc in the Run box.

- The Services console will be opened.
- Find the Windows Font Cache service in the list.
- Click on the stop button on the toolbar.
Tip: See the following detailed guide on how to start, stop or restart a service in Windows 10. - Open This PC in File Explorer.
- Go to the following folder by navigating one folder at a time. Do not copy paste the path directly as certain folders are protected and you may need to press the Continue button to access them:

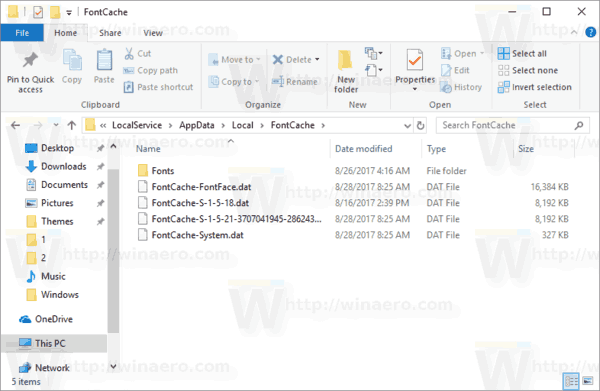
Note: If you have stopped the service but still cannot delete the files, here is a workaround.
- Download ExecTI.
- Use ExecTI to run cmd.exe as TrustedInstaller.
- In the command prompt opened as trusted installer, type or copy-paste the following command:
del /A /F /Q «%WinDir%\ServiceProfiles\LocalService\AppData\Local\FontCache\*FontCache*»
This should resolve the issue.
Tip: You can use the following command to stop and start the Windows Font Cache service.
On Windows 7 and Windows 8.1, the Font Cache files are located directly in the following folder:
There is no separate FontCache directory like Windows 10. In this case, be careful to not delete the other folders. Delete only the *.DAT files related to the font cache.
Note: If your fonts are still corrupted and displaying invalid characters after resetting the cache, the installed fonts in C:\Windows\Fonts themselves may be damaged. To restore the default fonts that ship with Windows, run the following command from an elevated command prompt:
Let Windows restore the original font files. If the font files in your Component Store are corrupted, refer to the following article to learn how to use DISM to repair them: How to Fix Windows 10 using DISM
Winaero greatly relies on your support. You can help the site keep bringing you interesting and useful content and software by using these options:
Share this post
About Sergey Tkachenko
Sergey Tkachenko is a software developer from Russia who started Winaero back in 2011. On this blog, Sergey is writing about everything connected to Microsoft, Windows and popular software. Follow him on Telegram, Twitter, and YouTube.


