- 3 способа подключения дисков HFS+ (macOS) в Windows
- MacDrive
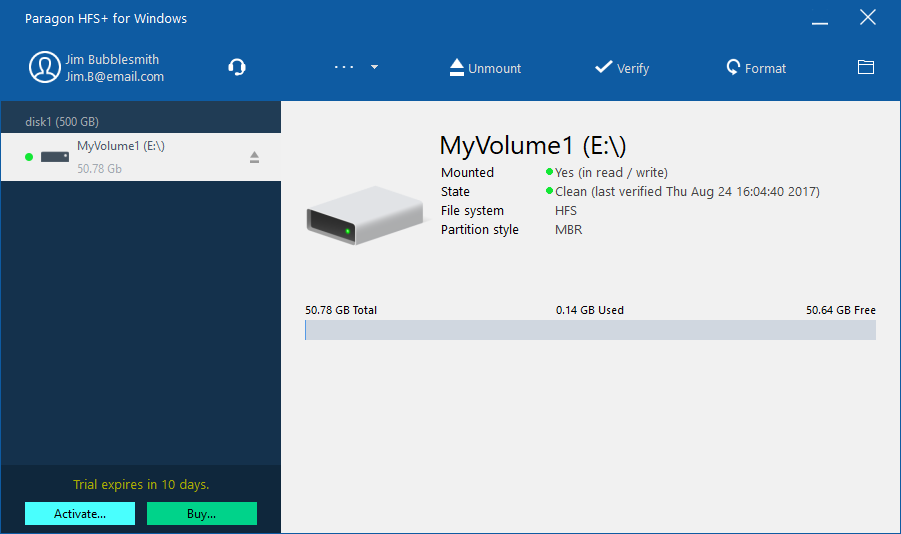
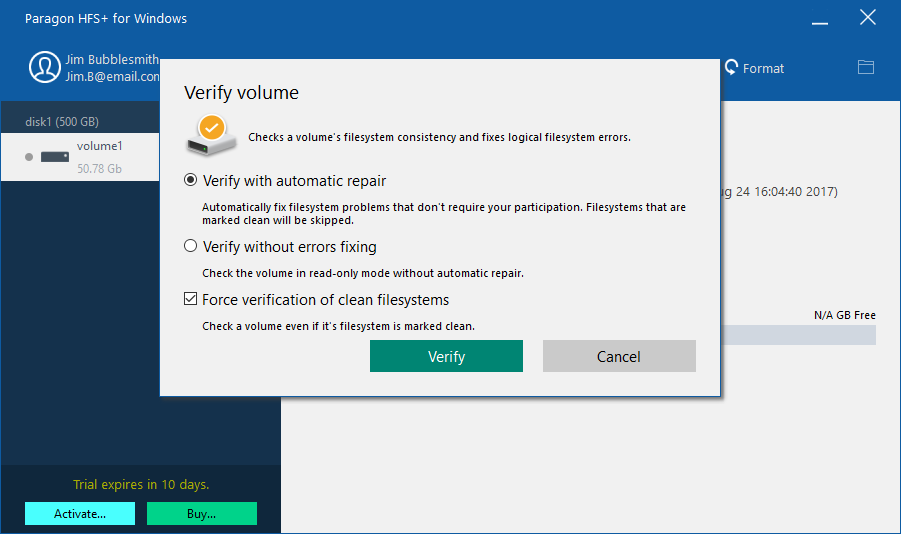
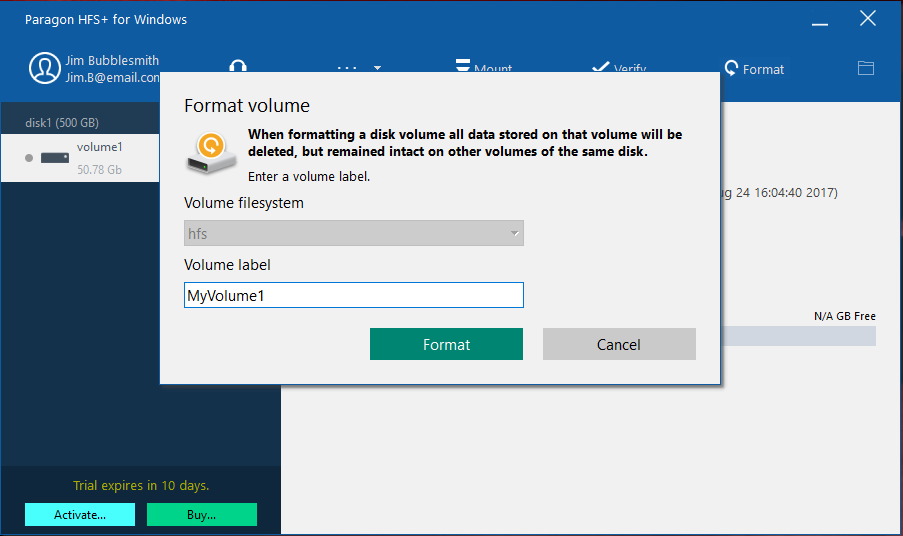
- Paragon HFS+ for Windows
- HFSExplorer
- Комментариев: 2
- How to Format a Disk to HFS Without a Mac
- Related
- How to Fix: Convert Windows Disk to Mac (Format HFS+)
- How to Fix: Convert Windows Disk to Mac (Format HFS+ on Windows)
- Option 1: Convert NTFS to HFS+ using Paragon Partition Manager Free
- Option 2: Convert NTFS to HFS+ using DiskPart
- Got a Computer Question or Problem? Ask Dennis!
- HFS+ for Windows by Paragon Software
- Stable Operation
- Data Safety
- Guaranteed Performance
- Efficient Use
- Native look and feel
- How it Works
- Install
- Connect
- Use
- Features
- Frequently Asked Questions
3 способа подключения дисков HFS+ (macOS) в Windows
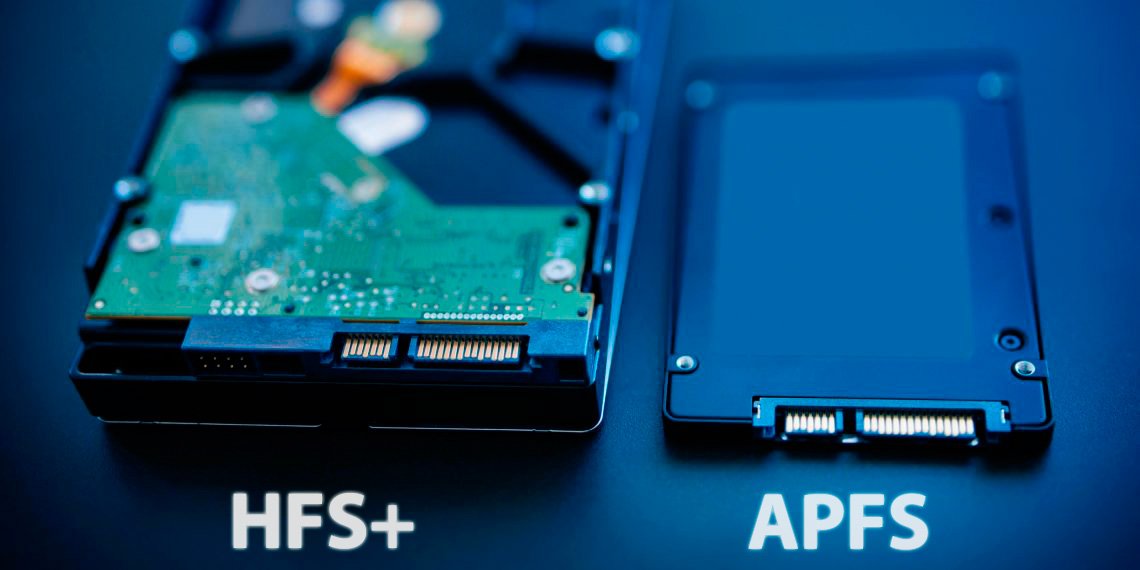
К сожалению, Windows не понимает файловую систему HFS, используемую на Mac. macOS, в этом плане более лояльна к своим пользователям, тут уже «из коробки» имеется возможность чтения данных с разделов NTFS (но не записи). Тоже, странное ограничение, объяснения которому я не нахожу, потому как в составе любой unix-системы (Linux, FreeBSD), уже довольно давно имеется поддержка NTFS.
Стоп, Остапа опять понесло. сегодня, всё-таки, рассмотрим варианты подключения жестких дисков или флешек, отформатированных в Mac OS Extended (другое название HFS Plus или HFS+) в Windows. Спросите, что за трэш? Кому это вообще нужно? Однако, ситуации бывают разные. Сразу оговорюсь, и кого-то, возможно, расстрою, но поддержки новейшей файловой системы Apple File System (APFS), появившейся в macOS High Sierra, пока нет ни в одном из решений.
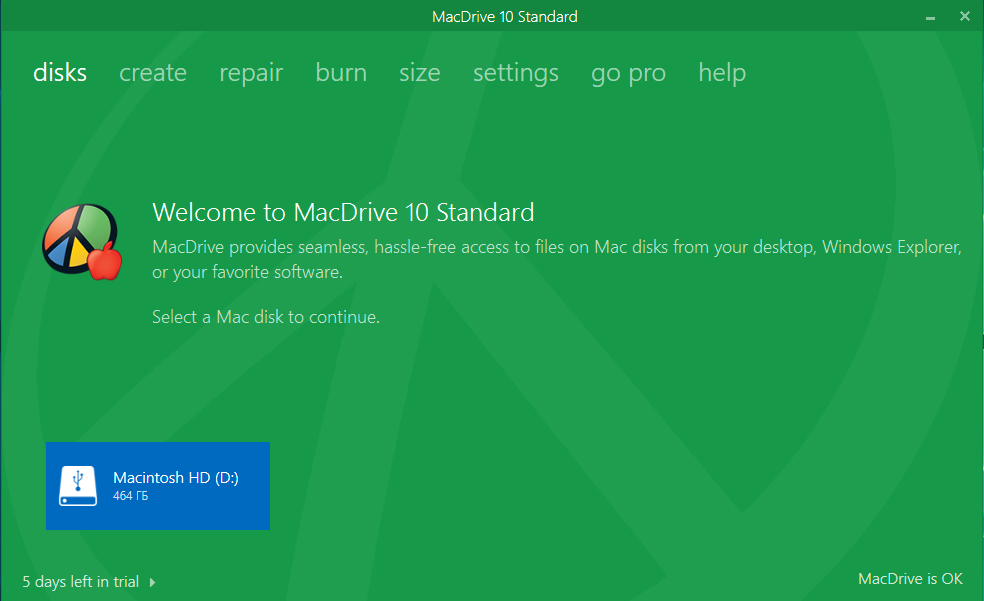
MacDrive

Начну обзор, пожалуй, с самого лучшего и стабильного решения — MacDrive. Хоть я только что и написал, что поддержки APFS нет, однако последняя версия MacDrive 10.5 + APFS (бета) всё-таки имеет возможность чтения дисков, отформатированных с новой файловой системой Apple. Статус бета-версии подразумевает, что её ещё продолжают тестировать и совершенствовать, однако уже сейчас, чтение и копирование файлов с подобных разделов уже работает. Правда, есть и еще одно ограничение — поддержка APFS, в настоящее время, доступна только в Windows 10 и MacDrive не поддерживает зашифрованные диски APFS (а вот это уже облом).
С дисками формата HFS+ никаких ограничений в работе нет, MacDrive позволяет легко читать и писать данные на эти разделы, а также открывать резервные копии Time Machine и копировать файлы из них на Windows-диски. В Windows добавляется специальный драйвер.
Стандартная лицензия на MacDrive стоит 49.99$. Имеется бесплатный пробный период на 5 дней, чего вполне может хватить, если не требуется постоянно работать с такими дисками.
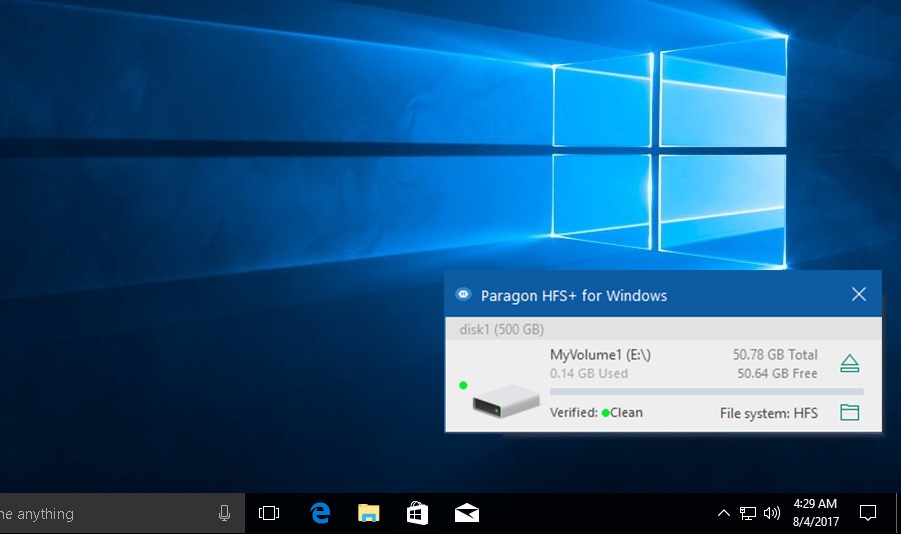
Paragon HFS+ for Windows
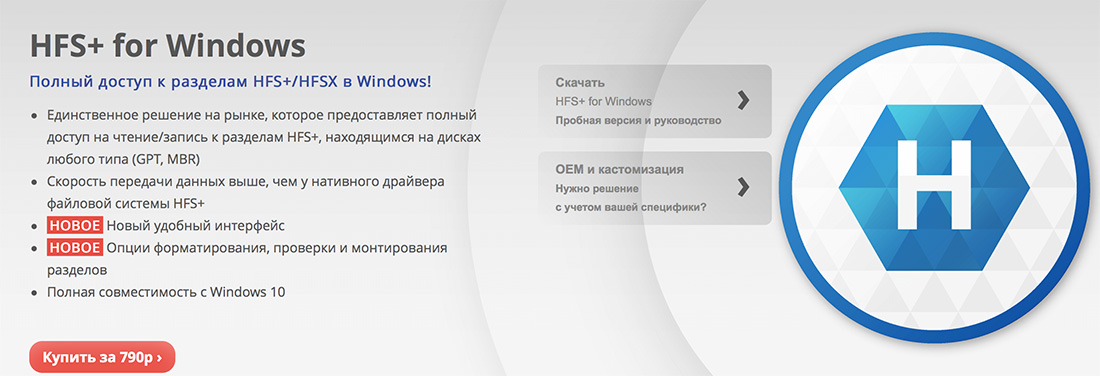
Уж не знаю почему, но Paragon HFS+ считается самым популярным драйвером для поддержки HFS+ в окнах, должен работать с дисками любого типа GPT и MBR. Почему я пишу об этом продукте с таким недоверием? Всё дело в том, что хоть на сайте и заявлена полная совместимость с Windows 10, однако эта хрень, после перезагрузки (а это действие обязательно после установки), благополучно завалила мне десятку в синий экран смерти.
И это, заметьте, на чистом свежеустановленном Windows 10, так что негативное влияние каких-то иных программ исключается. Пришлось загружаться в безопасном режиме (когда отключена загрузка дополнительных драйверов) и удалять нафиг эту поделку с компа. Причём, Paragon HFS+ не разу не бесплатная, лицензия обойдётся в 790 рублей (мне вполне хватило 10-дневной пробной версии).
HFSExplorer
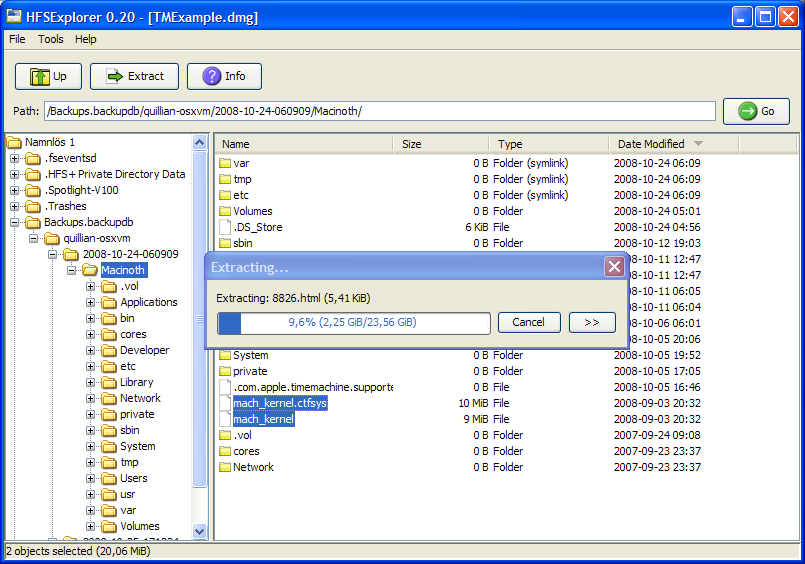
Первые два варианта поддержки HFS+ предполагали использование специальных драйверов в Windows, что позволяло обращаться к таким дискам на уровне системы и она их понимала. При использовании специальных приложений для тех же целей, доступ к файлам на разделах HFS+, будет возможен только внутри этих приложений. Мне известна пара подобных утилит — например, бесплатная HFSExplorer и TransMac (платная с пробным периодом).
HFSExplorer позволяет просматривать и копировать файлы с дисков HFS+. Также имеется возможность создания образов дисков HFS+ для последующей работы. Конечно, это не так удобно, как при использовании драйвера MacDrive, зато абсолютно бесплатно.
Если считаете статью полезной,
не ленитесь ставить лайки и делиться с друзьями.
Комментариев: 2
R-Studio понимает HFS+. Если вам ничего записывать не нужно, то достать инфу можно без проблем
Виталий Благодарю! ..только эта программа помогла мне открыть диск макинтоша
How to Format a Disk to HFS Without a Mac

Related
Hierarchical File System Plus, also known as Mac OS Extended, is the primary file system format used in Mac computers. Windows, on the other hand, runs off file allocation system or New Technology File System. Neither Mac OS nor Windows recognize each other’s volume formats. Most users will never need to create an HFS+ disk outside of Mac, but businesses that rely on virtualization to run other operating systems may need to format in Windows a flash drive with an HFS+ partition. Once the partition has been created on the storage device, the Mac OS installation files can be copied to the drive.
Click «Start.» Type «command» into the search bar and press «Enter.» Select «Command Prompt» from the list of search results.
Type «diskpart.exe» without quotes into Command Prompt and then press «Enter» to run DiskPart.
Execute the following commands to select the target disk:
list disk select disk #
Replace «#» with the number associated with the appropriate storage device. Use the Size and Free fields to differentiate between the disks, if necessary.
Run the command «clean» to wipe the disk of partition and volume formatting.
Execute the following command to create an HFS+ partition on the disk:
create partition primary >
Type «list partition» into Command Prompt and press «Enter» to see the new partition.
Run the command «select partition #» replacing the «#» with the number assigned to the HFS+ partition. Type «active» and then press «Enter» to mark the partition as a system volume.
Type «exit» and press «Enter» to quit DiskPart.
How to Fix: Convert Windows Disk to Mac (Format HFS+)

Infopackets Reader Sam G. writes:
I have an old external 1 TB hard drive I’d like to format for use with Apple Time Machine backup. The problem is that the disk is currently formatted as NTFS and is not readable with Time Machine. I have searched Google on how to convert a Windows disk to Mac (format to HFS+ on Windows) but can’t seem to find a solution to this problem. Any help would be appreciated! «
I asked Sam if he would like me to connect to his machine using my remote desktop support service in order to have a closer look, and he agreed.
Below I will discuss my findings.
How to Fix: Convert Windows Disk to Mac (Format HFS+ on Windows)
There are two ways you can format HFS+ on Windows: either use Paragon Partition Manager Free, Community Edition (CE), or by using diskpart.exe in Windows. The latter requires to you to use a command line interface, while the former uses a graphical user interface. For all intents and purposes, Paragon Partition Manager free is the most intuitive option.
As per comments below — there is a third option if you decided to format HFS+ on Mac: simply take the NTFS disk and insert into the Mac, then use «disk utility» to format. From what I’m read, Mac also supports reading NTFS volumes natively but not writing to them. So if you wanted to backup your NTFS data locally (from the NTFS volume to another HFS+ volume) before wiping the NTFS drive, it would certainly work.
Should you decide to format HFS+ using Windows, there are a few caveats before we continue:
- Both Paragon Partition Manager Free and diskpart are destructive, which means that all data on drive will be lost once you convert (format) from NTFS to HFS+ .
- If you wish to retain your data currently on the drive prior to the conversion (format), you will need to backup the data first, wipe the drive using HFS+ filesystem, then copy the data back to the HFS+ volume. That leads us to the next caveat.
- Once the NTFS drive is converted to HFS+, it won’t be visible or usable under Windows unless you install a third party application to use HFS+ volumes in Windows. At the time of writing, the only utility I know of that can achieve this is HFS+ for Windows by Paragon Software and it costs $19.95 USD.
If spending money is out of the question, another option is to move the HFS+ drive to your Mac after it’s been converted, then share the drive over the network and copy your data back, but that will take exponentially longer over a network versus having the drive attached to the same machine to copy the data — but that also depends on how much data is to be copied.
Option 1: Convert NTFS to HFS+ using Paragon Partition Manager Free
Note that this method is destructive, which means all data will be lost once the disk is converted from NTFS to HFS+.
Here are the steps:
- Attach the hard drive to the system that you wish to format using Mac HFS+ file system.
- Download Paragon Partition Manager Free if you have not already, then install the software.
- While the program loads, it will scan the disks attached to the system and present a list.
- Now you will need to select the disk you wish to format. There are two ways to select a disk, and depending how it is selected, you will have different options available on the «Operations» menu on the left of the screen.
Option (a): if you click the disk icon, this will place an orange border around the entire disk icon and its partitions. Only a handful of options will be available in the «Operations» menu on the left, such as convert MBR to GPT, update MBR, view / edit sectors, etc. This is not the option you want.
Option (b): if you left click the partition(s) to the right of the disk icon, this will allow you to format volume, delete partitions, move or resize partitions, and similar. This is the option you want. Select each partition on the drive, then delete it. Repeat until all the space on the drive says «Unallocated».
Now, select the unallocated space on the drive and choose «Create Volume» from the «Operations» menu on the left. The «Create New Volume» window will appear; make sure you expand the «Show Advanced Options», and then select «Apple HFS» under the «File System» header. Once that is done, click the «Create Now» button to format the drive has HFS+.
The disk will now be formatted to HFS+, but will not be visible, nor usable under Windows unless you install a third party utility to read the HFS+ filesystem (such as HFS+ for Windows by Paragon Software, for example). This is paid software but there may be freeware that achieves the same result; I have not looked — please search Google.
Option 2: Convert NTFS to HFS+ using DiskPart
Yet another way to convert an NTFS volume to HFS+ using Windows is through the administrative command line.
Once again: this method is destructive, which means all data will be lost once the disk is converted from NTFS to HFS+.
- Click Start, then type in «cmd» (no quotes); wait for «CMD.EXE» or «Command Prompt» to appear in the list, then right click it and select «Run as Administrator».
- Next, type in «diskpart» and press Enter on the keyboard. Once diskpart is loaded, type in «list disk» to show the list of disks attached to the system.
- Type in «select disk #» to select the disk you wish to format, replacing the # sign with the actual number. A word of warning: make sure you select the correct disk to format, otherwise you may end up wiping the wrong disk in the proceeding steps. Backup all data on the system before proceeding .
- Assuming you have selected the proper disk, type in «clean» to wipe the disk and press Enter. Then, type in «create partition primary and press Enter. Next, type in «select partition 1» and press Enter, then type in «active» and press Enter. Type in «exit» to exit diskpart.
The disk will now be wiped but not formatted. You should then be able to attach the disk to your Mac machine and it will continue with the format.
Visually, the list of commands will look something like this:
DISKPART> list disk
DISKPART> list disk
Disk ### Status Size Free Dyn Gpt
——— ————- ——- ——- — —
Disk 0 Online 120 GB 1024 KB select disk 1
Disk 1 is now the selected disk.
DiskPart succeeded in cleaning the disk.
DISKPART> create partition primary >
DiskPart succeeded in creating the specified partition.
DISKPART> list partition
Partition ### Type Size Offset
————- —————- ——- ——-
* Partition 1 Primary 59 GB 1024 KB
DISKPART> select partition 1
Partition 1 is now the selected partition.
DiskPart marked the current partition as active.
I hope that helps.
Got a Computer Question or Problem? Ask Dennis!
I need more computer questions. If you have a computer question — or even a computer problem that needs fixing — please email me with your question so that I can write more articles like this one. I can’t promise I’ll respond to all the messages I receive (depending on the volume), but I’ll do my best.
HFS+ for Windows by Paragon Software

Stable Operation
Fail-safe operability across compatible hardware and software systems for both general-purpose and specialized applications
Data Safety
Protection of data integrity and prevention of accidental data corruption and possible loss
Guaranteed Performance
Steady throughput and balanced goodput with effective flow control, reduced overheads, and congestion avoidance
Efficient Use
Thrifty usage of processor, memory, and disk resources
Native look and feel

It simply works out of the box too – previously inaccessible drives suddenly show up like any other, and you can now easily transfer data to and from a Mac using an external HFS+ formatted drive as an intermediary. There’s no performance penalty either – we happily transferred multi-gigabyte files via a USB 2 connection at around 40MB/s, for example.
Paragon HFS+ runs in the background and automatically starts on bootup, so accessing your Mac drives will feel exactly like accessing normal Windows drives.
Paragon HFS+ does cost $20, but it also offers a 10-day free trial. If you just need to recover files from a drive, 10 days is plenty of time to install this file system driver, copy your files over, and uninstall it. If you want to use Mac drives on Windows on an ongoing basis, paying $20 so you can use the drive properly is a pretty good deal. As a bonus, Paragon HFS+ doesn’t require you have the insecure Java installed.
How it Works

Install
Download and install the HFS+ for Windows by Paragon Software

Connect
Your HFS+ drive to your PC
Use
Your drive will show up in Explorer

Features
Supported Operating Systems
- Windows 10 (32/64-bit)
- Windows 8 / 8.1 (32/64-bit), expected
- Windows 7 SP1 (32/64-bit)
- Windows Server 2008 R2 SP1 (64-bit)
- Windows Server 2012 (64-bit)
- Windows Server 2016 (64-bit)
Supported File Systems
- HFS Plus (Mac OS Extended)
- HFSX (Mac OS Extended Case-Sensitive)
When a volume is mounted in write mode, you can do everything with files and folders it contains: read, edit, delete, rename, create new.
HFS+ for Windows by Paragon Software mounts supported volumes automatically at startup, so you don’t need to bother about it each time you restart the operating system or power your computer on. However, this feature can be disabled at any moment in the program interface.
HFS+ for Windows by Paragon Software supports all alphabets supported by your operating systems, including those that use non-Roman and non-Latin characters, so you will never face a problem of not getting access to file names on volumes mounted in non-native OS.
Support for journaling
HFS+ for Windows by Paragon Software supports native HFS+ journaling, thus ensuring that in case of any failure the disk file system is not irreversibly corrupted and can be put back on track easily.
Compatible with Apple Boot Camp
HFS+ for Windows by Paragon Software is fully compatible with Apple Boot Camp software and provides direct read and write access to Mac partitions from Windows installed on a Boot Camp.
Compatible with 3 rd party software
HFS+ for Windows by Paragon Software is compatible with popular virtualization and encryption applications including VMware Fusion and Workstation, Parallels Desktop, TrueCrypt and its forks.
Need APFS support for Windows 10?
GET APFS FOR WINDOWS NOW!
Full support of Windows 10, 8/8.1, 7 SP1
Availability to read and write data on APFS-formatted disks
Frequently Asked Questions
Due to the specifics of Windows 8 or Windows 10 Fast Startup feature, we highly recommend that you disable it before installing the driver to avoid possible file system corruption. For more details, please refer to the Microsoft Knowledge Base ››


