- Введение в Windows Forms
- Создание графического приложения
- Запуск приложения
- Step 1: Create a Windows Forms App project
- Open Visual Studio 2017
- Open Visual Studio 2019
- About the Windows Forms App project
- Next steps
- C# Windows Forms tutorial
- Windows Forms
- Building Windows Forms applications
- Windows Forms simple example
- Windows Forms tooltips
- Windows Forms Quit button
- Windows Forms Label
- Windows Forms CheckBox
- Windows Forms simple menu
- Windows Forms painting rectangles
Введение в Windows Forms
Для создания графических интерфейсов с помощью платформы .NET применяются разные технологии — Window Forms, WPF, приложения для магазина Windows Store (для ОС Windows 8/8.1/10). Однако наиболее простой и удобной платформой до сих пор остается Window Forms или формы. Данное руководство ставит своей целью дать понимание принципов создания графических интерфейсов с помощью технологии WinForms и работы основных элементов управления.
Создание графического приложения
Для создания графического проекта нам потребуется среда разработки Visual Studio. Поскольку наиболее распространенная пока версия Visual Studio 2013, то для данного руководства я буду использовать бесплатную версию данной среды Visual Studio Community 2013 которую можно найти на странице https://www.visualstudio.com/en-us/products/visual-studio-community-vs.aspx.
После установки среды и всех ее компонентов, запустим Visual Studio и создадим проект графического приложения. Для этого в меню выберем пункт File (Файл) и в подменю выберем New — > Project (Создать — > Проект). После этого перед нами откроется диалоговое окно создания нового проекта:

В левой колонке выберем Windows Desktop , а в центральной части среди типов проектов — тип Windows Forms Application и дадим ему какое-нибудь имя в поле внизу. Например, назовем его HelloApp. После этого нажимаем OK.
После этого Visual Studio откроет наш проект с созданными по умолчанию файлами:
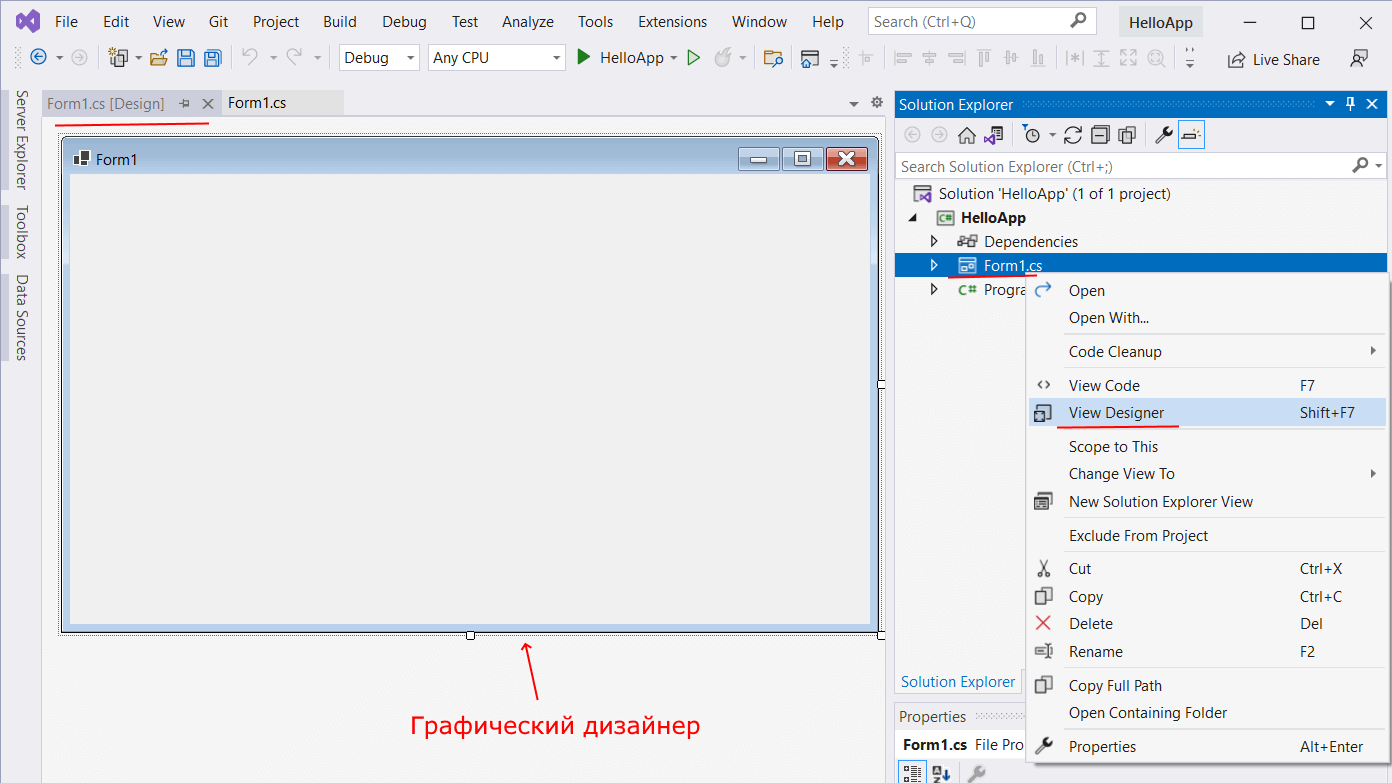
Большую часть пространства Visual Studio занимает графический дизайнер, который содержит форму будущего приложения. Пока она пуста и имеет только заголовок Form1. Справа находится окно файлов решения/проекта — Solution Explorer (Обозреватель решений). Там и находятся все связанные с нашим приложением файлы, в том числе файлы формы Form1.cs.
Внизу справа находится окно свойств — Properties. Так как у меня в данный момент выбрана форма как элемент управления, то в этом поле отображаются свойства, связанные с формой.
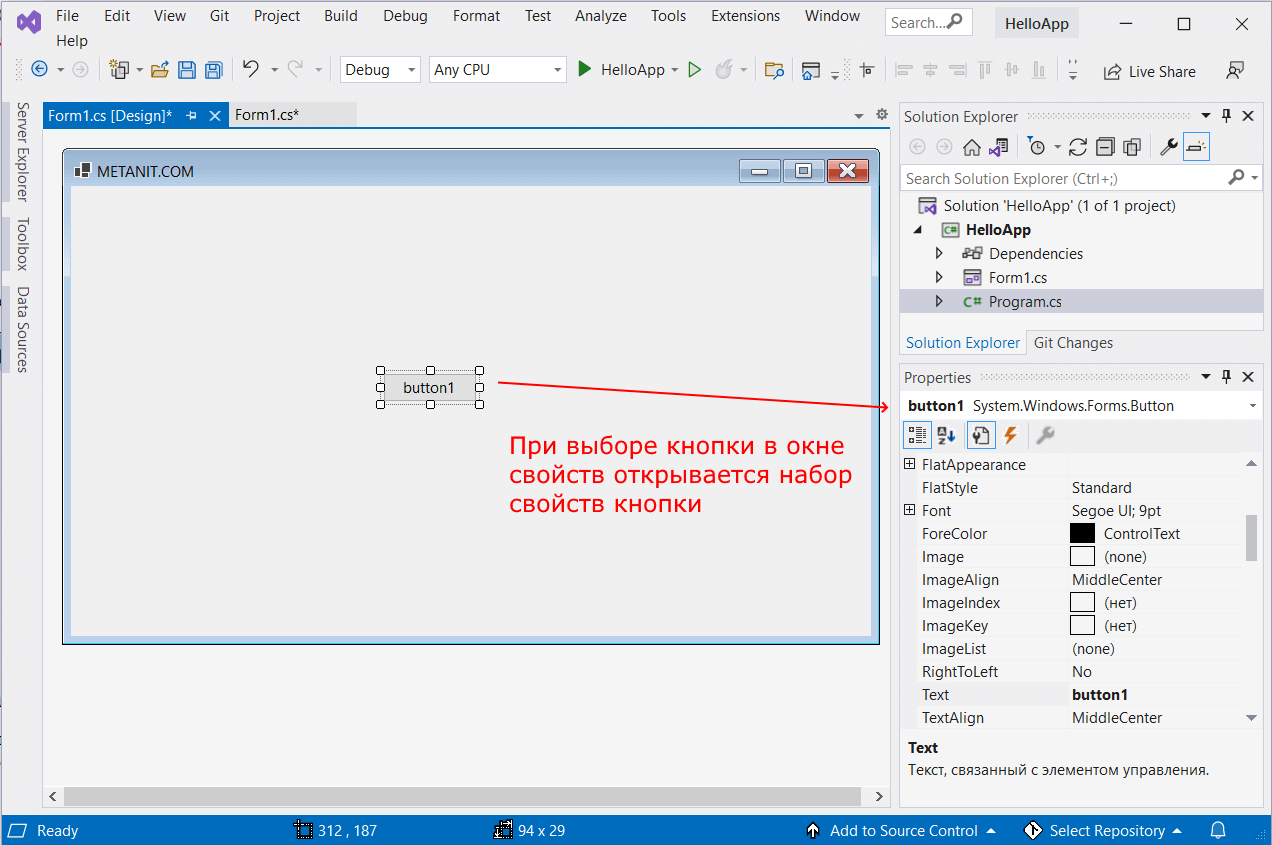
Теперь найдем в этом окне свойство формы Text и изменим его значение на любое другое:

Таким образом мы поменяли заголовок формы. Теперь перенесем на поле какой-нибудь элемент управления, например, кнопку. Для этого найдем в левой части Visual Studio вкладку Toolbox (Панель инструментов) . Нажмем на эту вкладку, и у нас откроется панель с элементами, откуда мы можем с помощью мыши перенести на форму любой элемент:
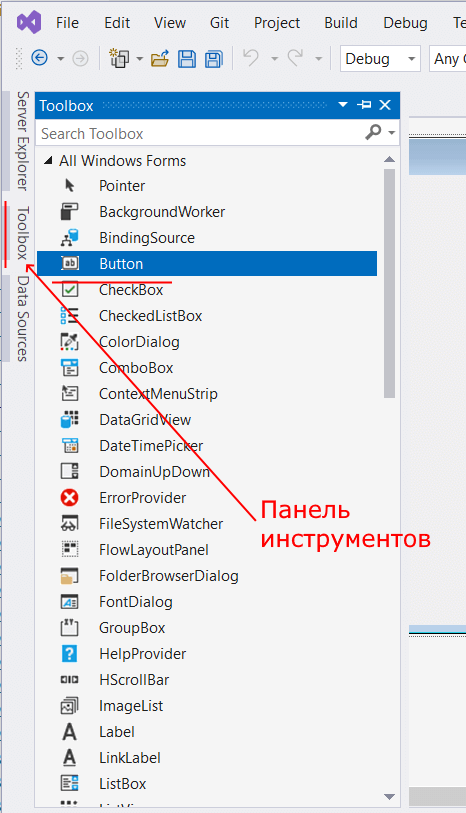
Найдем среди элементов кнопку и, захватив ее указателем мыши, перенесем на форму:
Это визуальная часть. Теперь приступим к самому программированию. Добавим простейший код на языке C#, который бы выводил сообщение по нажатию кнопки. Для этого мы должны перейти в файл кода, который связан с этой формой. Если у нас не открыт файл кода, мы можем нажать на форму правой кнопкой мыши и в появившемся меню выбрать View Code (Посмотреть файл кода):
Однако воспользуемся другим способом, чтобы не писать много лишнего кода. Наведем указатель мыши на кнопку и щелкнем по ней двойным щелчком. Мы автоматически попадаем в файл кода Form1.cs, который выглядит так:
Добавим вывод сообщения по нажатию кнопки, изменив код следующим образом:
Запуск приложения
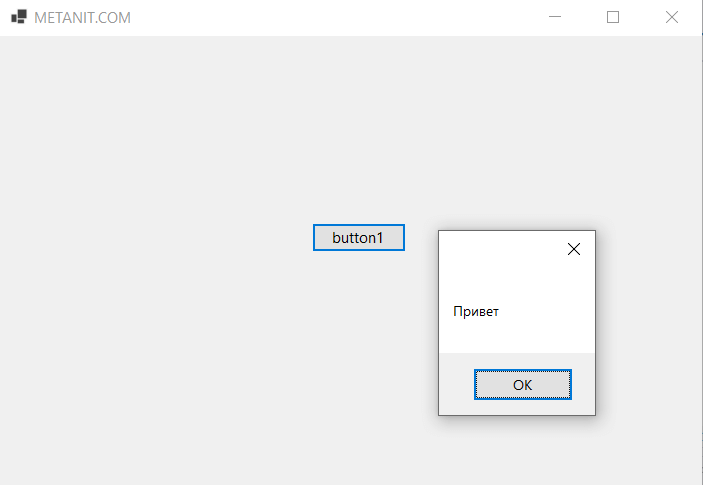
Чтобы запустить приложение в режиме отладки, нажмем на клавишу F5 или на зеленую стрелочку на панели Visual Studio. После этого запустится наша форма с одинокой кнопкой. И если мы нажмем на кнопку на форме, то нам будет отображено сообщение с приветствием.
После запуска приложения студия компилирует его в файл с расширением exe. Найти данный файл можно, зайдя в папку проекта и далее в каталог bin/Debug или bin/Release
Рассмотрев вкратце создание проекта графического приложения, мы можем перейти к обзору основных компонентов и начнем мы с форм.
Step 1: Create a Windows Forms App project
When you create a picture viewer, the first step is to create a Windows Forms App project.
Open Visual Studio 2017
On the menu bar, choose File > New > Project. The dialog box should look similar to the following screenshot.
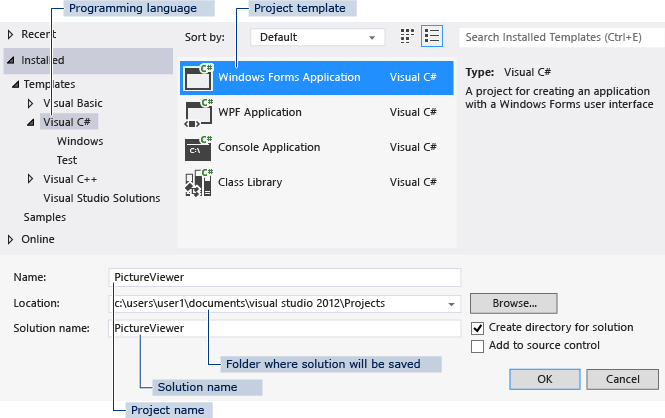
New project dialog box
On the left side of the New Project dialog box, choose either Visual C# or Visual Basic, and then choose Windows Desktop.
In the project templates list, choose Windows Forms App (.NET Framework). Name the new form PictureViewer, and then choose the OK button.
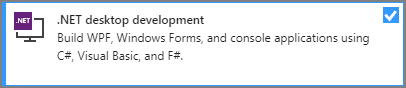
If you don’t see the Windows Forms App (.NET Framework) template, use the Visual Studio Installer to install the .NET desktop development workload.
For more information, see the Install Visual Studio page.
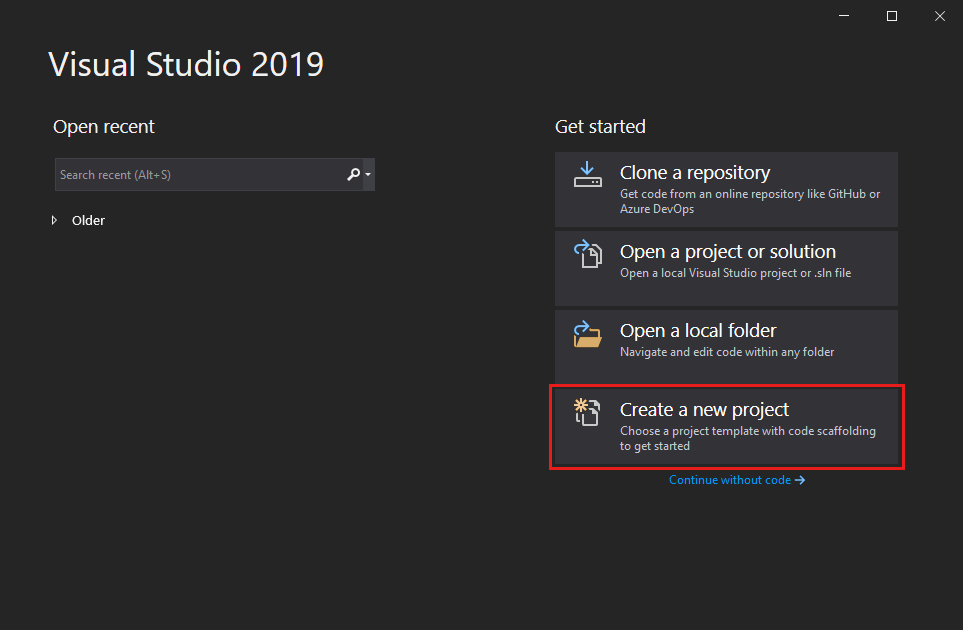
Open Visual Studio 2019
On the start window, choose Create a new project.
On the Create a new project window, enter or type Windows Forms in the search box. Next, choose Desktop from the Project type list.
After you apply the Project type filter, choose the Windows Forms App (.NET Framework) template for either C# or Visual Basic, and then choose Next.
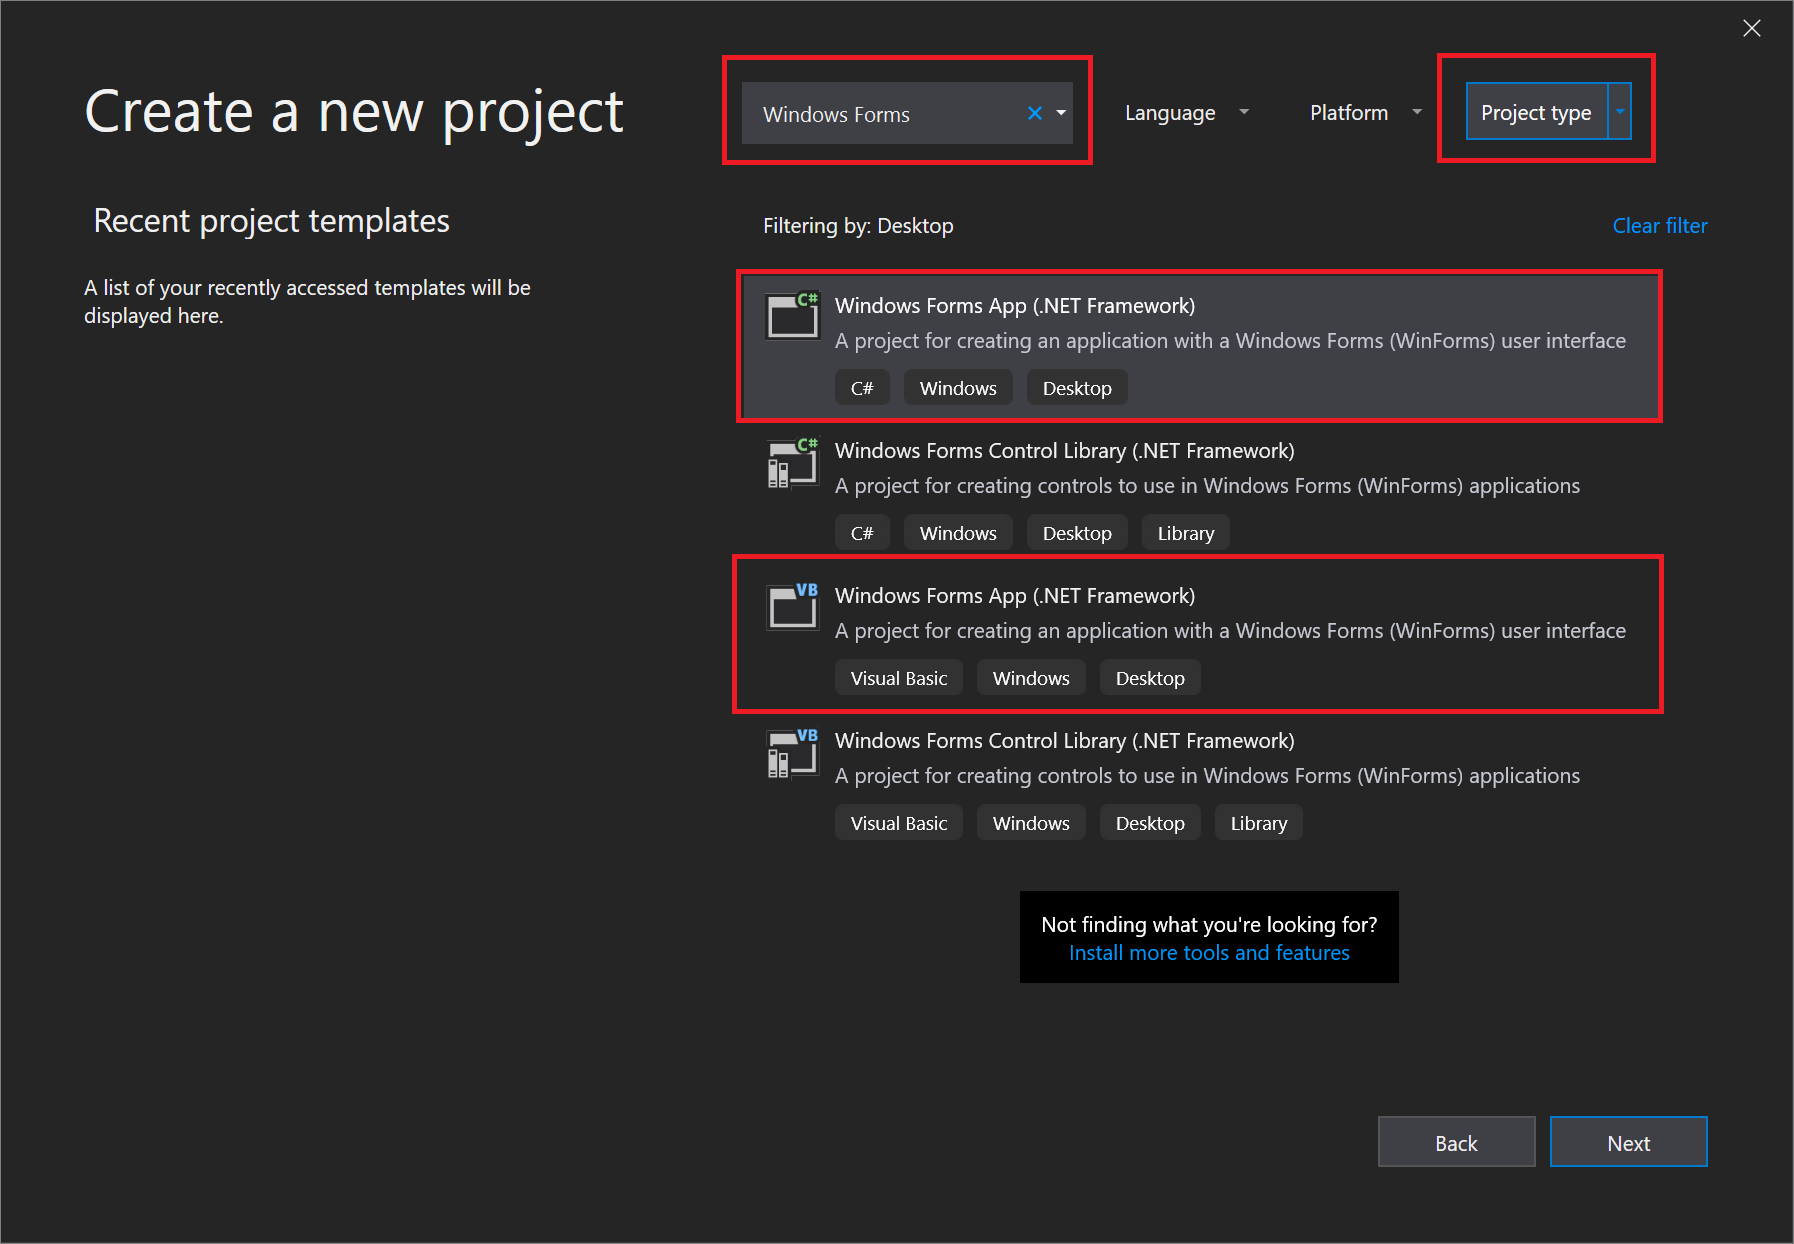
If you don’t see the Windows Forms App (.NET Framework) template, you can install it from the Create a new project window. In the Not finding what you’re looking for? message, choose the Install more tools and features link.

Next, in the Visual Studio Installer, choose the Choose the .NET desktop development workload.

After that, choose the Modify button in the Visual Studio Installer. You might be prompted to save your work; if so, do so. Next, choose Continue to install the workload.
In the Configure your new project window, type or enter PictureViewer in the Project name box. Then, choose Create.
Visual Studio creates a solution for your app. A solution acts as a container for all of the projects and files needed by your app. These terms will be explained in more detail later in this tutorial.
About the Windows Forms App project
The development environment contains three windows: a main window, Solution Explorer, and the Properties window.
If any of these windows are missing, you can restore the default window layout. On the menu bar, choose Window > Reset Window Layout.
You can also display windows by using menu commands. On the menu bar, choose View > Properties Window or Solution Explorer.
If any other windows are open, close them by choosing the Close (x) button in their upper-right corners.
- Main window In this window, you’ll do most of your work, such as working with forms and editing code. The window shows a form in the Form Editor. At the top of the window, the Start Page tab and the Form1.cs [Design] tab appear. (In Visual Basic, the tab name ends with .vb instead of .cs.)
- Main window In this window, you’ll do most of your work, such as working with forms and editing code. The window shows a form in the Form Editor.
- Solution Explorer window In this window, you can view and navigate to all items in your solution.
If you choose a file, the contents of the Properties window changes. If you open a code file (which ends in .cs in C# and .vb in Visual Basic), the code file or a designer for the code file appears. A designer is a visual surface onto which you can add controls such as buttons and lists. For Visual Studio forms, the designer is called the Windows Forms Designer.
Properties window In this window, you can change the properties of items that you choose in the other windows. For example, if you choose Form1, you can change its title by setting the Text property, and you can change the background color by setting the Backcolor property.
The top line in Solution Explorer shows Solution ‘PictureViewer’ (1 project), which means that Visual Studio created a solution for you. A solution can contain more than one project, but for now, you’ll work with solutions that contain only one project.
On the menu bar, choose File > Save All.
As an alternative, choose the Save All button on the toolbar, which the following image shows.
Save All toolbar button
Visual Studio automatically fills in the folder name and the project name and then saves the project in your projects folder.
Next steps
To go to the next tutorial step, see Step 2: Run your app.
To return to the overview topic, see Tutorial 1: Create a picture viewer.
C# Windows Forms tutorial
last modified November 3, 2020
C# Windows Forms tutorial teaches the basics of GUI programming with C# & Windows Forms. In our tutorial, we will build our applications manually; we will not use Form designers.
Windows Forms
Windows Forms, sometimes abbreviated as Winforms, is a graphical user interface application programming interface (API) included as a part of Microsoft’s .NET Framework.
Windows Forms allows to create graphically rich applications that are easy to deploy and update. The applications are more secure than traditional Windows-based applications.
In December 2018, Microsoft announced releasing Windows Forms as open source project on GitHub. It is released under the MIT License. With this release, Windows Forms has become available on the .NET Core framework. Windows Forms is available on Windows only.
Building Windows Forms applications
We will be using .NET Core to create Windows Forms applications.
A new template for the Windows Forms application is created with the dotnet new winforms command.
The application is run with the dotnet run command.
Windows Forms simple example
In the first example, we display a simple window on the screen.
We create the template of the Windows Forms application. The command also generates Form1.Designer.cs and Form1.cs files. We will not use them and they can be safely deleted.
The example displays a main window on the screen. The window is centered.
We use the Windows Forms and Drawing namespaces.
In Windows Forms, any window or a dialog is a Form. This control is a basic container whose purpose is to display other child controls. The MyForm inherits from a form. This way it becomes a form itself.
As a good programming practice, the form initialization is delegated to the InitComponents method.
Text and Size are properties of a form. Changing these properties, we modify our form control. The first line displays text «First application» in the titlebar of the form control. The second line sets the size of the client area of the form. The CenterToScreen method centers the form on the screen.
The Main method is an entry point to the application. Windows Forms applications must declare the [STAThread] attribute; otherwise, the controls might not work correctly. This tells to use single-threaded apartment model instead of multi-threaded.
With the SetHighDpiMode method, we ensure that our application looks good on any display resolution.
The EnableVisualStyles method enables visual styles. The application will use the built-in Windows theming to style controls instead of the classic Windows look and feel.
The Run method starts the application. It begins running a standard application message loop on the current thread, and makes the specified form visible.
Windows Forms tooltips
A tooltip is a small rectangular pop-up window that displays a brief description of a control’s purpose when the user rests the pointer on the control.
The code example creates a tooltip for two controls: one Button control and the Form control.
We place two buttons on the FlowLayoutPanel . It dynamically lays out its contents horizontally or vertically. (The default dimension is vertical.)
We create a new tooltip. With the SetToolTip , we assign the tooltip to the FlowLayoutPanel control.
The FlowLayoutPanel fills the entire area of the form control.
A new Button control is created. We set its text with the Text property and size it automatically to fit the text size.
A tooltip is added to the first Button control.
The buttons are added to the flow panel and the flow panel is added to the form.
Windows Forms Quit button
Button control represents a Windows button control. It can be clicked by using the mouse, Enter key, or Spacebar if the button has focus.
The example creates a Quit button control; the application terminates when we click on the button.
The button has some margin around its borders. We add some space to the left and above the button control.
We plug an event handler to the Click event. When we click on the button, the application is closed with the Close method. Since we do not work with the sender object and event arguments, we use discards.
Windows Forms Label
Label is a simple control for displaying text or images. It does not receive focus.
The example displays lyrics using the Label control.
We use this font to display the text.
The label control is created. It is located at the x=10, y=10 coordinate on the form.
The main window is automatically sized to fit the lyrics.
Windows Forms CheckBox
CheckBox is a control that has two states: on and off. It is a box with a label or an image. If the CheckBox is checked, it is represented by a tick in a box.
The code example shows or hides the title of the window depending on its state.
When the application starts, we show the title. And we set the CheckBox control to checked state.
When we click on the CheckBox control, the CheckedChanged event is triggered.
Depending on the value of the Checked property, we toggle the title of the window.
Windows Forms simple menu
A menubar is a collection of menus. A menu groups commands of an application.
In our example, we have a menubar and one menu. Inside a menu there is one menu item. If we select the menu item, application is closed.
The application can be closed also by using the Ctrl + X shorcut or by pressing Alt , F , E keys.
MenuStrip creates a menu system for our form. We add ToolStripMenuItem objects to the MenuStrip that represent the individual menu commands in the menu structure. Each ToolStripMenuItem can be a command for your application or a parent menu for other submenu items.
Here we create a menu with the ToolStripMenuItem .
This line creates the exit menu item.
We provide a shortcut for the exit menu item.
The exit menu item is added to the drop down items of the menu object.
Here we add the menu object into the menu strip.
The MenuStrip is plugged into the form. In other words, the menubar is added to the main window of the application.
Windows Forms painting rectangles
Painting is done with the painting API provided by the Windows Forms. The painting is done within a method, that we plug into the Paint event.
We draw nine rectangles with nine different colours.
Paint events are delivered to the OnPaint method.
This is the signature of the OnPaint method.
In order to paint on the form, we must get the Graphics object. Painting on a form is actually calling various methods of the Graphics object.
The FillRectagle method fills a specified rectangle with a brush. A brush can be a colour or a pattern. There are some predefined colours available. We can get them from the Brushes enumeration. The last four values are the x, y values of the topleft point and the width and height of the rectangle.
In this tutorial, we have created simple GUI applications in C# and Windows Forms.


