- Создание формы в Access
- В этой статье
- Создание формы из существующей таблицы или запроса в Access
- Создание пустой формы в Access
- Создание разделенной формы в Access
- Создание формы, отображающей несколько записей, в Access
- Создание формы, содержащей подчиненную форму, в Access
- Создание формы навигации в Access
- Дополнительные сведения
- How to automate Microsoft Access by using Visual C#
- Summary
- Automation vs. ADO.NET
- Common Automation Tasks
- Open a Database in Access
- Print or Preview an Access Report
- Show and Edit an Access Form
- Access Security Dialog Boxes
- Avoiding Database Password Dialog Boxes
- Avoiding Access Security Logon Dialog Boxes
- Automating Access Runtime
- Create the Complete Sample Visual C# 2005 or Visual C# .NET Project
- References
Создание формы в Access
В форме Access, как на витрине магазина, удобно просматривать и открывать нужные элементы. Так как форма — это объект, с помощью которого пользователи могут добавлять, редактировать и отображать данные, хранящиеся в базе данных классического приложения Access, ее внешний вид играет важную роль. Если база данных классического приложения Access используется несколькими пользователями, хорошо продуманные формы — залог точности данных и эффективности работы с ними.
Создать форму на компьютере в базе данных Access можно несколькими способами. В этой статье мы рассмотрим наиболее распространенные из них.
Примечание: Информация, приведенная в этой статье, не относится к веб-базам данных Access или веб-приложениям Access.
В этой статье
Создание формы из существующей таблицы или запроса в Access
Чтобы создать форму из таблицы или запроса базы данных, в области навигации щелкните таблицу или запрос, содержащие данные для формы, а затем на вкладке Создание нажмите кнопку Форма .
Приложение Access создаст форму и отобразит ее в режиме макета. При необходимости вы можете изменить оформление, например настроить размер текстовых полей в соответствии с данными. Подробнее читайте в статье об использовании инструмента «Форма».
Создание пустой формы в Access
Чтобы создать форму без элементов управления и заранее отформатированных элементов, выполните следующее. На вкладке Создание нажмите кнопку Пустая форма. Откроется пустая форма в режиме макета, и отобразится область Список полей.
В области Список полей щелкните знак плюс ( +) рядом с одной или несколькими таблицами, содержащими поля, которые нужно включить в форму.
Чтобы добавить поле к форме, дважды щелкните его или перетащите на форму. Чтобы добавить сразу несколько полей, щелкните их по очереди, удерживая нажатой клавишу CTRL. Затем перетащите выбранные поля на форму.
Примечание: Порядок таблиц в области Список полей может изменяться в зависимости от выбранной части формы. Если не удается добавить поле в форму, выберите другую часть формы и повторите попытку.
С помощью инструментов в группе Элементы управления на вкладке Работа с макетами форм можно добавить в форму эмблему компании, заголовок, номера страниц, дату и время.
Если требуется добавить в форму другие виды элементов управления, откройте вкладку Конструктор и выберите нужные элементы в группе Элементы управления.
Создание разделенной формы в Access
Разделенная форма позволяет одновременно отображать данные в двух представлениях: в представлении формы и в режиме таблицы. То есть вы можете использовать возможности обоих этих представлений в одной форме. Например, можно быстро найти запись в режиме таблицы, а затем просмотреть или изменить ее в представлении формы. Эти две части формы связаны с одним и тем же источником данных и всегда синхронизированы друг с другом.
Чтобы создать новую разделенную форму с помощью инструмента «Разделенная форма», в области навигации щелкните таблицу или запрос с нужными данными, а затем на вкладке Создание нажмите кнопку Другие формы и выберите пункт Разделенная форма.
Access создаст форму, которую можно изменять по своему усмотрению. Например, при необходимости можно настроить размер текстовых полей в соответствии с данными. Подробнее о работе с разделенными формами читайте в статье о создании разделенной формы.
Создание формы, отображающей несколько записей, в Access
Форма нескольких элементов (также называется ленточной) удобна, если требуется отобразить несколько записей. Кроме того, ее легче настроить, чем таблицу. Такую форму можно создать с помощью инструмента «Несколько элементов».
В области навигации щелкните таблицу или запрос с данными, которые должны отображаться в форме.
На вкладке Создание нажмите кнопку Другие формы и выберите пункт Несколько элементов.
Приложение Access создаст форму и отобразит ее в режиме макета. В этом режиме можно вносить изменения в структуру формы при одновременном просмотре данных. Например, можно настроить размер полей в соответствии с данными. Подробнее читайте в статье Создание формы с помощью инструмента «Несколько элементов».
Создание формы, содержащей подчиненную форму, в Access
При работе со связанными данными, хранящимися в отдельных таблицах, часто приходится просматривать их из нескольких таблиц или запросов в одной и той же форме, поэтому подчиненные формы отлично подойдут в такой ситуации. В зависимости от потребностей подчиненные формы можно добавлять несколькими способами. Подробнее об этом читайте в статье Создание формы, содержащей подчиненную форму (форма с отношением «один-ко-многим»).
Создание формы навигации в Access
Форма навигации — это простая форма, содержащая элемент навигации. Формы навигации являются полезным дополнением любой базы данных, но особенно важны для баз данных, публикуемых в Интернете, так как область навигации Access не отображается в браузере.
Откройте базу данных, в которую нужно добавить форму навигации.
На вкладке Создание в группе Формы нажмите кнопку Навигация и выберите нужный стиль формы навигации.
Access создаст форму, добавит на нее элемент навигации и отобразит форму в режиме макета. Подробнее об этом читайте в статье Создание формы навигации.
Дополнительные сведения
Формы можно настраивать с помощью нескольких параметров. Выберите нужные из представленных ниже.
Если вы хотите иметь возможность выбирать поля, которые будут отображаться в форме, создайте форму с помощью мастера форм.
Добавление вкладок в форму позволяет упорядочить данные и сделать форму более удобной для восприятия, особенно, если форма содержит большое количество элементов управления.
Элемент управления «Веб-браузер» дает возможность отображать в форме веб-страницы. Вы можете связывать его с полями и элементами управления базы данных, чтобы динамически определять отображаемую страницу. Например, с помощью адресов в базе данных можно создавать настраиваемые карты на сайте, или использовать сведения о товаре в базе данных для поиска объектов на веб-сайте поставщика.
Элементы управления в Access размещаются вдоль направляющих линий (макетов), которые позволяют выравнивать элементы управления в форме. Узнайте, как перемещать и изменять размер отдельных элементов управления.
How to automate Microsoft Access by using Visual C#
Summary
This article demonstrates how to automate Microsoft Access by using Microsoft Visual C# 2005 or Microsoft Visual C# .NET. The topics and the sample code show you how to do the following:
- Open a database in Access.
- Print or preview an Access report.
- Show and edit an Access form.
- Avoid dialog boxes when you open a password-protected database or when user-level security is turned on.
- Automate the Access Runtime.
Automation vs. ADO.NET
A developer can work with a Microsoft Access database from Visual C# 2005 or Visual C# .NET by using two separate technologies: Automation and Microsoft ADO.NET.
ADO.NET is the preferred technology if you want to work with data objects, such as tables and queries in an Access database. Use Automation only if you need Microsoft Access application-specific features, such as the ability to print or to preview an Access report, to display an Access form, or to call Access macros.
This article discusses how to automate Access. The article does not discuss ADO.NET. For information regarding ADO.NET, click the article numbers below to view the articles in the Microsoft Knowledge Base:
306636 How to connect to a database and run a command by using ADO 2005 and Visual C# 2005 or by using ADO.NET and Visual C# .NET
314145 How to populate a DataSet object from a database by using Visual C# .NET
307587 How to update a database from a DataSet object by using Visual C# 2005 or Visual C# .NET
Automation is a Component Object Model (COM) technology. Automation allows applications that are written in languages such as Visual C# .NET to programmatically control other applications. When you automate a Microsoft Office application, you actually run an instance of that application in memory, and then call on the application’s object model to perform various tasks in that application. With Access and other Microsoft Office applications, virtually all of the actions that you can perform manually through the user interface can also be performed programmatically by using Automation.
Access exposes this programmatic functionality through an object model. The object model is a collection of classes and methods that serve as counterparts to the logical components of Access. To access the object model from Visual C# .NET, you can set a project reference to the type library.
Common Automation Tasks
Open a Database in Access
When you automate Microsoft Access, you must open a database before you can perform useful tasks, such as printing reports. To open a database in the instance of Access you are automating, you use the OpenCurrentDatabase or OpenAccessProject methods of the Application object. You can have only one database opened in Access at a time. To work with a different database, you can use the CloseCurrentDatabase method before opening another.
You may also use the System.Runtime.InteropServices.Marshal.BindToMoniker(
) method to open a database in an instance of Access. If the database is already open in an instance of Access, BindToMoniker returns the Application object of that instance. Otherwise, BindToMoniker starts a new instance of Access and opens the specified database.
OpenCurrentDatabase is the preferred method to open a database, because you specify the instance of Access that you are automating. You can also provide arguments to control how the database is opened, for example:
Print or Preview an Access Report
To preview or to print an Access report, you call the OpenReport method of the DoCmd object. When you call OpenReport, one of the arguments that you pass determines whether the report is previewed on the screen, or whether it is sent to the printer:
Notice that the View argument determines whether the report is displayed in Access or whether it is sent to the printer. The WhereCondition argument can limit the report’s recordset, if you use a valid SQL WHERE clause (without the word WHERE.) Notice that you can use System.Reflection.Missing.Value to skip any object parameters that are optional.
If you are previewing a report, be sure to set the Visible property of the Application object so that Access is visible on the screen. In this way, the user can view the report in the Access window.
There is another way to print a report or other objects in the database. Use the PrintOut method of the DoCmd object. In this example, you select a report named Employees in the Database window, and then you call PrintOut to print the selected object. The PrintOut method allows you to provide arguments that correspond to the Print dialog box in Access:
Or, in some cases, you may want to use both the OpenReport and the PrintOut methods to print a report. Suppose you want to print multiple copies of the Employees report but only for a specific employee. This example first uses OpenReport to open the Employees report in preview mode, using the WhereCondition argument to limit the records to a specific employee. Then, PrintOut is used to print multiple copies of the active object:
Access 2002 introduced the Printer object. You can use this object to customize Access printer settings more easily than in earlier versions of Access. For an example of using the Printer object in Access to print a report, click the article number below to view the article in the Microsoft Knowledge Base:
284286 How to reset changes to the Application.Printer object
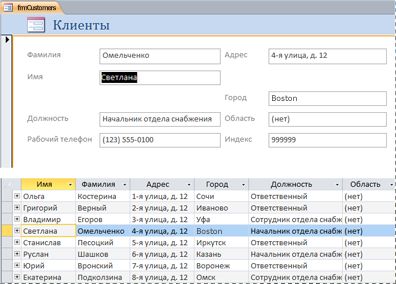
Show and Edit an Access Form
Visual C# .NET has very powerful form capabilities. However, there may be times when you want the user to view a form that was previously developed in Access. Or, you may have a form in your Access database that provides criteria for a query or report, and you must open that form before you can preview or print the report. To open and show an Access form, you call the OpenForm method of the DoCmd object:
You can now edit the controls on the form.
Access Security Dialog Boxes
When you automate Access, you may be prompted to enter a user name or a password, or both, when you try to open a database. If the user enters the wrong information, an error will occur in your code. There may be times when you want to avoid these dialog boxes and instead to programmatically provide the user name and password so that your Automation code runs uninterrupted.
There are two types of security in Microsoft Access: password-protected databases and user-level security through a workgroup file (System.mdw). If you are trying to open a database that is password protected, you will receive a dialog box prompting for the database password. User-level security is different from a password-protected database. When user-level security is activated, Access displays a logon dialog box prompting for both a user name and password before the user can open any database in Access.
Avoiding Database Password Dialog Boxes
If you are opening a database that has been protected with a password, you can avoid the dialog box by providing the password to the OpenCurrentDatabase method:
Here is an example, where oAccess has been previously set to an instance of Access that does not have a database open. This code provides the password to the database to avoid a dialog box:
The oDB.Close does not actually close the database in Access. It only closes the DAO connection to the database that was made through the DBEngine object. The DAO connection is no longer necessary after the OpenCurrentDatabase method is used. Notice the code to release the oDB and oDBEngine objects. You must use these objects so that Access quits correctly after the code is completed.
Avoiding Access Security Logon Dialog Boxes
If user-level security is turned on in Access, the user is prompted with a logon dialog box, prompting for both a user name and a password. A user name and a password cannot be specified using the Access object model. Therefore, if you want to avoid the logon dialog box when you automate Access, you must first start the Msaccess.exe file and provide the /user and /pwd command-line switches to specify the user name and password. Afterward, you can use GetActiveObject or BindToMoniker to retrieve the Application object of the running instance of Access, so that you can then proceed with Automation.
Automating Access Runtime
The Microsoft Office Developer Edition includes the Microsoft Office Developer Tools (MOD). Using MOD, Access developers can create and distribute Access applications to users who do not have the retail version of Access. When the user installs the Access application on a computer that does not have the retail version of Access, a Runtime version of Access is installed. The Access Runtime is installed and is registered like the retail version. The executable is also called Msaccess.exe. The Access Runtime allows an Access application to run on a client computer, but the Access Runtime does not permit a user to develop new applications or modify the design of existing applications.
The Access Runtime must be started with a database. Because of this requirement, if you want to automate the Access Runtime, you must start the Msaccess.exe and specify a database to open. After you use GetActiveObject or BindToMoniker to retrieve the Application object, you can then automate the Access Runtime. If you do not use this approach when you try to automate the Access Runtime, you will receive an error message such as the following when you try to instantiate the instance:
System.Runtime.InteropServices.COMException (0x80080005) Server execution failed.
Create the Complete Sample Visual C# 2005 or Visual C# .NET Project
To use the following step-by-step sample, make sure the Northwind sample database is installed. By default, Microsoft Access 2000 installs the sample databases in the following path:
C:\Program Files\Microsoft Office\Office\Samples
Microsoft Access 2002 uses the following path:
C:\Program Files\Microsoft Office\Office10\Samples
Microsoft Office Access 2003 uses the following path:
To make sure that the Northwind sample database is installed on Access 2002 or on Access 2003, click Sample Databases on the Help menu, and then click Northwind Sample Database.
Close any instances of Access that are currently running.
Start Microsoft Visual Studio .NET.
On the File menu, click New, and then click Project. Select Windows Application from the Visual C# Project types. By default, Form1 is created.
Note You must change the code in Visual Studio 2005. By default, Visual C# adds one form to the project when you create a Windows Forms project. The form is named Form1. The two files that represent the form are named Form1.cs and Form1.designer.cs. You write the code in Form1.cs. The Form1.designer.cs file is where the Windows Forms Designer writes the code that implements all the actions that you performed by dragging and dropping controls from the Toolbox.
For more information about the Windows Forms Designer in Visual C# 2005, visit the following Microsoft Developer Network (MSDN) Web site: https://msdn.microsoft.com/en-us/library/ms173077.aspx
Add a reference to Microsoft Access Object Library. To do this, follow these steps:
- On the Project menu, click Add Reference.
- On the COM tab, locate Microsoft Access Object Library, and then click Select.
Note In Visual Studio 2005. you do not have to click Select.
Note Microsoft Office 2003 includes Primary Interop Assemblies (PIAs). Microsoft Office XP does not include PIAs, but they can be downloaded.
In the Add References dialog box, click OK to accept your selections.
Note If you are referencing the Access 10.0 object library and you receive errors when you try to add the reference.
On the View menu, click Toolbox to display the toolbox.
Add five radio button controls and one button control to Form1.
Select all of the radio button controls, and then set the Size property to 150,24.
Add event handlers for the Form Load event and for the Click event of the Button control:
In design view for Form1.cs, double-click Form1.
The handler for the Form’s Load event is created and displayed in Form1.cs.
On the View menu, click Designer to switch to design view.
The handler for the button’s Click event is created and displayed in Form1.cs.
In Form1.cs, replace the following code
Add the following code to the Using directives in Form1.cs:
Press F5 to build and to run the program. Form1 is displayed.
Click Print report, and then click Go!. The Print_Report procedure prints a report from the Northwind database.
Click Preview report, and then click Go!. The Preview_Report procedure previews a report from the Northwind database. Close the Access instance when you are ready to continue.
Click Show form, and then click Go!. The Show_Form procedure displays the Customer Labels dialog box form from the Northwind database. It also sets the option group on the form to «Specific Country» and selects «USA» from the list. Close the Access instance when you are ready to continue.
Click Print report (Security), and then click Go!. The Print_Report_Security procedure shows you how to automate Access and how to avoid the logon dialog box if user-level security is turned on. In this example, assume the default logon by passing the user Admin with a blank password. The code then prints a report in the Northwind database.
Click Preview report (Runtime), and then click Go!. The Preview_Report_Runtime procedure shows you how to automate the Access Runtime to preview a report in the Northwind database. If the retail version of Access is installed, the procedure will still work correctly. Close the instance of Access when you are ready to continue.
References
For more information, visit the following MSDN Web site: Microsoft Office Development with Visual Studio https://msdn.microsoft.com/en-us/library/aa188489(office.10).aspxFor more information, click the following article numbers to view the articles in the Microsoft Knowledge Base:
317109 Office application does not quit after automation from Visual Studio .NET client
316126 How to use Visual C# to automate a running instance of an Office program


