- game exe не работает что делать
- Вот так, вы сможете исправить ошибки, связанные с Game.exe
- Информация о файле Game.exe
- Комментарий пользователя
- Лучшие практики для исправления проблем с Game
- Game сканер
- 1- Очистите мусорные файлы, чтобы исправить game.exe, которое перестало работать из-за ошибки.
- 2- Очистите реестр, чтобы исправить game.exe, которое перестало работать из-за ошибки.
- 3- Настройка Windows для исправления критических ошибок game.exe:
- Как вы поступите с файлом game.exe?
- Некоторые сообщения об ошибках, которые вы можете получить в связи с game.exe файлом
- GAME.EXE
- процессов:
- Games for Windows Test Cases: Best Practices for Games on Windows XP, Windows Vista, Windows 7, and Windows 8
- How to Use This Article
- Test Requirements
- 1. Game Requirements
- 1.1 Windows Games Explorer
- 1.2 Windows Family Safety / Parental Controls
- 1.3 Windows Vista Rich Saved Games
- 1.4 Xbox 360 Common Controller for Windows [Conditional Requirement]
- 1.5 Multiple Aspect Ratios and Resolutions
- 1.6 Windows Media Center
- 1.7 Direct3D [Conditional Requirement]
- 1.8 Enable High-DPI Aware
- 2. Security and Compatibility
- 2.1 Follow User Account Control Guidelines
- 6.3 Thread Hijacker — threadhijacker.exe
- 6.4 Microsoft Games for Windows Test Tool
- Writing a Bug
- Clicking Fail on a test case
- Manually Adding a Bug
game exe не работает что делать
Подлинный файл является одним из компонентов программного обеспечения Blizzard North Diablo II, разработанного Blizzard Entertainment.
Game.exe — это исполняемый файл (программа) для Windows. Расширение имени файла .exe — это аббревиатура от англ. слова executable — исполнимый. Необходимо запускать исполняемые файлы от проверенных производителей программ, потому что исполняемые файлы могут потенциально изменить настройки компьютера или нанести вред вашему компьютеру. Бесплатный форум с информацией о файлах может помочь вам разобраться является ли Game.exe вирусом, трояном, программой-шпионом, рекламой, которую вы можете удалить, или файл принадлежит системе Windows или приложению, которому можно доверять.
Вот так, вы сможете исправить ошибки, связанные с Game.exe
- Используйте программу Настройщик Windows, чтобы найти причину проблем, в том числе и медленной работы компьютера.
- Обновите программу game exe. Обновление можно найти на сайте производителя (ссылка приведена ниже).
- В следующих пунктах предоставлено описание работы Game.exe.
Информация о файле Game.exe
Описание: Game.exe не является необходимым для Windows. Файл Game.exe находится в подпапках «C:Program Files». Известны следующие размеры файла для Windows 10/8/7/XP 13,179,660 байт (50% всех случаев), 58,872 байт и еще 7 варианта . 
У процесса есть видимое окно. Это не системный файл Windows. Нет информации по файлу. Game.exe способен мониторить приложения и записывать ввод данных. Поэтому технический рейтинг надежности 27% опасности.
Если у вас возникли любые проблемы с Game.exe, вы можете удалить Warface или warface.crytek.com, или попытаться получить помощь от поставщика программного обеспечения. Нажмите на Warface или warface.crytek.com в Панели управления Windows (раздел Программы и компоненты) для удаления, или нажмите на wf.mail.ru или crytek.com, чтобы перейти на сайт разработчика.
Важно: Некоторые вирусы маскируют себя как Game.exe, особенно, если они расположены в каталогах c:windows или c:windowssystem32. Таким образом, вы должны проверить файл Game.exe на вашем ПК, чтобы убедиться, что это угроза. Мы рекомендуем Security Task Manager для проверки безопасности вашего компьютера.
Комментарий пользователя
| у меня не идёт игра.пишет что программа game.exe не работает. |
| это обычная программа и мне кажется что только для старых игр, у меня почему-то это программа пропала без вести=/ кто знает где её достать? |
| Это программа,которая позволяет держать под контролем в компьютере память игр и их работоспособность. Максим |
| у меня не идёт игра.пишет что программа game.exe не работает. олег |
| она запускает игру николай |
| жрет 800мб оперативки! Миша |
Лучшие практики для исправления проблем с Game
Аккуратный и опрятный компьютер — это главное требование для избежания проблем с Game. Для этого требуется регулярная проверка компьютера на вирусы, очистка жесткого диска, используя cleanmgr и sfc /scannow, удаление программ, которые больше не нужны, проверка программ, которые запускаются при старте Windows (используя msconfig) и активация Автоматическое обновление Windows. Всегда помните о создании периодических бэкапов, или в крайнем случае о создании точек восстановления.
Если у вас актуальные проблемы, попробуйте вспомнить, что вы делали в последнее время, или последнюю программу, которую вы устанавливали перед тем, как появилась впервые проблема. Используйте команду resmon, чтобы определить процесс, который вызывает проблемы. Даже если у вас серьезные проблемы с компьютером, прежде чем переустанавливать Windows, лучше попробуйте восстановить целостность установки ОС или для Windows 8 и более поздних версий Windows выполнить команду DISM.exe /Online /Cleanup-image /Restorehealth. Это позволит восстановить операционную систему без потери данных.
Следующие программы могут вам помочь для анализа процесса Game.exe на вашем компьютере: Security Task Manager отображает все запущенные задания Windows, включая встроенные скрытые процессы, такие как мониторинг клавиатуры и браузера или записей автозагрузки. Уникальная оценка рисков безопасности указывает на вероятность процесса быть потенциально опасным — шпионской программой, вирусом или трояном. Malwarebytes Anti-Malware определяет и удаляет бездействующие программы-шпионы, рекламное ПО, трояны, кейлоггеры, вредоносные программы и трекеры с вашего жесткого диска.
Game сканер

Security Task Manager показывает все запущенные сервисы Windows, включая внедренные скрытые приложения (например, мониторинг клавиатуры или браузера, авто вход). Уникальный рейтинг надежности указывает на вероятность того, что процесс потенциально может быть вредоносной программой-шпионом, кейлоггером или трояном.
Бесплатный aнтивирус находит и удаляет неактивные программы-шпионы, рекламу, трояны, кейлоггеры, вредоносные и следящие программы с вашего жесткого диска. Идеальное дополнение к Security Task Manager.
Reimage бесплатное сканирование, очистка, восстановление и оптимизация вашей системы.
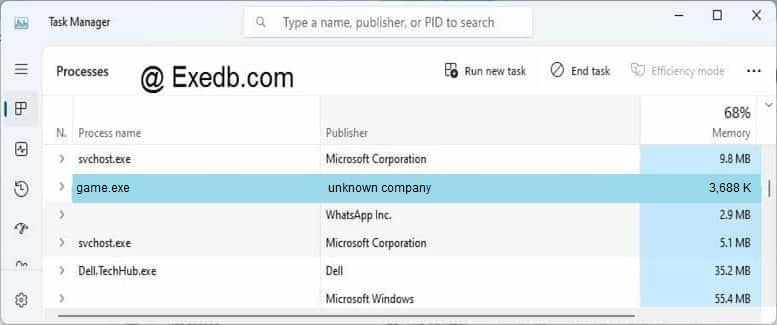
Файл game.exe из unknown company является частью W32 Gaze@mm worm. game.exe, расположенный в D:Pc GamerFantastic FourGame с размером файла 3776512.00 байт, версия файла 1, 0, 0, 1, подпись not found.
В вашей системе запущено много процессов, которые потребляют ресурсы процессора и памяти. Некоторые из этих процессов, кажется, являются вредоносными файлами, атакующими ваш компьютер.
Чтобы исправить критические ошибки game.exe,скачайте программу Asmwsoft PC Optimizer и установите ее на своем компьютере
1- Очистите мусорные файлы, чтобы исправить game.exe, которое перестало работать из-за ошибки.
- Запустите приложение Asmwsoft Pc Optimizer.
- Потом из главного окна выберите пункт «Clean Junk Files».
- Когда появится новое окно, нажмите на кнопку «start» и дождитесь окончания поиска.
- потом нажмите на кнопку «Select All».
- нажмите на кнопку «start cleaning».
2- Очистите реестр, чтобы исправить game.exe, которое перестало работать из-за ошибки.

3- Настройка Windows для исправления критических ошибок game.exe:

- Нажмите правой кнопкой мыши на «Мой компьютер» на рабочем столе и выберите пункт «Свойства».
- В меню слева выберите » Advanced system settings».
- В разделе «Быстродействие» нажмите на кнопку «Параметры».
- Нажмите на вкладку «data Execution prevention».
- Выберите опцию » Turn on DEP for all programs and services . » .
- Нажмите на кнопку «add» и выберите файл game.exe, а затем нажмите на кнопку «open».
- Нажмите на кнопку «ok» и перезагрузите свой компьютер.
Всего голосов ( 165 ), 94 говорят, что не будут удалять, а 71 говорят, что удалят его с компьютера.
Как вы поступите с файлом game.exe?
Некоторые сообщения об ошибках, которые вы можете получить в связи с game.exe файлом
(game.exe) столкнулся с проблемой и должен быть закрыт. Просим прощения за неудобство.
(game.exe) перестал работать.
game.exe. Эта программа не отвечает.
(game.exe) — Ошибка приложения: the instruction at 0xXXXXXX referenced memory error, the memory could not be read. Нажмитие OK, чтобы завершить программу.
(game.exe) не является ошибкой действительного windows-приложения.
(game.exe) отсутствует или не обнаружен.
GAME.EXE
Проверьте процессы, запущенные на вашем ПК, используя базу данных онлайн-безопасности. Можно использовать любой тип сканирования для проверки вашего ПК на вирусы, трояны, шпионские и другие вредоносные программы.
процессов:
Cookies help us deliver our services. By using our services, you agree to our use of cookies.
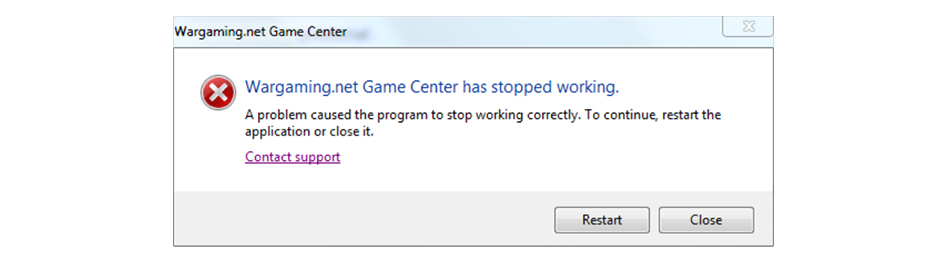
Если Game Center прекратил работать из-за ошибки «Прекращена работа программы Game Center», следуйте инструкции ниже. Окно ошибки может выглядеть так:
- Проверьте, есть ли у вас доступ и права для папки, в которую установлен Game Center.
- Перезагрузите компьютер, чтобы удалить временные файлы и остановить активные процессы.
- Проверьте, есть ли ограничения в используемом антивирусном программном обеспечении и брандмауэре (файерволе). Чтобы исключить возможные проблемы с антивирусом и брандмауэром, можно временно отключить их и повторить проблемную операцию. Также отключите их на маршрутизаторе или другом используемом сетевом оборудовании.
- Запустите Game Center от имени администратора, предварительно полностью закрыв его.
- Полностью удалите Game Center. Попробуйте установить его на другой локальный диск или в папку, имя которой содержит только латинские символы и цифры и не использует кириллицу.
Если проблема сохранится, создайте заявку в Центр поддержки пользователей. Чтобы мы решили проблему быстрее, в заявке:
- Детально опишите проблему.
- Укажите ошибку. По возможности прикрепите скриншот, на котором она видна.
- Прикрепите к заявке отчёт DxDiag и архив папки logs, которая находится по пути установки Game Center.
- Уточните, какое используется антивирусное программное обеспечение.
Games for Windows Test Cases: Best Practices for Games on Windows XP, Windows Vista, Windows 7, and Windows 8
This article provides test cases for games for Windows.
How to Use This Article
There are three main sections to this article:
Test Requirements
Each test requirement in this document has four main sections: a title and a table with three notable sections (left column, right top, right bottom).
Name of the test case.
Box, far left column
Names of the operating systems to which the test case applies.
Brief summary of the test case.
Box, right bottom
Details of the actual test case.
Sample Test Script
This section is a sample of the sequence that a typical test pass would follow if using the test requirements as a guide.
Test Tool Notes
This section contains detailed notes on each of the test tools used to verify pass or fail conditions in the test requirements.
Test Requirements
1. Game Requirements
1.1 Windows Games Explorer
| Windows 7 Windows Vista | The game must be visible within the Games Explorer on Windows Vista and Windows 7. When selected, the game must also display correct metadata. The installation must not create a shortcut to launch the game on the desktop, in the Start menu, or in any other location. Tasks and shortcuts for removal must not be created. |
|
1.2 Windows Family Safety / Parental Controls
| Windows 7 Windows Vista | Game must execute within the context of a «Standard User». Parental Controls must be able to block the game. Verify that the GDF has EXE names. |
|
1.3 Windows Vista Rich Saved Games
This requirement has been retired.
1.4 Xbox 360 Common Controller for Windows [Conditional Requirement]
| Windows 7 Windows Vista Windows XP | Games that support gamepad controllers must support the Xbox 360 Controller for Windows using the XInput API. All references to common controller triggers and buttons must use the Xbox 360 names. |
|
[!Note]
If the game does not support a game controller and/or only supports keyboard/mouse, then skip this test case.
** Settings for the controller might be located outside of the game.
1.5 Multiple Aspect Ratios and Resolutions
| Windows 7 Windows Vista Windows XP | The game must support at least the following aspect ratios and associated screen resolutions:
|
| Locate the Video Options for the game (this may be in our out of game). |
[!Note]
The following tests must be done on a widescreen monitor.
- In the video resolution section, select 800 600 or 1024 768.
- Verify that the game runs at a 4:3 Aspect Ratio resolution.
- In the video resolution section, select 1280 720.
- Verify that the game runs at a 16:9 Aspect Ratio resolution.
- In the video resolution section, select 1680 1050, 800 480, or 1152 720.
- Verify that the game runs at a 16:10 Aspect Ratio resolution.
- Verify that the game does not stretch the picture and in turn presents a wider area of view.
- Verify that the game prompts the user when a change is made to the resolution.
- If the user does not accept within 15 seconds, verify that the display reverts to the previous setting.
- Verify that the game does not add black bars to the left and right of the game play area. (In this case, you will see the game area still in a 4:3 ratio in the middle of the screen.)
1.6 Windows Media Center
This requirement has been retired.
1.7 Direct3D [Conditional Requirement]
| Windows 7 Windows Vista Windows XP | If the game uses Direct3D, the minimum version supported must be Direct3D 9, and Direct3D must be the default for any display configuration option. |
| Manual Launch the game. In the video options, check to see if there are render options, D3D and/or OpenGL. If there are, verify that the game render options default to Direct3D. If you are unable to verify that D3D9 is the version of DirectX that is being used, then proceed to Automated Test. Automated Test Use tool: Depends.exe |
1.8 Enable High-DPI Aware
| Windows 7 Windows Vista | Games and their installers must run correctly without visual problems when DPI scaling is enabled. |
Manual
Automated Test Verify that element is contained in the embedded manifest. |
2. Security and Compatibility
2.1 Follow User Account Control Guidelines
| Windows 7 Windows Vista | Every executable file (.EXE extension) included with an application must have an embedded manifest that defines its execution level: Click Start -> Run -> type cmd and click the OK button Run the mt.exe tool to generate a .manifest file for each .exe file that installs with the game Open the generated .manifest file Ensure that each .exe file contains the following (requested: Requested execution level should be present for every file, and dpiAware should be present for at least the game s executable file. 6.3 Thread Hijacker — threadhijacker.exeThis tool is run from a command prompt where threadhijacker.exe is located. Where str is the name_of_program.exe
6.4 Microsoft Games for Windows Test ToolThis tool is located in the DirectX SDK. Once the SDK is installed on a computer, the installer for the Games for Windows Test Tool can be placed on the test computer and installed. Locate the Microsoft Games for Windows Test Tool installer on the development computer where the DirectX SDK is installed. By default, it is placed in the following location: Copy the installer (MicrosoftGFWTestTool.msi / setup.exe) to the test computer. Run the installer. Launch the Microsoft Games for Windows Test Tool. In the Project List field replace Create New Project with your title name and click Create New. Wait for the Baseline to complete. Fill in any information that you may have in the Game Information section, and click Update Game Information. Click on Test Cases tab. Starting at the top, proceed through the test cases, clicking Pass or Fail as appropriate. See «Writing a Bug», later in this section, for details on including a bug in the report. Return to the Projects tab after reviewing the report (by checking the Report and Bug Edit tabs). Click Compile Report. A window will open when the report is finished compiling. Here you will find a .ZIP file names ProjectName_report.zip. This file contains all of the logs and results collected during the test pass. Writing a BugThere are two ways to write a bug report: you can go through the test cases and click Fail when the title fails a test case, or you can click the Bug Edit tab and manually add a bug report. Clicking Fail on a test case
Manually Adding a BugThis process is the same as clicking Fail, with the exception of the auto-populated drop-down list. In this case, either select the appropriate TCR failure type or select ** Non-TR Issue ** for bugs that fall outside of the TR range but should still be reported. |


