- List of user groups command line
- «Локальные пользователи и группы» в Windows 10
- Запуск «Локальных пользователей и групп»
- «Пользователи»
- «Группы»
- Добавление нового пользователя
- Присоединение пользователя к группе
- Windows group all users
- Вопрос
- Ответы
- How to open Local Users and Groups on Windows 10
- Open Local Users and Groups on Windows 10
- 1] Using the Computer Management utility
- 2] Directly by using lusrmgr.msc
- Using the Run box
- Using Windows Search box
- Using Windows 10 Command Prompt
- Using Windows PowerShell command line
- Add or remove Users from Group
- Add a User to Group using Command Prompt
- Remove a User from a Group using Command Prompt
- Add a User to Group using PowerShell
- Remove a User from a Group using PowerShell
List of user groups command line
On Windows OS we can find the list of local user groups created on a system from Contorl Panel -> User Accounts. This information can be obtained from command line also using net command. Syntax is shown below.
Example: Running this command shows the following local groups on my system.
How to list the users in a local group?
Use the below command to know the list of members of a group from command line.
For example to get the list of all remote desktop users on a system we can run the below command.
How to find the list of all groups a user is member of?
You can run the below command to list the groups a user is member of. This command prints the details of the given user account. You can find the group membership information in the last two line of this command output.
Useful references, however “net use username” should be changed to “net user username”
Thank you Kennedy. Corrected the command.
Please get me a command which will display all local users as: LOGIN, FULL NAME, DESCRIPTION, GROUP etc..
I’d just like to express my frustration with this API. As you can see in these examples, thet net API localgroups functionality will happily list all members of a group. However the net user code completely ignores system accounts, as does most of the rest of what Windows makes available. Internally they are organized as a subclass of Win32_Account but not Win32_UserAccount. So it’s possible to retrieve a bunch of useless information from the Windows API. This happens with LookupAccountSid as well. If you give it an SID like S-1-5-20, it will give you an answer. But the answer it gives you can’t be used as input for anything else, which is obnoxious.
You can query if users exist by doing
SET /P query_user=What user do i look for?
::Take out /domain if you want to look on the local computer
Net User %query_user% /domain
if NOT %errorlevel% == 0 goto s_error_1
if %errorlevel% == 0 goto s_success_1
“net user /domain username” lists only the groups to which the username is a direct member. It can’t show nested groups. I was doing a quick check to see if a username was a member of a group:
net user /domain username | find “Group Name”
That fails since the user is not directly a member of “Group Name”. In reality, they are a member, as they’re a member of a nested group.
Any idea of a command line that will expand groups to look for a particular member? I’ve used the “dsquery” and “dsget” commands, but they are only present if the AD tools are installed.
Very useful thanks, didn’t worked for me the first time.
The command is not case sensitive.
For example “NET USER /DOMAIN MYDOMAIN/MyUser” Didn’t worked.
But “NET USER /DOMAIN MyUser” works fine!
So not necessary to put explicitly the domain.
By the way it means also you can’t query another domain than the main one you are logged on to ?
Is there any option where we can get the multiple user’s output in excel for local computer and remote computer
net user userName
«Локальные пользователи и группы» в Windows 10

Важно! Рассматриваемая оснастка присутствует только в редакциях Pro и Enterprise!
Запуск «Локальных пользователей и групп»
Доступ к рассматриваемому элементу можно получить следующим образом:
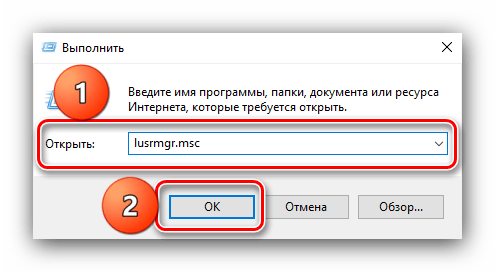
- Вызовите инструмент «Выполнить» сочетанием клавиш Win+R, введите в нём запрос lusrmgr.msc и щёлкните «ОК».
Запустится нужный инструмент.
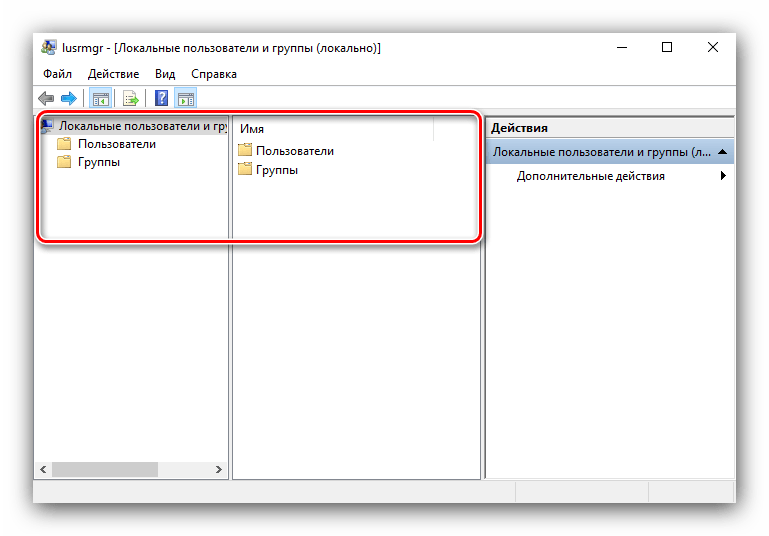
Теперь взглянем подробнее на особенности приложения.
«Пользователи»
В данном каталоге присутствуют такие категории:
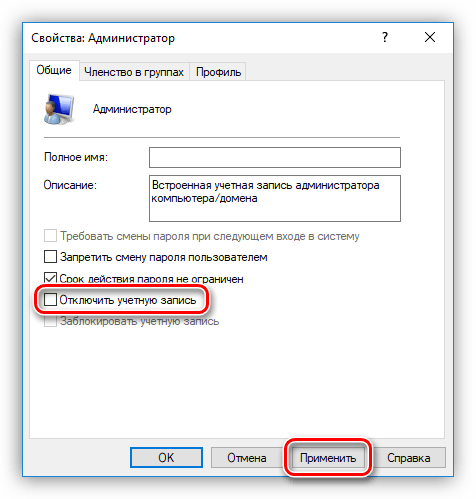
- «Администратор» – встроенный аккаунт, который используется в процессе инсталляции ОС перед тем, как юзер создаст свой собственный. Полномочия данной учётки весьма обширны, плюс её нельзя никаким образом удалить. Она пригодится в случае, когда в систему необходимо внести серьёзные изменения, но обычного пользователя-администратора для этой цели недостаточно.
Читайте также: Использование встроенной учётной записи администратора Windows 10
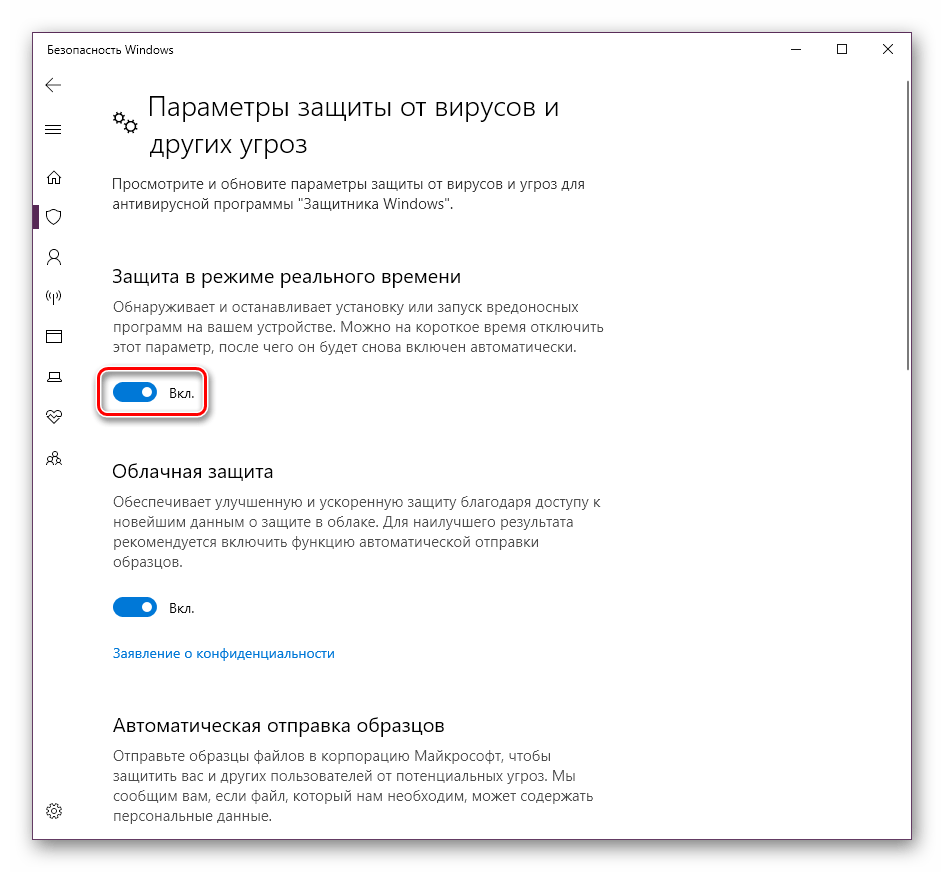
Читайте также: Отключение Защитника в Windows 10
«Группы»
В каталоге «Группы» записей намного больше – они обозначают категории, разграниченные в правах и выполняемых функциях. В этой директории обычно присутствуют следующие элементы:
- «Администраторы» – основная группа, члены которой имеют полный доступ к управлению операционной системой, соответственно, добавлять к ней новые учётки стоит с осторожностью.
- «Администраторы Hyper-V» – здесь находятся записи, которым разрешен доступ к виртуальной машине Hyper-V.
Читайте также: Виртуальная машина в Windows 10
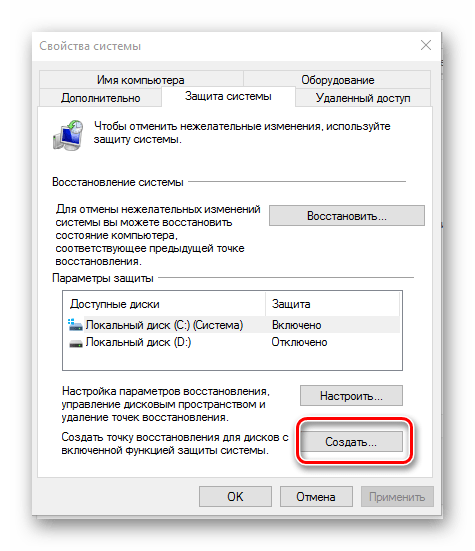
Читайте также: Создание точек восстановления Windows 10
Остальные позиции представляют собой системные категории, с которыми рядовой юзер навряд ли столкнётся.
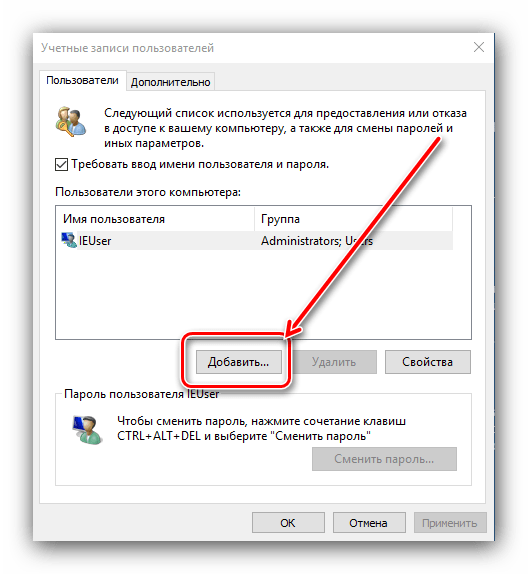
Добавление нового пользователя
Посредством рассматриваемой оснастки можно добавить новую учётную запись. Процедура описана одним из наших авторов, рекомендуем прочитать статью по ссылке далее.
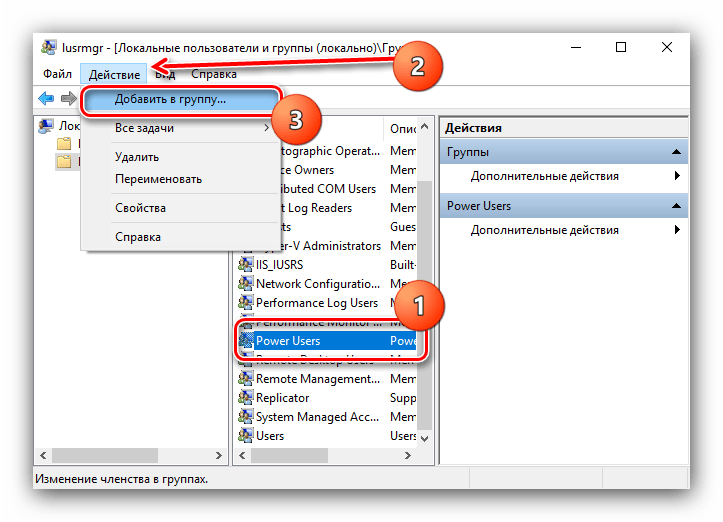
Присоединение пользователя к группе
Редактирование группы происходит по похожему алгоритму:
- Выделите одиночным кликом ЛКМ категорию, после чего воспользуйтесь вариантами «Действие» – «Добавить пользователя в группу».
В окне свойств группы кликните по кнопке «Добавить».
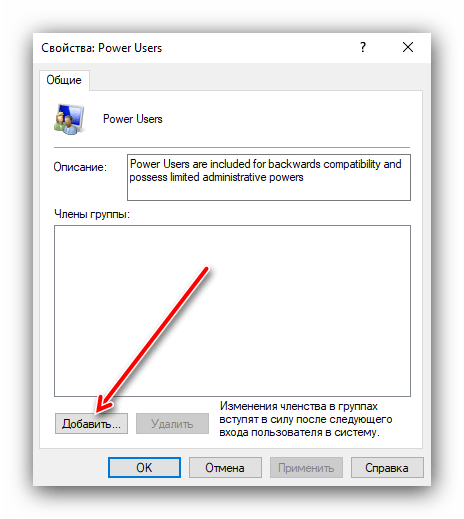
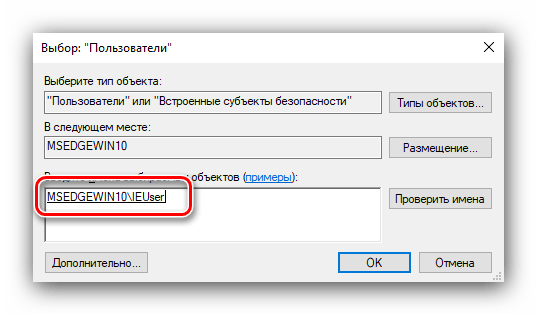
Укажите имя аккаунта в блоке «Введите имена выбираемых объектов», после чего щёлкните «Проверить имена».
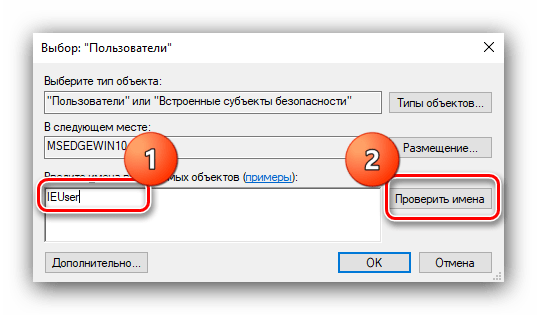
Под названием должно появиться подчёркивание – это означает, что объект распознан и будет присоединён.
По возвращении в окно свойств вы увидите имя добавленной учётки.
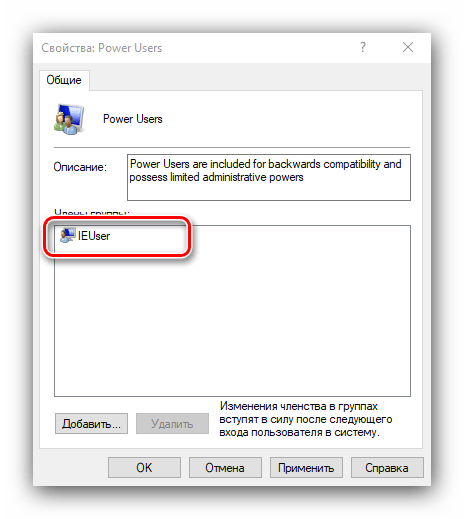
Как видим, действительно ничего сложного.
Теперь вам известно, что собой представляет оснастка «Локальные пользователи и группы» в Windows 10.
Windows group all users
![]()
Вопрос
![]()
![]()
Как получить доступ к desktop All Users на сервере Windows 2008 R2. Надо часто рваскидывать ярлыки для всех пользователей сразу на рабочий стол. Помогите плиз
Ответы
![]()
![]()
(не нужно «ломиться» туда, где закрыто :-)) не то что туда «нельзя», туда просто «не нужно!»)
Познакомьтесь с организацией личных папок в Win7 или WS2008R2. Там многие объекты представляют собой не папки, а junctions. (Поэтому в них пытаться «зайти» просто бессмысленно. )
Думаю, Вам нужна папка C:\Users\Default\Desktop — все новые пользователи будут «подхватывать» ярлыки оттуда.
Если нужно создавать ярлыки для уже существующих пользователей, то Ваш подход вообще неверный — нужно пользоваться Group Policy Preferences (очень удобно!)
(еще можно работать с папкой C:\Users\Public\Desktop. но это «чревато» — все добавления-удаления ярлыков будут сразу сказываться на всех локальных пользователях компьютера! легко удалить что-то нужное. )
How to open Local Users and Groups on Windows 10
Apart from what is visible to you on the login screen, Windows 10 tends to create several users and groups in the background to carry out several tasks on a computer. However, they are not visible to a normal user and are logged in in the background and serve a great deal in permission structuring. Let us learn how to see and to manage Local Users and groups on a Windows 10/8/7 on the computer.
Open Local Users and Groups on Windows 10
The following methods will help you to open and view Local Users and Groups on Windows 10:
- Using the Computer Management utility
- Directly by using lusrmgr.msc.
Let us look at the procedure in detail. We will also take a look at how to add or remove Users from a Group.
1] Using the Computer Management utility
Open the WinX menu and select Computer Management.
From the left side navigation panel, select Local Users and Groups under the expanded list of Computer Management (Local).
You will see two folders here:
- Users and
- Groups.
Expanding each will give you the required details.
2] Directly by using lusrmgr.msc
To open Local Users and Groups window, you have to invoke its process, which is called lusrmgr.msc, and you can do this in the following four ways.
Using the Run box
Hit the Windows Key + R button combination on your keyboard.
Type in lusrmgr.msc and hit Enter.
It will open the Local Users and Groups window.
Using Windows Search box
Hit the Windows Key + S button combination on your keyboard. It will launch the Windows Search Box.
Search for lusrmgr.msc and hit Enter.
The Local Users and Group window will now be open.
Using Windows 10 Command Prompt
Open Windows Command Prompt and execute the following command:
You will arrive at your destination window.
Using Windows PowerShell command line
Open Windows PowerShell and execute the following command:
It will open at your destination window.
Add or remove Users from Group
To add or remove Users from a Group:
- Open the Groups folder
- Select the Group
- Double-click on the group
- Under the Members box, select the user you want to delete.
- Click on the Delete button.
To add a User, click the Add button and follow the process.
Add a User to Group using Command Prompt
You need to execute the following command:
Replace GROUP and USER with the actual names.
Remove a User from a Group using Command Prompt
You need to execute the following command:
Replace GROUP and USER with the actual names.
Add a User to Group using PowerShell
You need to execute the following command:
Replace GROUP and USER with the actual names.
Remove a User from a Group using PowerShell
You need to execute the following command:
Replace GROUP and USER with the actual names.
I hope this helps.
Windows 10 Home user? These links may interest you:
- Use freeware Lusrmgr tool to access Local User and Group Management in Windows 10 Home
- Open and Manage Local User and Group Management in Windows 10 Home using Command Prompt or PowerShell.


